![[Laser cut and engrave] Christmas Lantern – Laser Cut Wooden Holiday Light Box](https://image-res.atomm.com/resource/xtool/community/attachment/xtool-community/15950b3b-4d1e-4f90-8377-1eac7a1dbe49.png?x-oss-process=image/resize,w_1200,h_900,limit_0/interlace,1/format,webp/auto-orient,1)
![[Laser cut and engrave] Christmas Lantern – Laser Cut Wooden Holiday Light Box](data:image/png;base64,iVBORw0KGgoAAAANSUhEUgAAAAoAAAAKCAYAAACNMs+9AAAAAXNSR0IArs4c6QAAABdJREFUKFNjZCASMBKpjmFUId6QIjp4AAppAAuXjCs4AAAAAElFTkSuQmCC)
![[Laser cut and engrave] Christmas Lantern – Laser Cut Wooden Holiday Light Box](https://image-res.atomm.com/resource/xtool/community/attachment/xtool-community/15950b3b-4d1e-4f90-8377-1eac7a1dbe49.png?x-oss-process=image/resize,w_200,h_150,limit_0/interlace,1/format,webp/auto-orient,1)
![[Laser cut and engrave] Christmas Lantern – Laser Cut Wooden Holiday Light Box](https://image-res.atomm.com/resource/xtool/community/attachment/xtool-community/768f7d62-1de2-4e88-9b0f-f8b1f9053696.png?x-oss-process=image/resize,w_200,h_150,limit_0/interlace,1/format,webp/auto-orient,1)
![[Laser cut and engrave] Christmas Lantern – Laser Cut Wooden Holiday Light Box](https://image-res.atomm.com/resource/xtool/community/attachment/xtool-community/32f4c02d-3618-43aa-b584-eac5cac4ab94.png?x-oss-process=image/resize,w_200,h_150,limit_0/interlace,1/format,webp/auto-orient,1)
![[Laser cut and engrave] Christmas Lantern – Laser Cut Wooden Holiday Light Box](https://image-res.atomm.com/resource/xtool/community/attachment/xtool-community/026aae29-d752-4158-99b6-ae1659de1019.png?x-oss-process=image/resize,w_200,h_150,limit_0/interlace,1/format,webp/auto-orient,1)
Christmas Lantern – Laser Cut Wooden Holiday Light Box
 Lucky Prize in 2025 Christmas Contest
 Instruction


Information
      Beautifully designed wooden Christmas lantern for laser cutting.
Each lantern features detailed snowflake cutouts, arched window frames, hinged doors and decorative winter motifs. Perfect as a holiday decoration, table centerpiece or LED candle holder.
The lanterns can be used individually — or stacked to create a stunning Christmas pyramid, as shown in the photo.
Assembly is simple and requires no hardware except optional glue for extra strength.
Instruction
Step1

Description
Beautifully designed wooden Christmas lantern for laser cutting.
Each lantern features detailed snowflake cutouts, arched window frames, hinged doors and decorative winter motifs. Perfect as a holiday decoration, table centerpiece or LED candle holder.
The lanterns can be used individually — or stacked to create a stunning Christmas pyramid, as shown in the photo.
Assembly is simple and requires only basic tools.
How to Make It
1. Material
3 mm birch plywood (recommended)
Birch plywood holds fine details, has light elegant color and engraves with strong contrast.
Alternatives: basswood plywood, MDF (painted finish), bamboo board.
2. Laser Settings (reference for 20W diode)
Cut: 95% power / 6 mm/s / 1 pass
Engrave: 80% / 200 mm/s
Air Assist: ON
3. Cutting Order
– Engrave decorative elements first
– Then cut all outer shapes
– Keep small parts in place with masking or light tabs
4. Assembly Steps
– Use wood glue to connect the side panels
– Insert the bottom plate while the glue is still flexible
– Attach the top ring or lid
– Add the front door and hinge pins
– Lightly sand the hinge edges for smoother door movement
– Glue small snowflakes or additional décor if included
– For the pyramid effect: stack lanterns in layers to create a Christmas tree shape
5. LED Use Only
Do not use real candles. Only LED tea lights or LED strings.
Material Info
Short: 3 mm birch plywood
Long: Smooth, light-toned plywood that engraves cleanly and holds precise cutouts. Ideal for lanterns with thin decorative elements.
Optional finishes: mineral oil, beeswax paste, transparent lacquer.
Remixes



You may also like

christmas lantern


Laser Cut Merry Christmas Holiday Light Decor with House and Candy


Laser Cut Christmas Light Box with Snowman and Tree Scene


Laser Cut Wooden Christmas House Light Decoration with Doorbell Activated Lights


Christmas Tree Lantern/Lamp


Laser Cut Wooden Winter Scene Lantern with Snowflake Design


christmas lamp box decoration


Laser Cut Wooden Star Christmas Tree Lantern

Christmas lantern with snowman and snowflake cutouts


Halloween Wooden Lantern

🎄Santa’s Glow — Illuminated Christmas Shadow Box🎅🏼


Laser Cut Merry Christmas Deer Scene Light Decoration

Laser Engraved Merry Christmas Acrylic Ornament Decoration

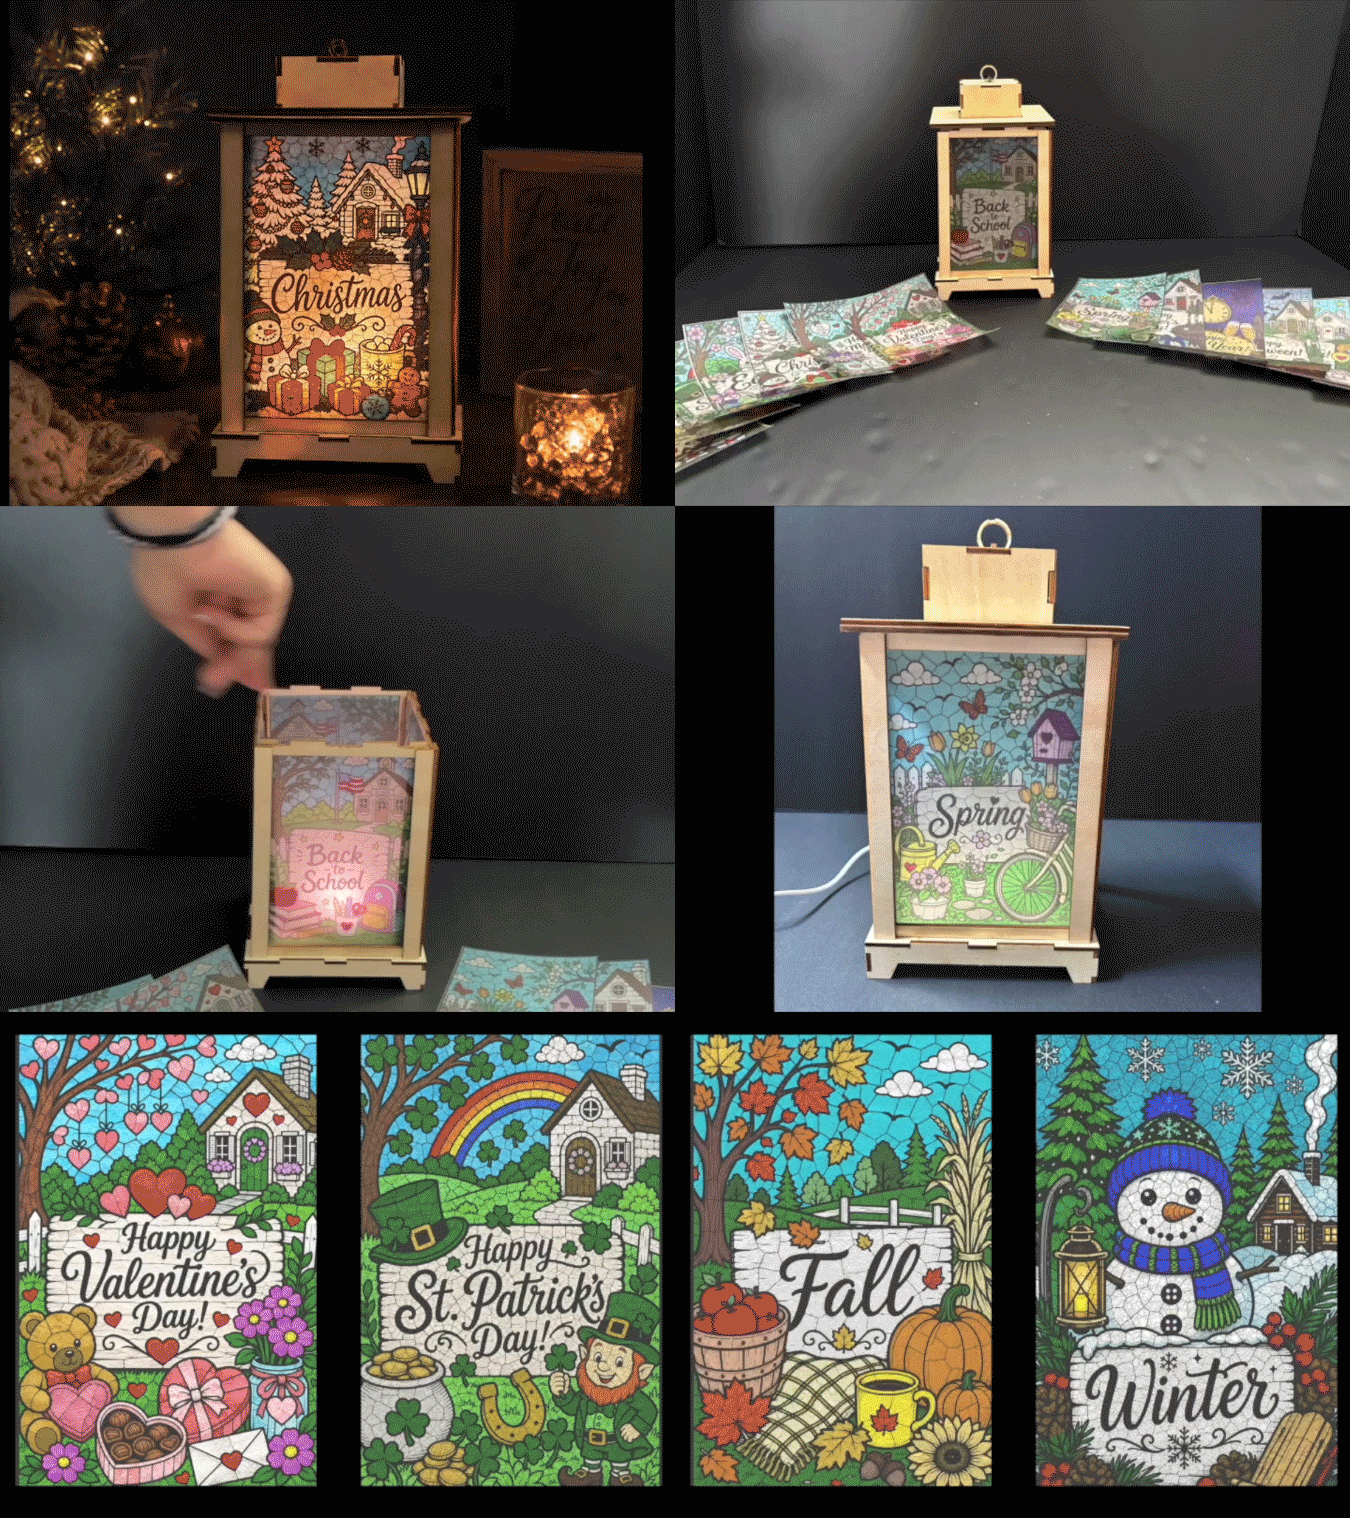
Interchangeable Seasonal Holiday Lantern with 16 Decorative Insert Panels


'/%3e%3cdefs%3e%3clinearGradient%20id='paint0_linear_1433_15726'%20x1='12'%20y1='5.25'%20x2='12'%20y2='18.75'%20gradientUnits='userSpaceOnUse'%3e%3cstop%20stop-color='%23FFC654'/%3e%3cstop%20offset='1'%20stop-color='%23FF8D12'/%3e%3c/linearGradient%3e%3c/defs%3e%3c/svg%3e)
Boite cadeau lumineuse

Laser Engraved Winter Bear Lantern with LED Light


giraffe lantern

'/%3e%3cdefs%3e%3clinearGradient%20id='paint0_linear_1433_15675'%20x1='12'%20y1='3.25'%20x2='16.6891'%20y2='20.75'%20gradientUnits='userSpaceOnUse'%3e%3cstop%20stop-color='%23FF5D80'/%3e%3cstop%20offset='1'%20stop-color='%23FF0035'/%3e%3c/linearGradient%3e%3c/defs%3e%3c/svg%3e)
Laser Cut Wooden Christmas Light House Decoration with LED