


xTool F2 Ultra combines MOPA laser and diode laser in one machine, giving you the flexibility to work with a wide range of materials in different ways. From color engraving to vibrant marking and detailed relief effects, the possibilities are endless. This guide is here to walk you through these advanced features step by step, so you can quickly unlock the full potential of your F2 Ultra.
Stainless Steel Color Engraving
When xTool F2 Ultra engraves colors on metals, it doesn’t use any pigments or dyes. Instead, it relies on a subtle physical phenomenon. When the MOPA laser acts on the metal surface, it creates an ultra-thin oxide layer. Different thicknesses of this layer reflect light in different colors—just like the rainbow effect you see on soap bubbles or oil films.
Because the MOPA laser adjusts pulse width and frequency to precisely control temperature, it creates oxide layers of different thicknesses. This allows you to engrave a wide range of colors with the MOPA laser. Since these colors come from structural changes in the metal itself rather than coatings, they are highly durable and won’t fade or peel off.
Now let’s move on to how you can use this in real color engraving.
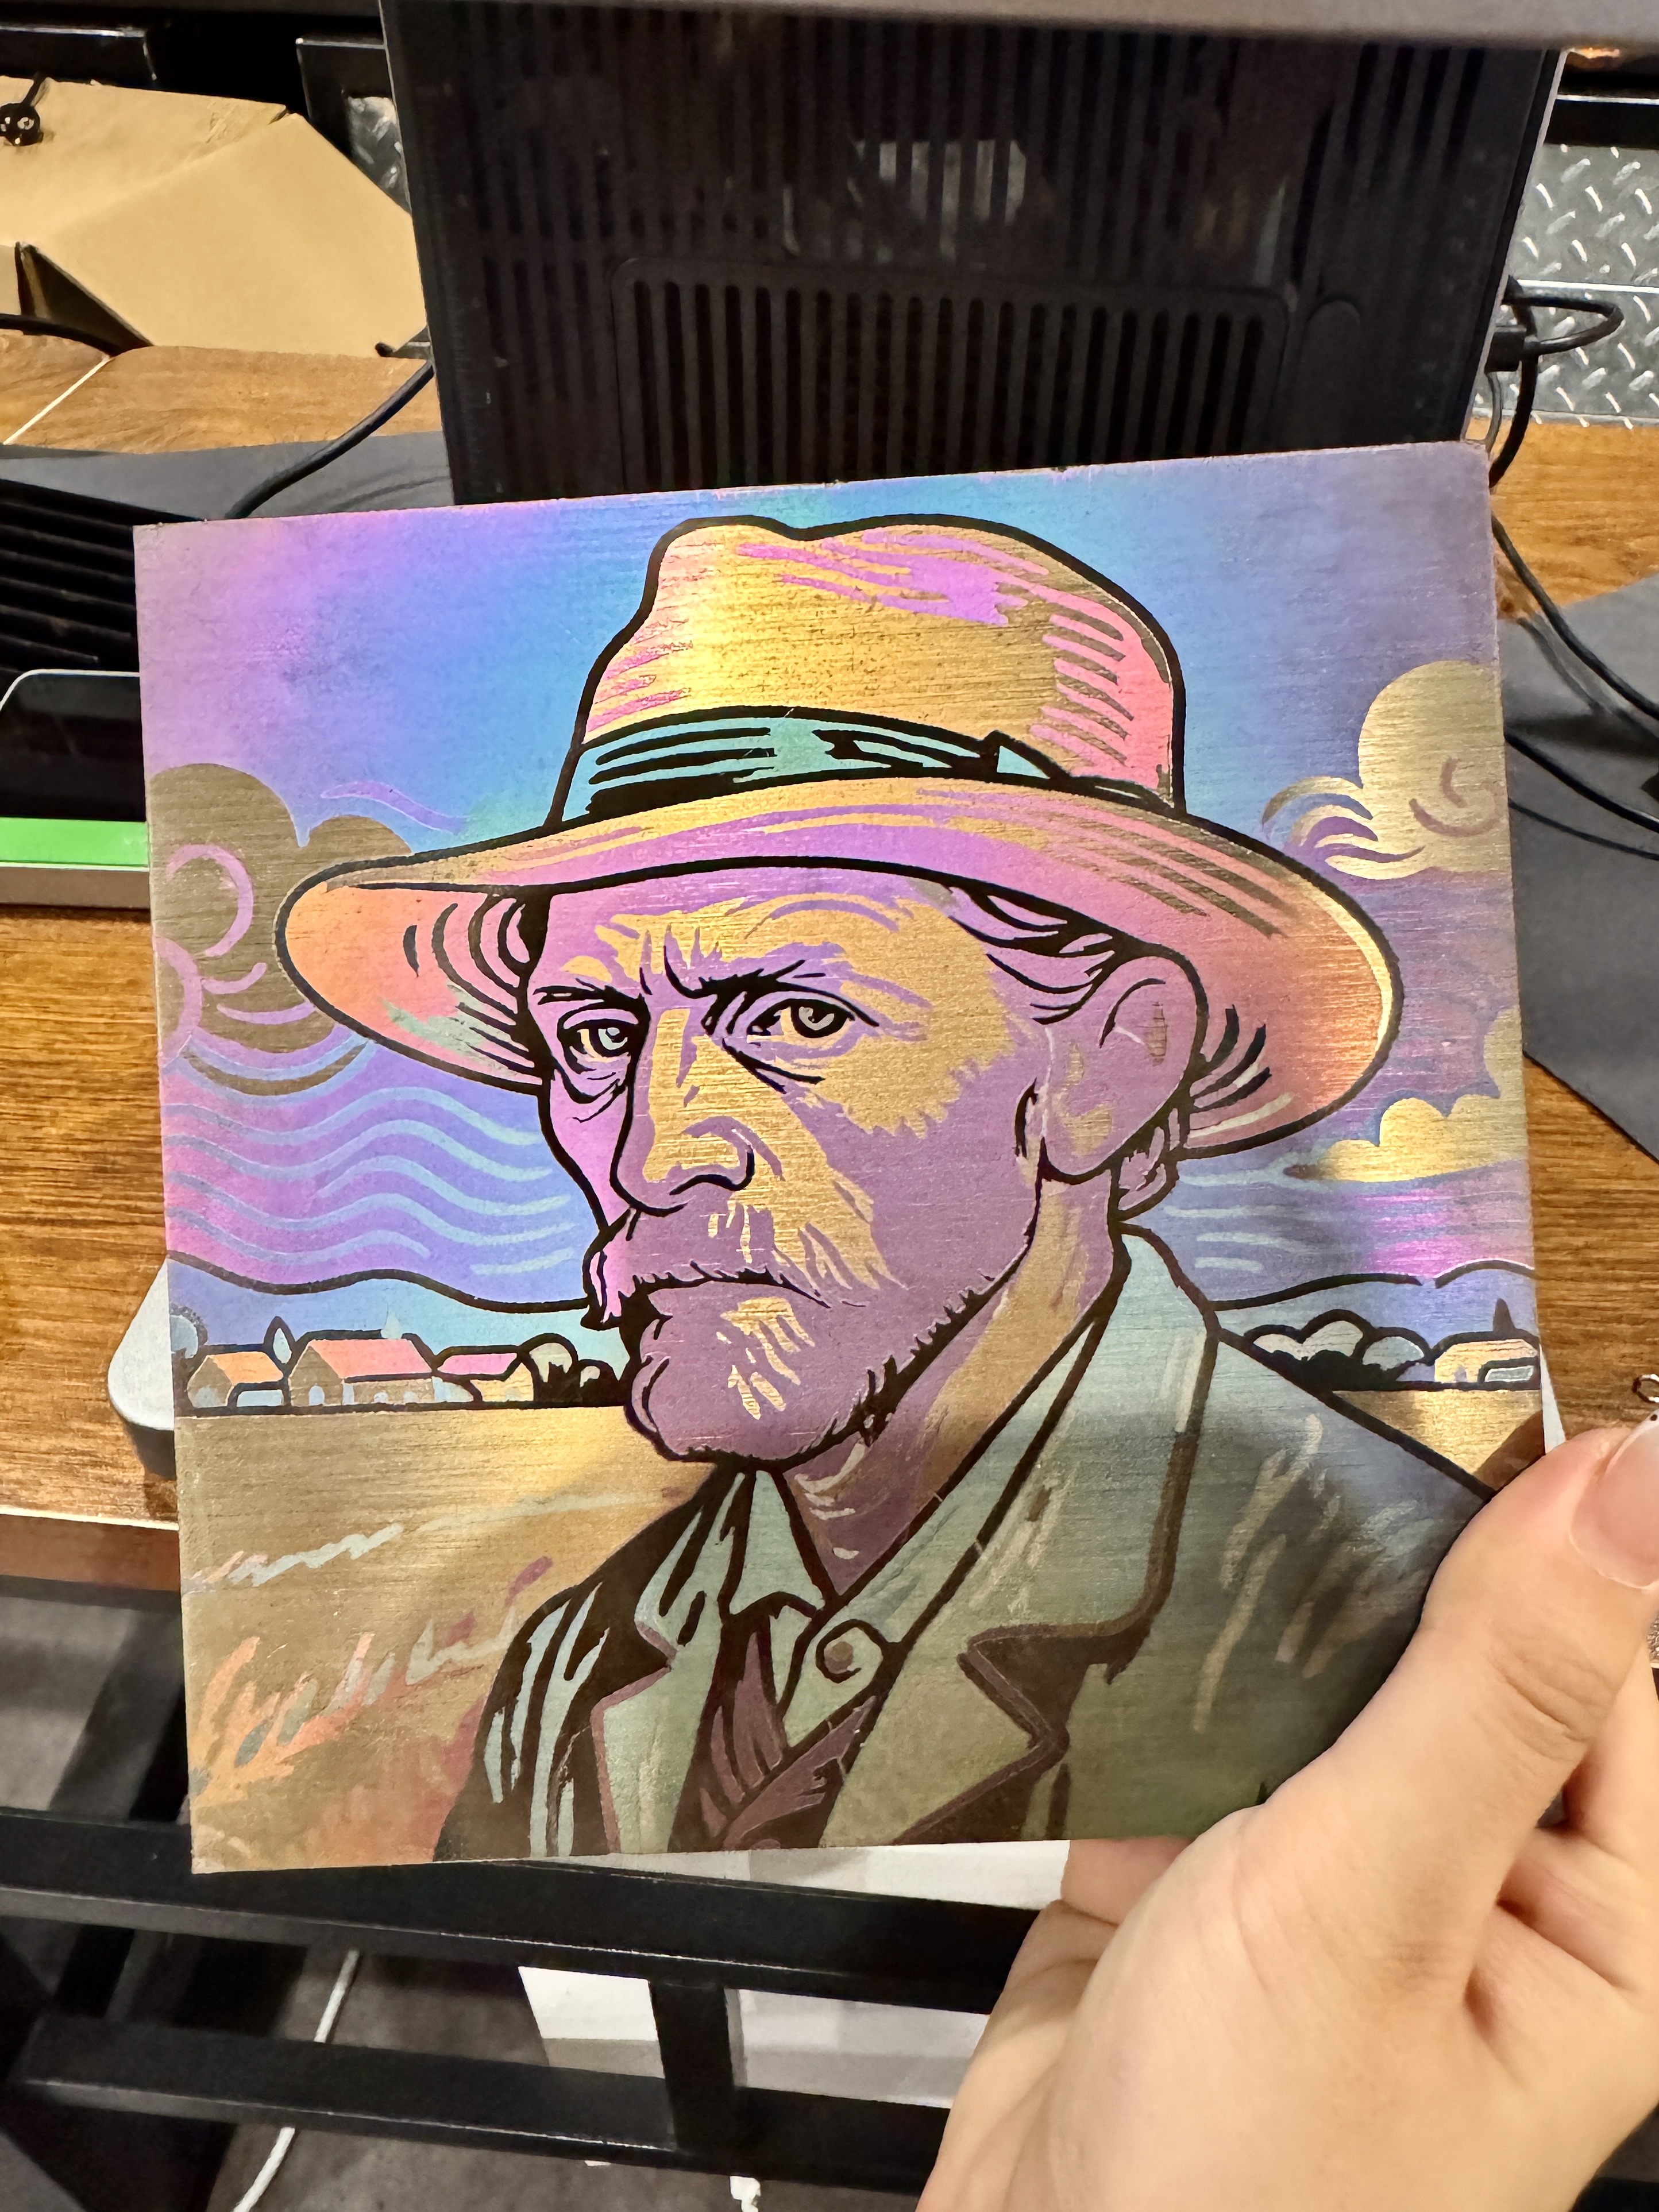
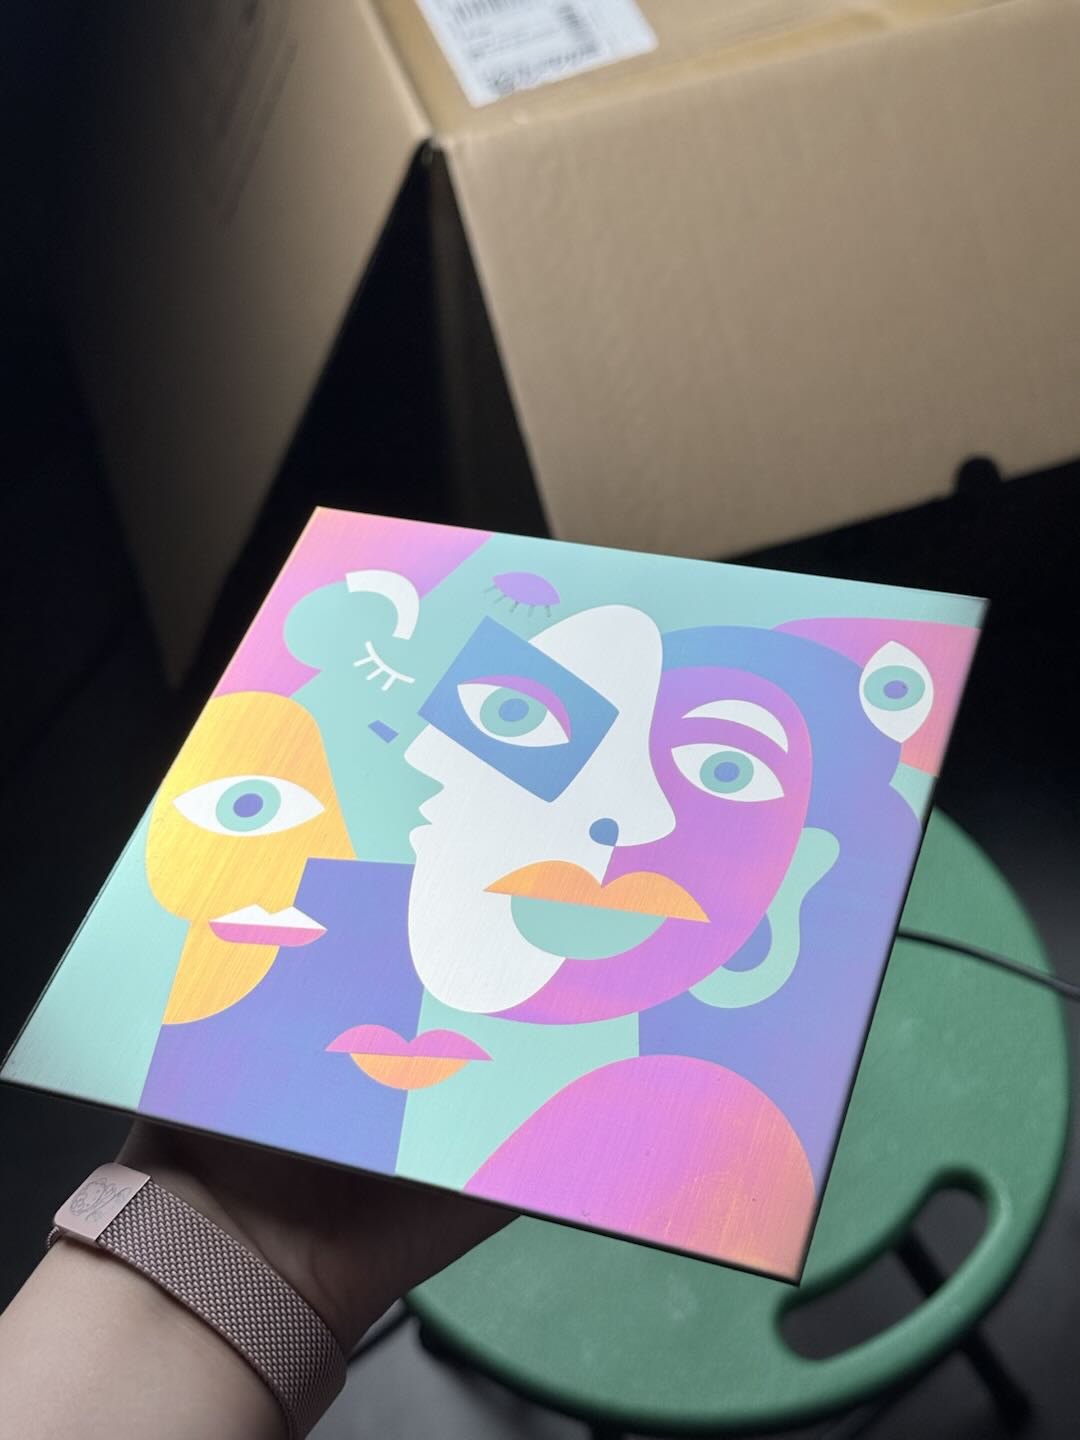
For the best results, choose designs with large color blocks. Make sure each block is filled with a solid, simple color and avoid using gradients. Try not to use patterns with too many small or scattered details, as these can affect the clarity and vibrancy of the final engraving.
1.1 Material Selection
Use 304 stainless steel for color engraving.
1.2 Preparation
(1) Place the material at the center of the working area and perform focusing.
- It’s best to manually input the material thickness.
- If you’re using a slat plate underneath, measure both the material and the slat plate together (material thickness + 18 mm for the slat plate).
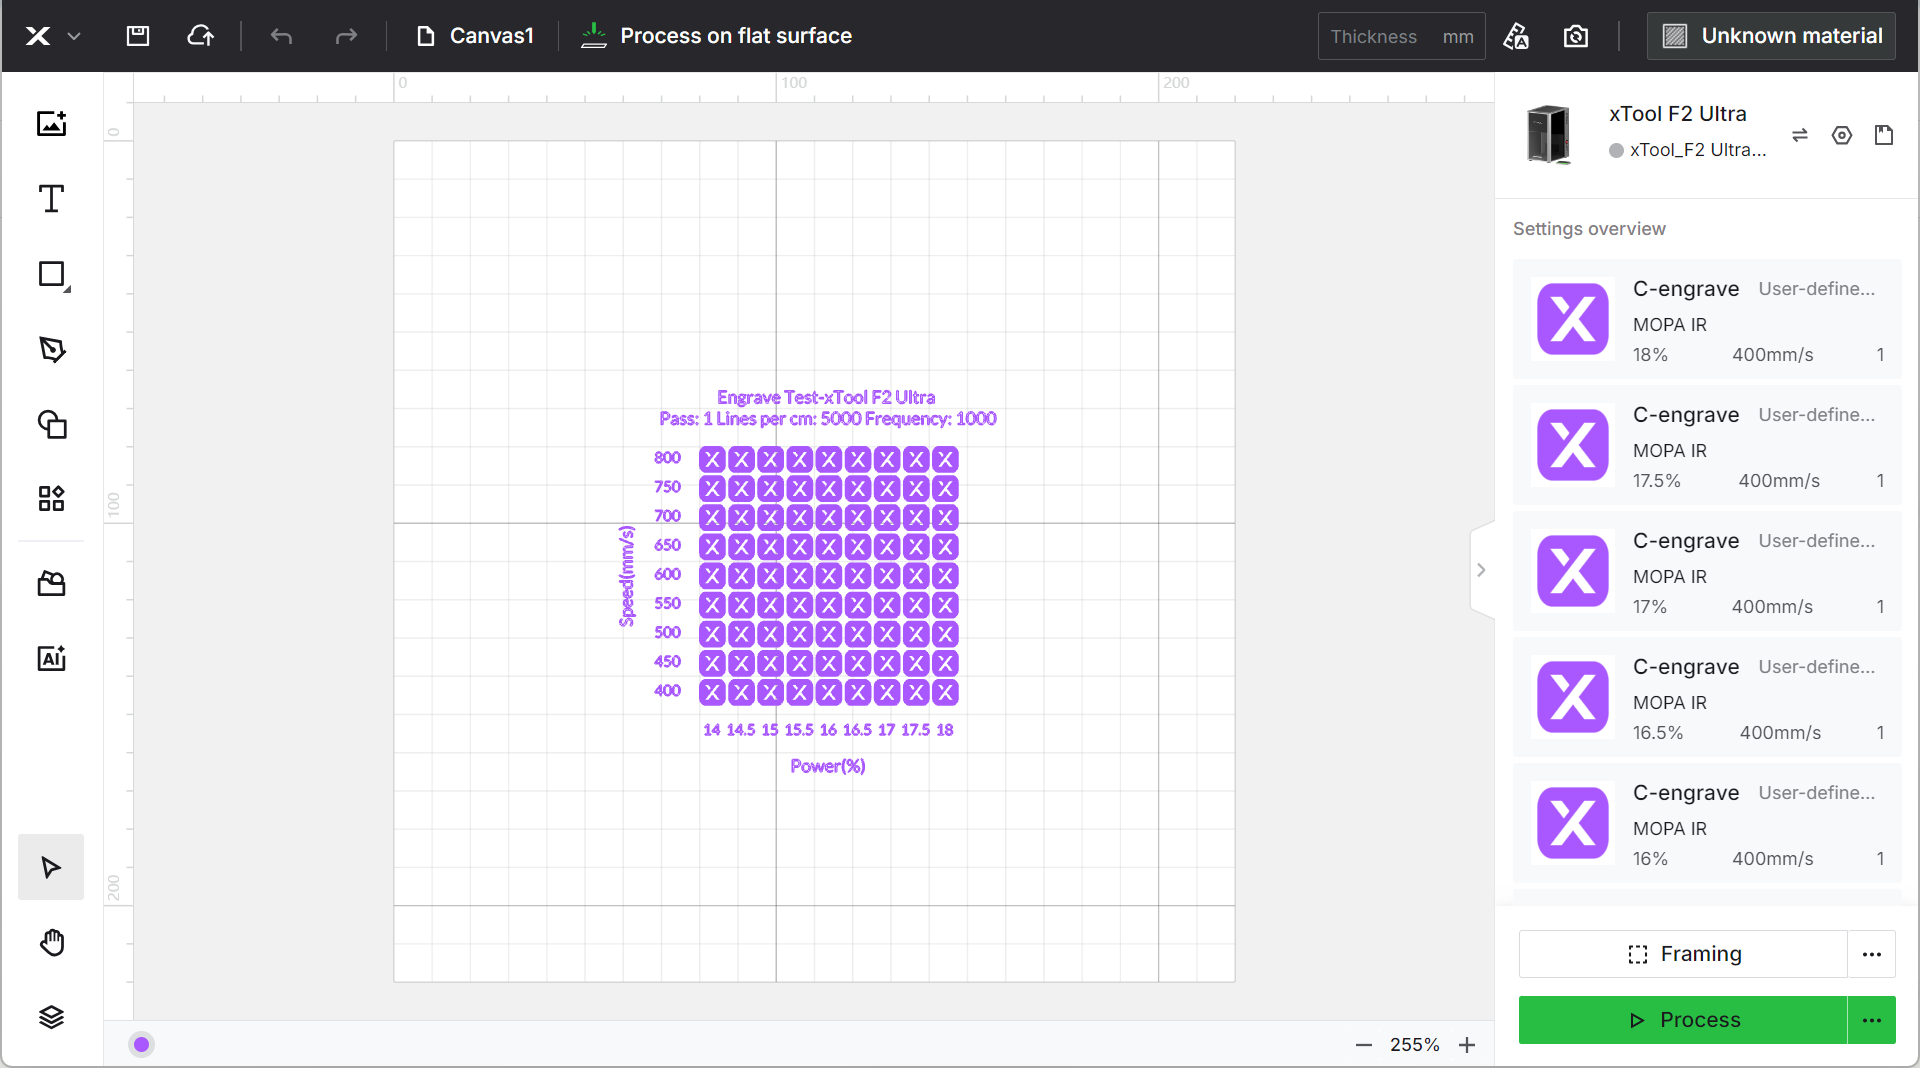
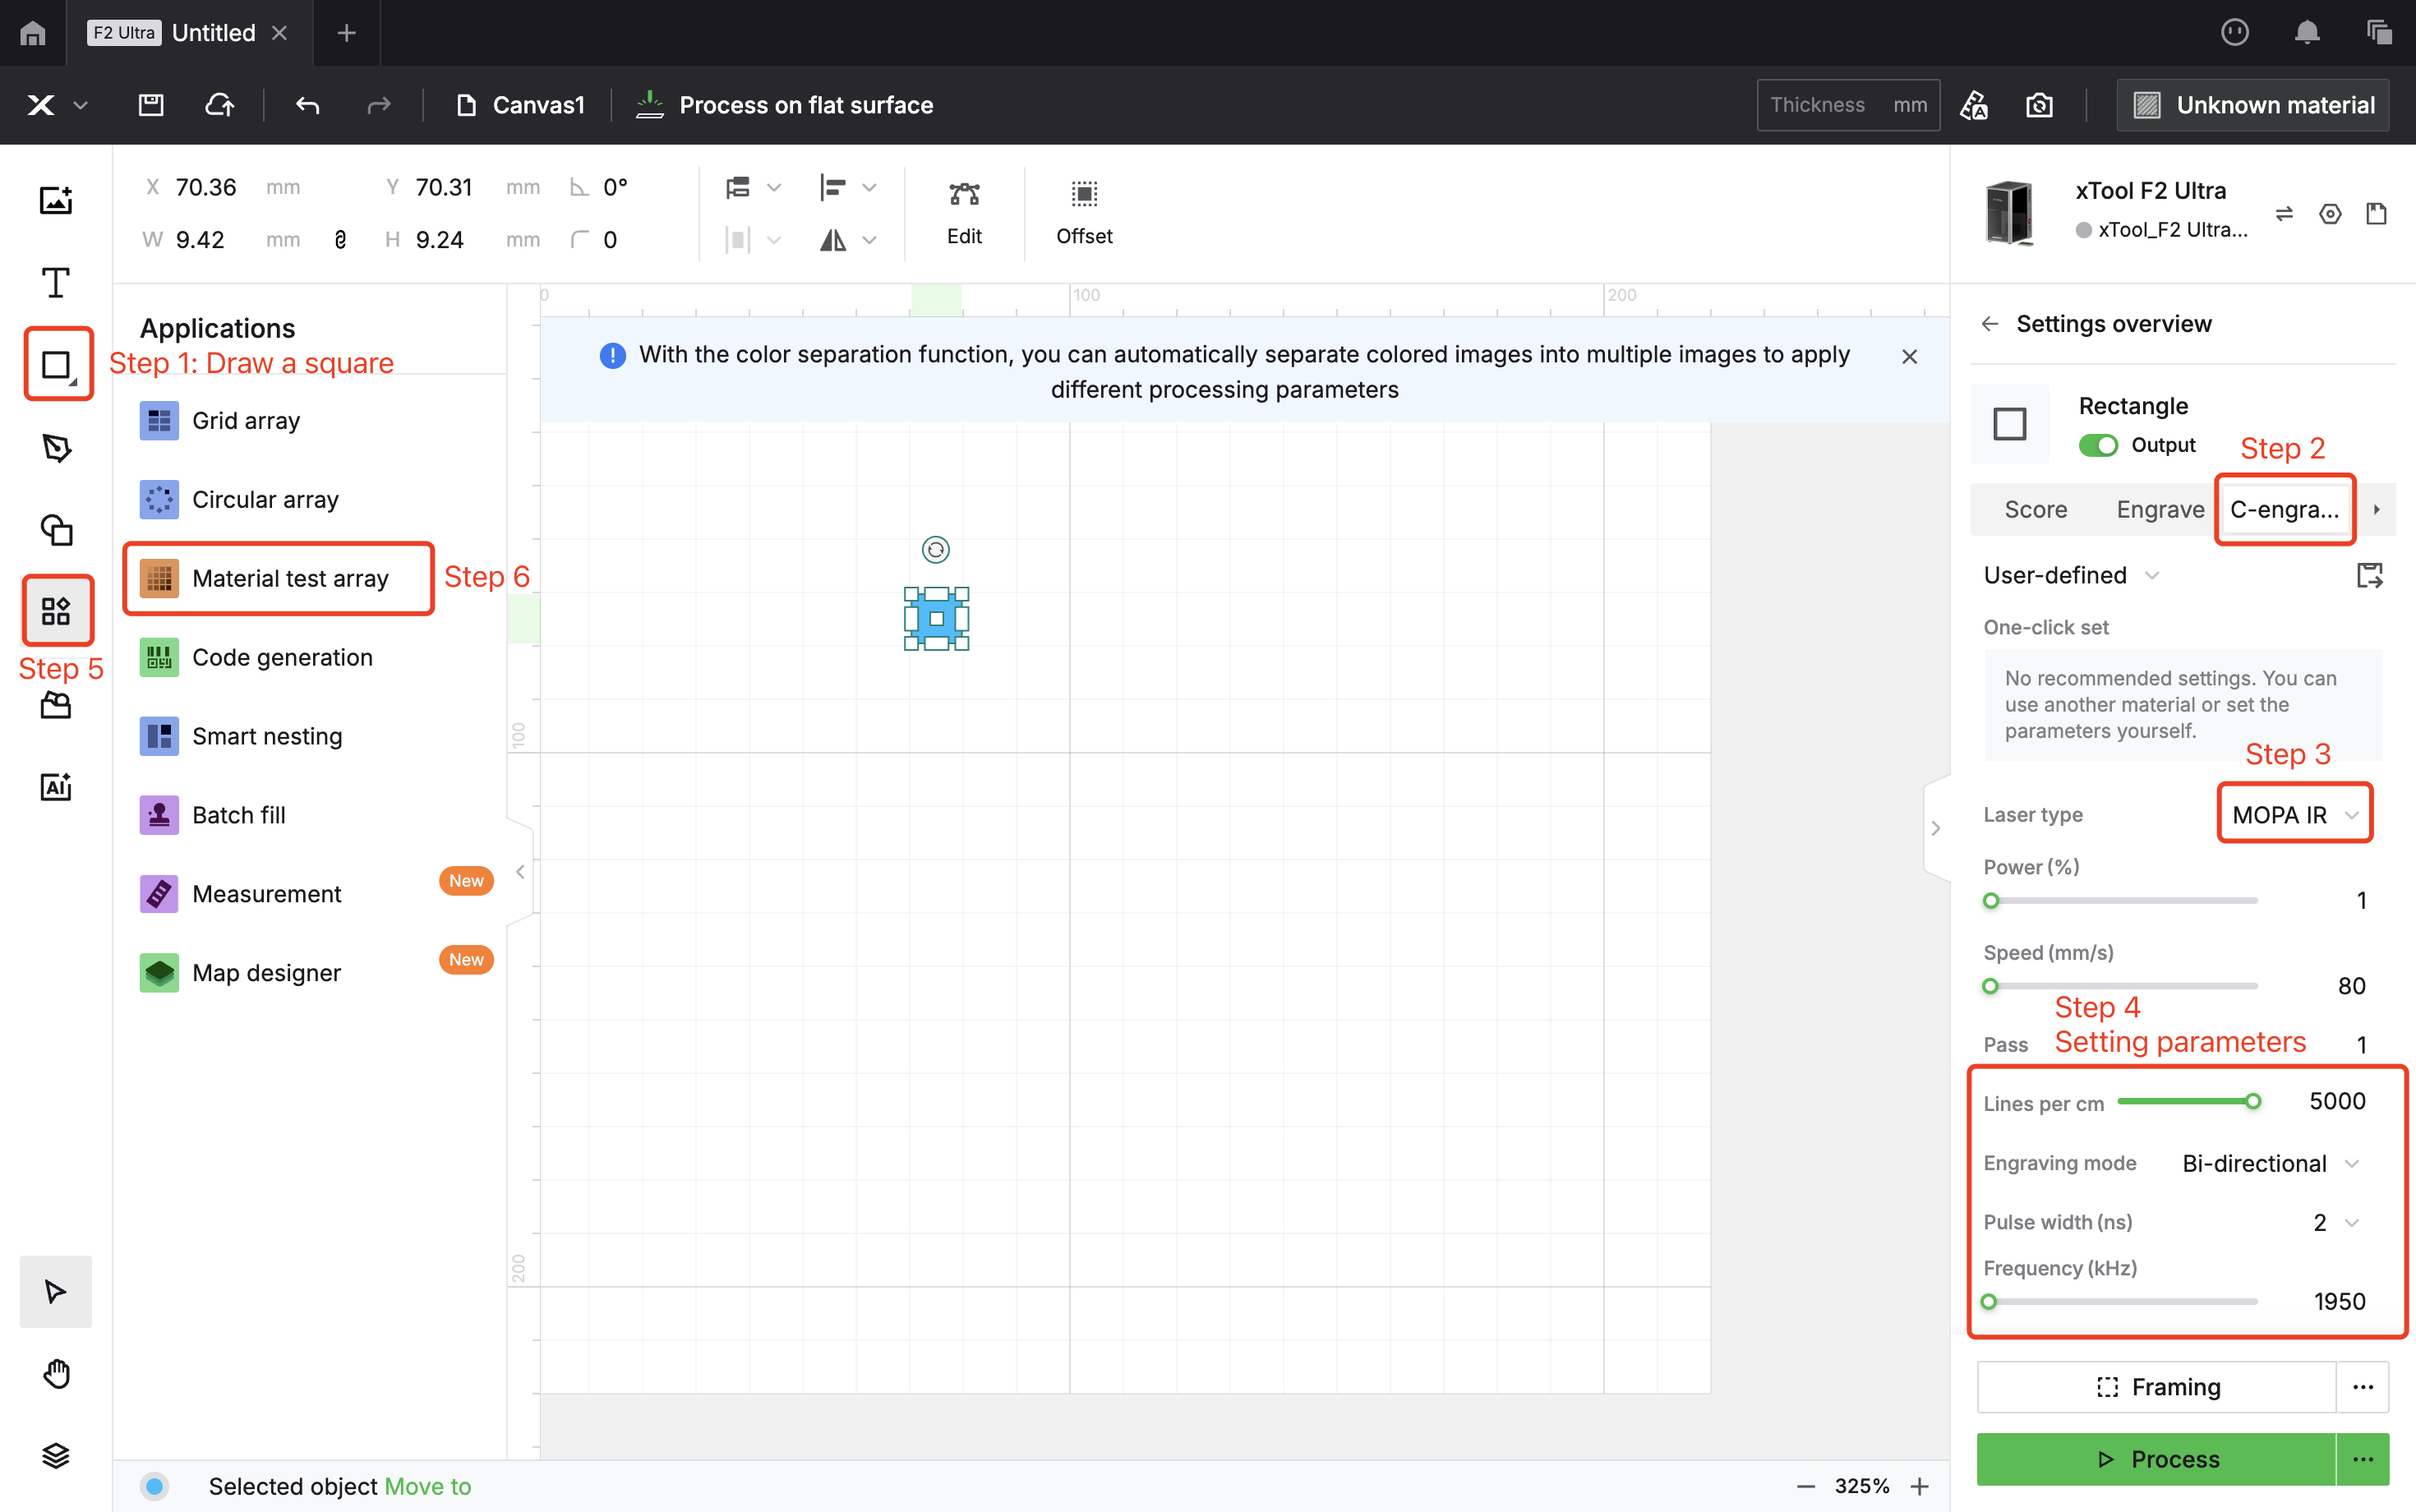
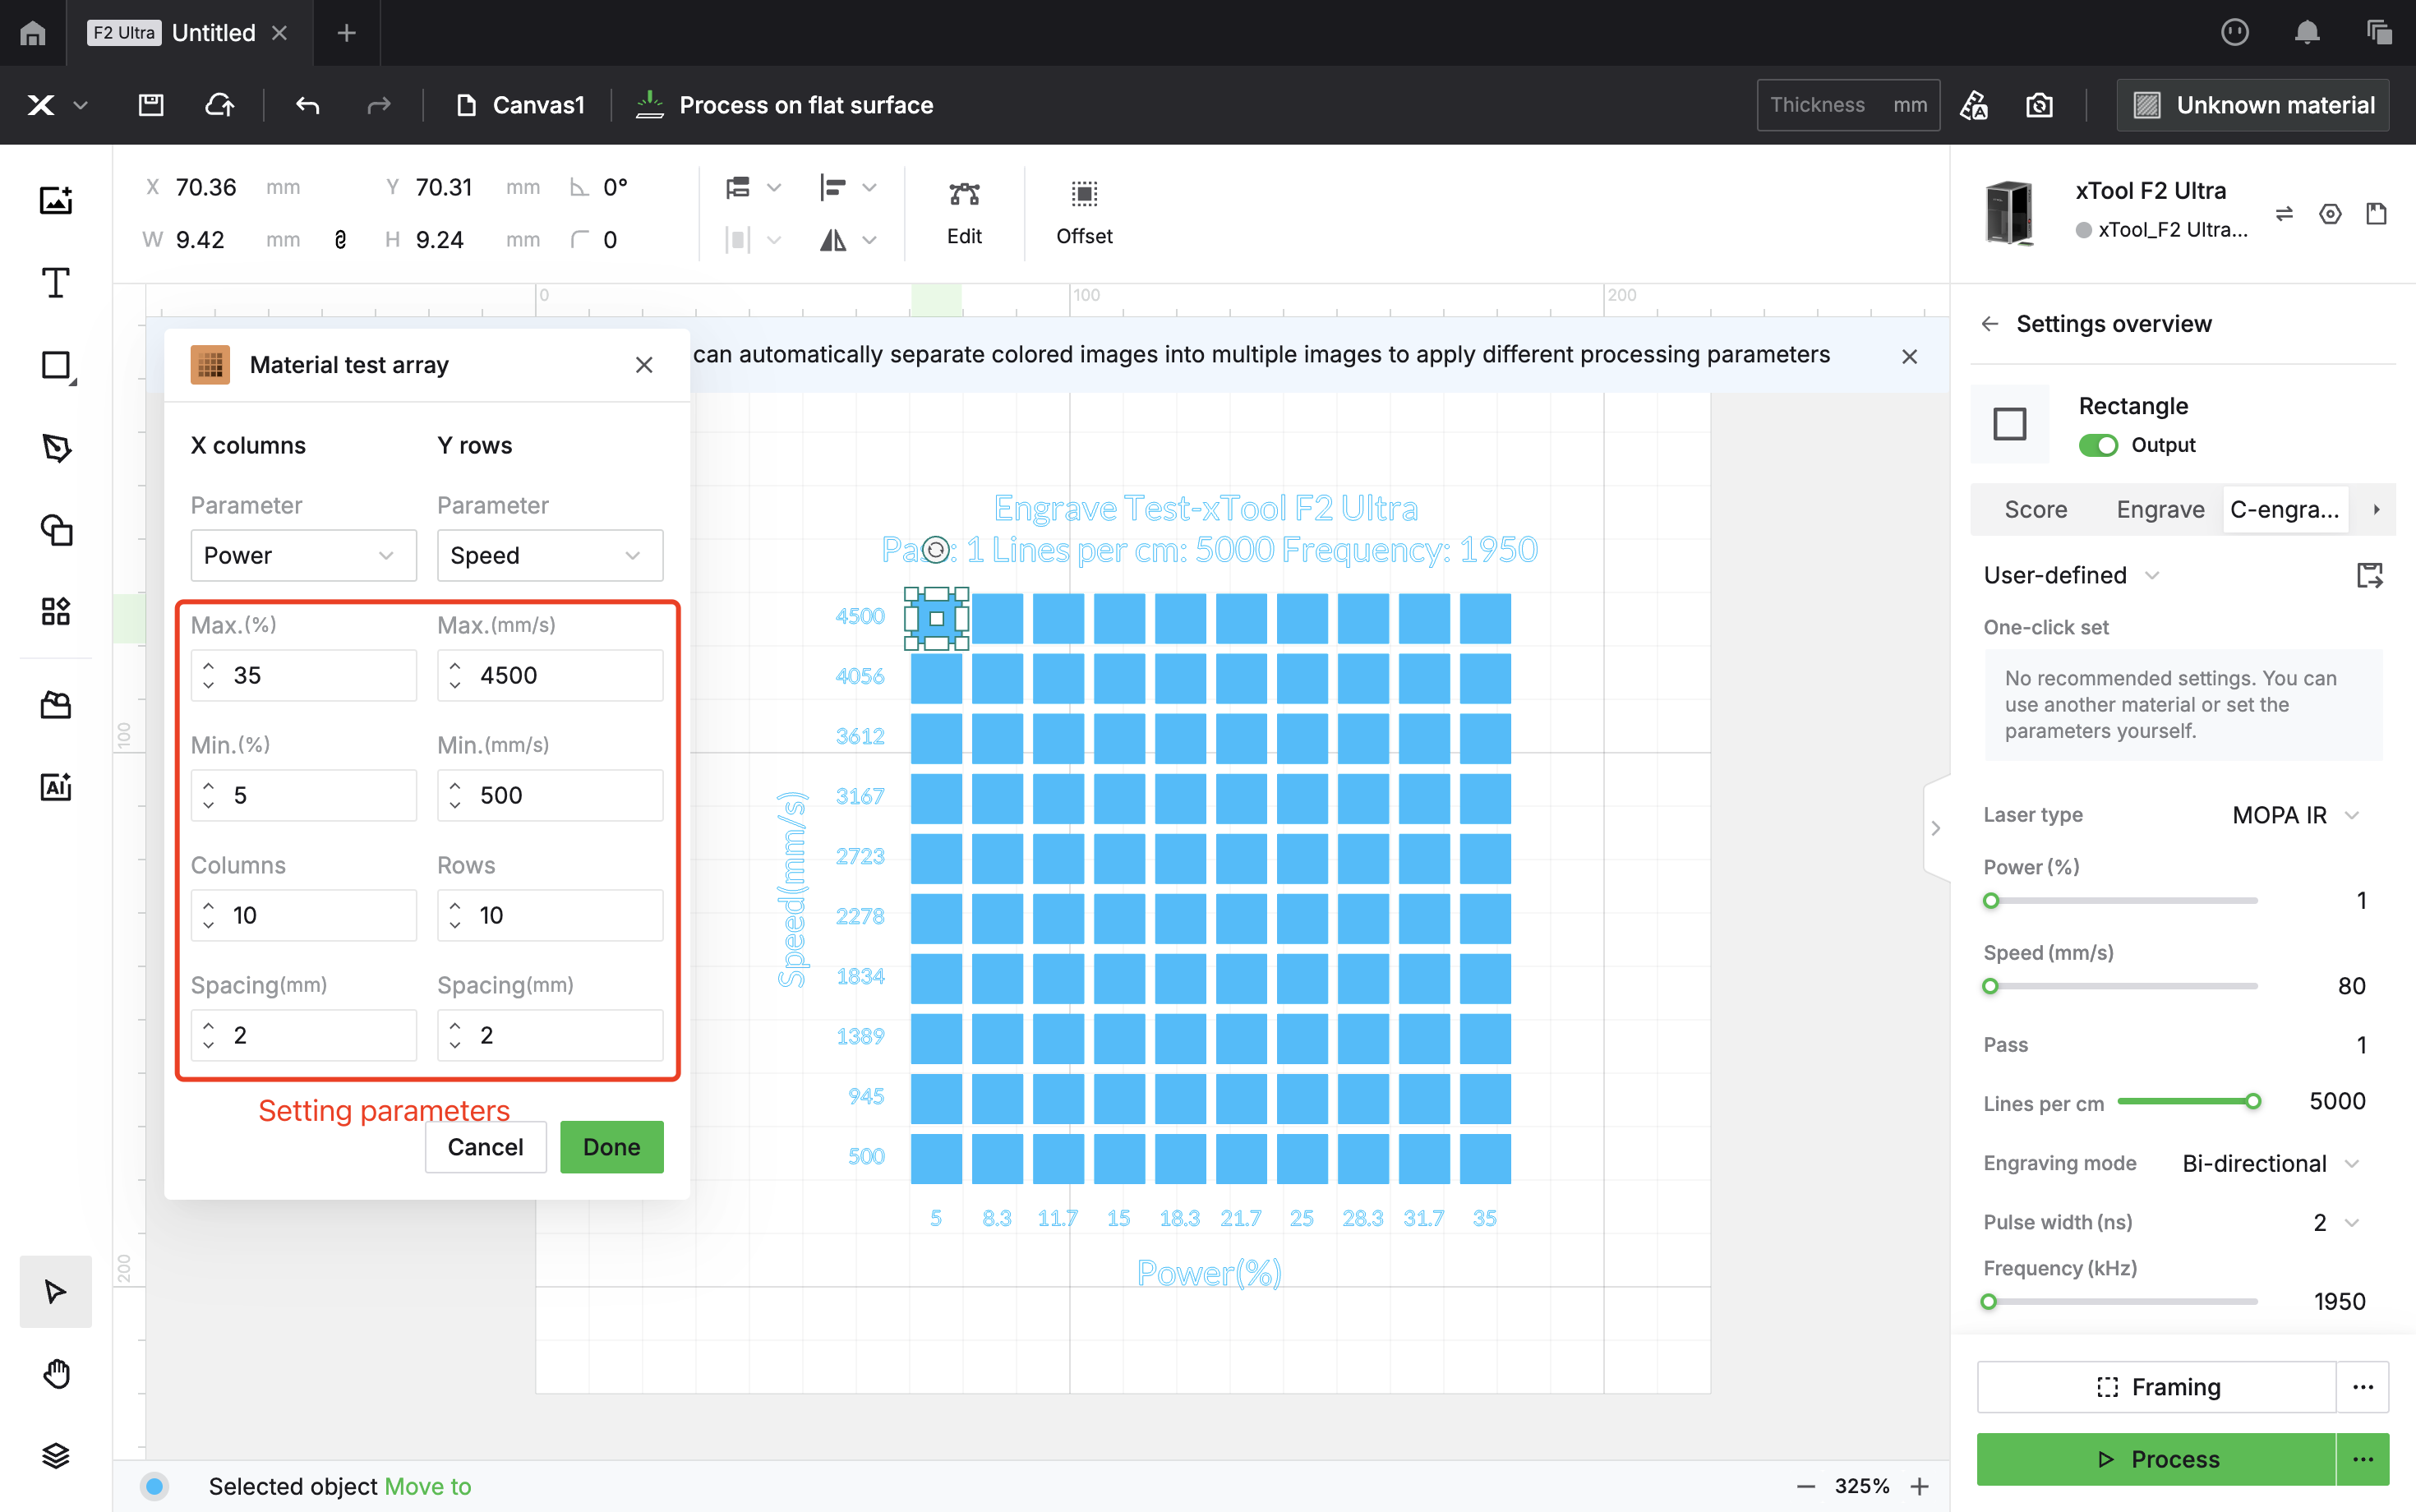
(2) Test Matrix and Make a Color Platte
Why do we need to test our own parameters for color engraving?
Because the colors depend on the thickness of the oxide layer formed when the metal is heated. Since power output and heating conditions vary from one machine to another, the same settings won’t always produce the same colors. That’s why you need to fine-tune the parameters on your own device.
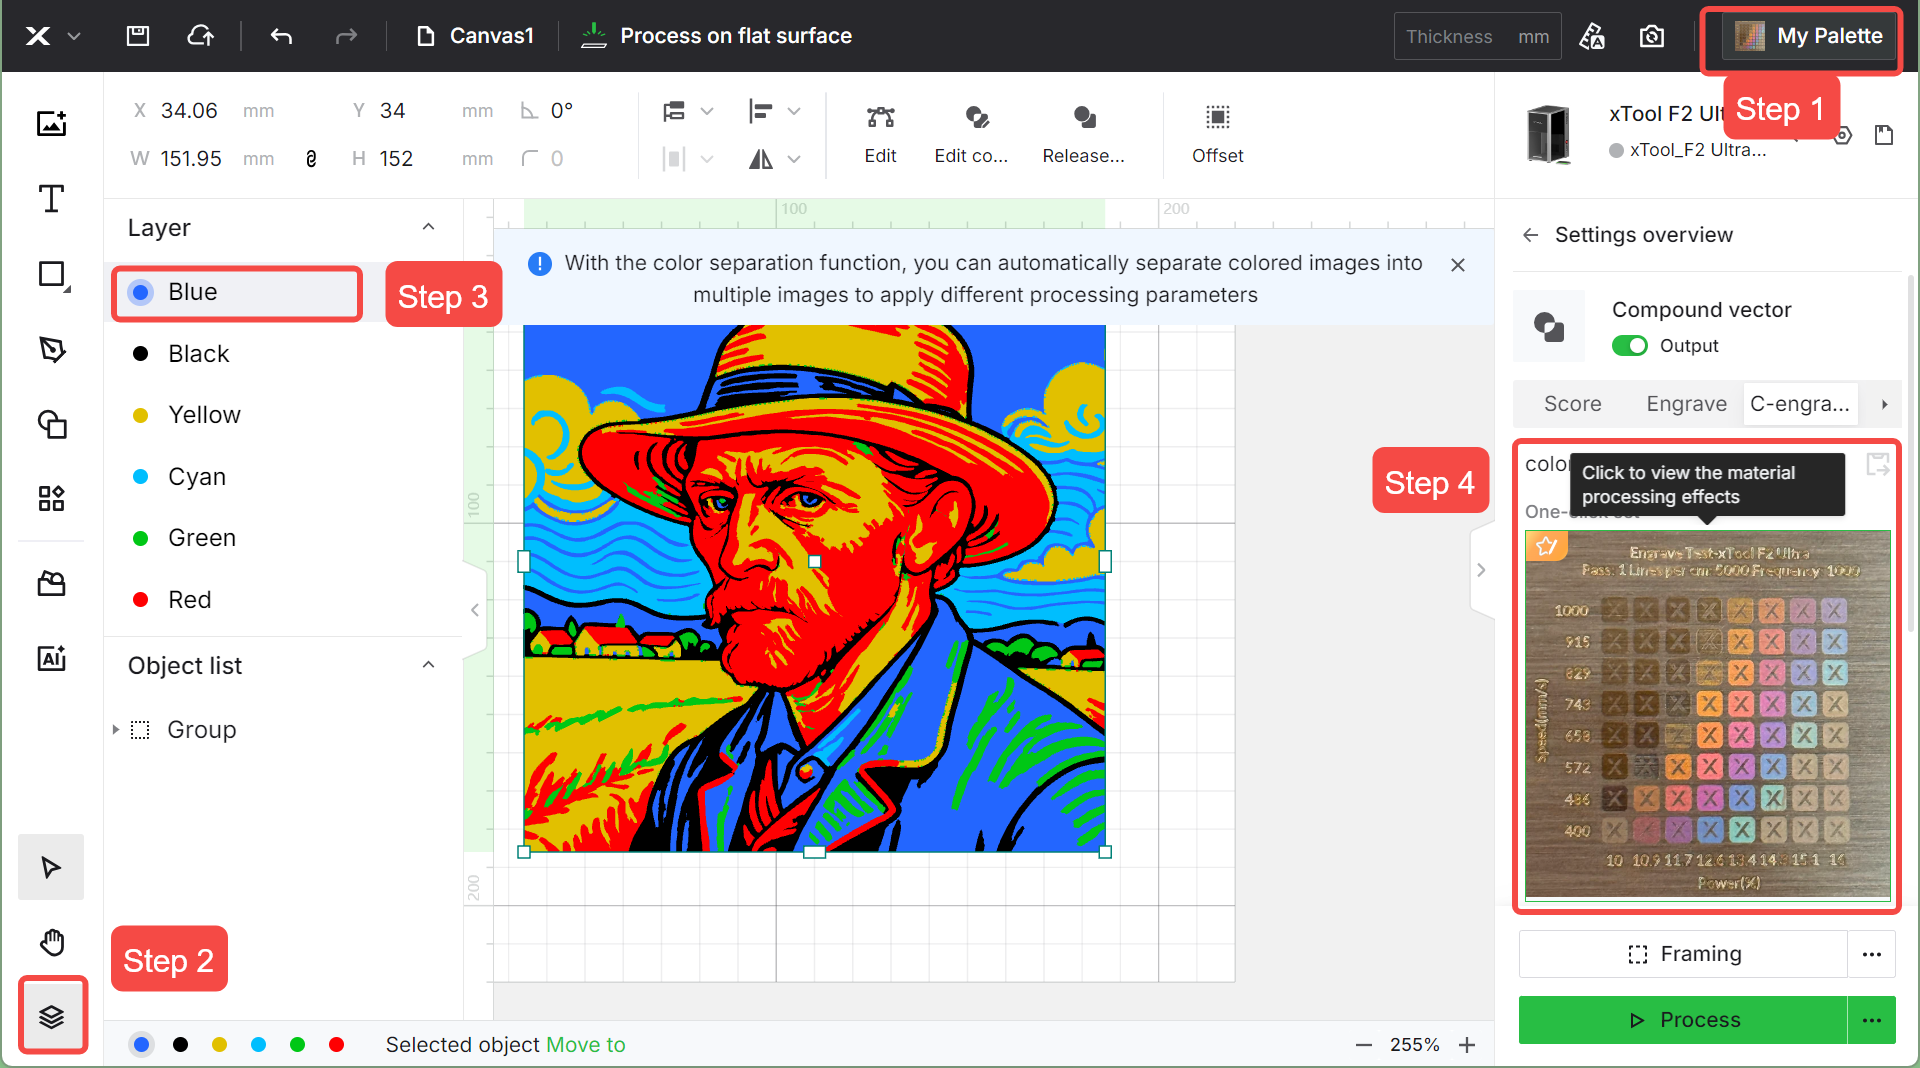
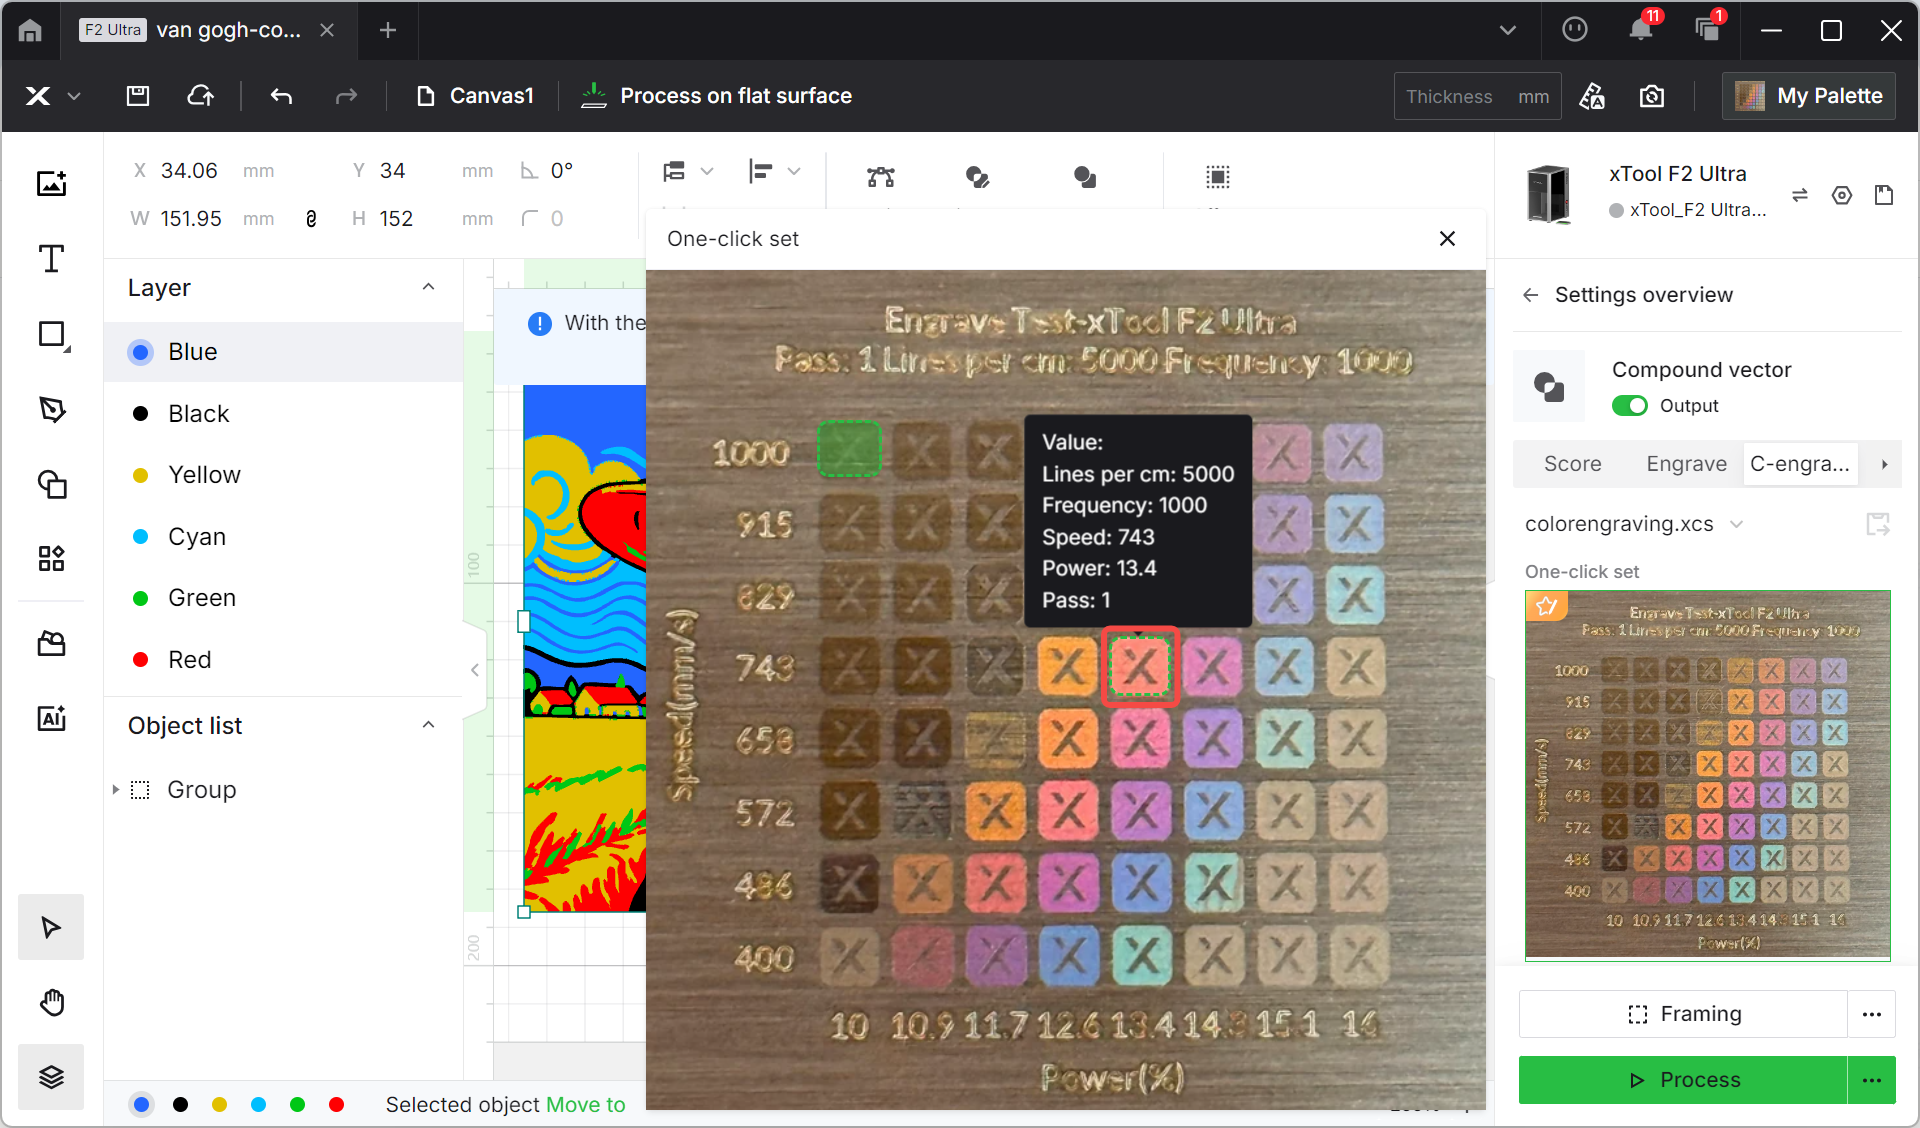
If you’d like a simpler way to generate a test matrix, use the official preset to create a custom color palette unique to your machine. For fine-tuning engraving parameters and exploring a wider range of colors, Click here for the full color engraving guide.
Note: To ensure the optimal results, please place the objects to be engraved within 60 x 60 of the center of the baseplate.
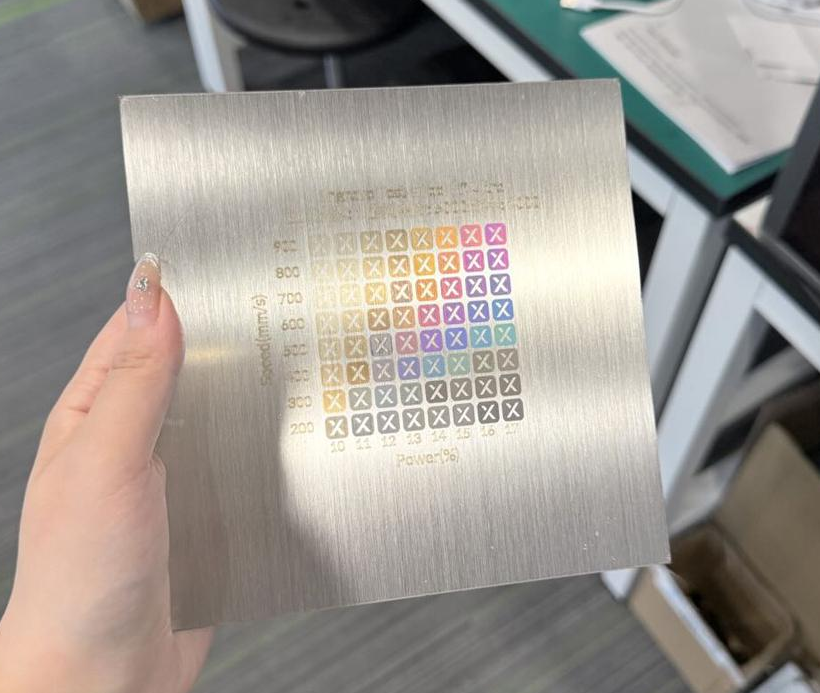
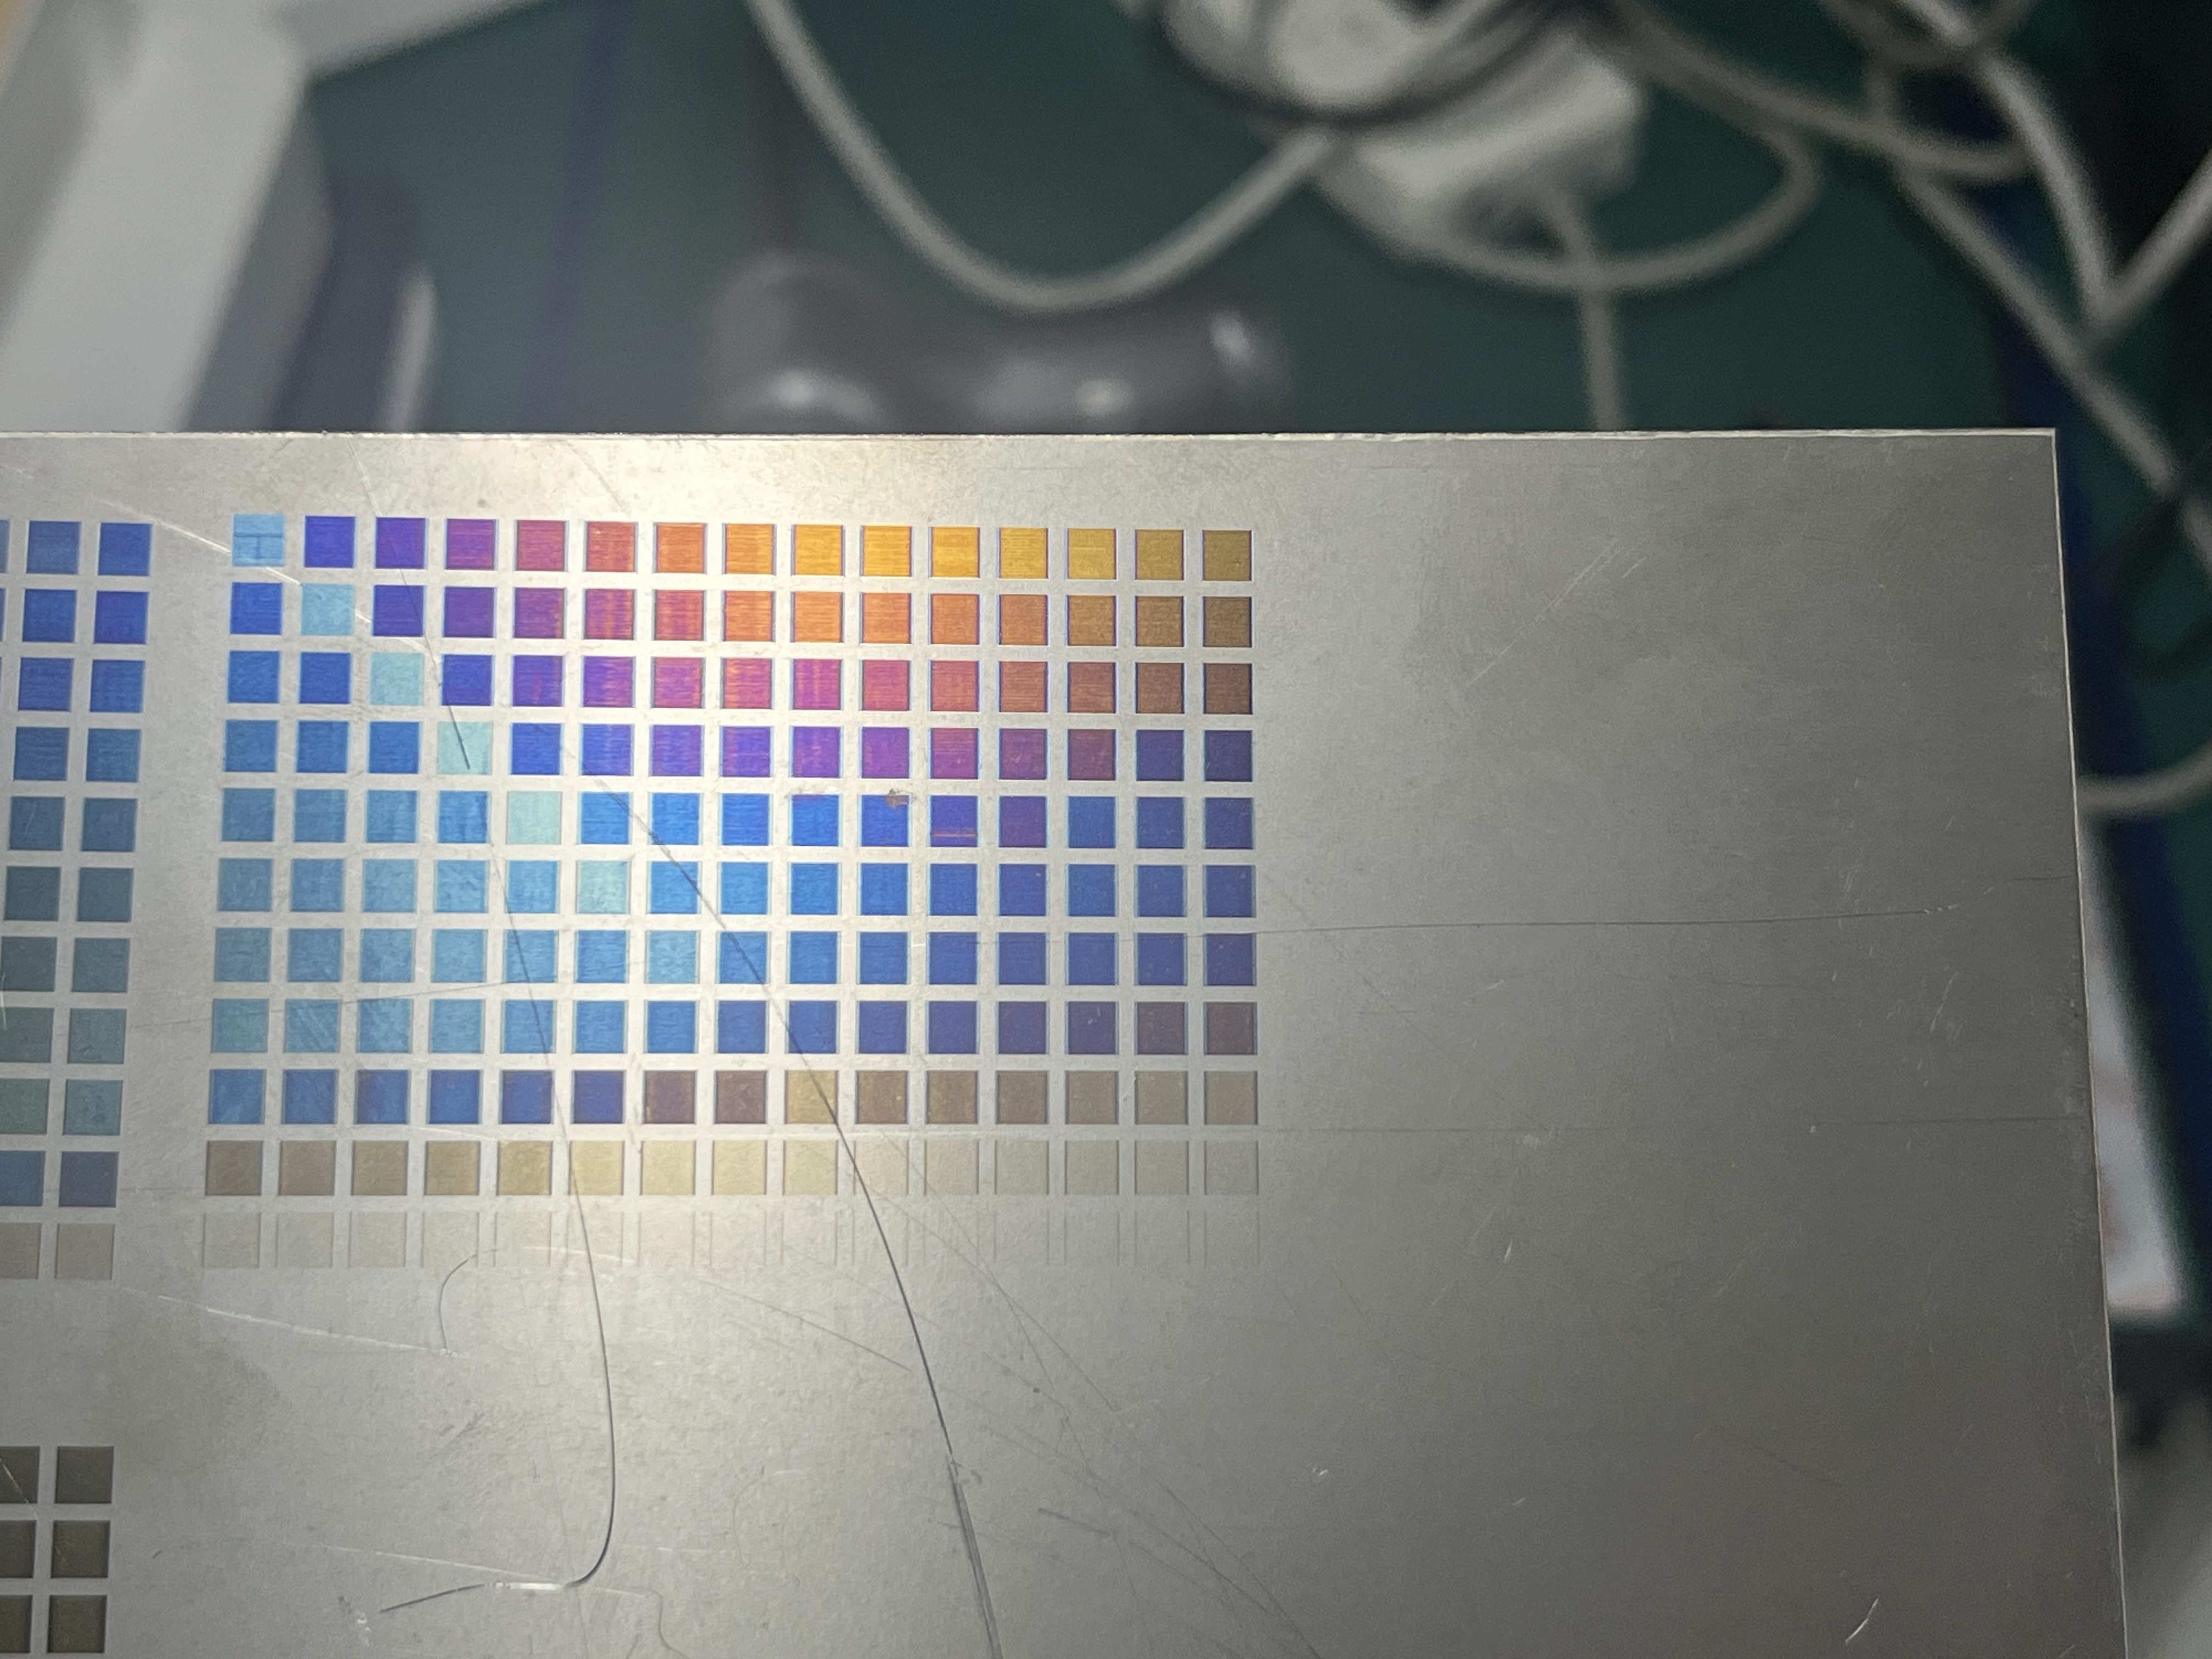
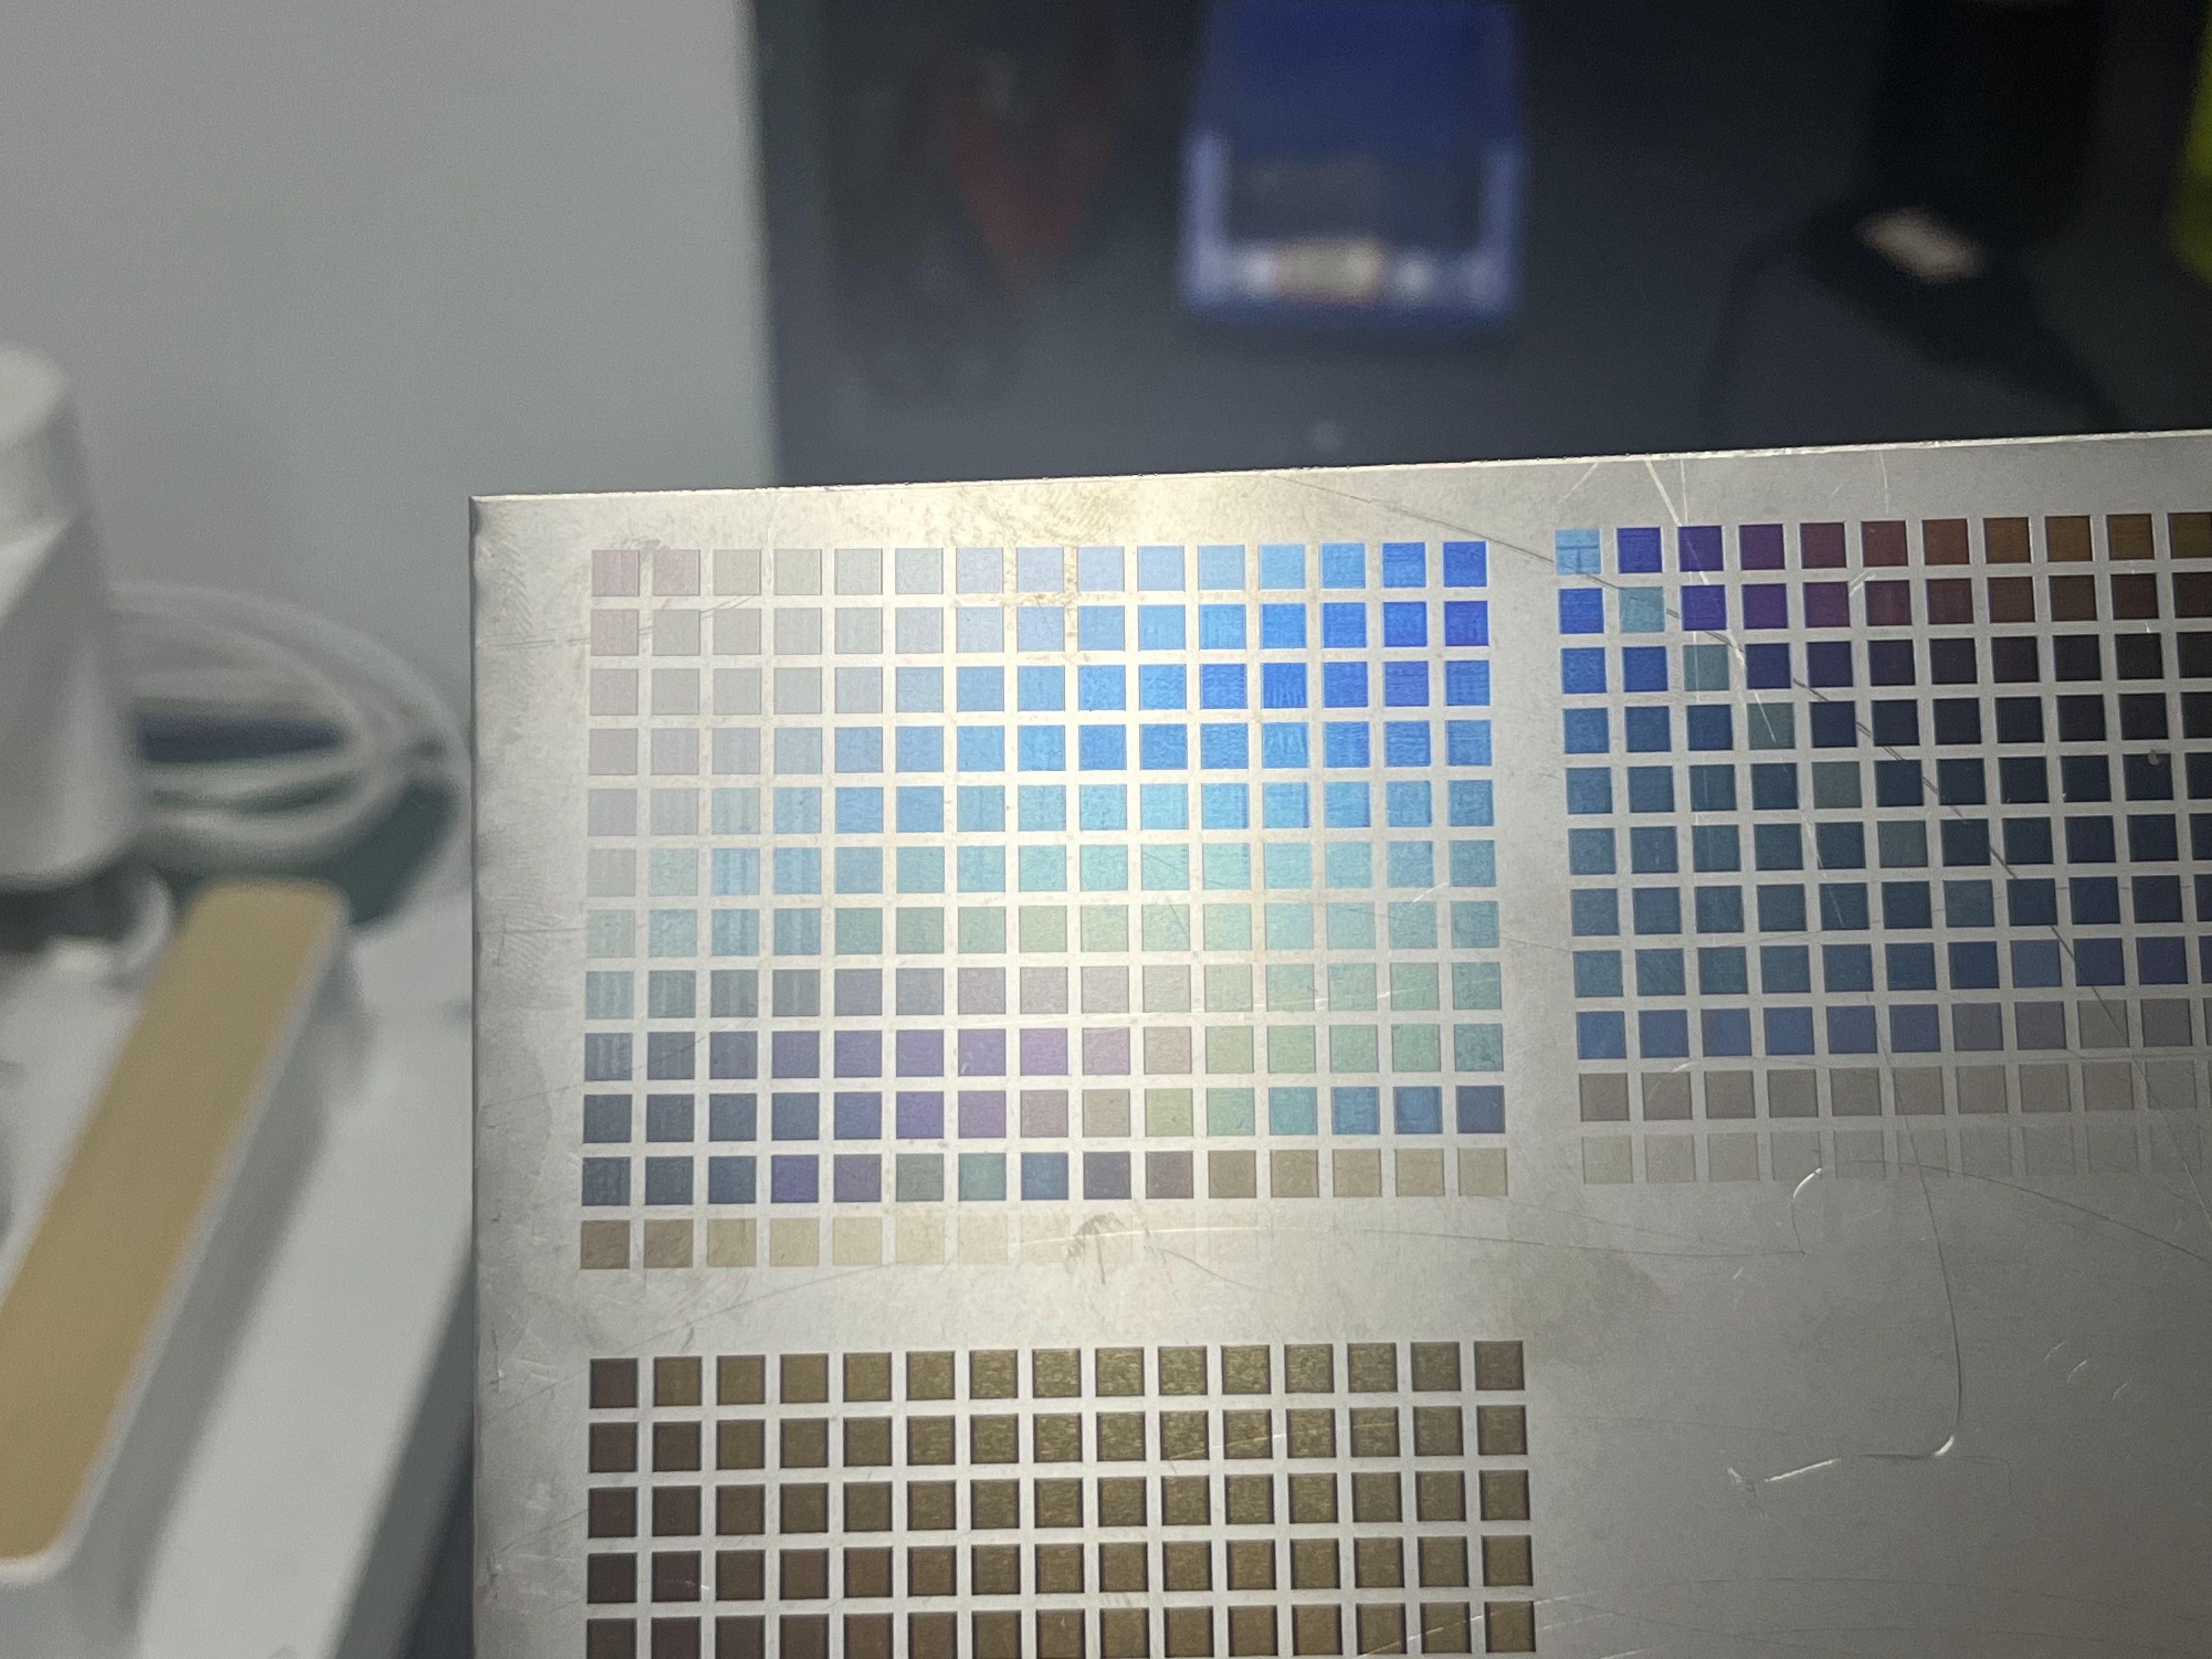
(3) After processing, save the XCS file, take a clear photo of the colors, and start creating your personal color chart.
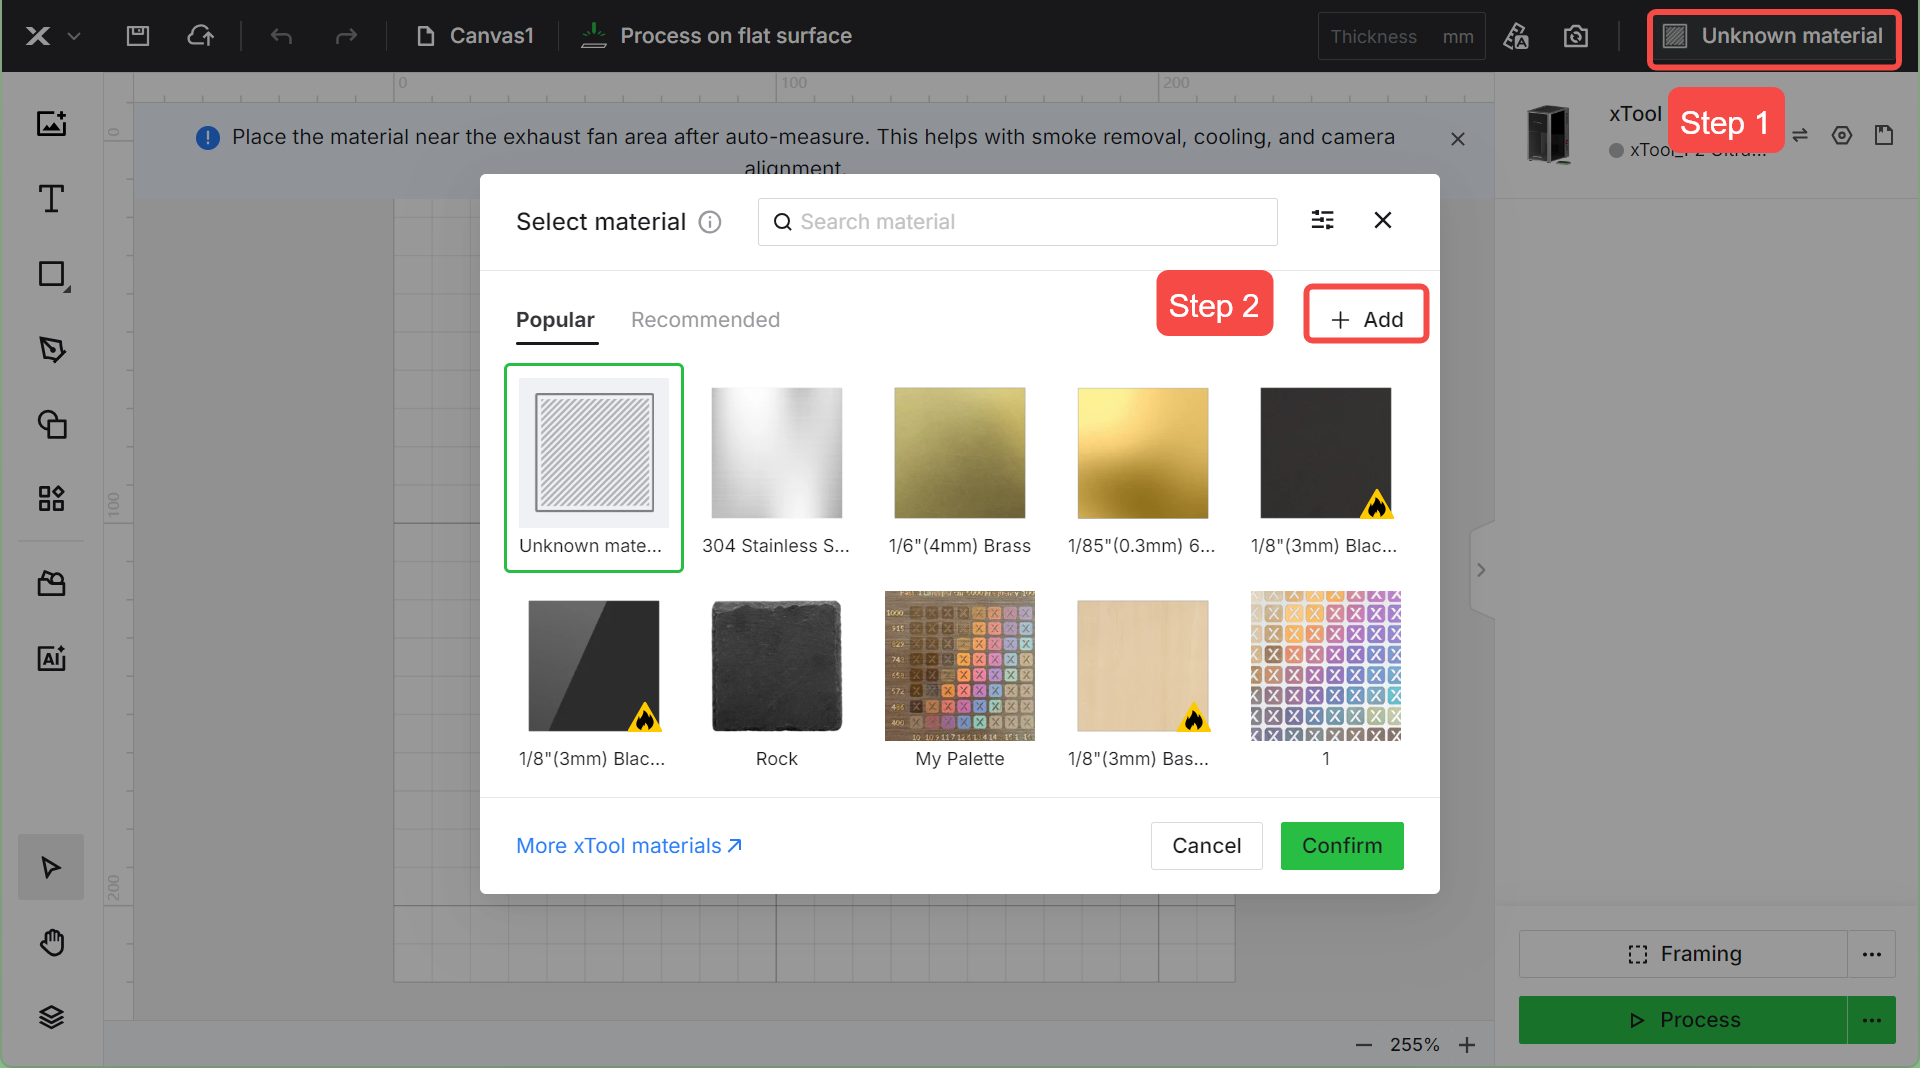
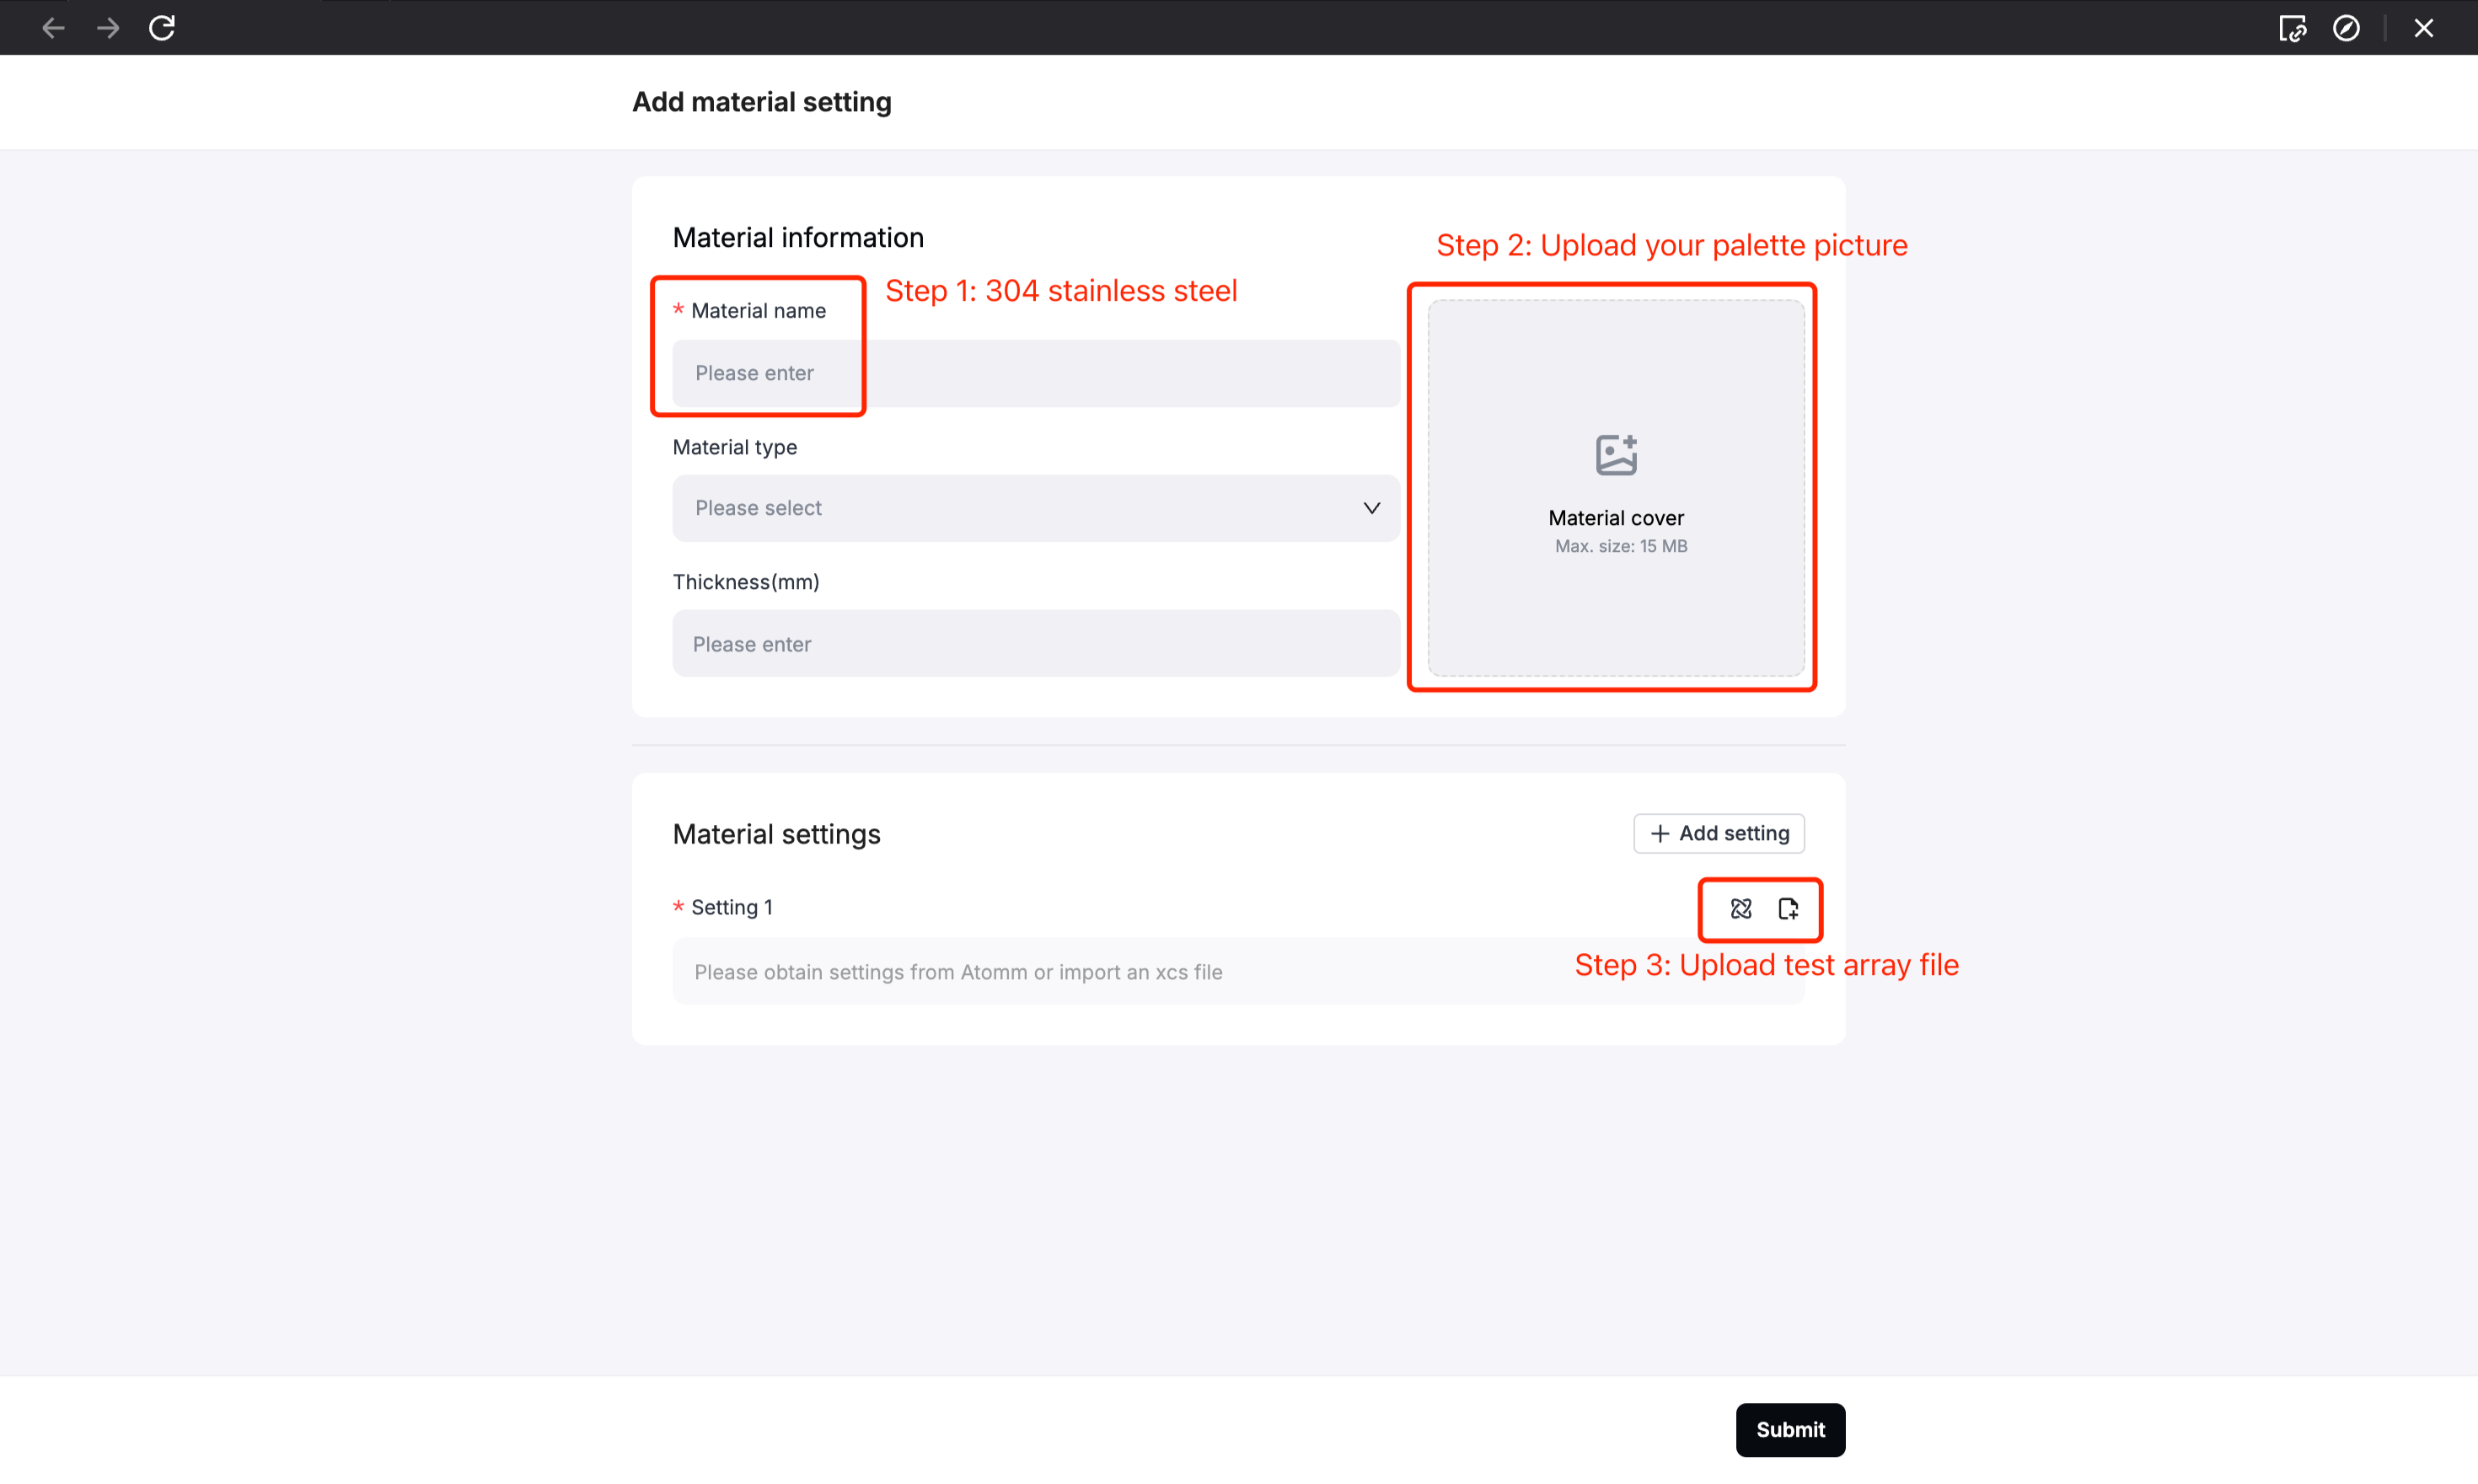
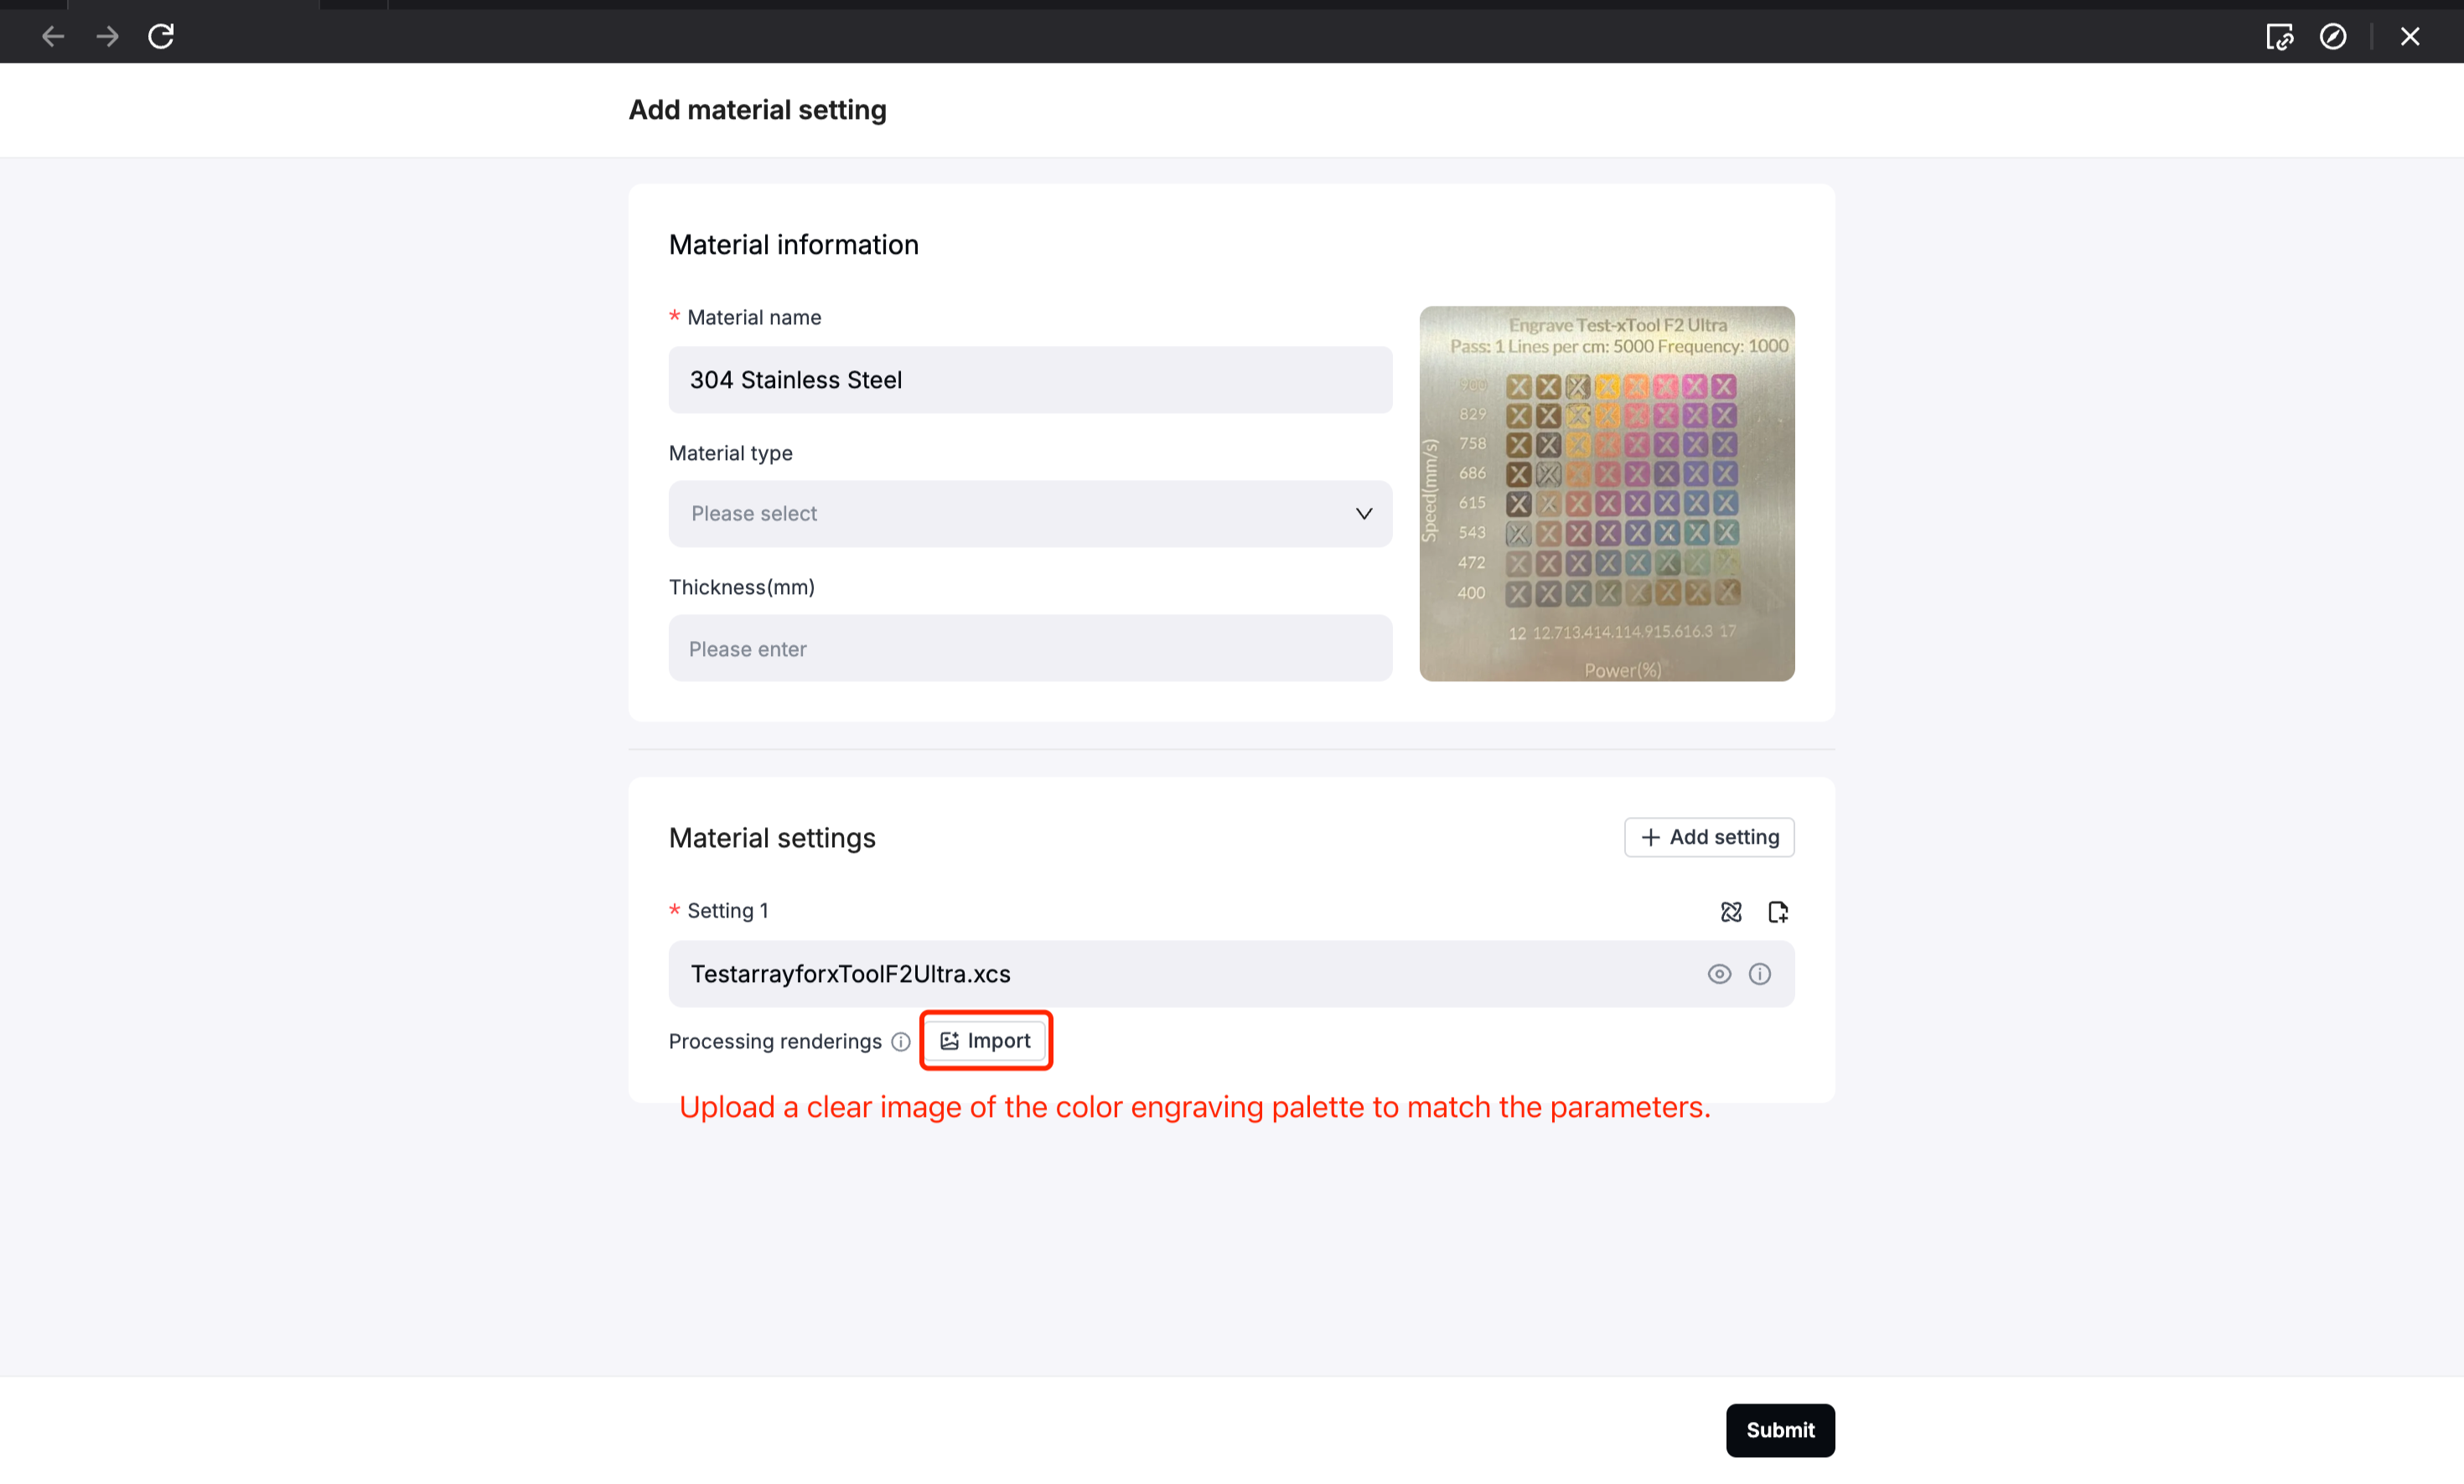
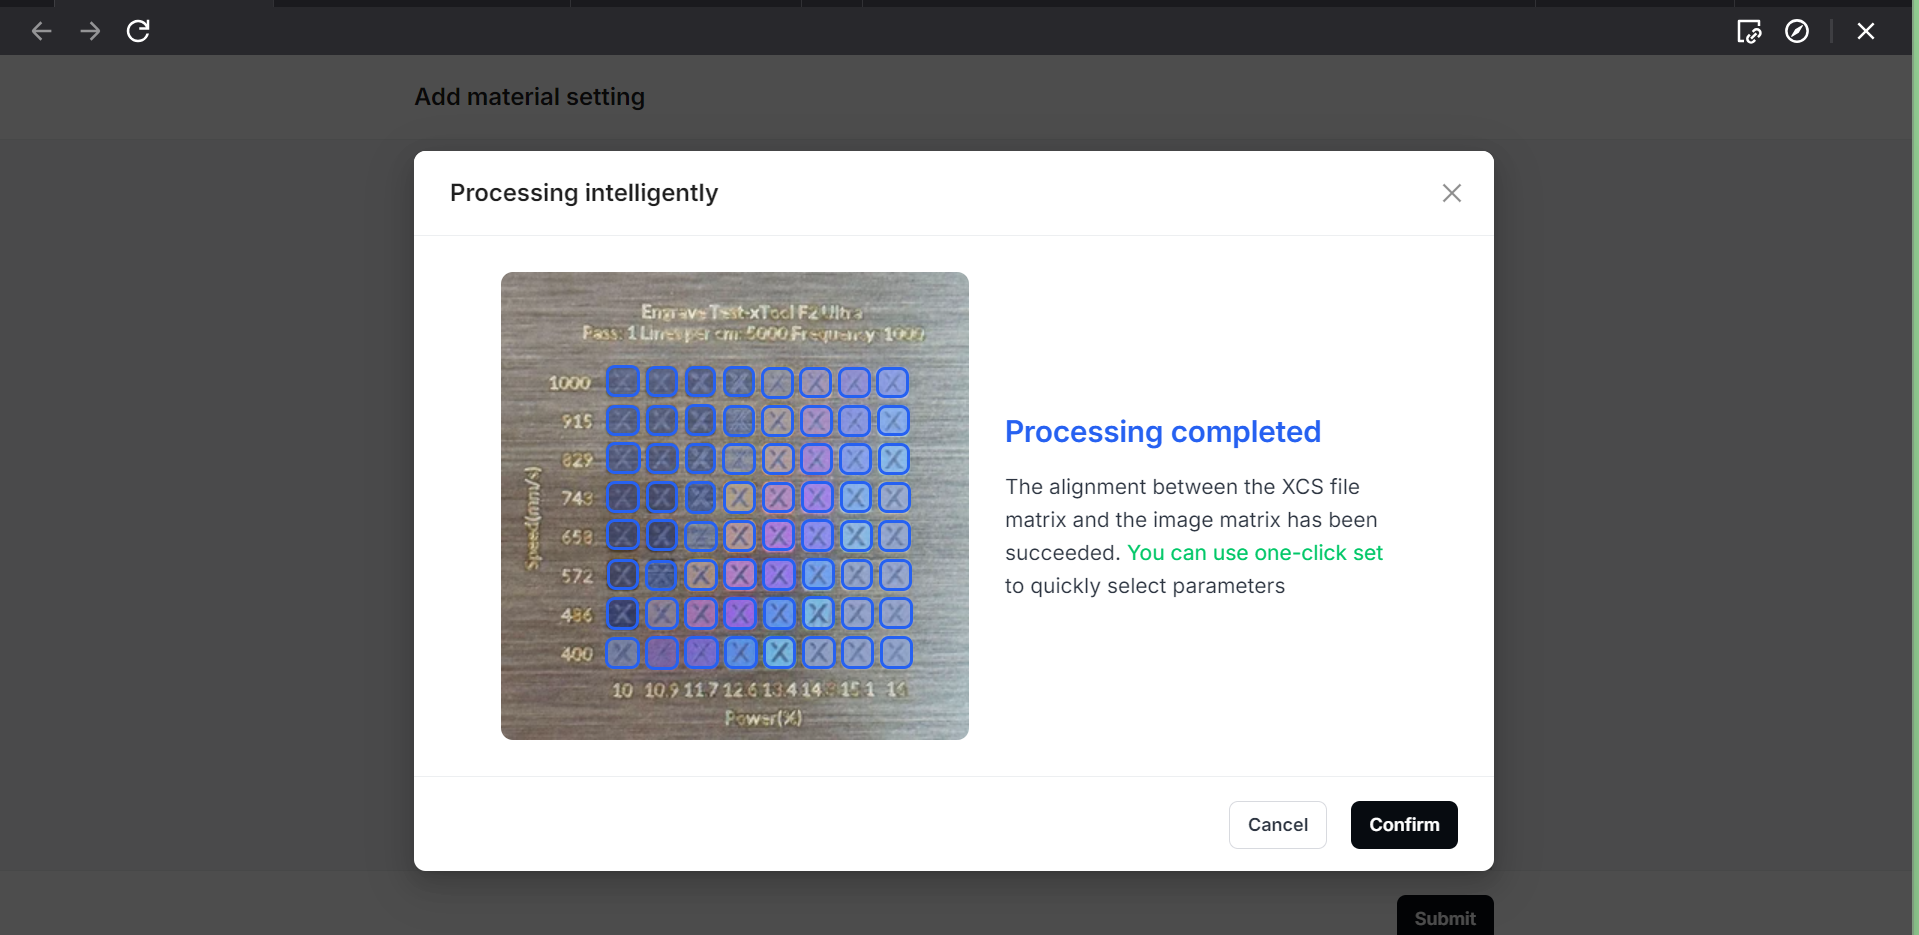
(4) Select the personal color palette you created, choose your desired colors, and the parameters will match automatically. Once set, you can start processing to complete your work.
Titanium Color Engraving
Titanium is also an excellent material for color laser engraving, capable of producing colors that are brighter and more saturated than those on stainless steel.
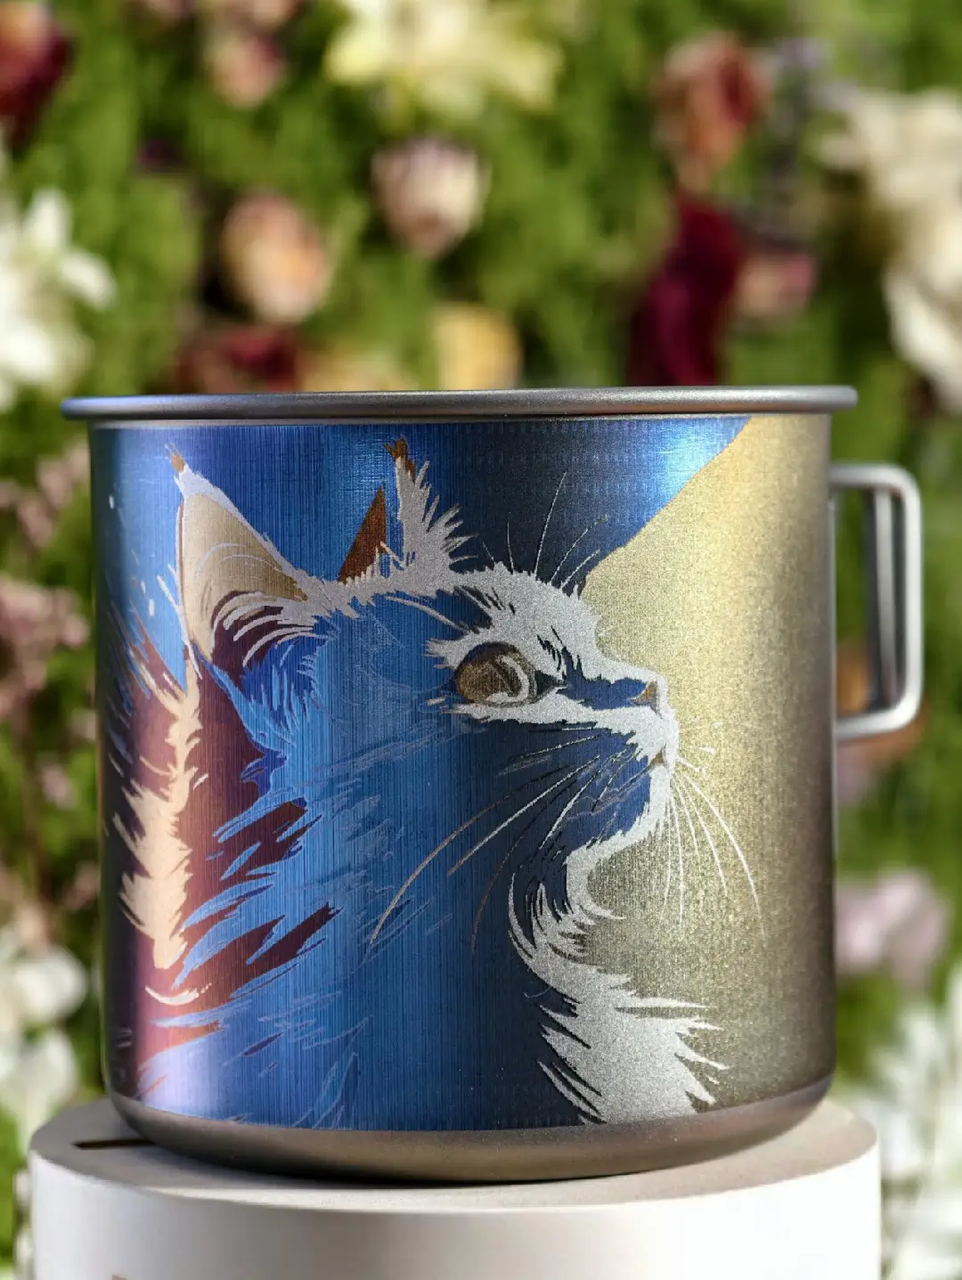
The steps for color engraving on titanium are basically the same as on stainless steel. The key is still to build your own test matrix to explore and calibrate color parameters.
The official reference settings (Power 5–35%, Speed 500–4500 mm/s, Lines per cm 5000, Pulse Width 2 ns, Frequency 1950 kHz) provide a great starting point, but by creating your own test matrix, you can unlock an even wider spectrum of colors.
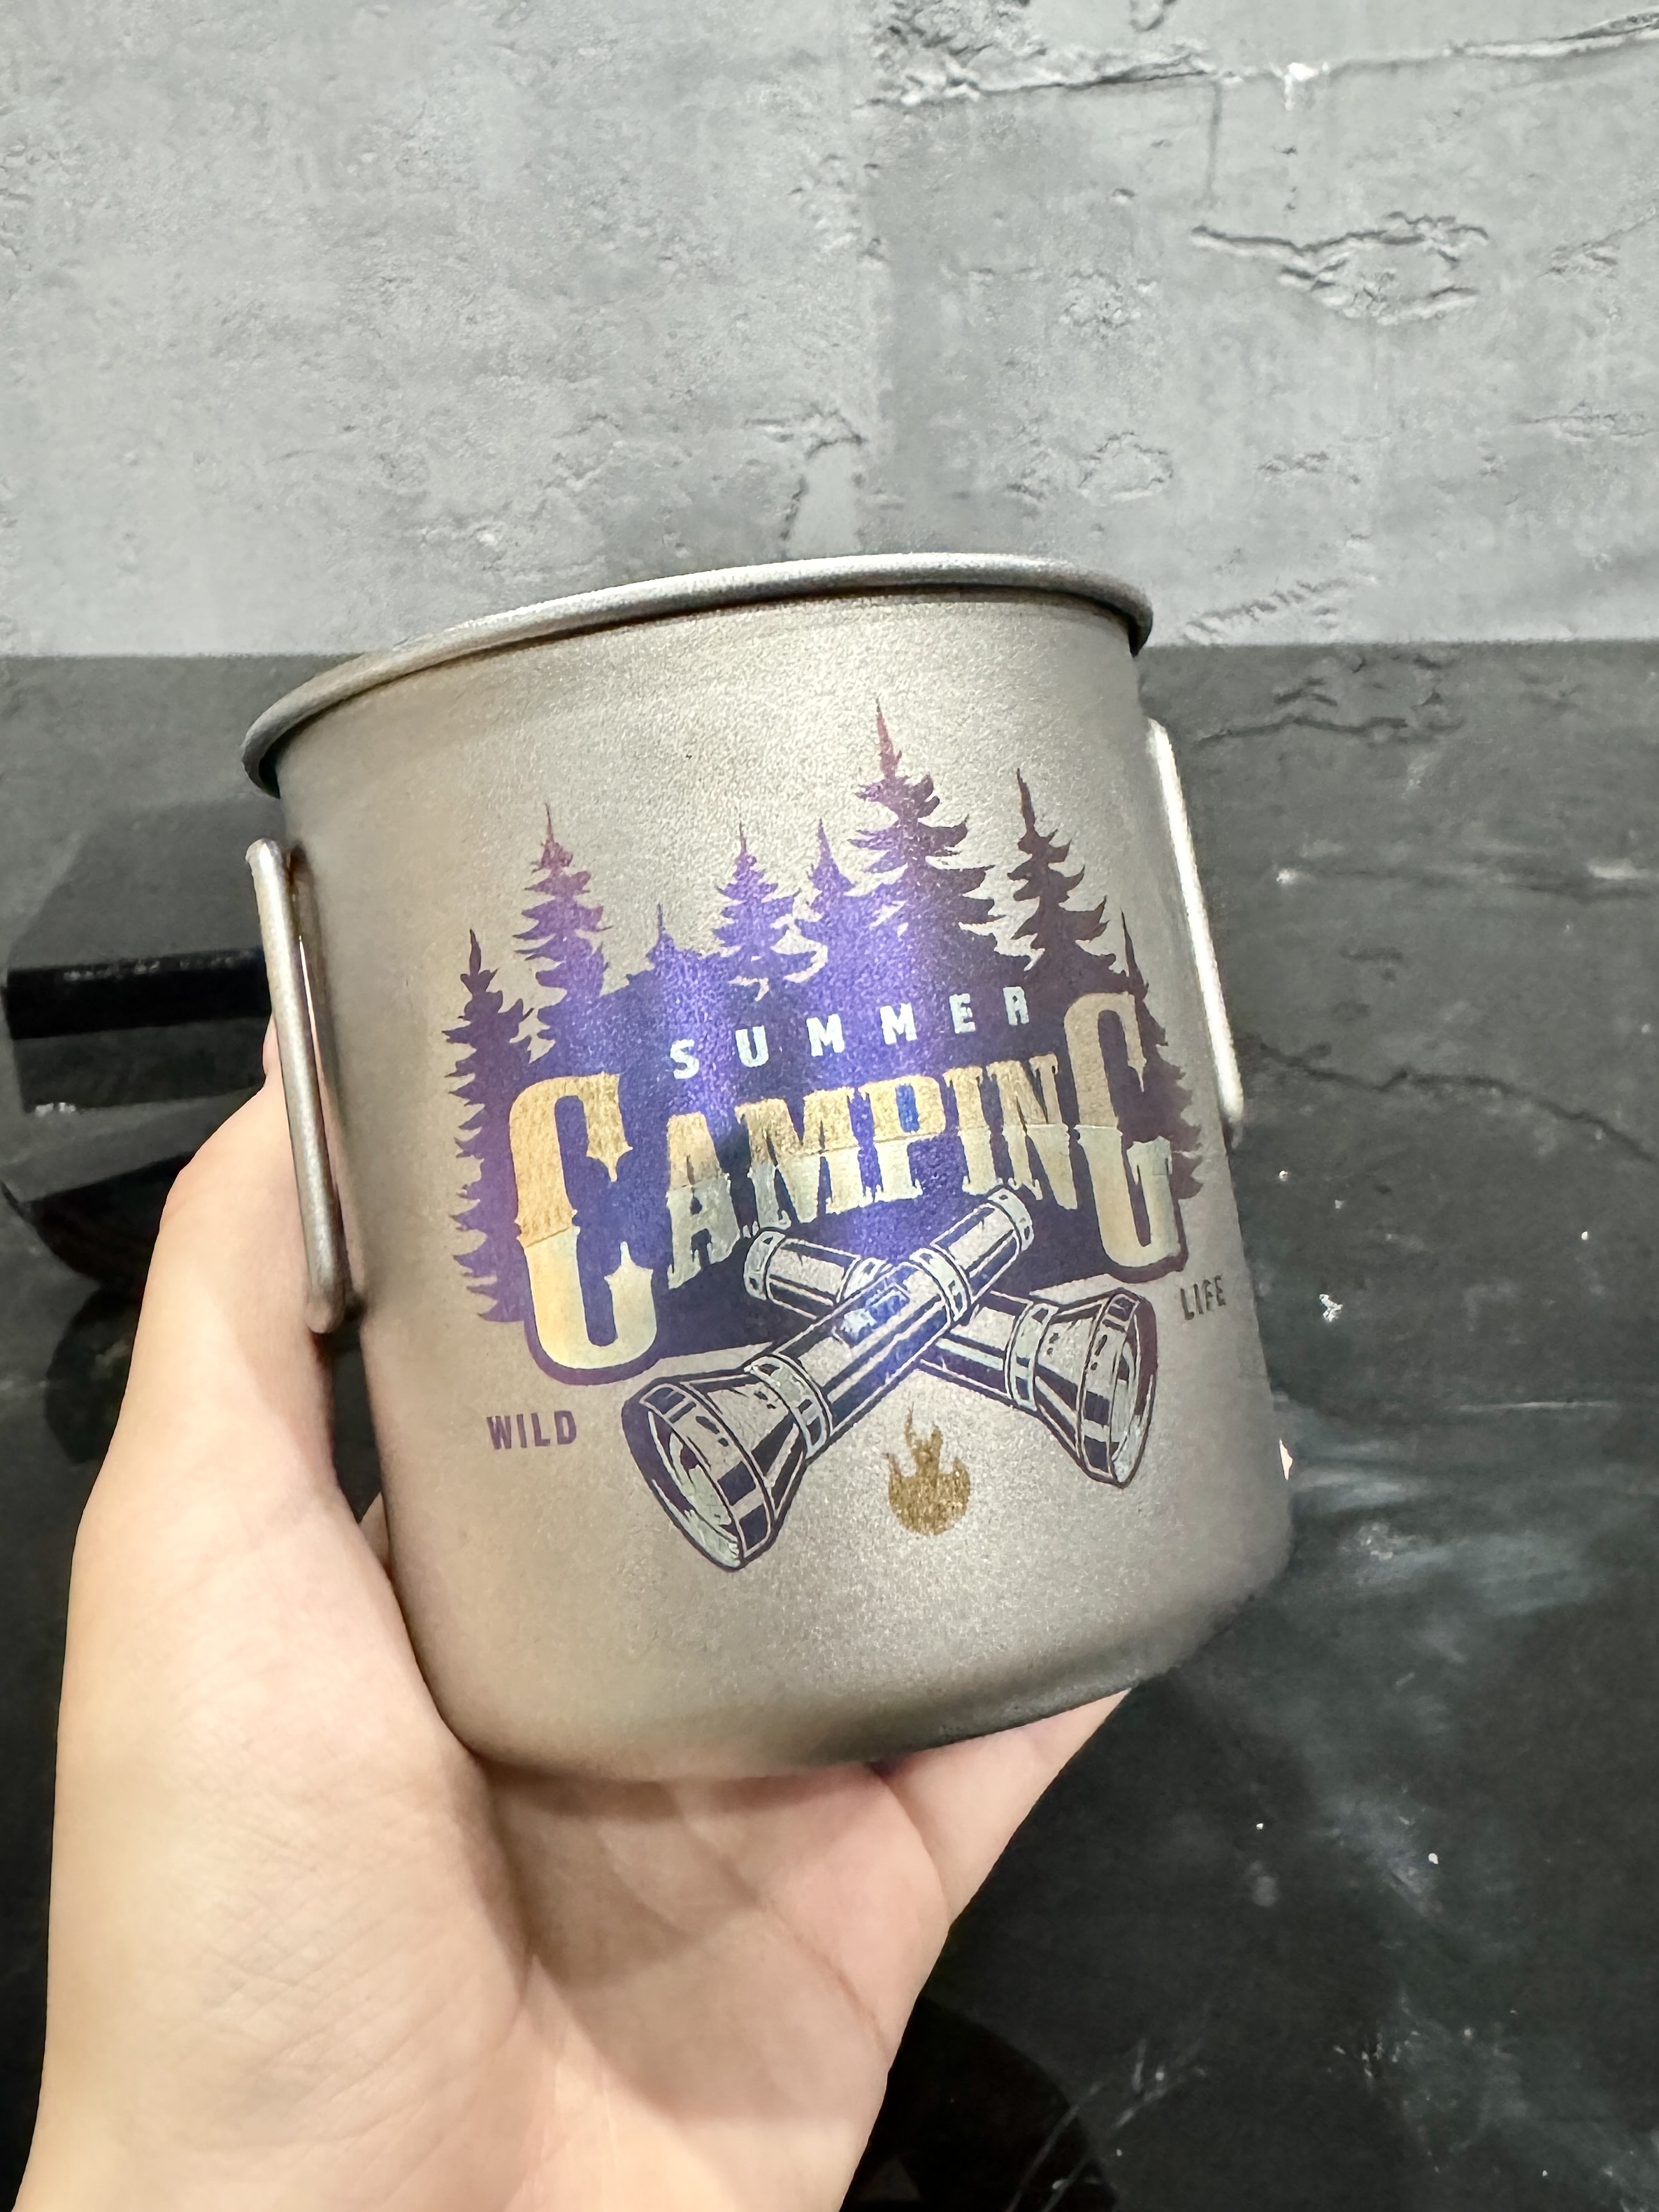
Brass Color Engraving
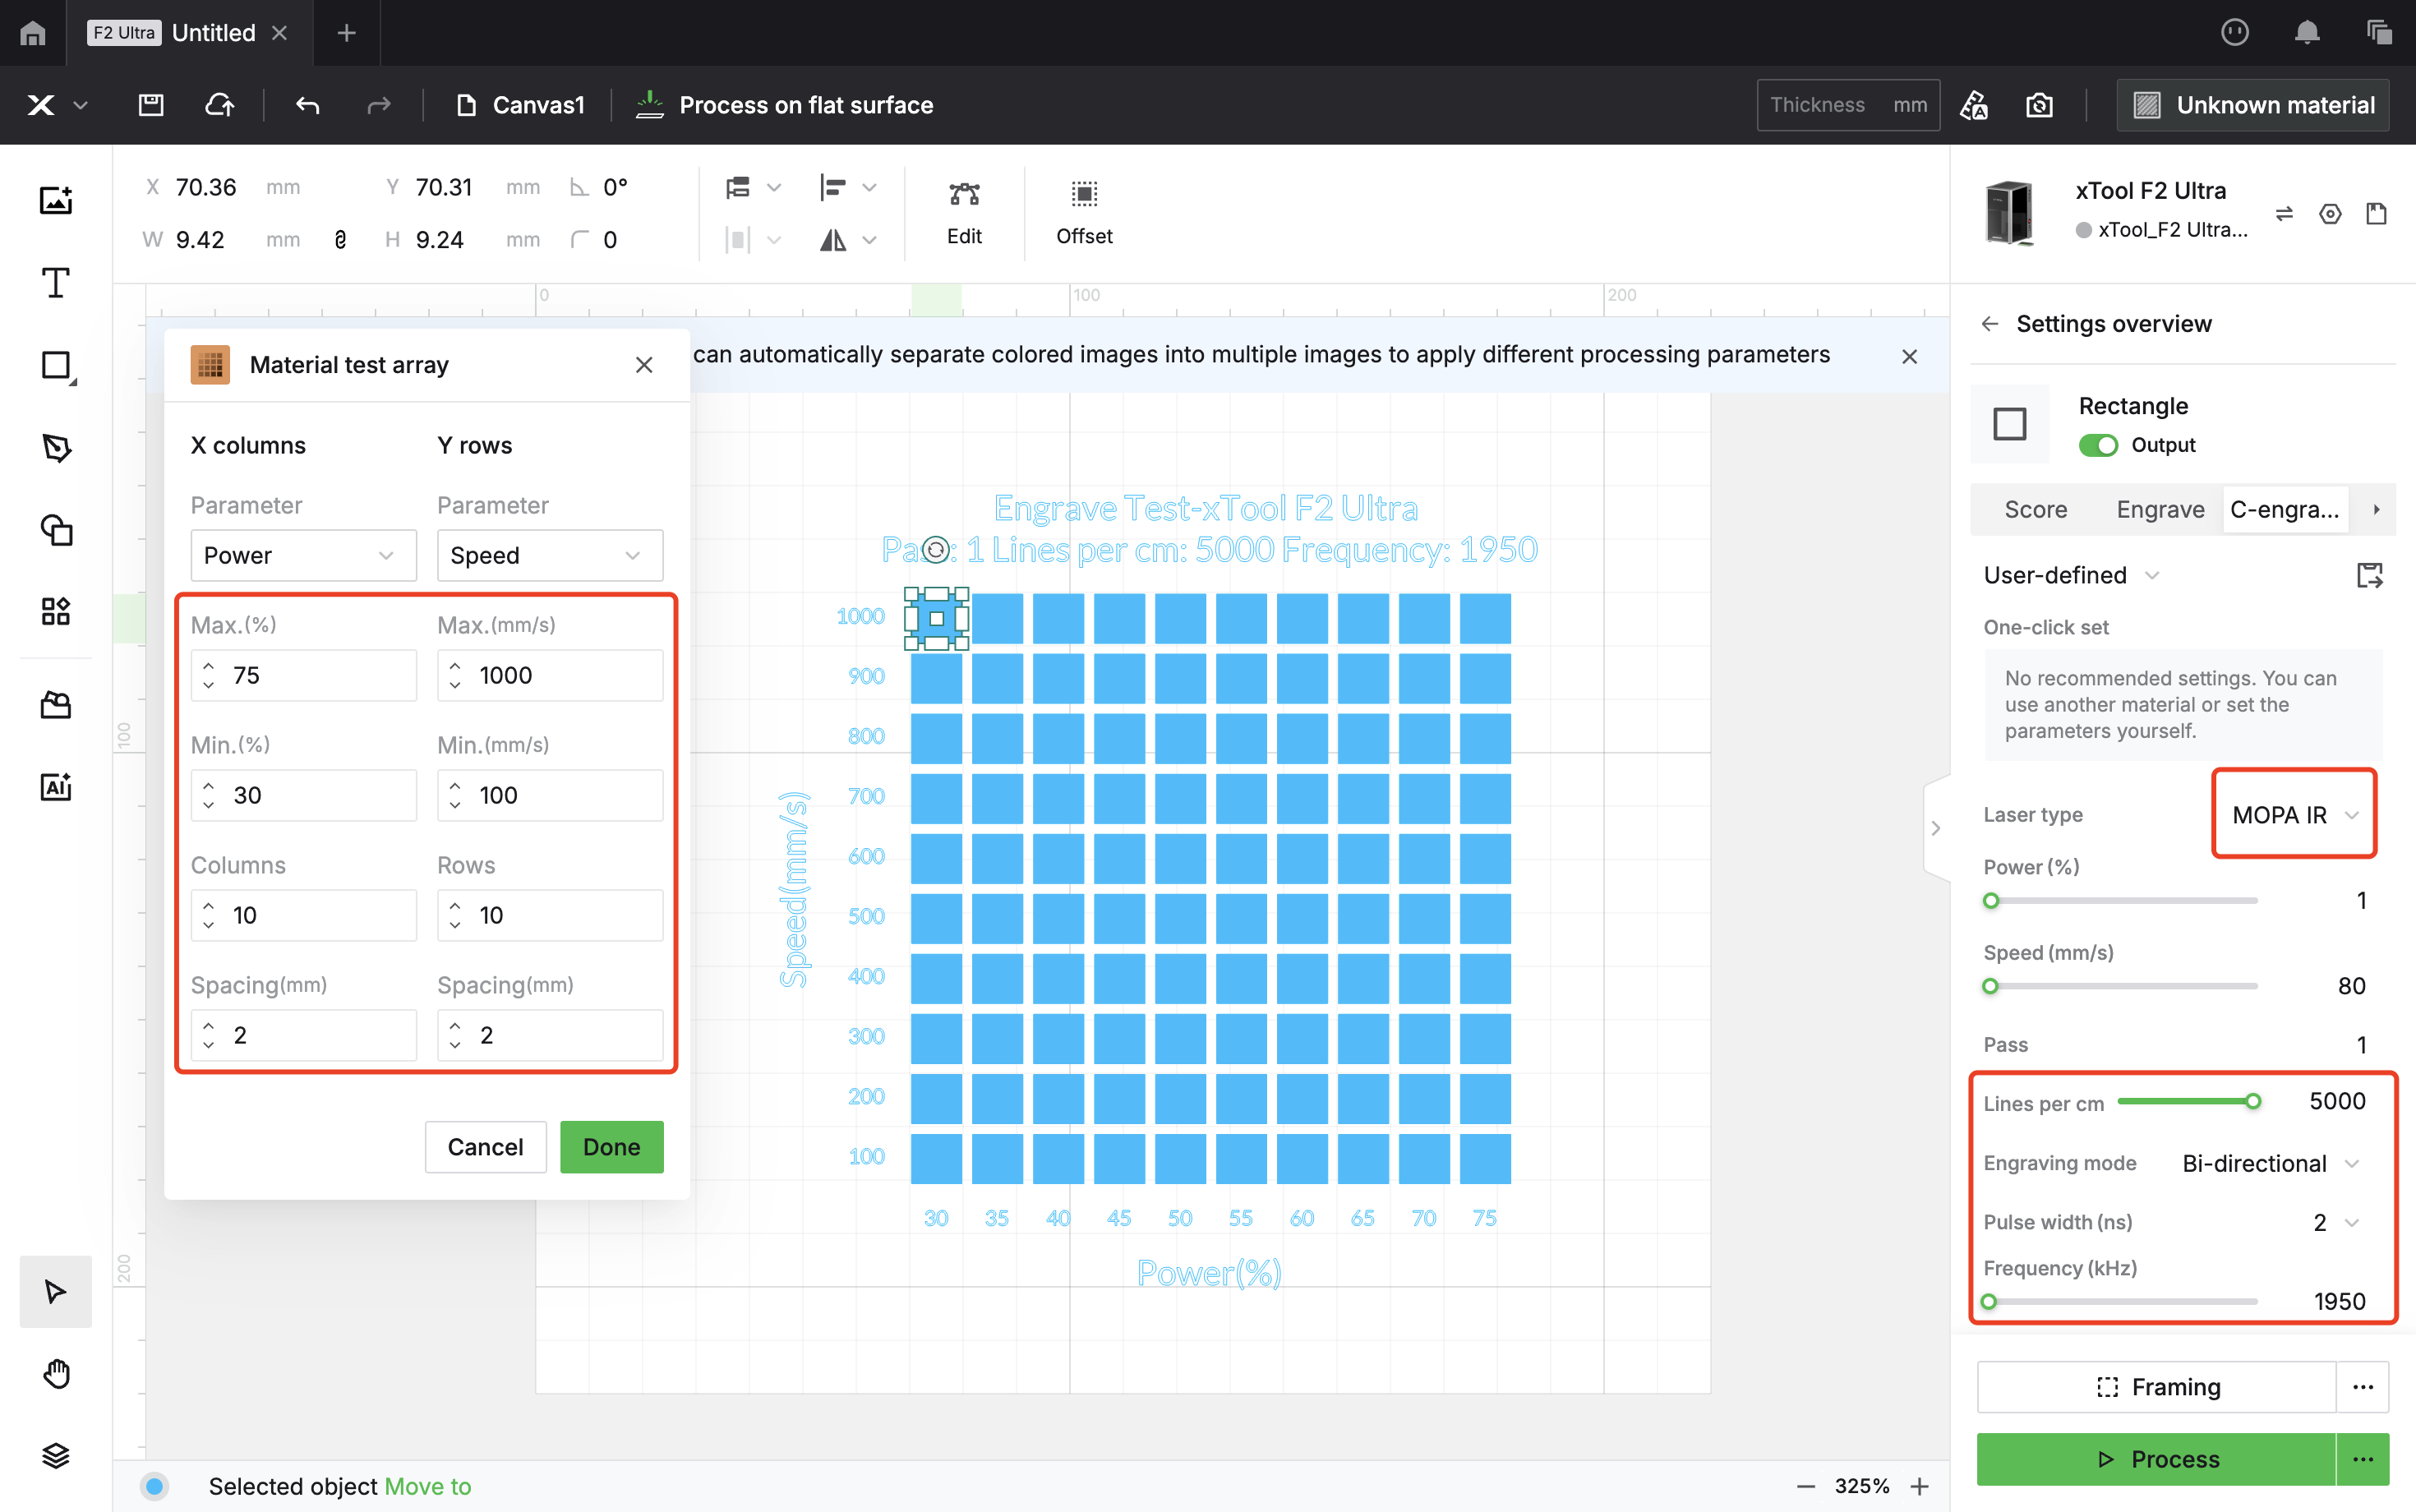
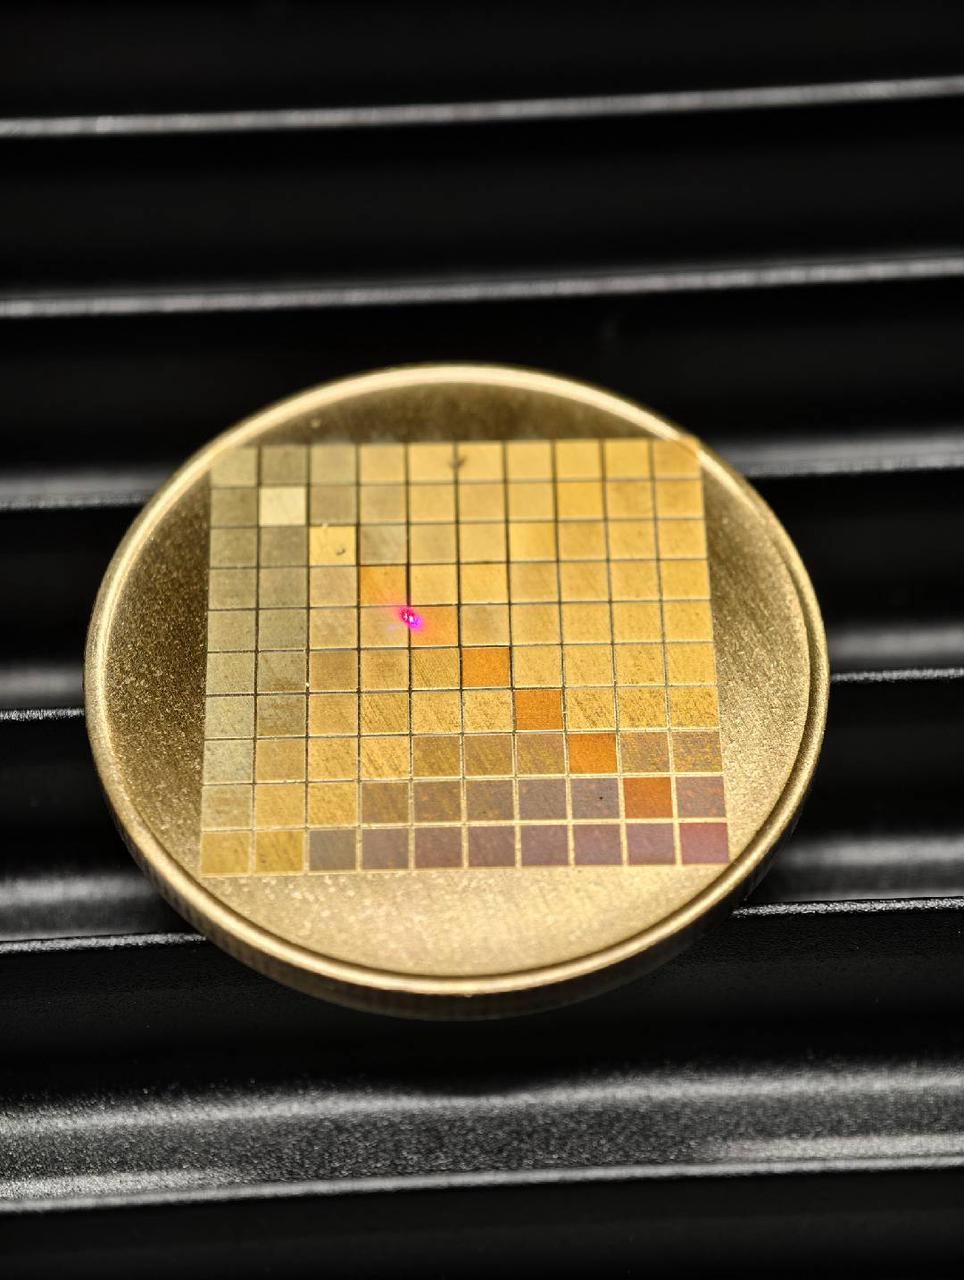
Just like with the previous two metals, color engraving on brass also relies on using a test matrix to determine the best parameters. You can refer to the following settings and steps to create a test array:
Power 30–75%, Speed 100–1000 mm/s, Lines per cm 5000, Pulse Width 2 ns, Frequency 1950 kHz

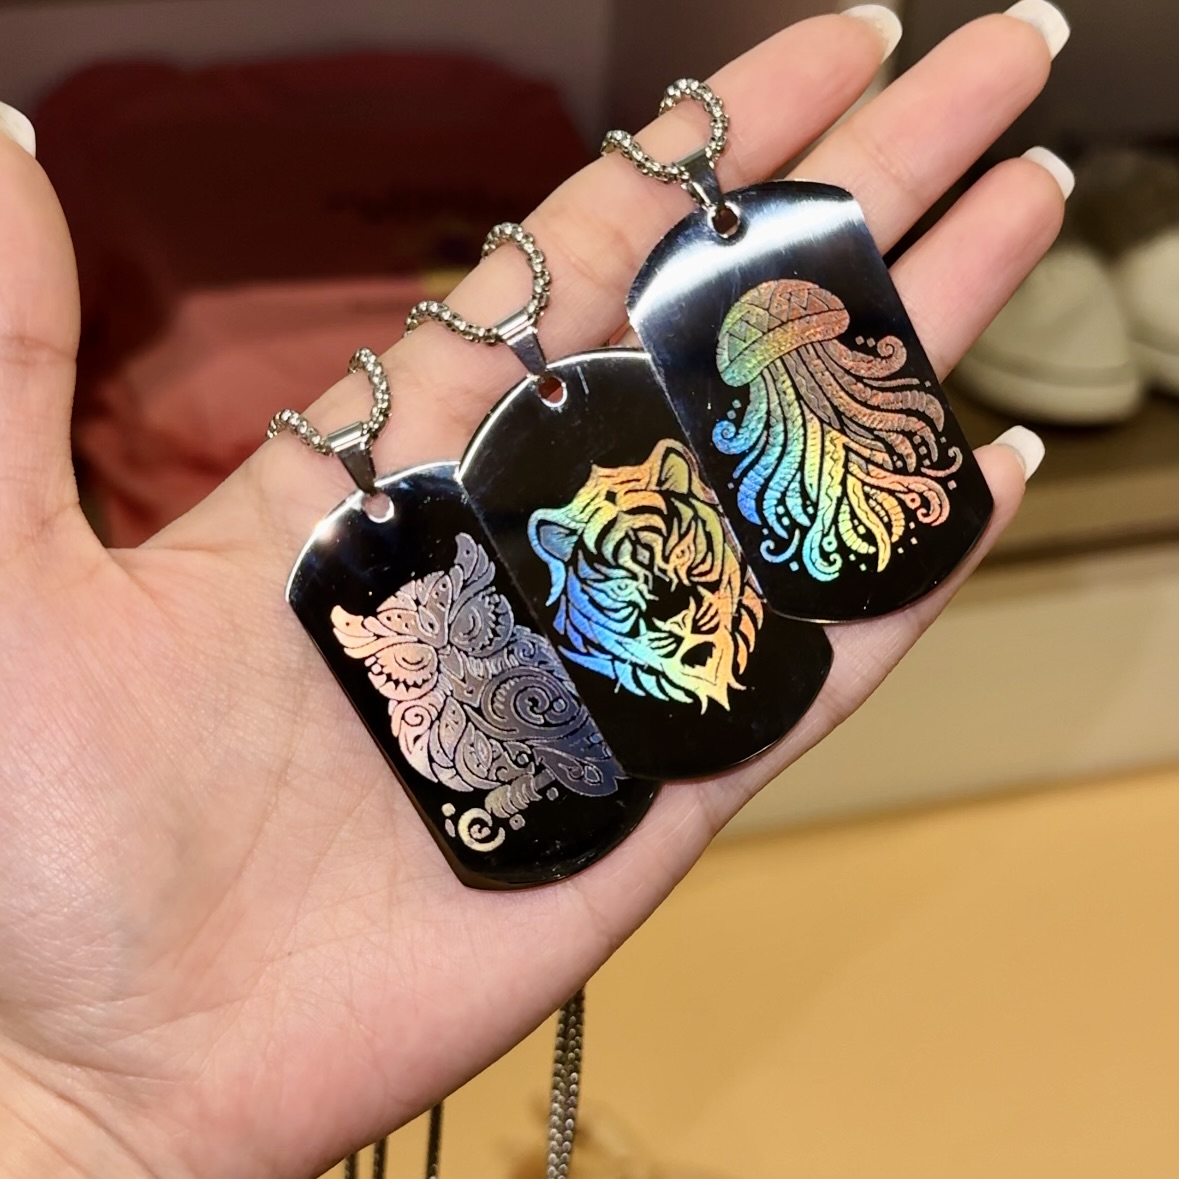
The Holographic Effects
Once you’ve mastered color engraving, an even more advanced technique is using the laser to reshape the surface of the material to control how light is reflected, diffracted, and absorbed—creating stunning holographic effects.
This effect is achieved by engraving extremely fine lines on the metal surface, hundreds of times thinner than a strand of hair. These microscopic lines act like a tiny diffraction grating. When light hits the surface, it is diffracted and interferes, splitting white light into its spectrum of colors—much like a prism. As the viewing angle changes, different wavelengths of light reach the eye, producing a dazzling, multicolored shimmer that shifts with perspective.
You need to use 304 mirror-finish stainless steel for this project. Only a highly reflective surface can effectively reflect the diffracted light and create a clear holographic effect, while brushed or matte finishes make this difficult to achieve.
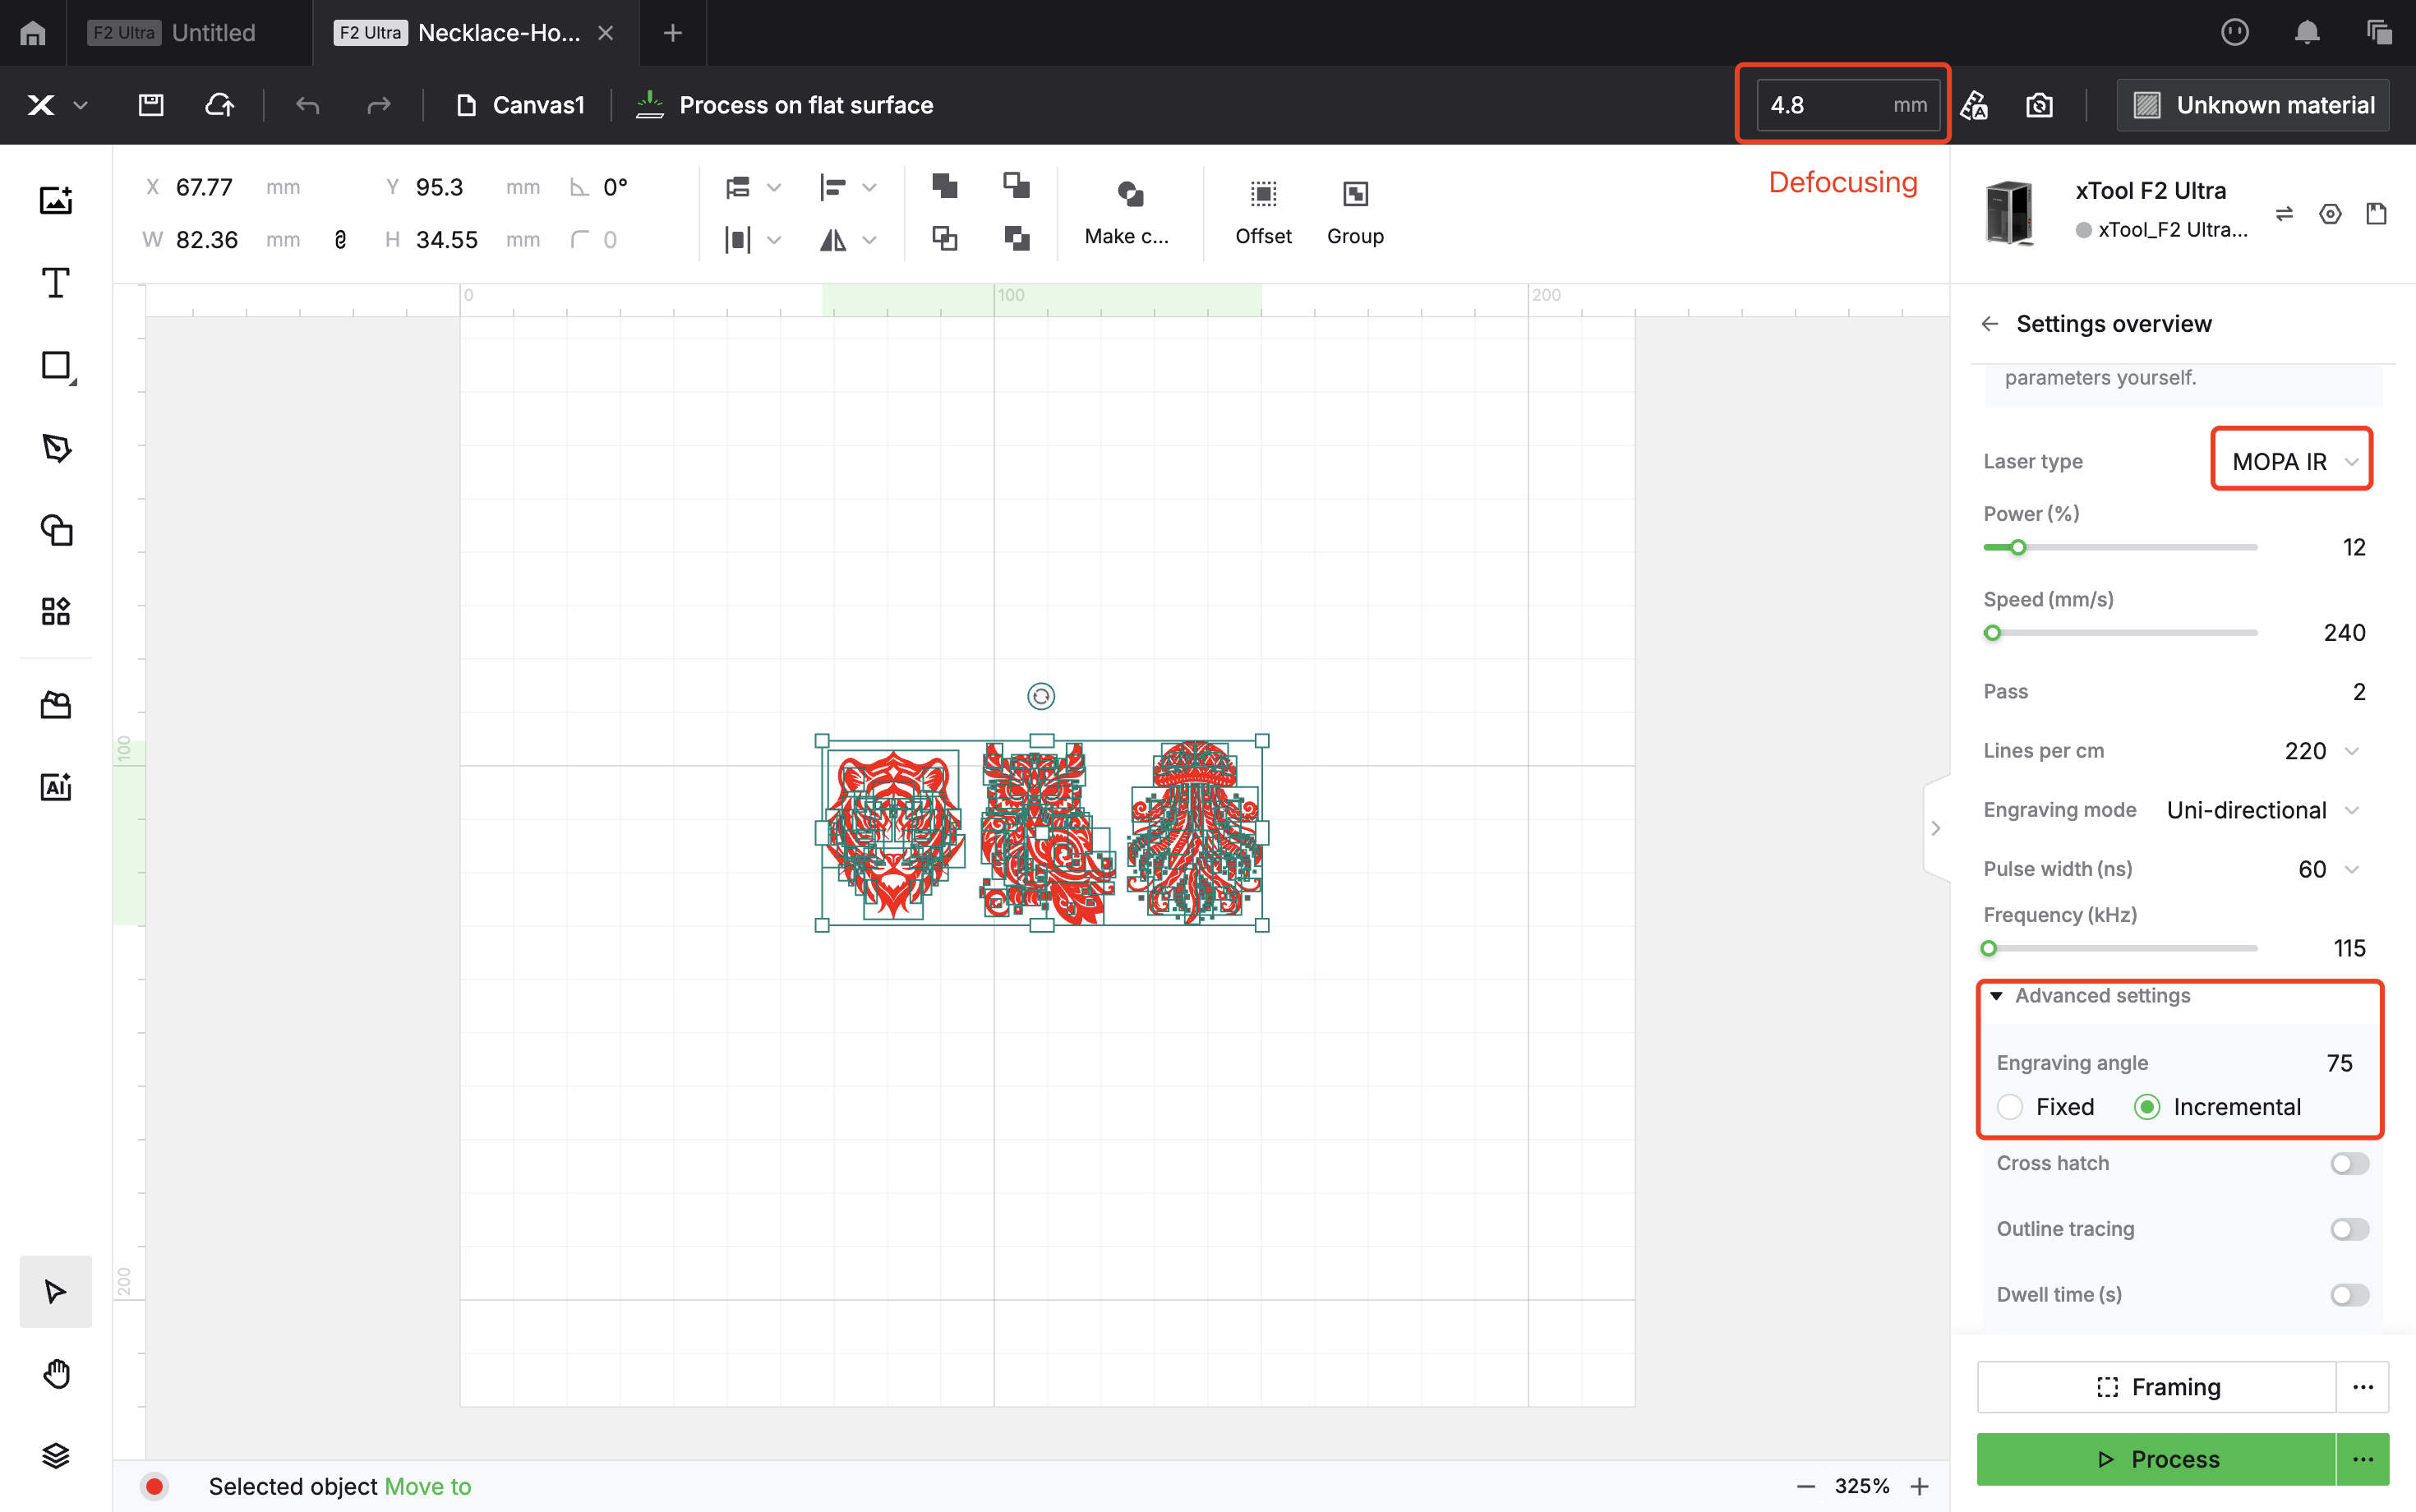
This file requires engraving mode. Be sure to tap Auto Focus first, then manually add 1 mm to the focus distance. This process is called defocusing, and it’s essential for achieving the holographic engraving effect. We recommend a defocus of 1–2 mm, though the exact value may vary depending on your machine, so test multiple times to find the best setting for your setup.
Most importantly, remember to set the fill angle before processing. We used 45° to achieve this effect.
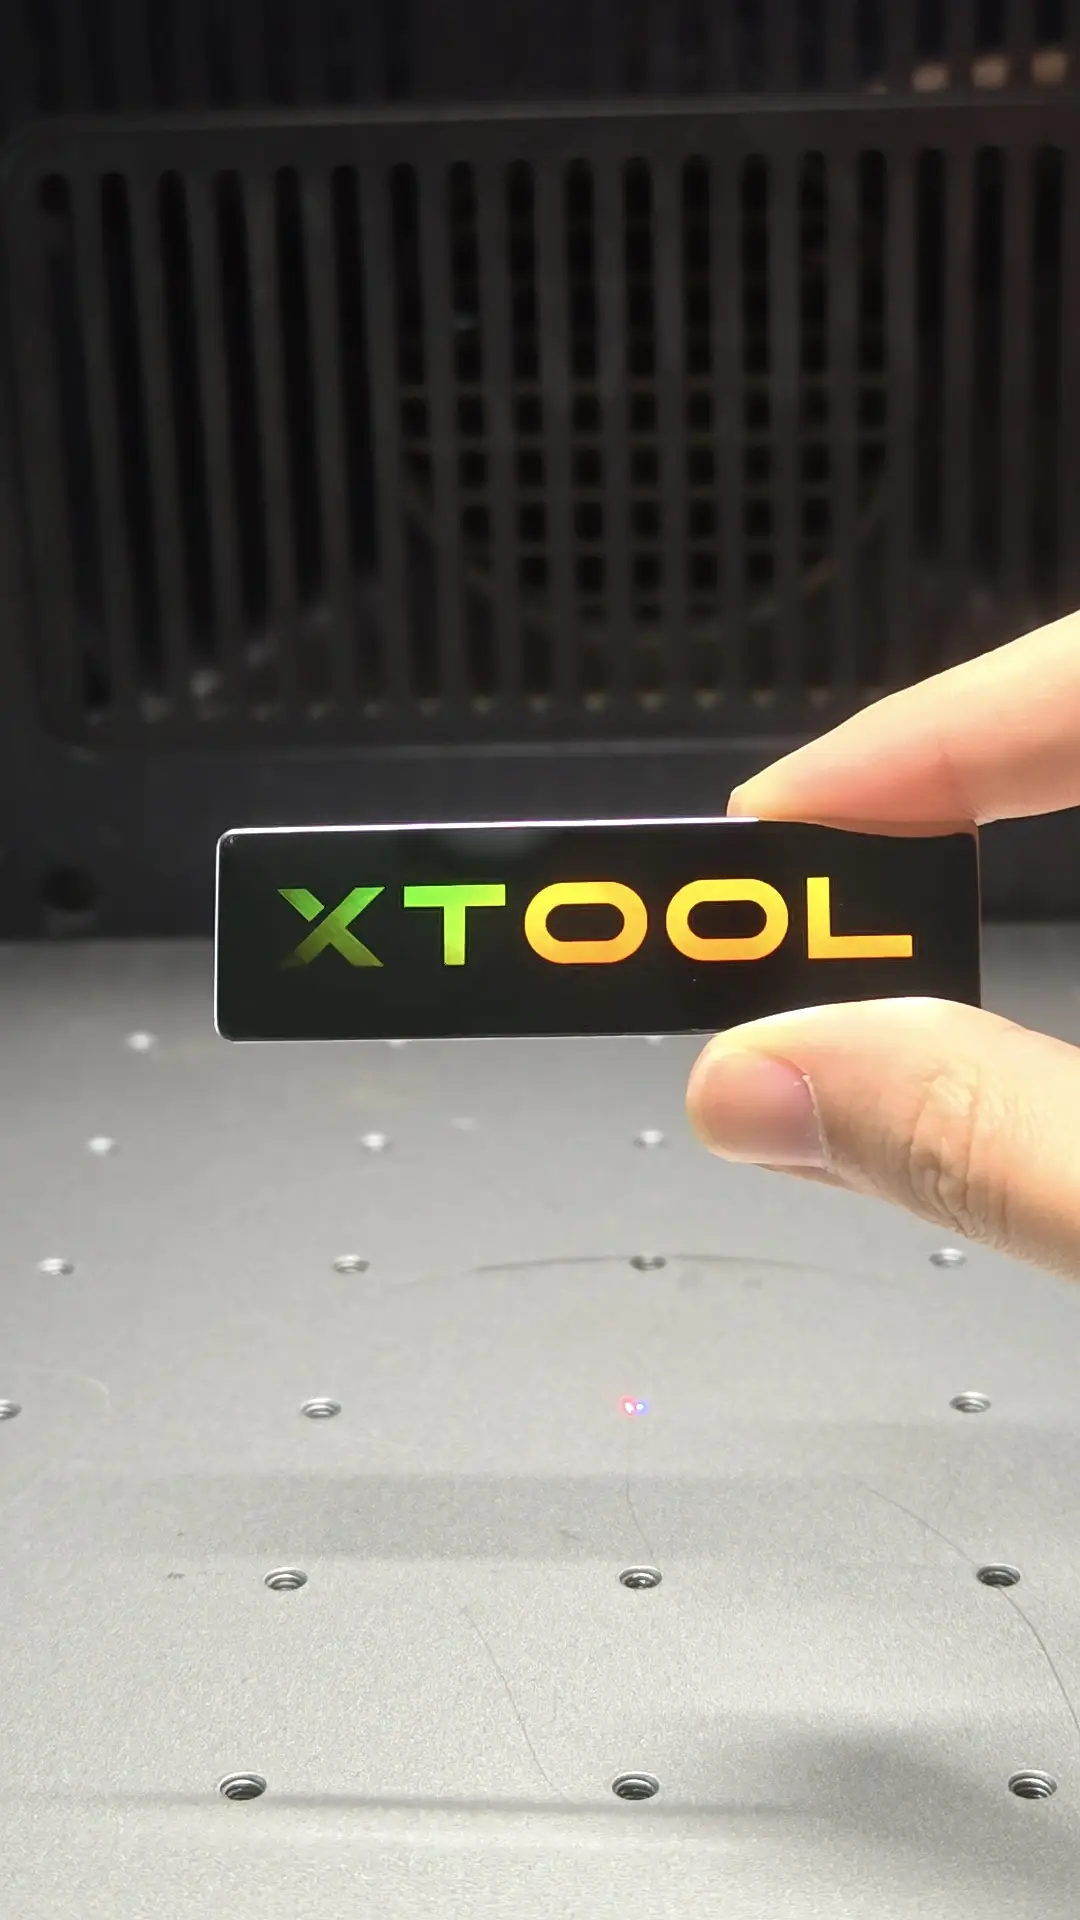
Black marking on anodized aluminum
You can use this parameter to easily leave black markings on anodized aluminum material.
One of the key advantages of the MOPA laser is its ability to make black markings on anodized aluminum. Traditional lasers (such as CO2 or fiber lasers) usually ablate the surface to produce gray markings. In contrast, the MOPA laser uses short pulses and high frequency to let energy pass through the transparent oxide layer and act directly on the aluminum base beneath, resulting in a sharp black mark. Compared with gray, black offers much higher contrast and remains clear under any lighting or viewing angle. 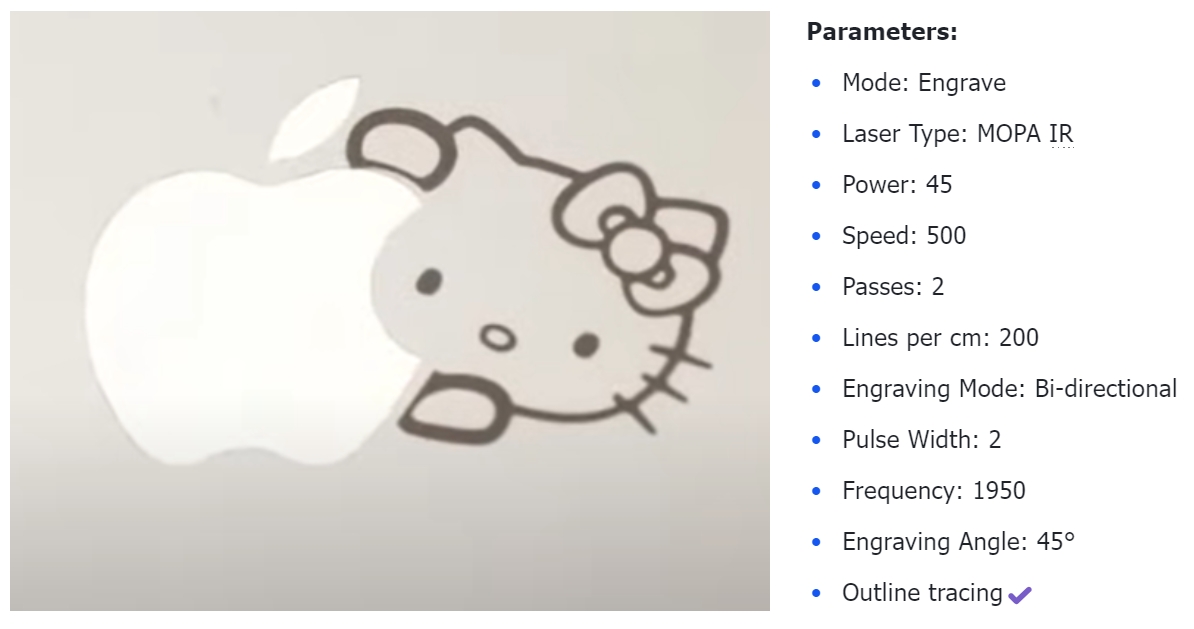
Cutting Brass
In this brass cutting tutorial, we'll introduce two distinct cutting methods, each with its own advantages in terms of speed, quality, and suitable applications. Understanding the differences between these methods—along with their strengths and limitations—will help you make more informed decisions for your projects.
5.1 Use the line cutting function for cutting
The advantage of this mode is fast speed, but the drawback is that the cut pieces may have black edges and burrs, which require additional polishing.
The following are the cutting parameters for 1 mm material:

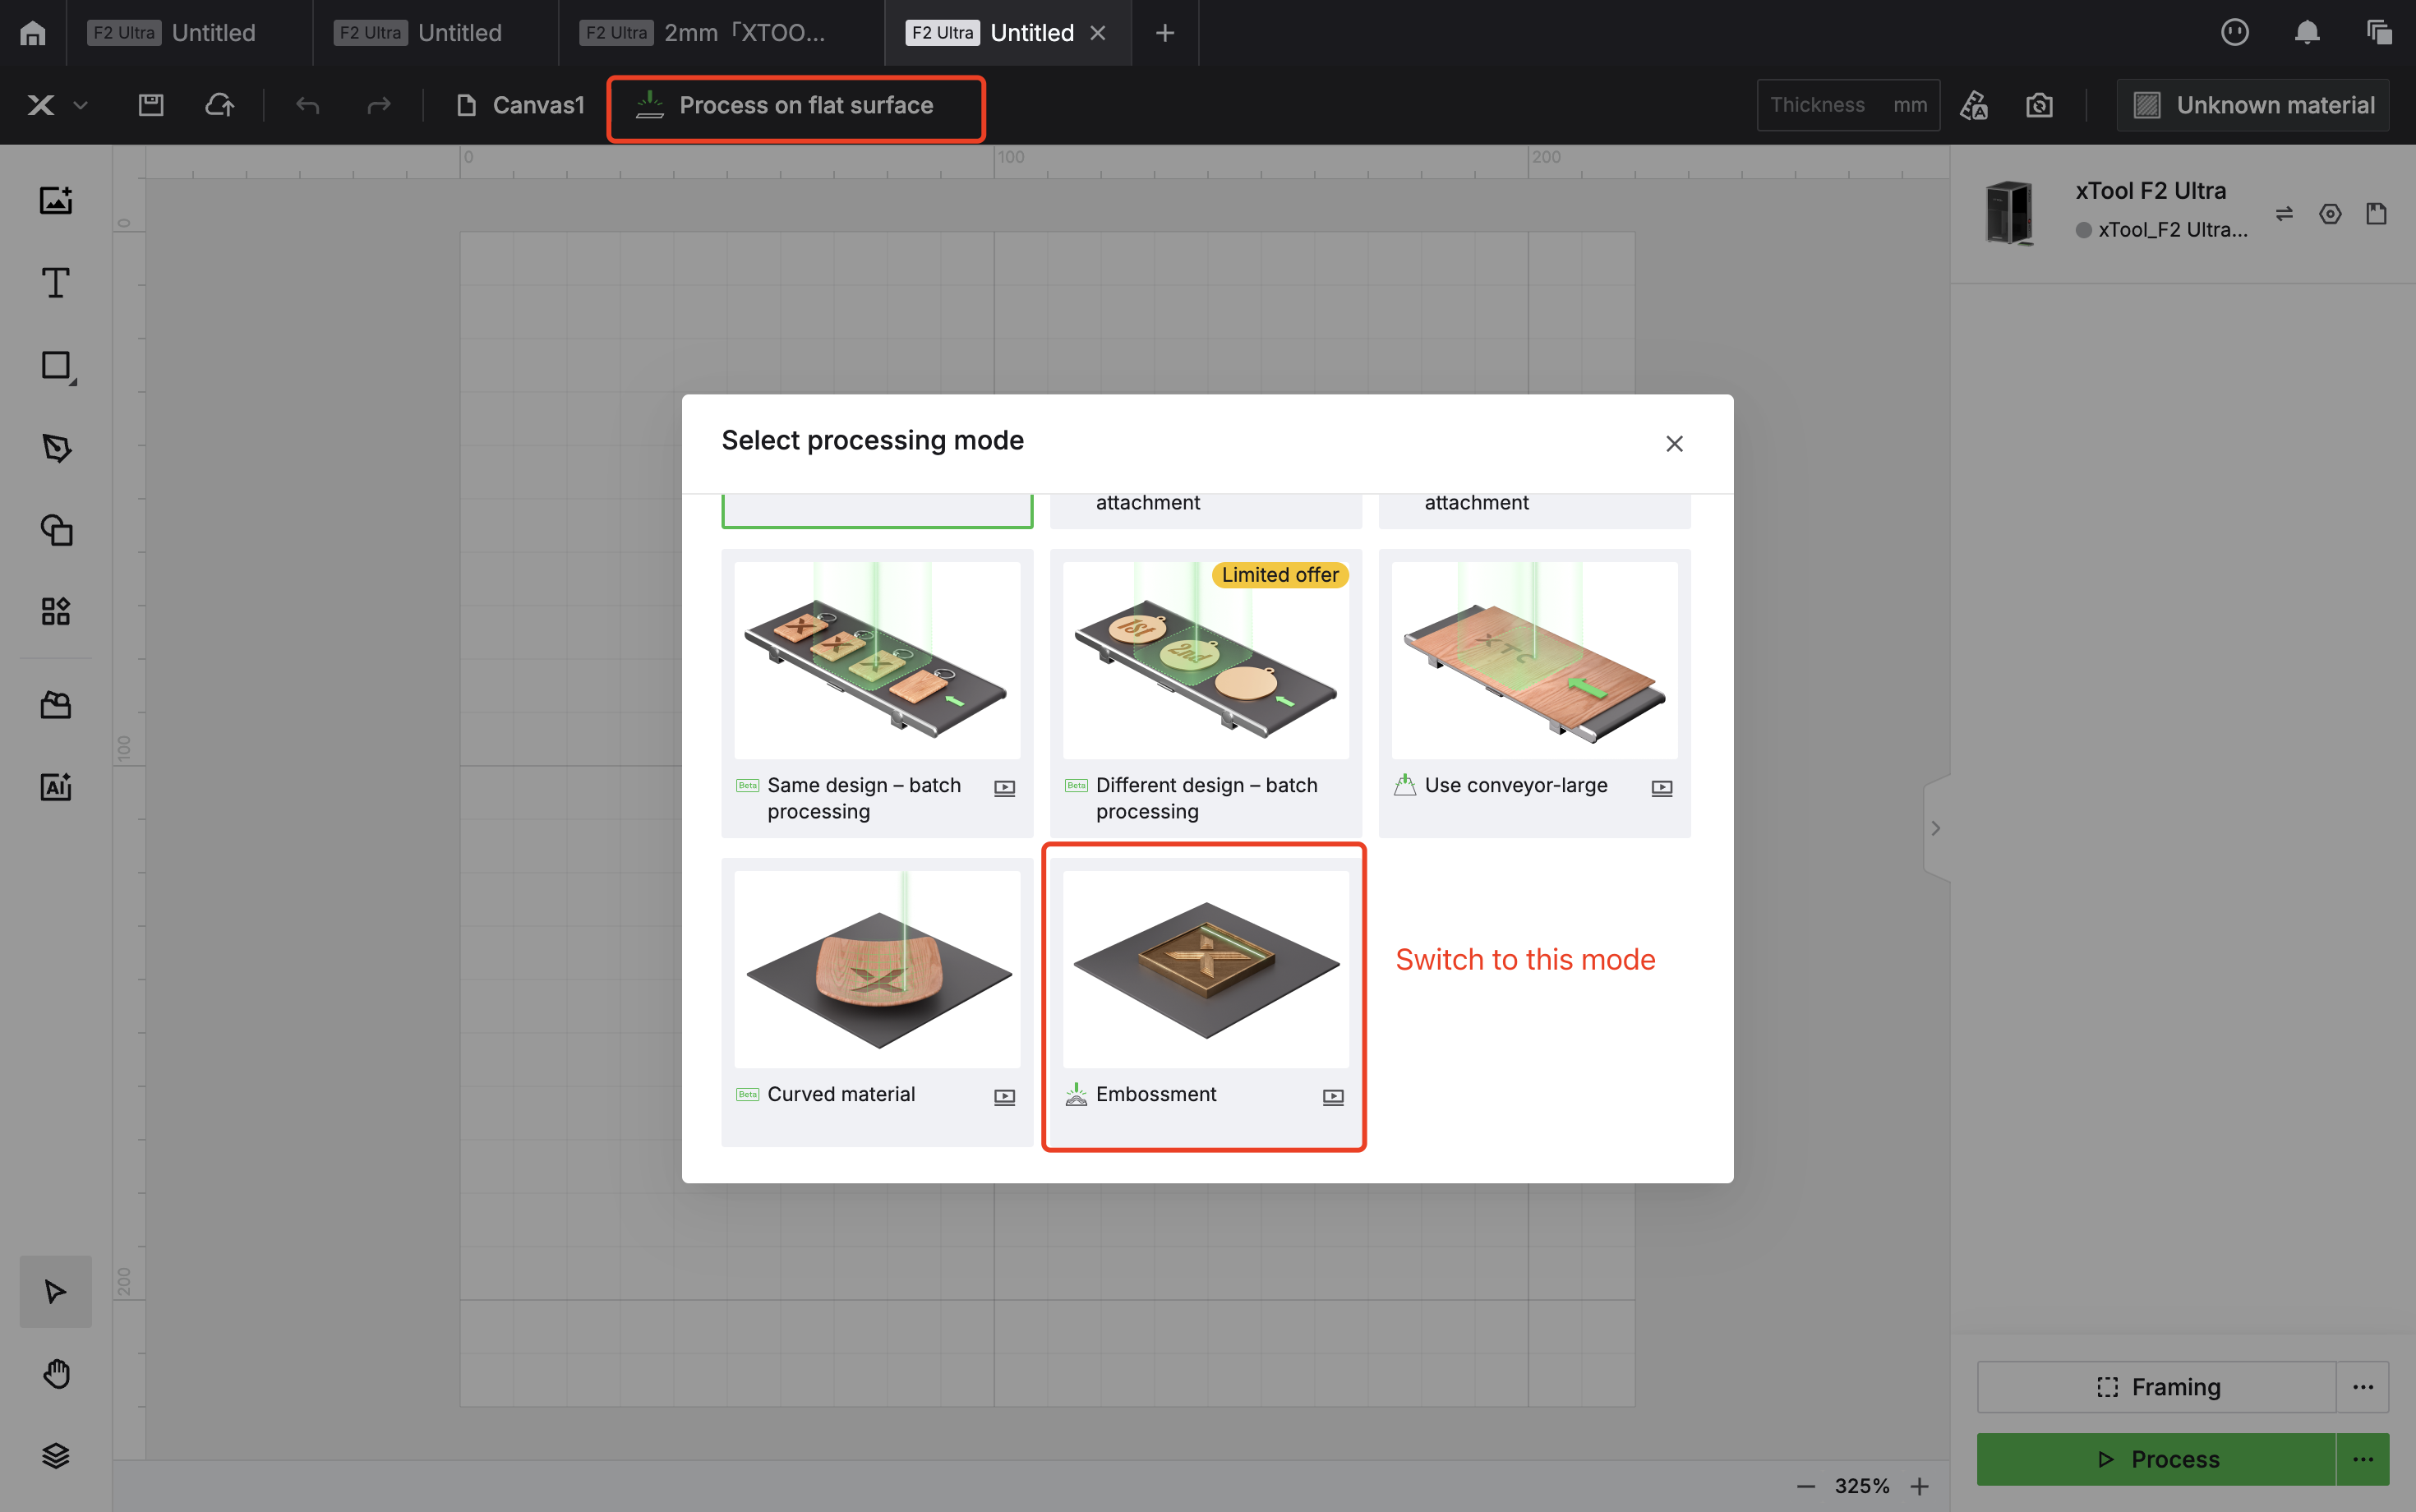
5.2 Use the Incise function of Embossment for cutting.
This is a newly explored cutting method. Using the cut mode for long periods can easily cause overheating, leading to metal deformation or edges that are too dark and difficult to clean. By switching to the embossment mode, cutting can effectively avoid the blackened edges. The drawback of this method is that it may take more time.
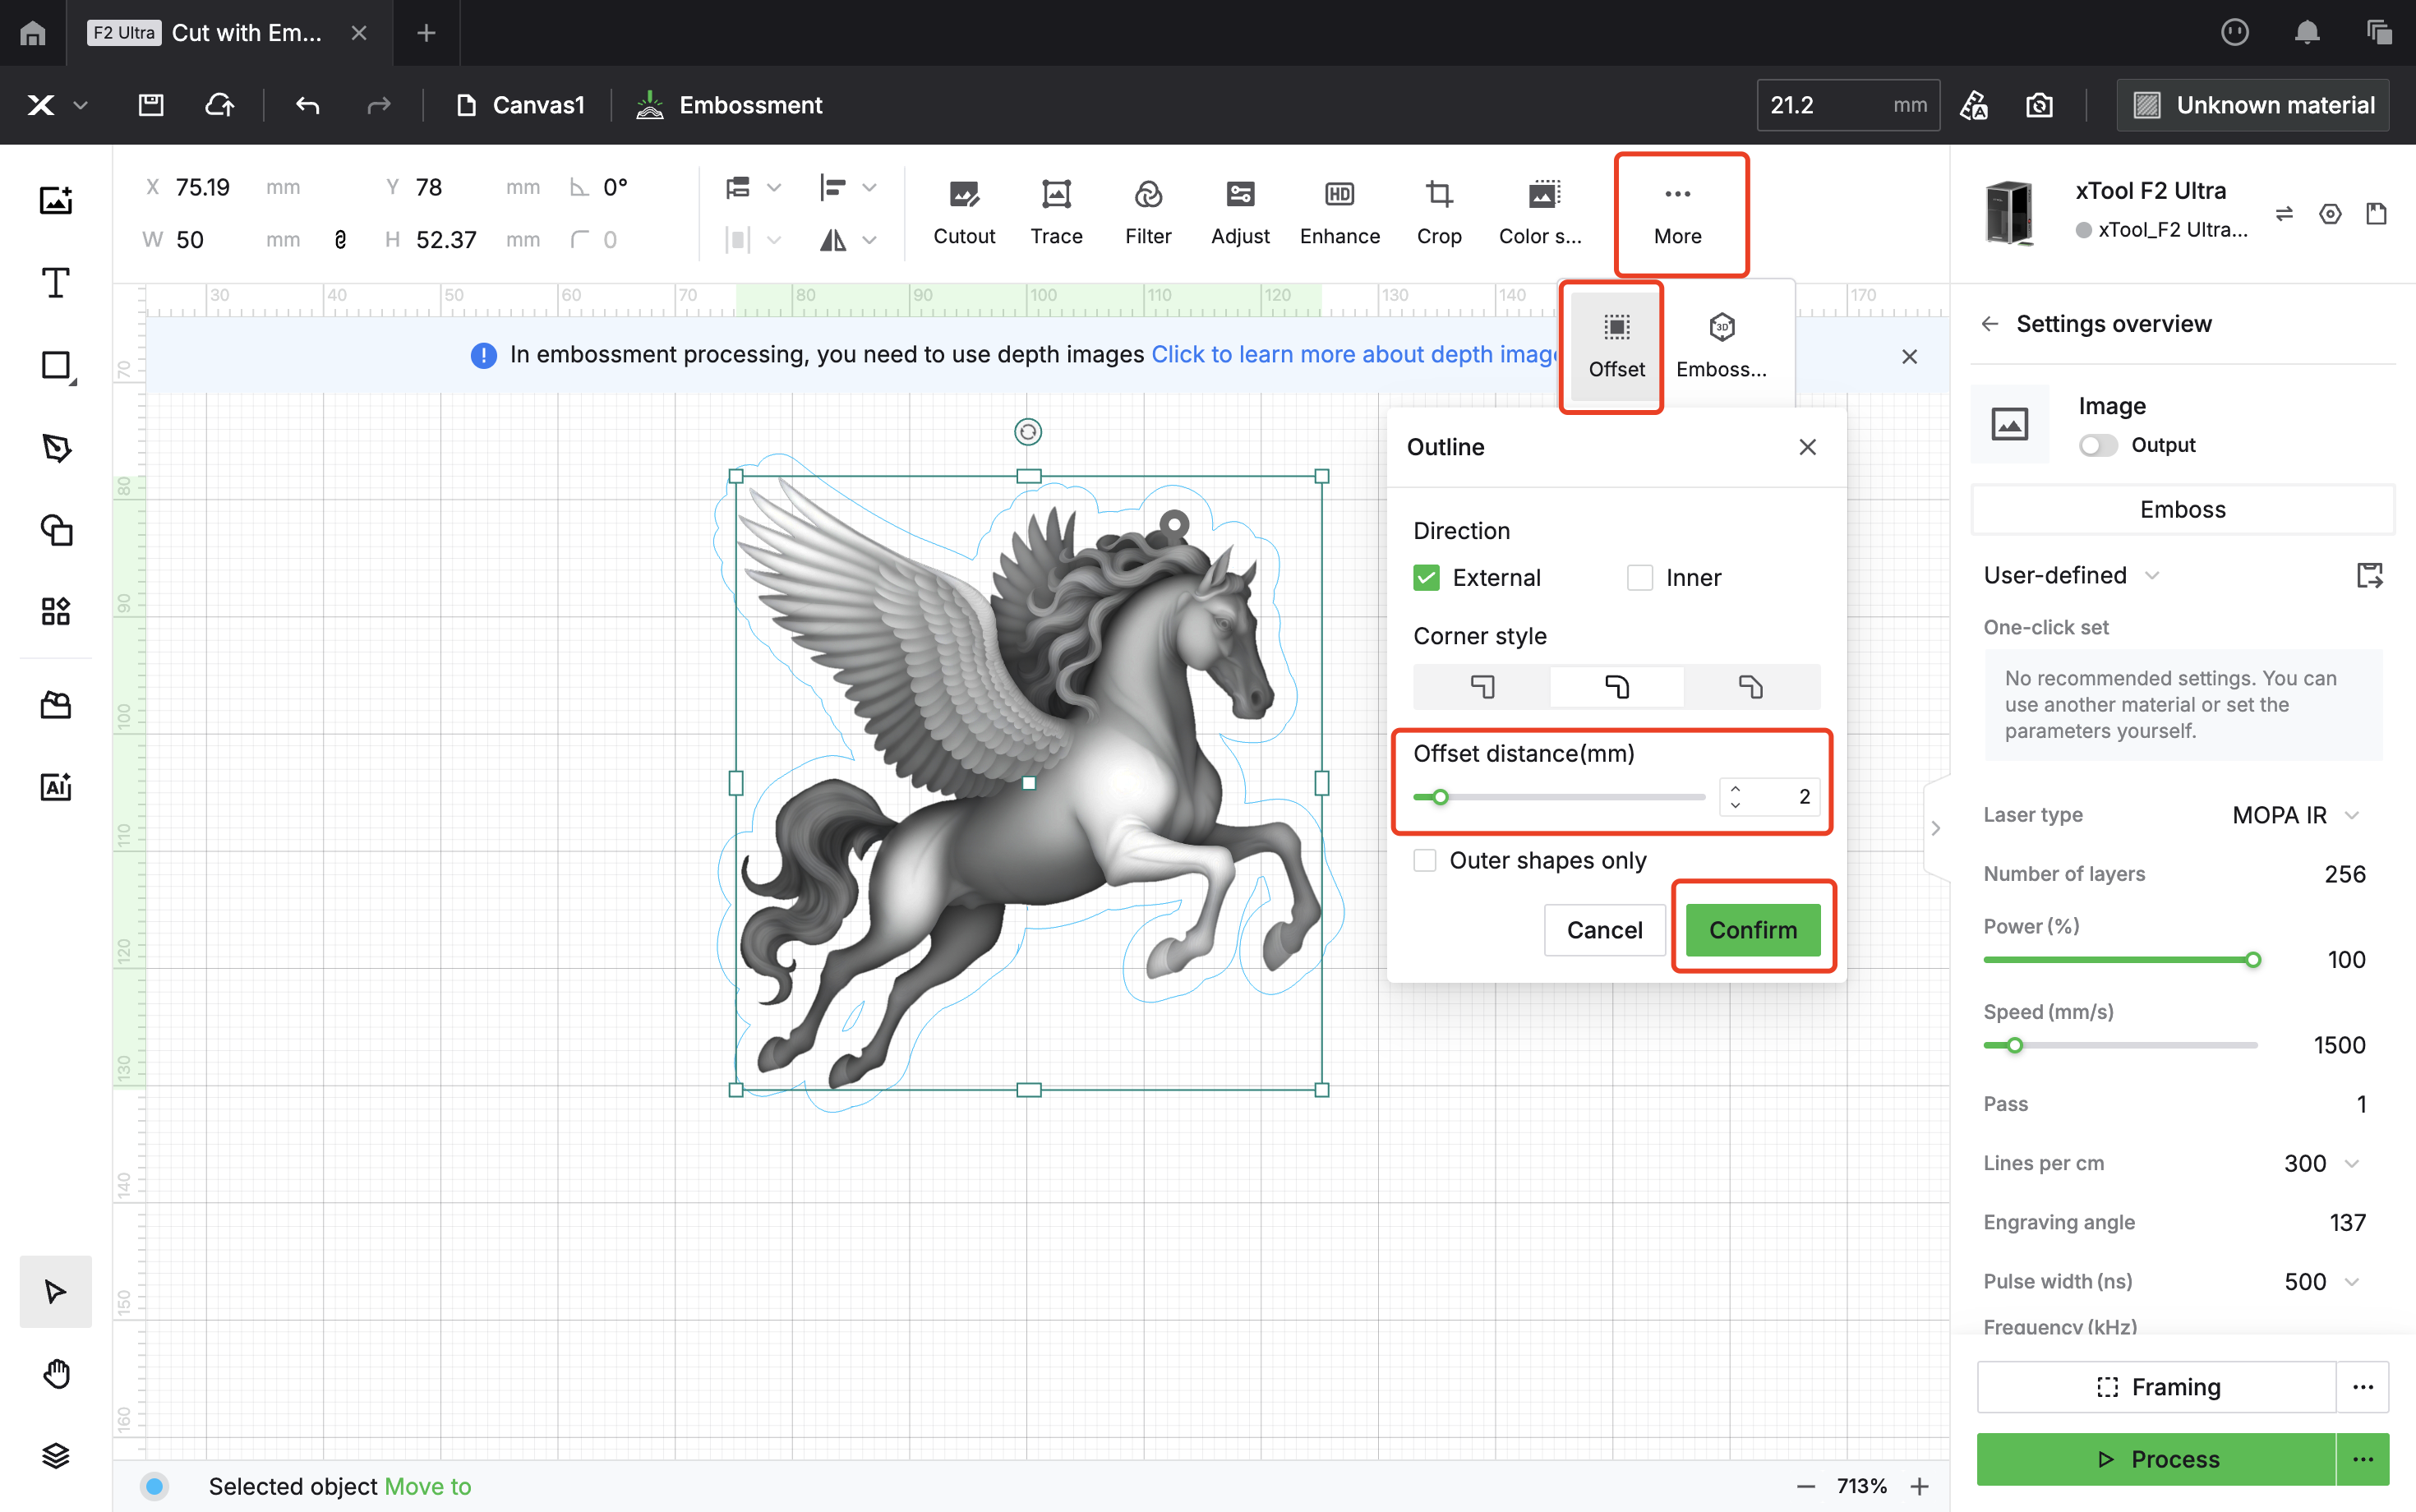
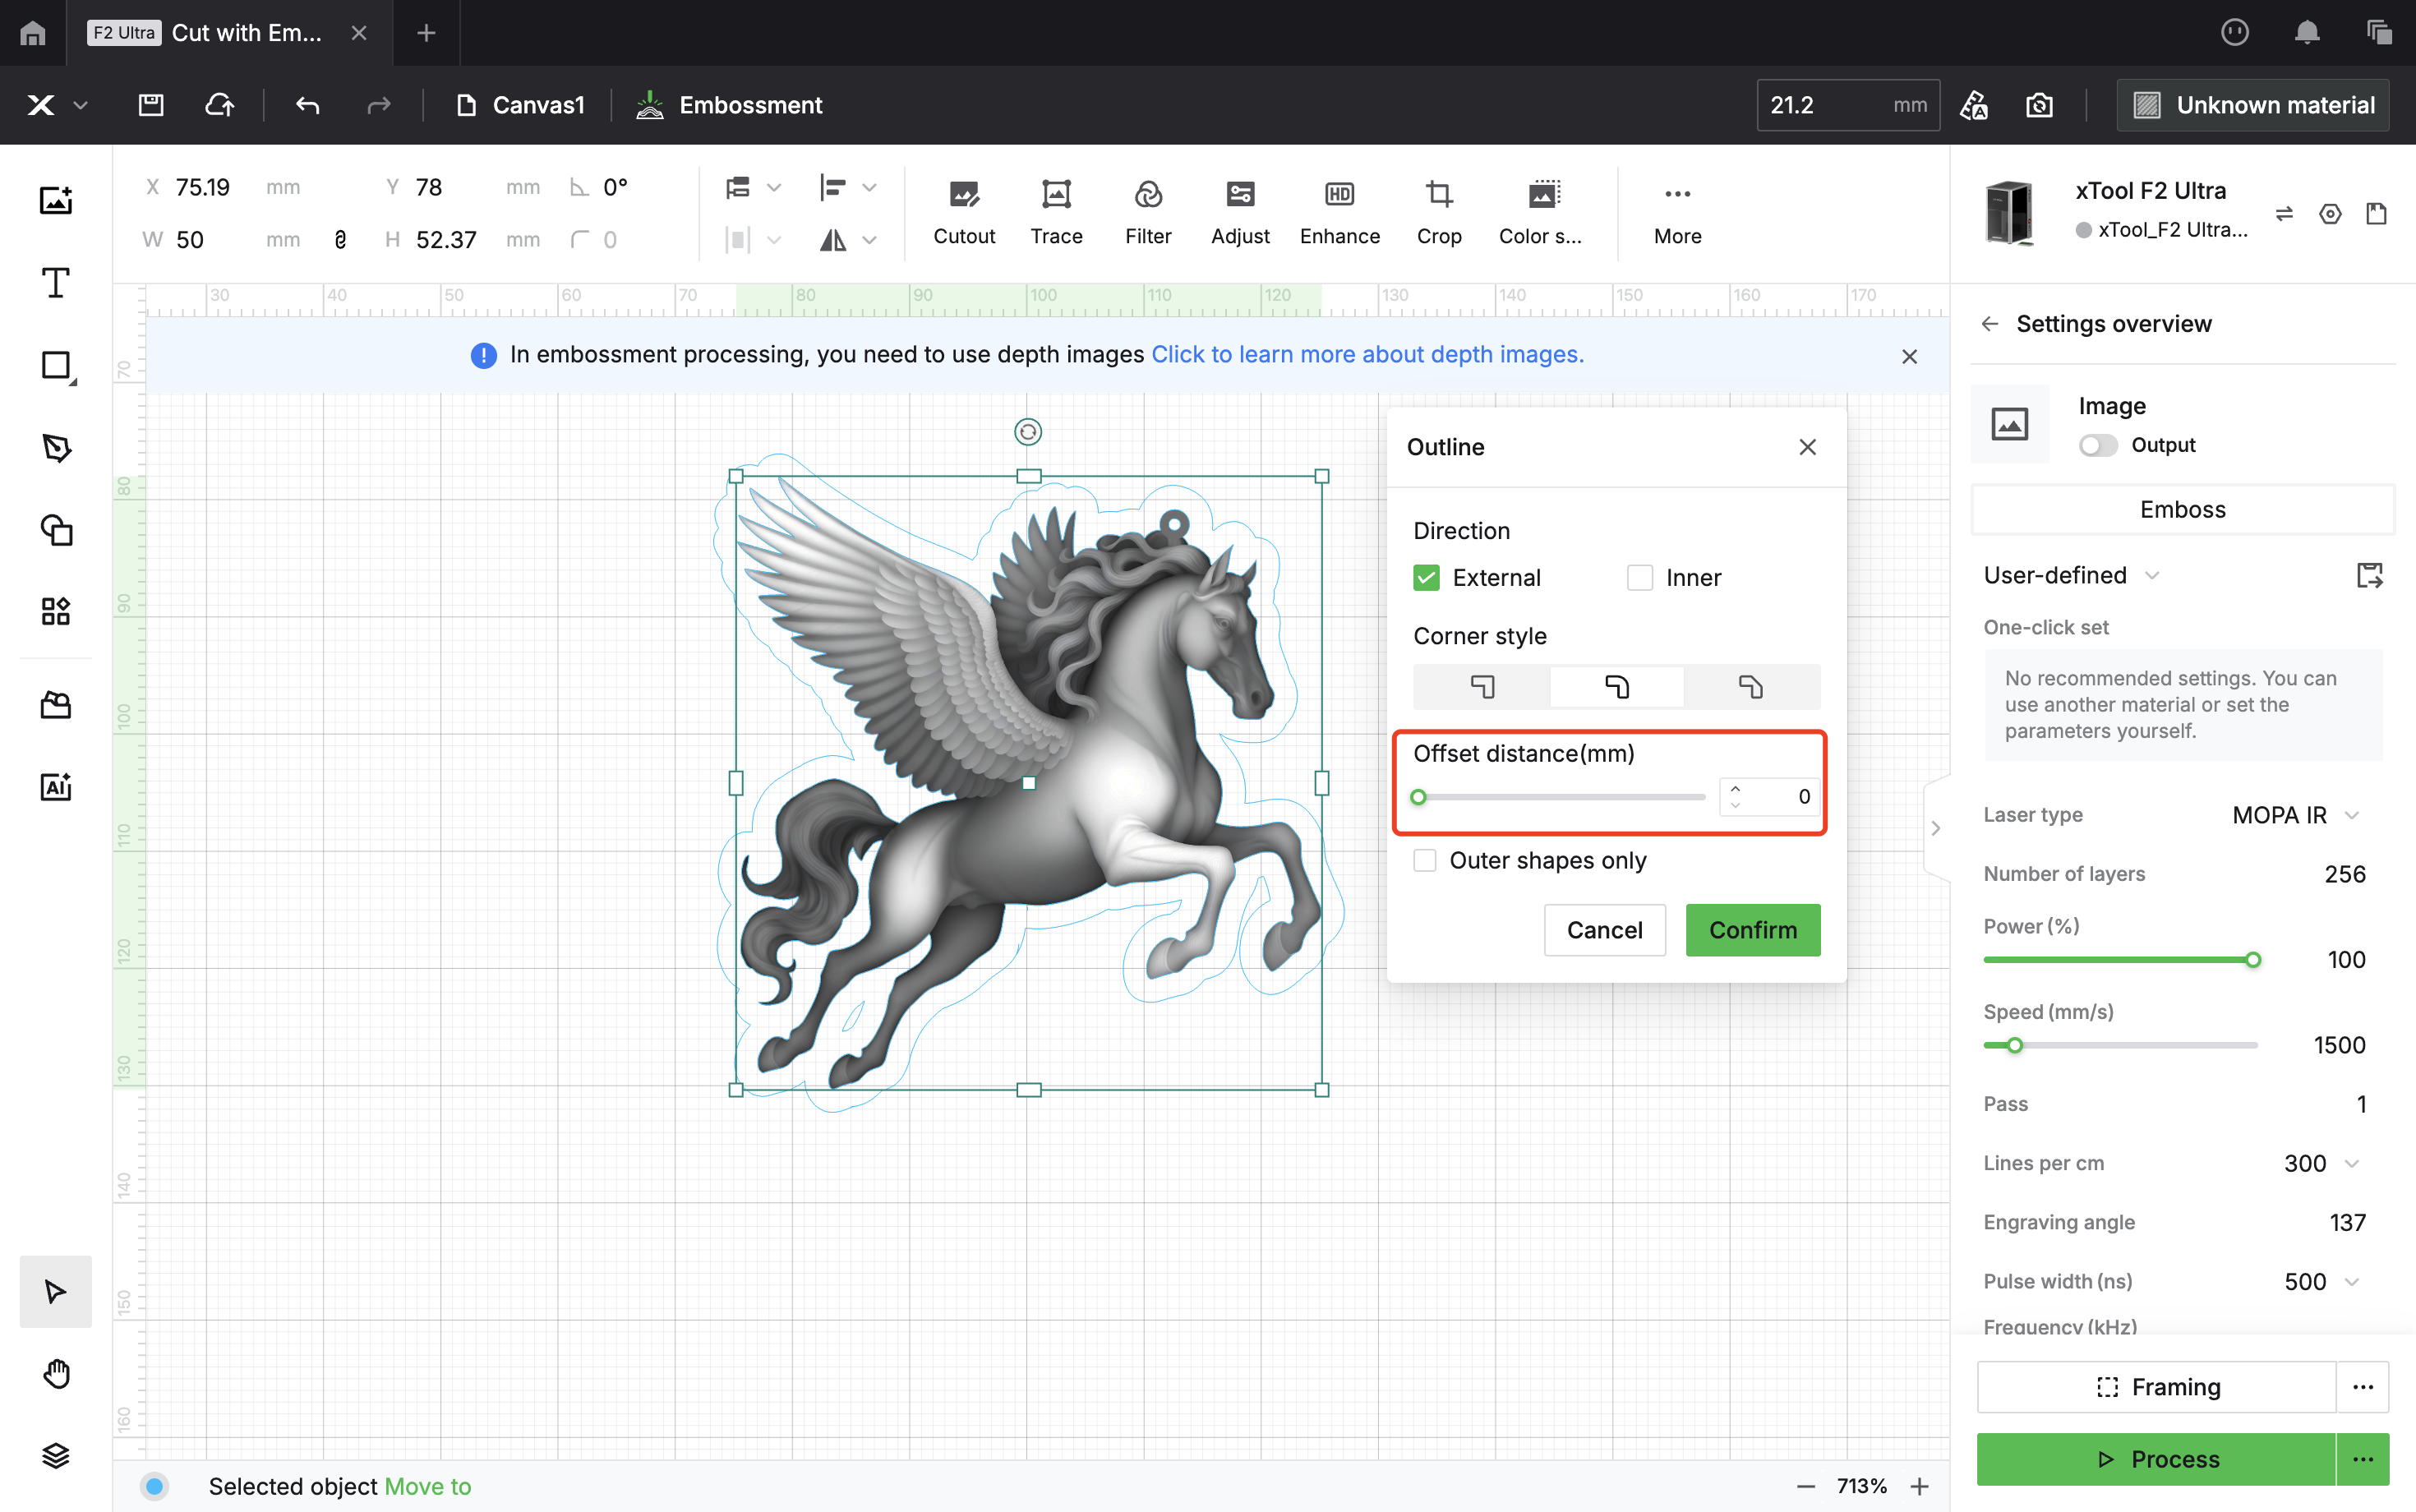
First, let’s show you how to create the outline of your design for cutting with the incise mode.
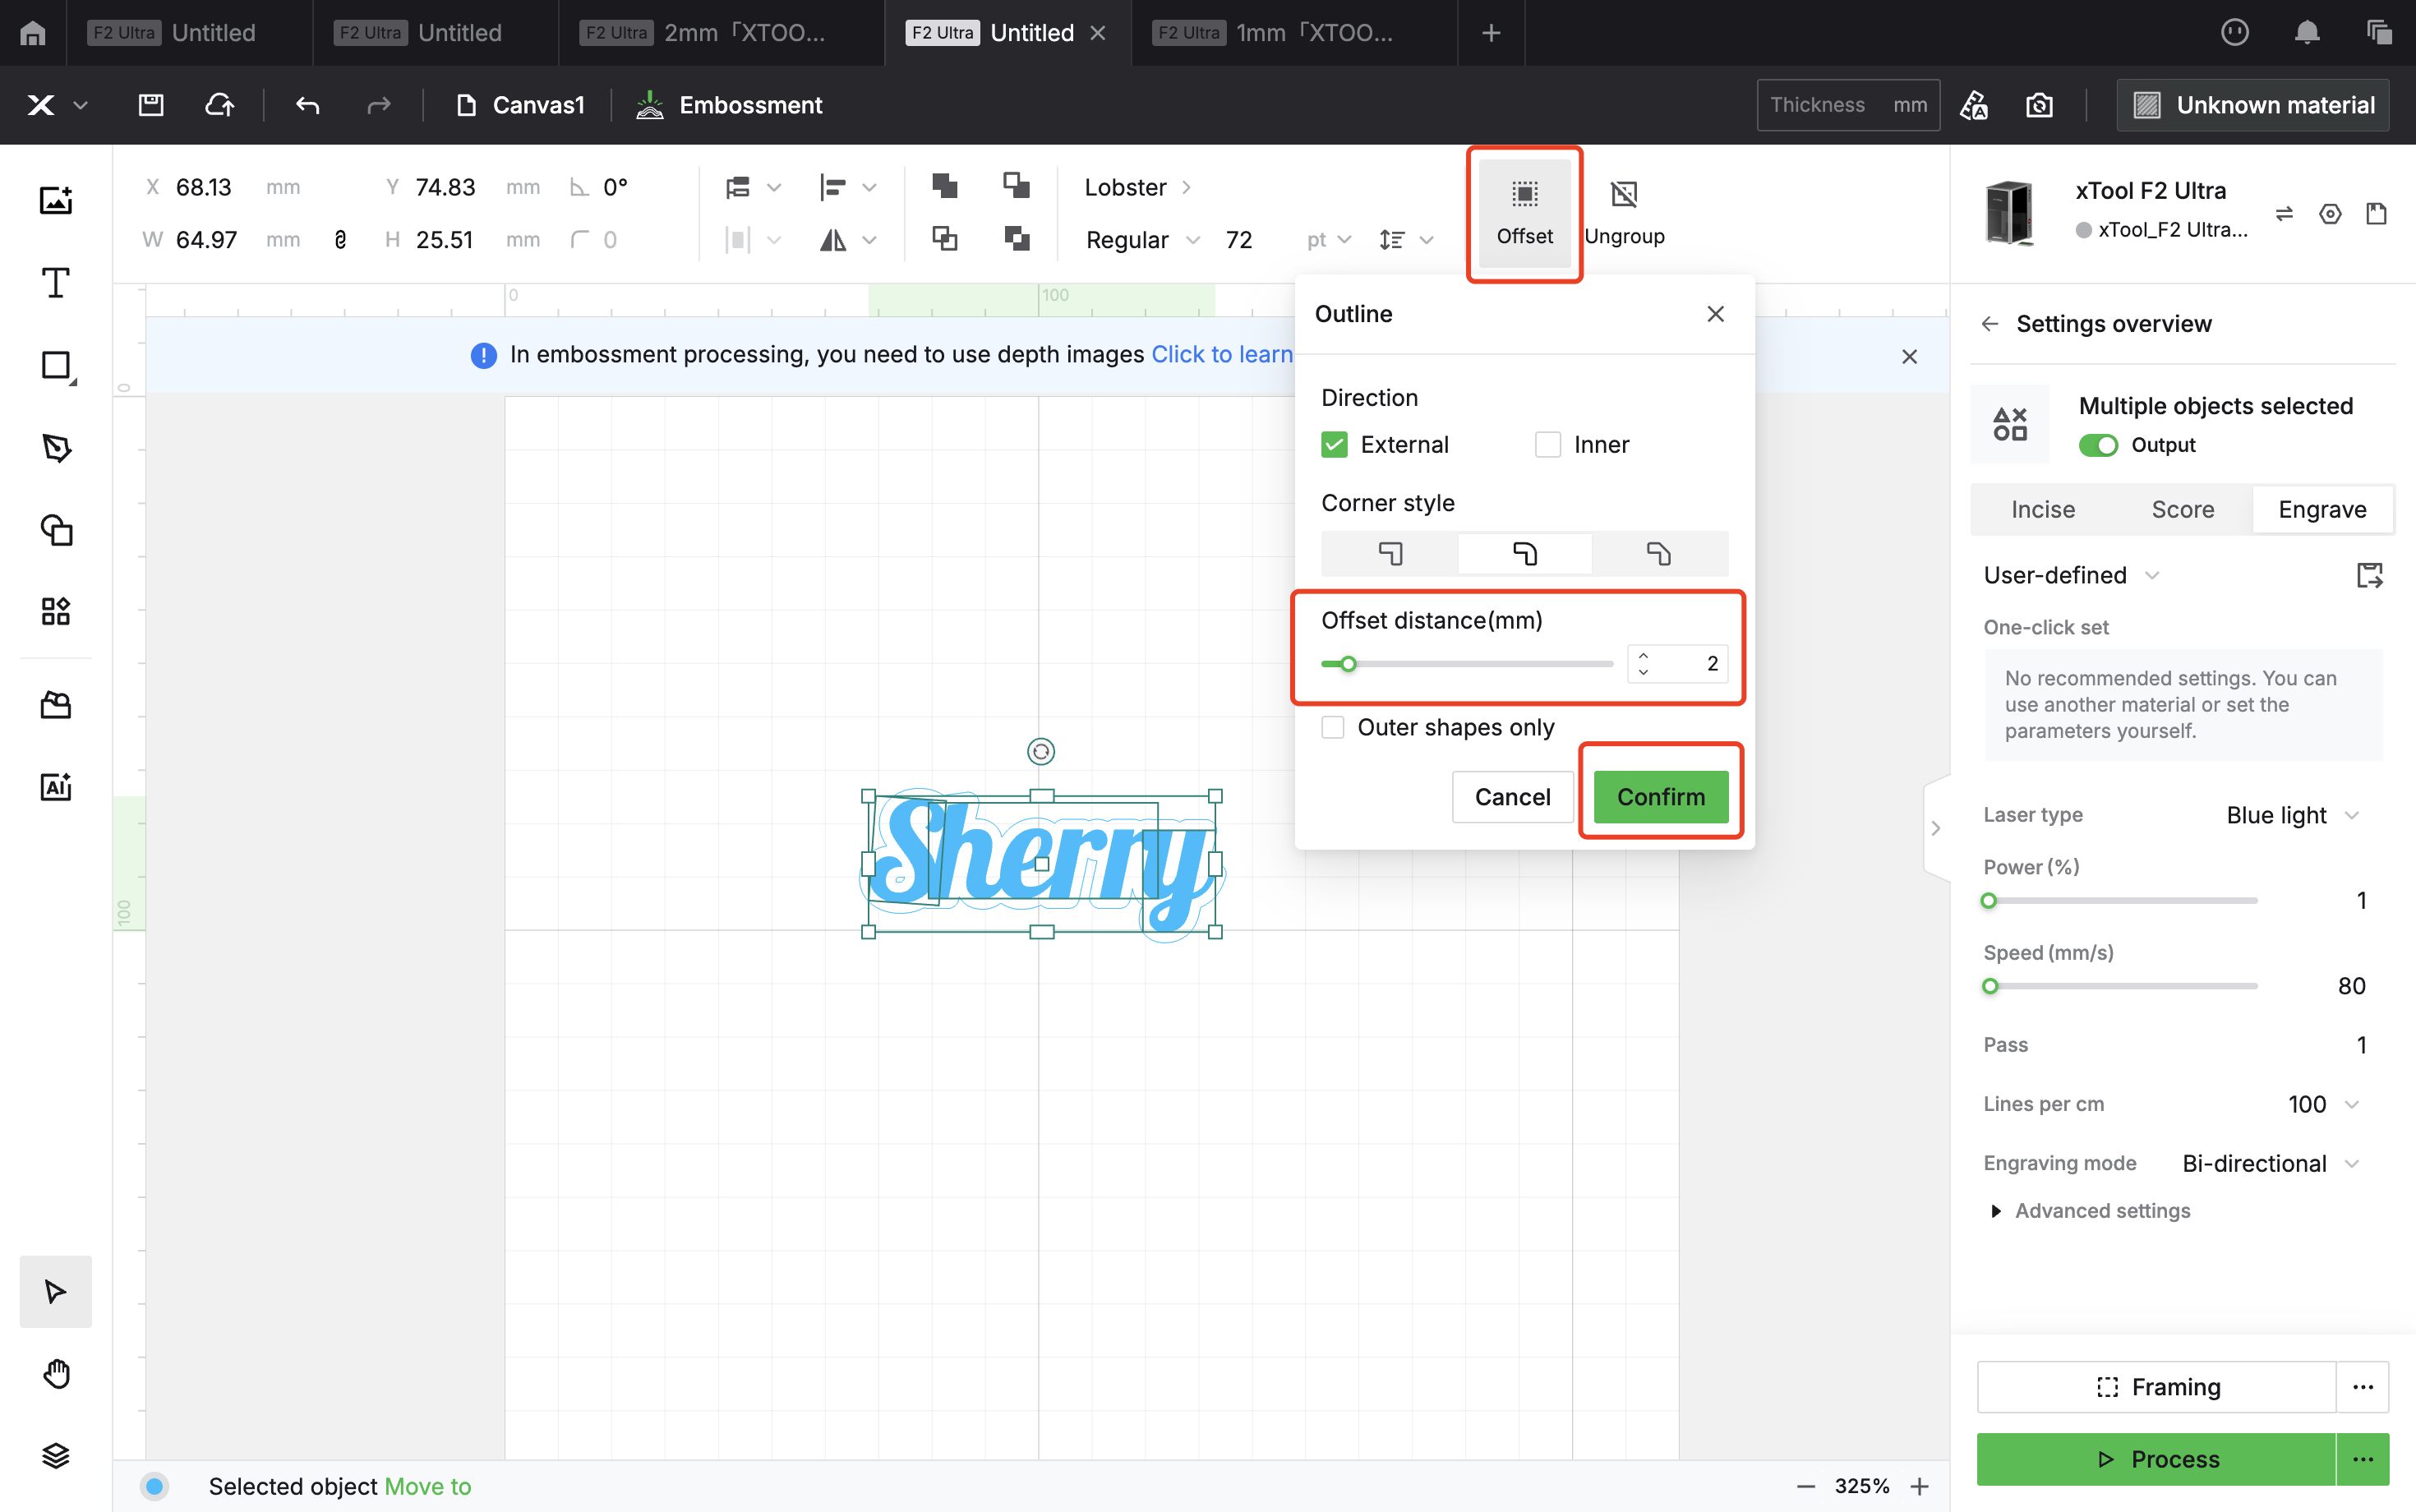


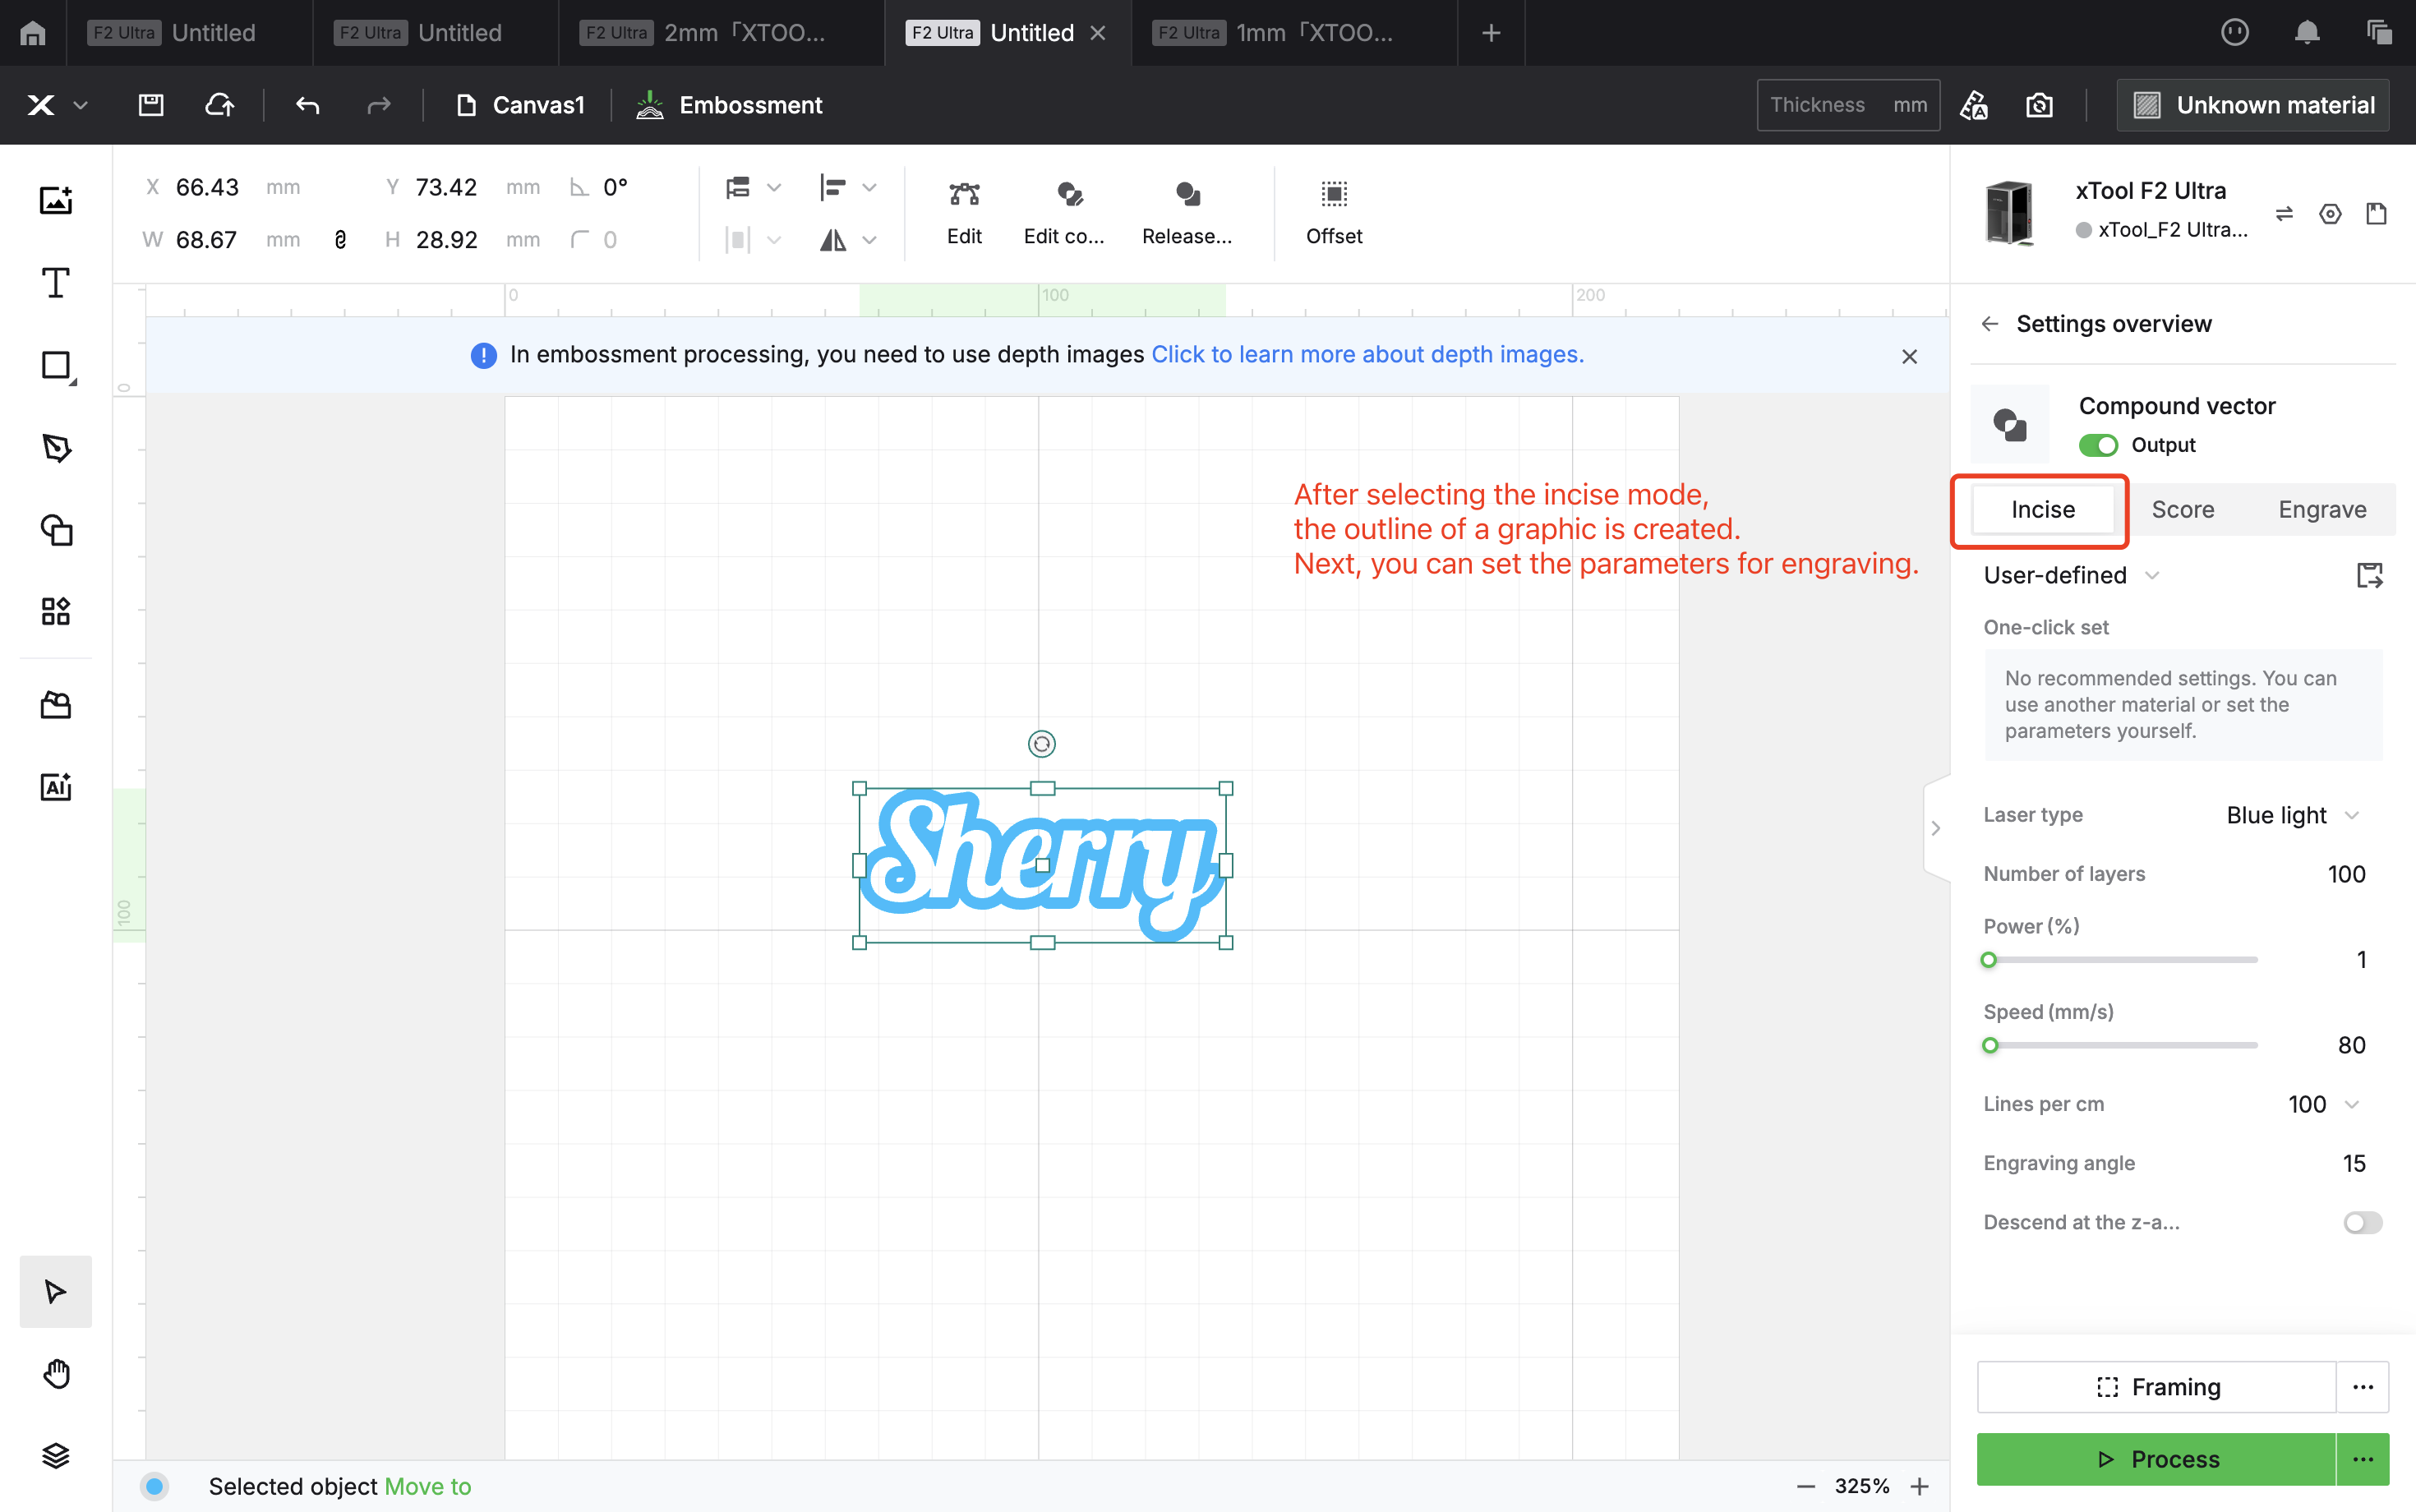
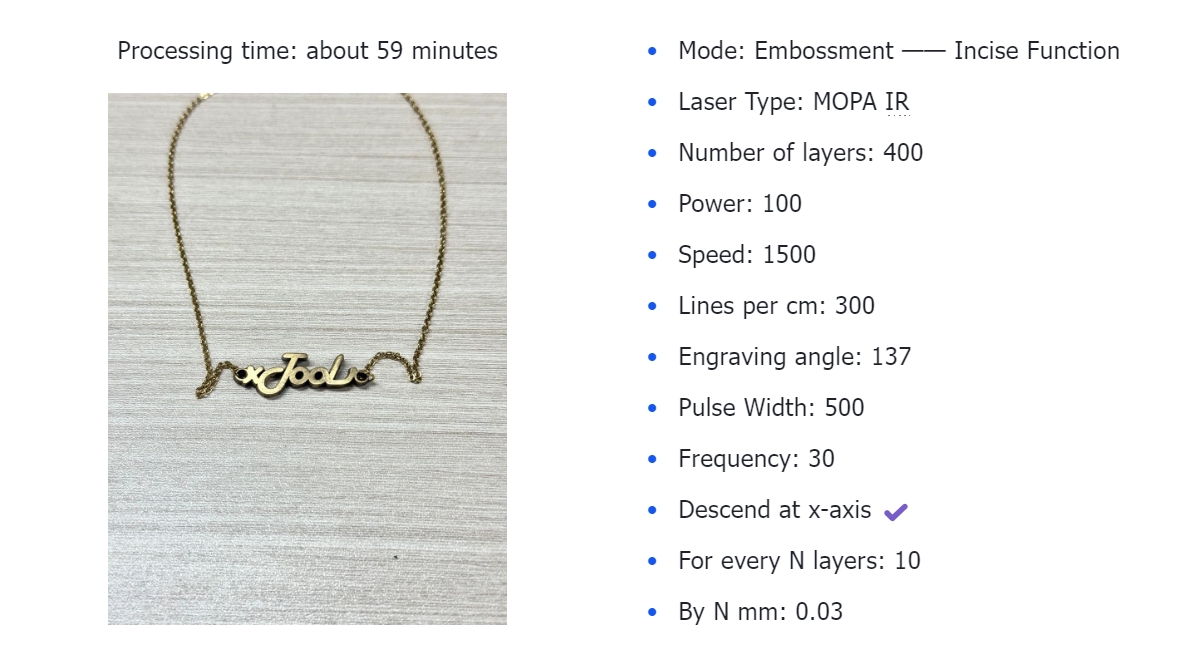
You can adjust the number of cutting layers based on the material thickness to achieve clean edge removal. Below, I’ll provide the recommended parameters for cutting 2mm brass.
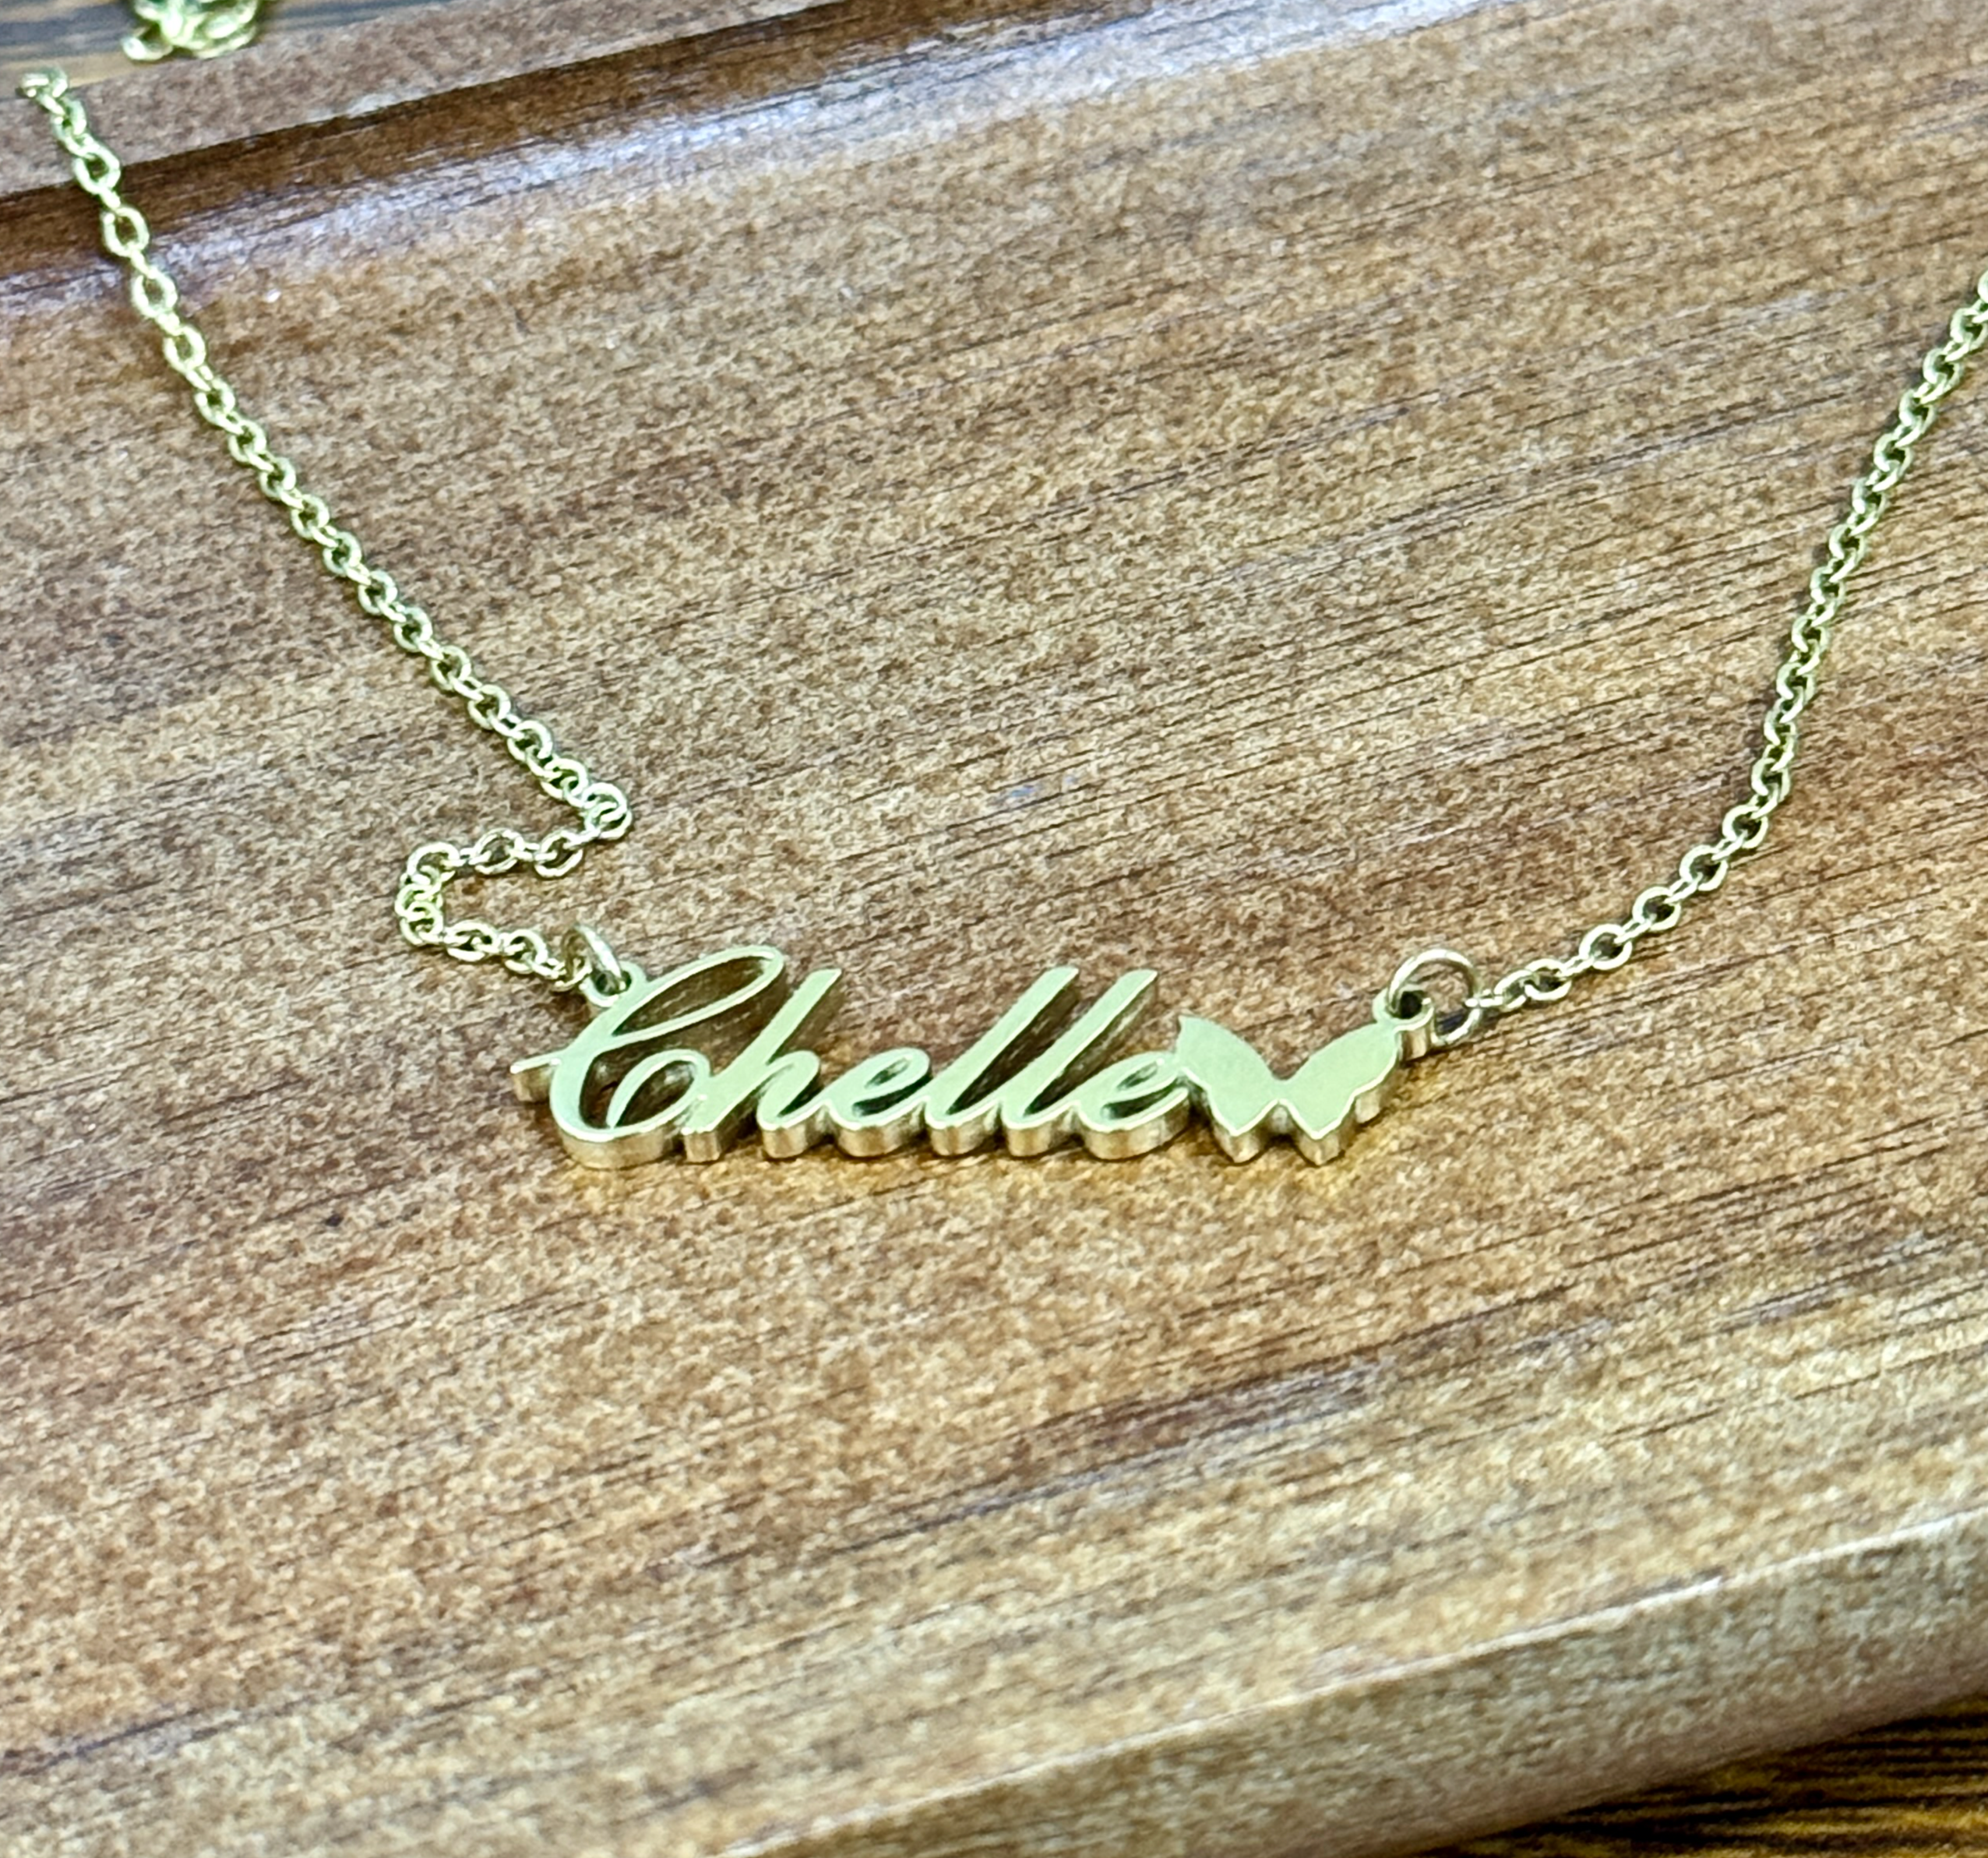
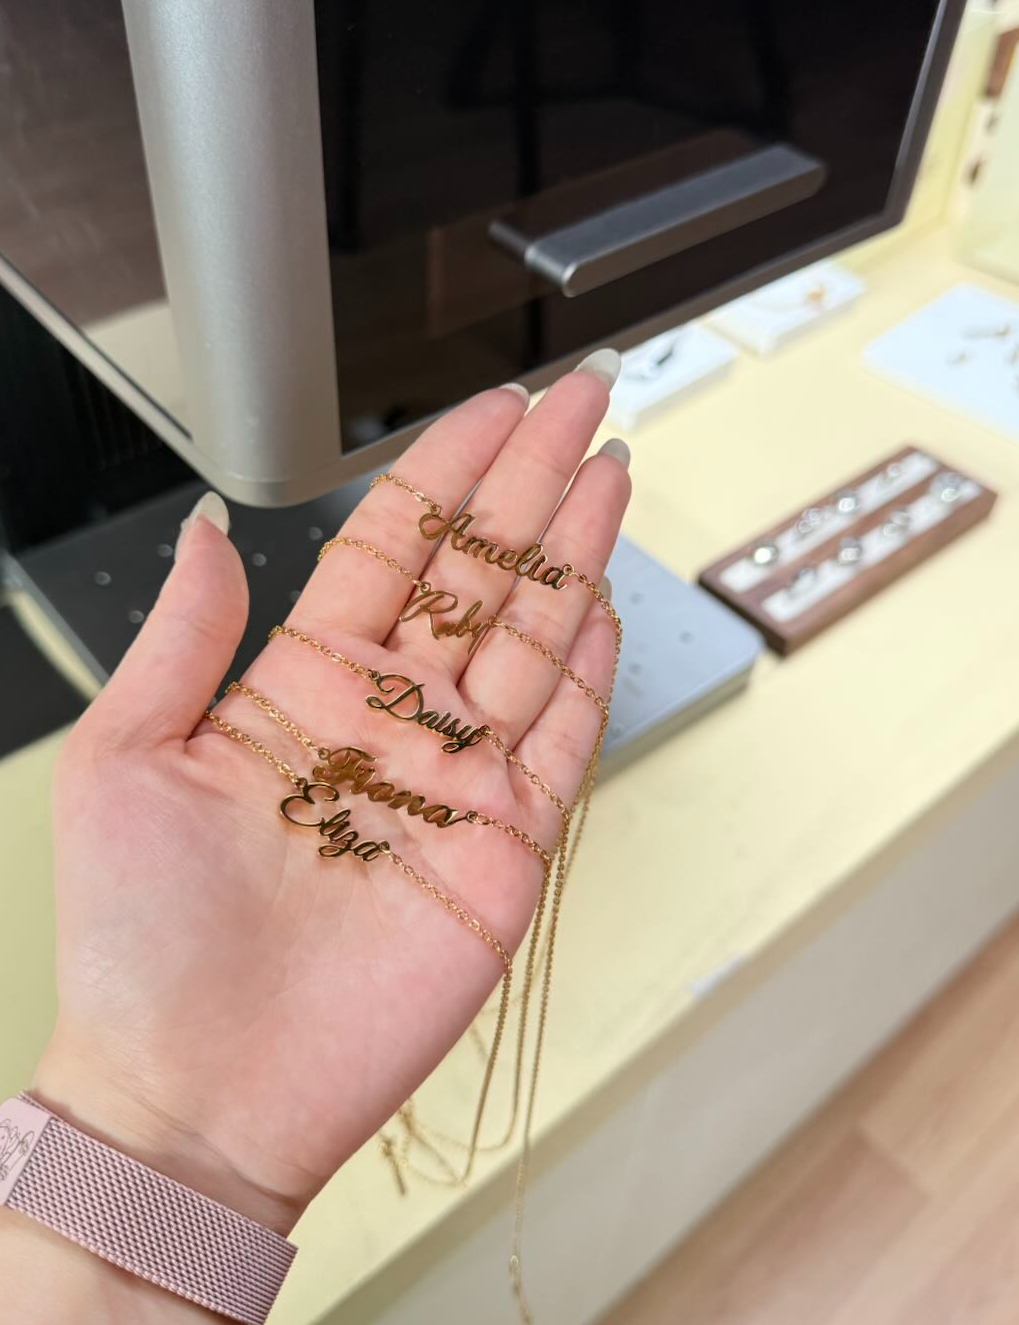
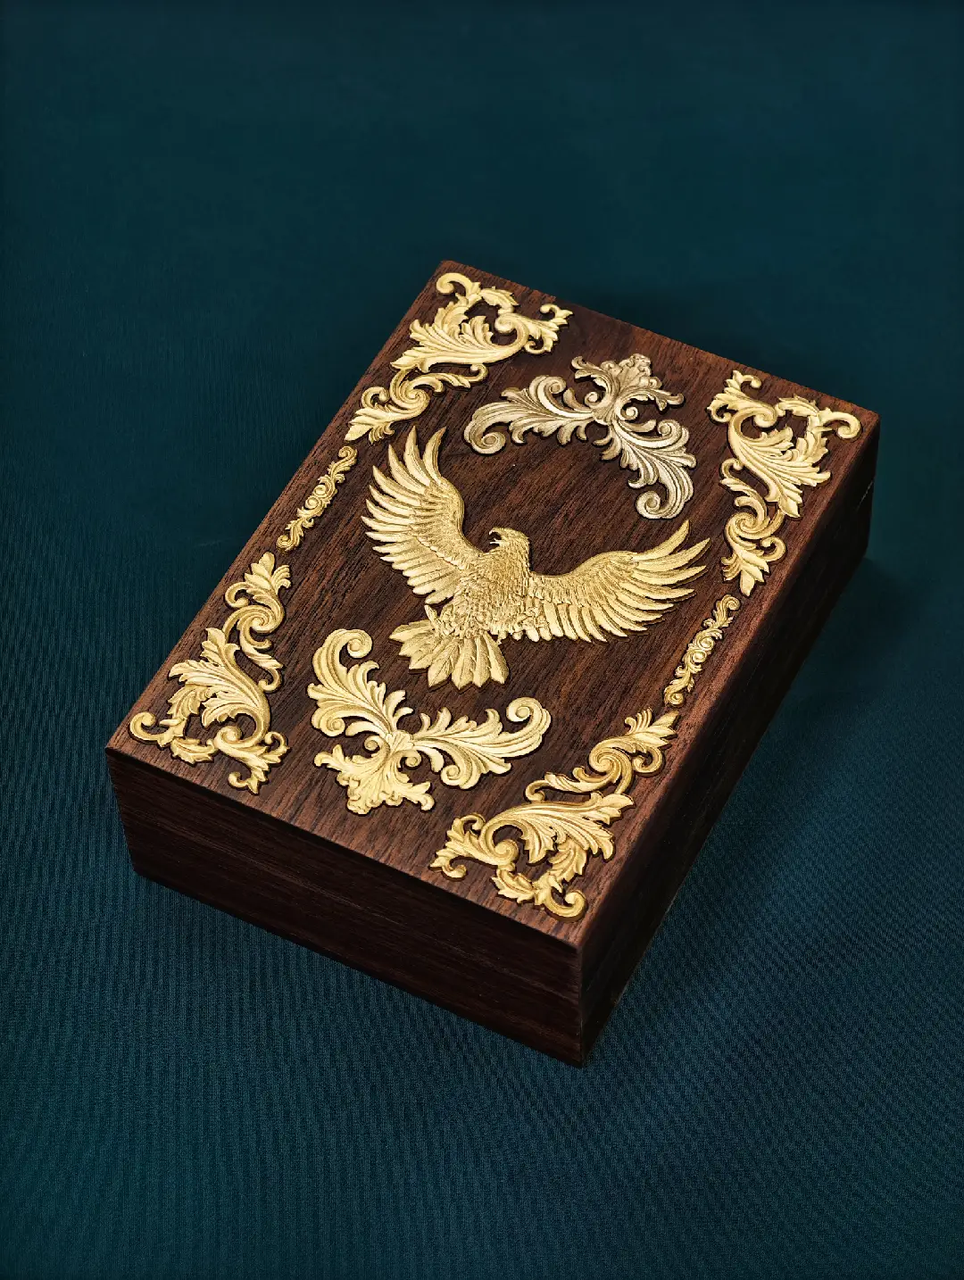
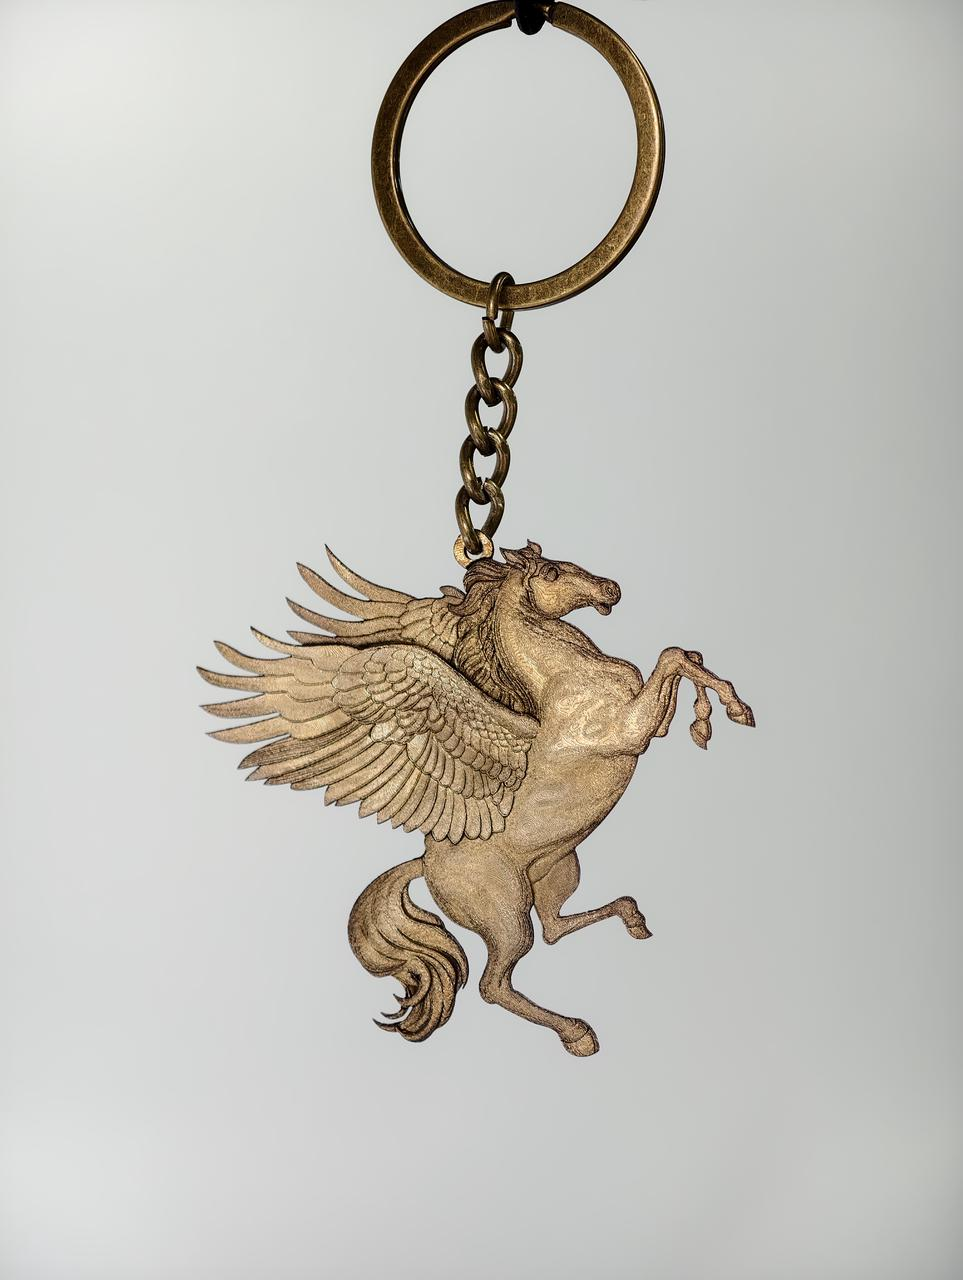
Cut and Emboss on Brass
Now that you’ve learned how to cut brass, let’s try combining cutting with deep engraving. As shown in the sample images, by using these two techniques together, you can easily transform an ordinary brass plate into whatever you have in mind, creating all kinds of beautiful crafts.
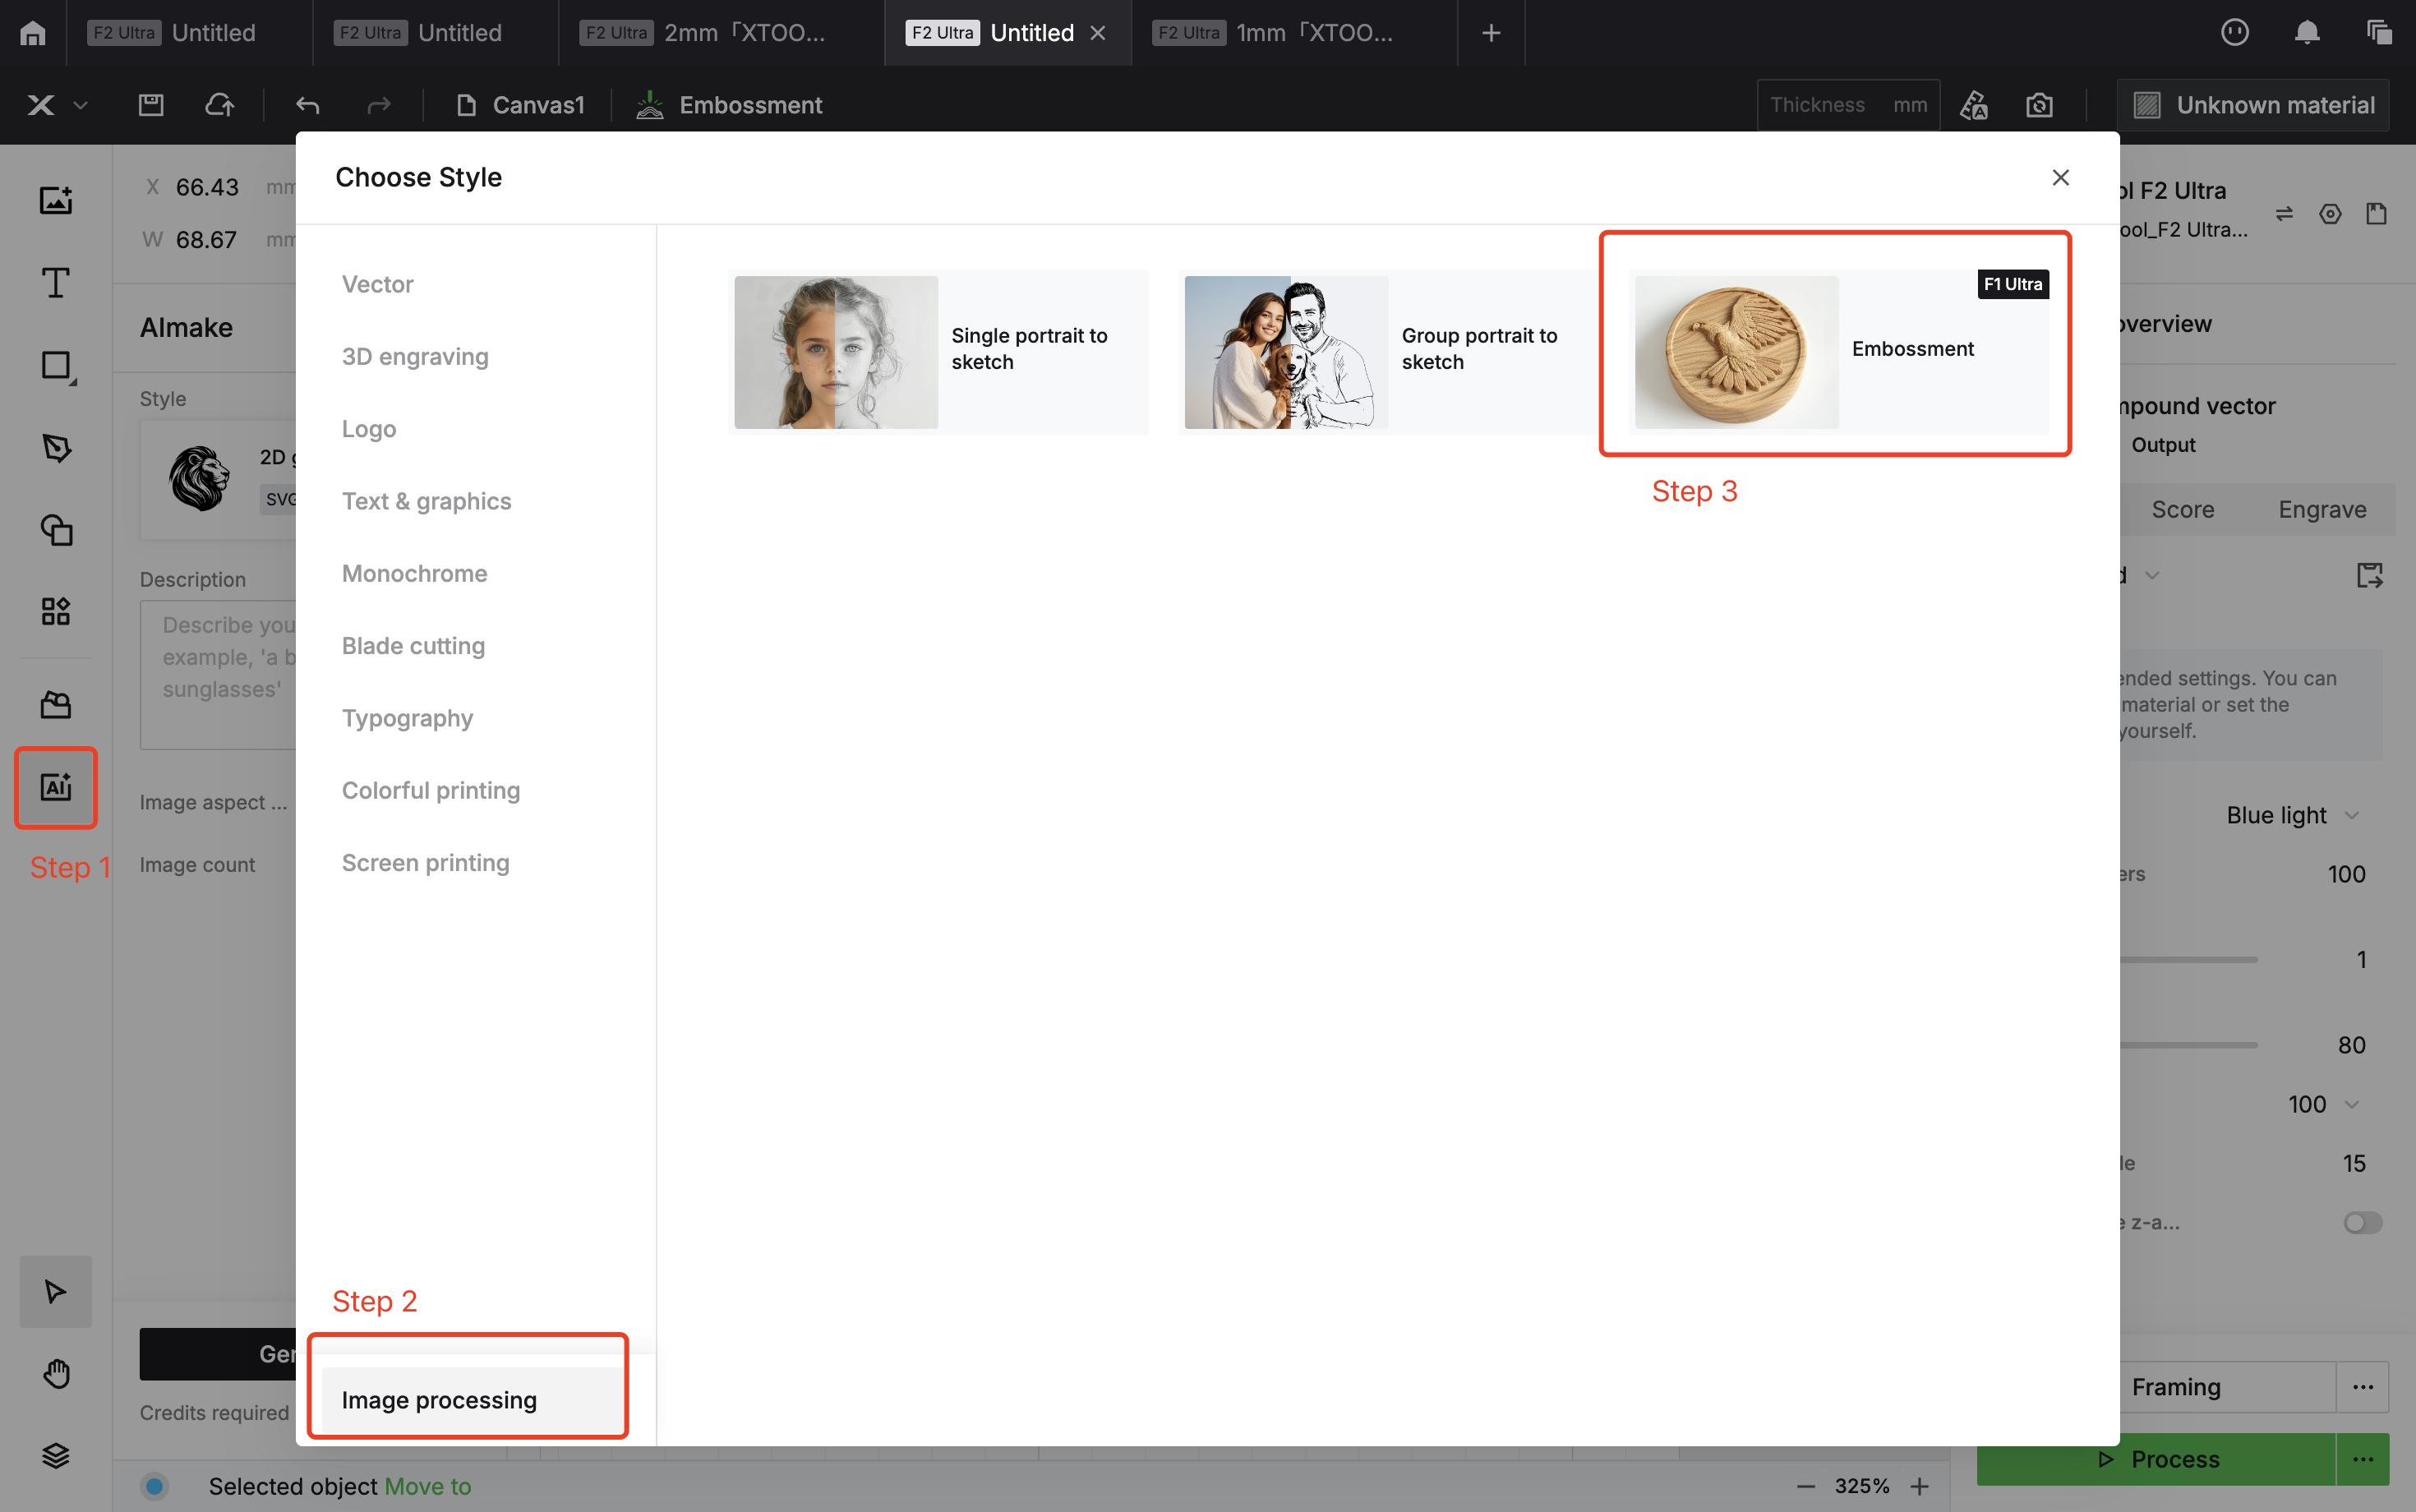
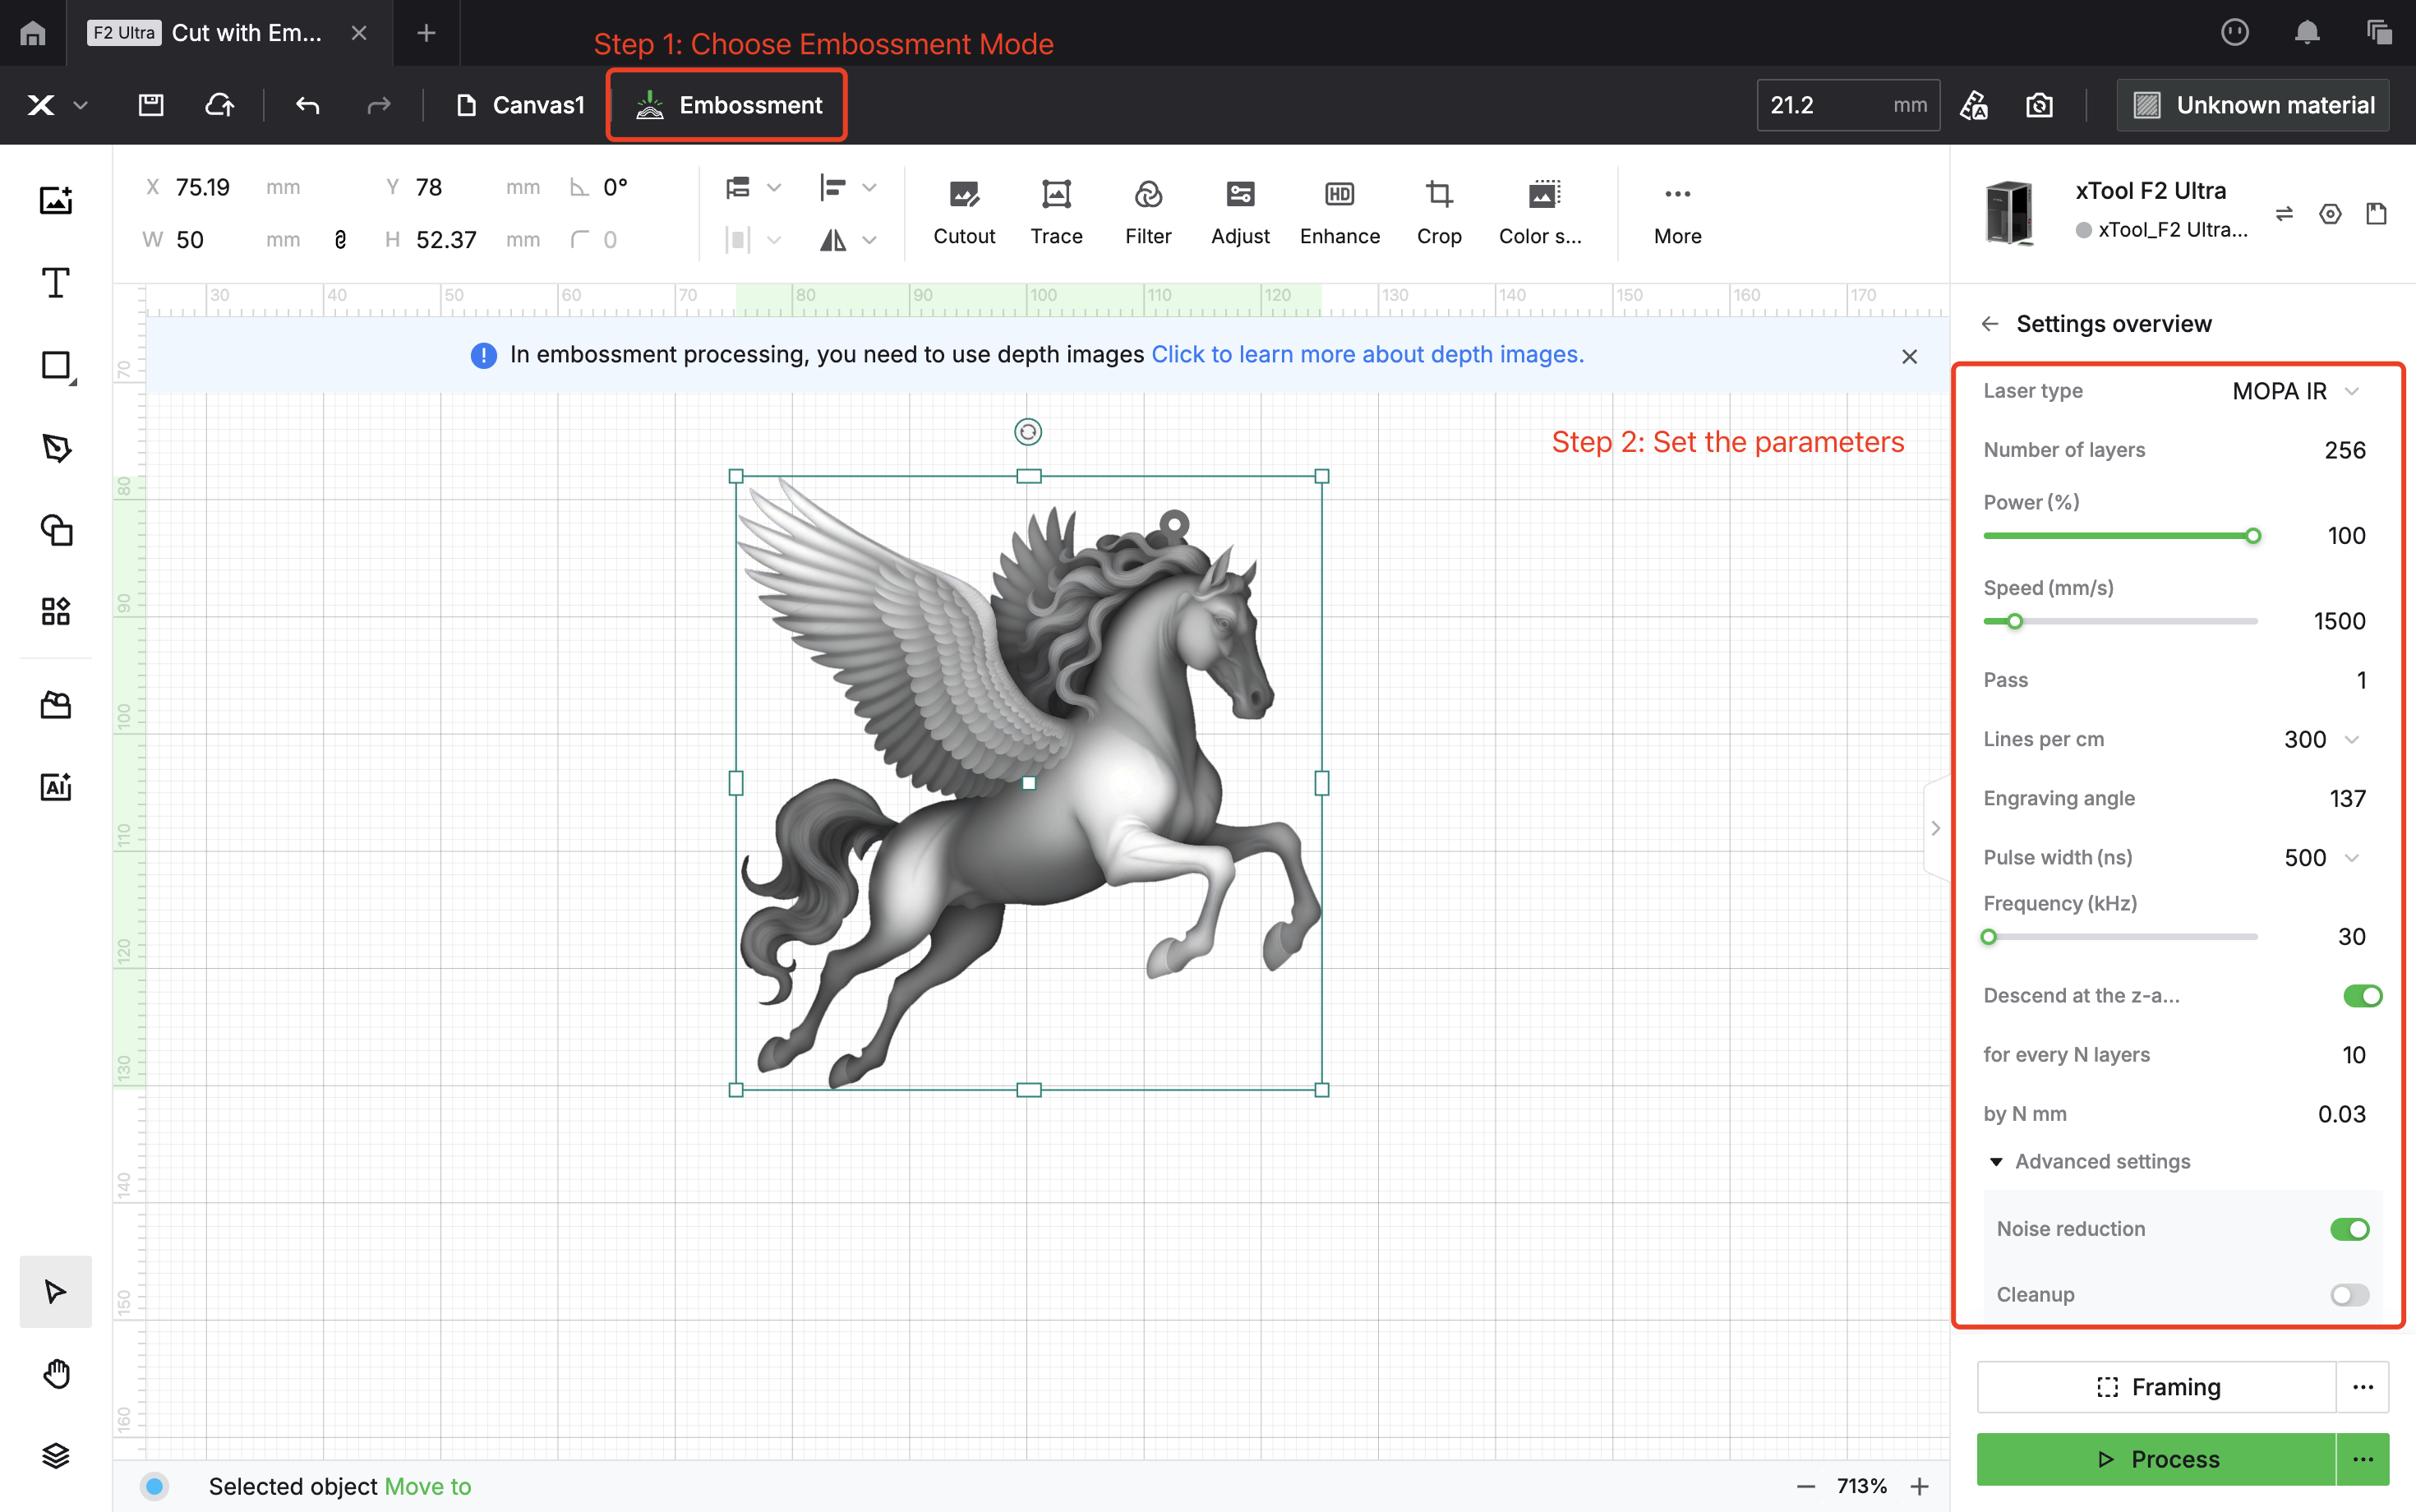
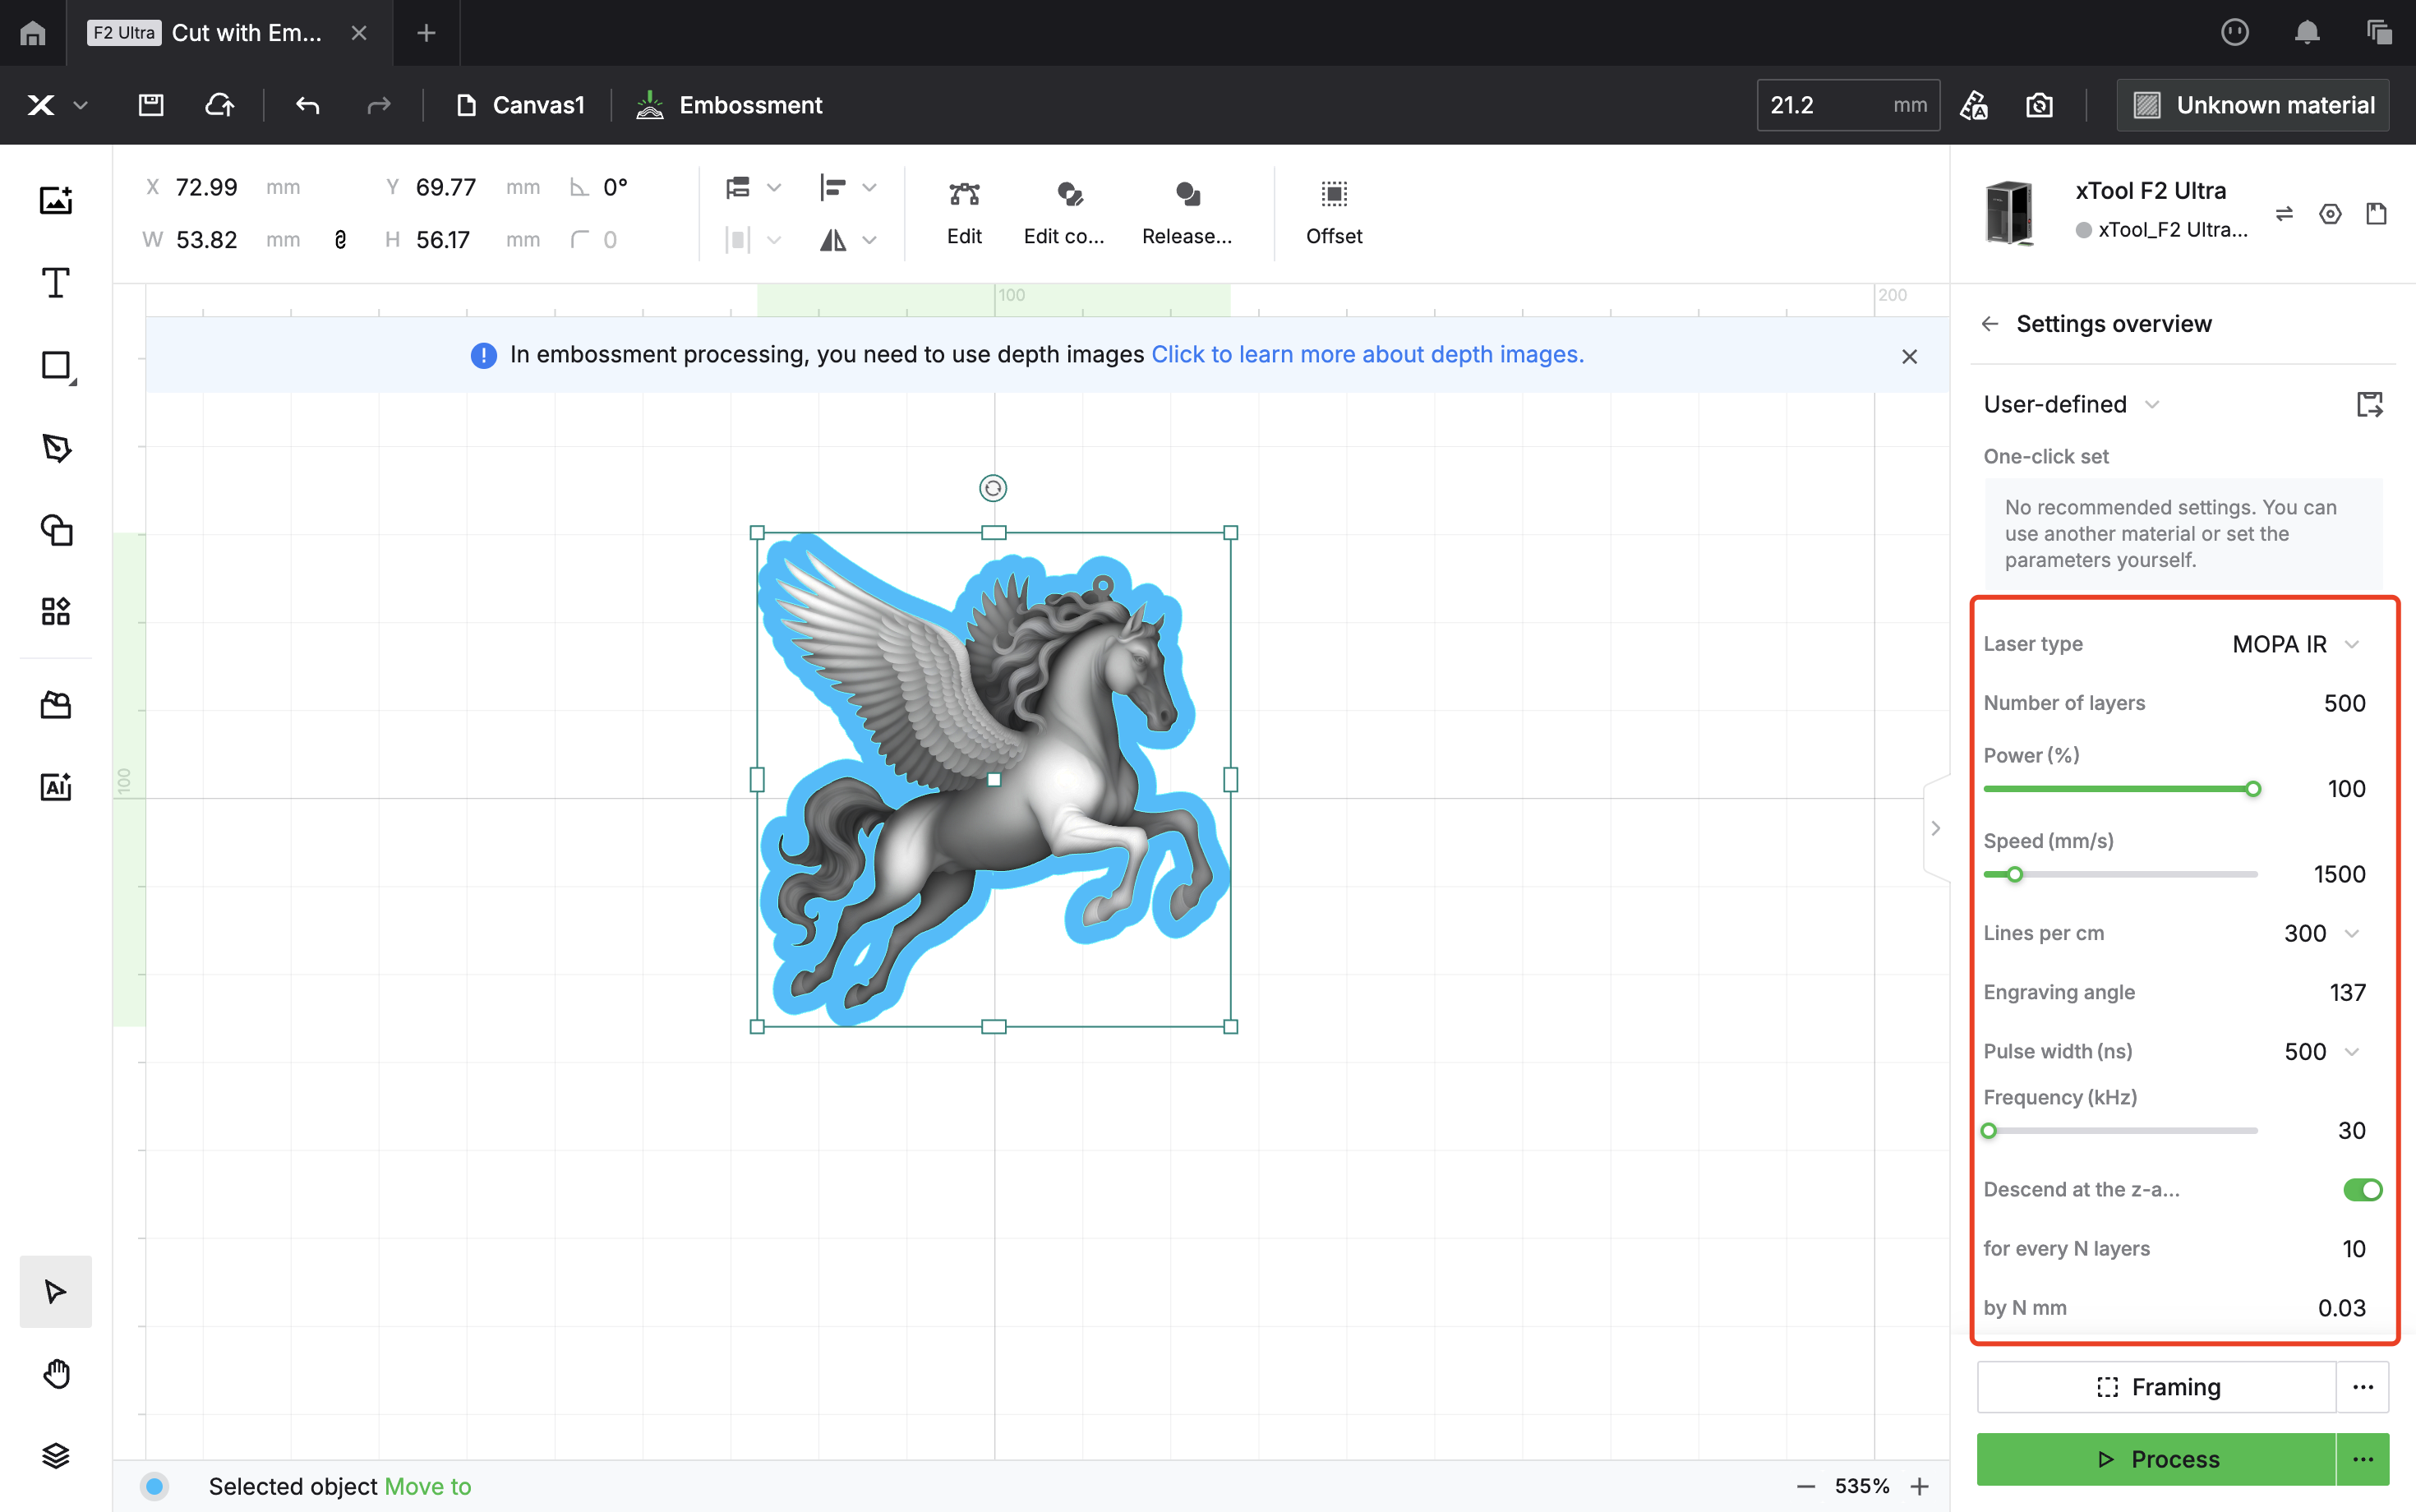
First, prepare a depth map (grayscale image). You can try using the AI-generated relief function in XCS, and then set the relief parameters for the depth map.
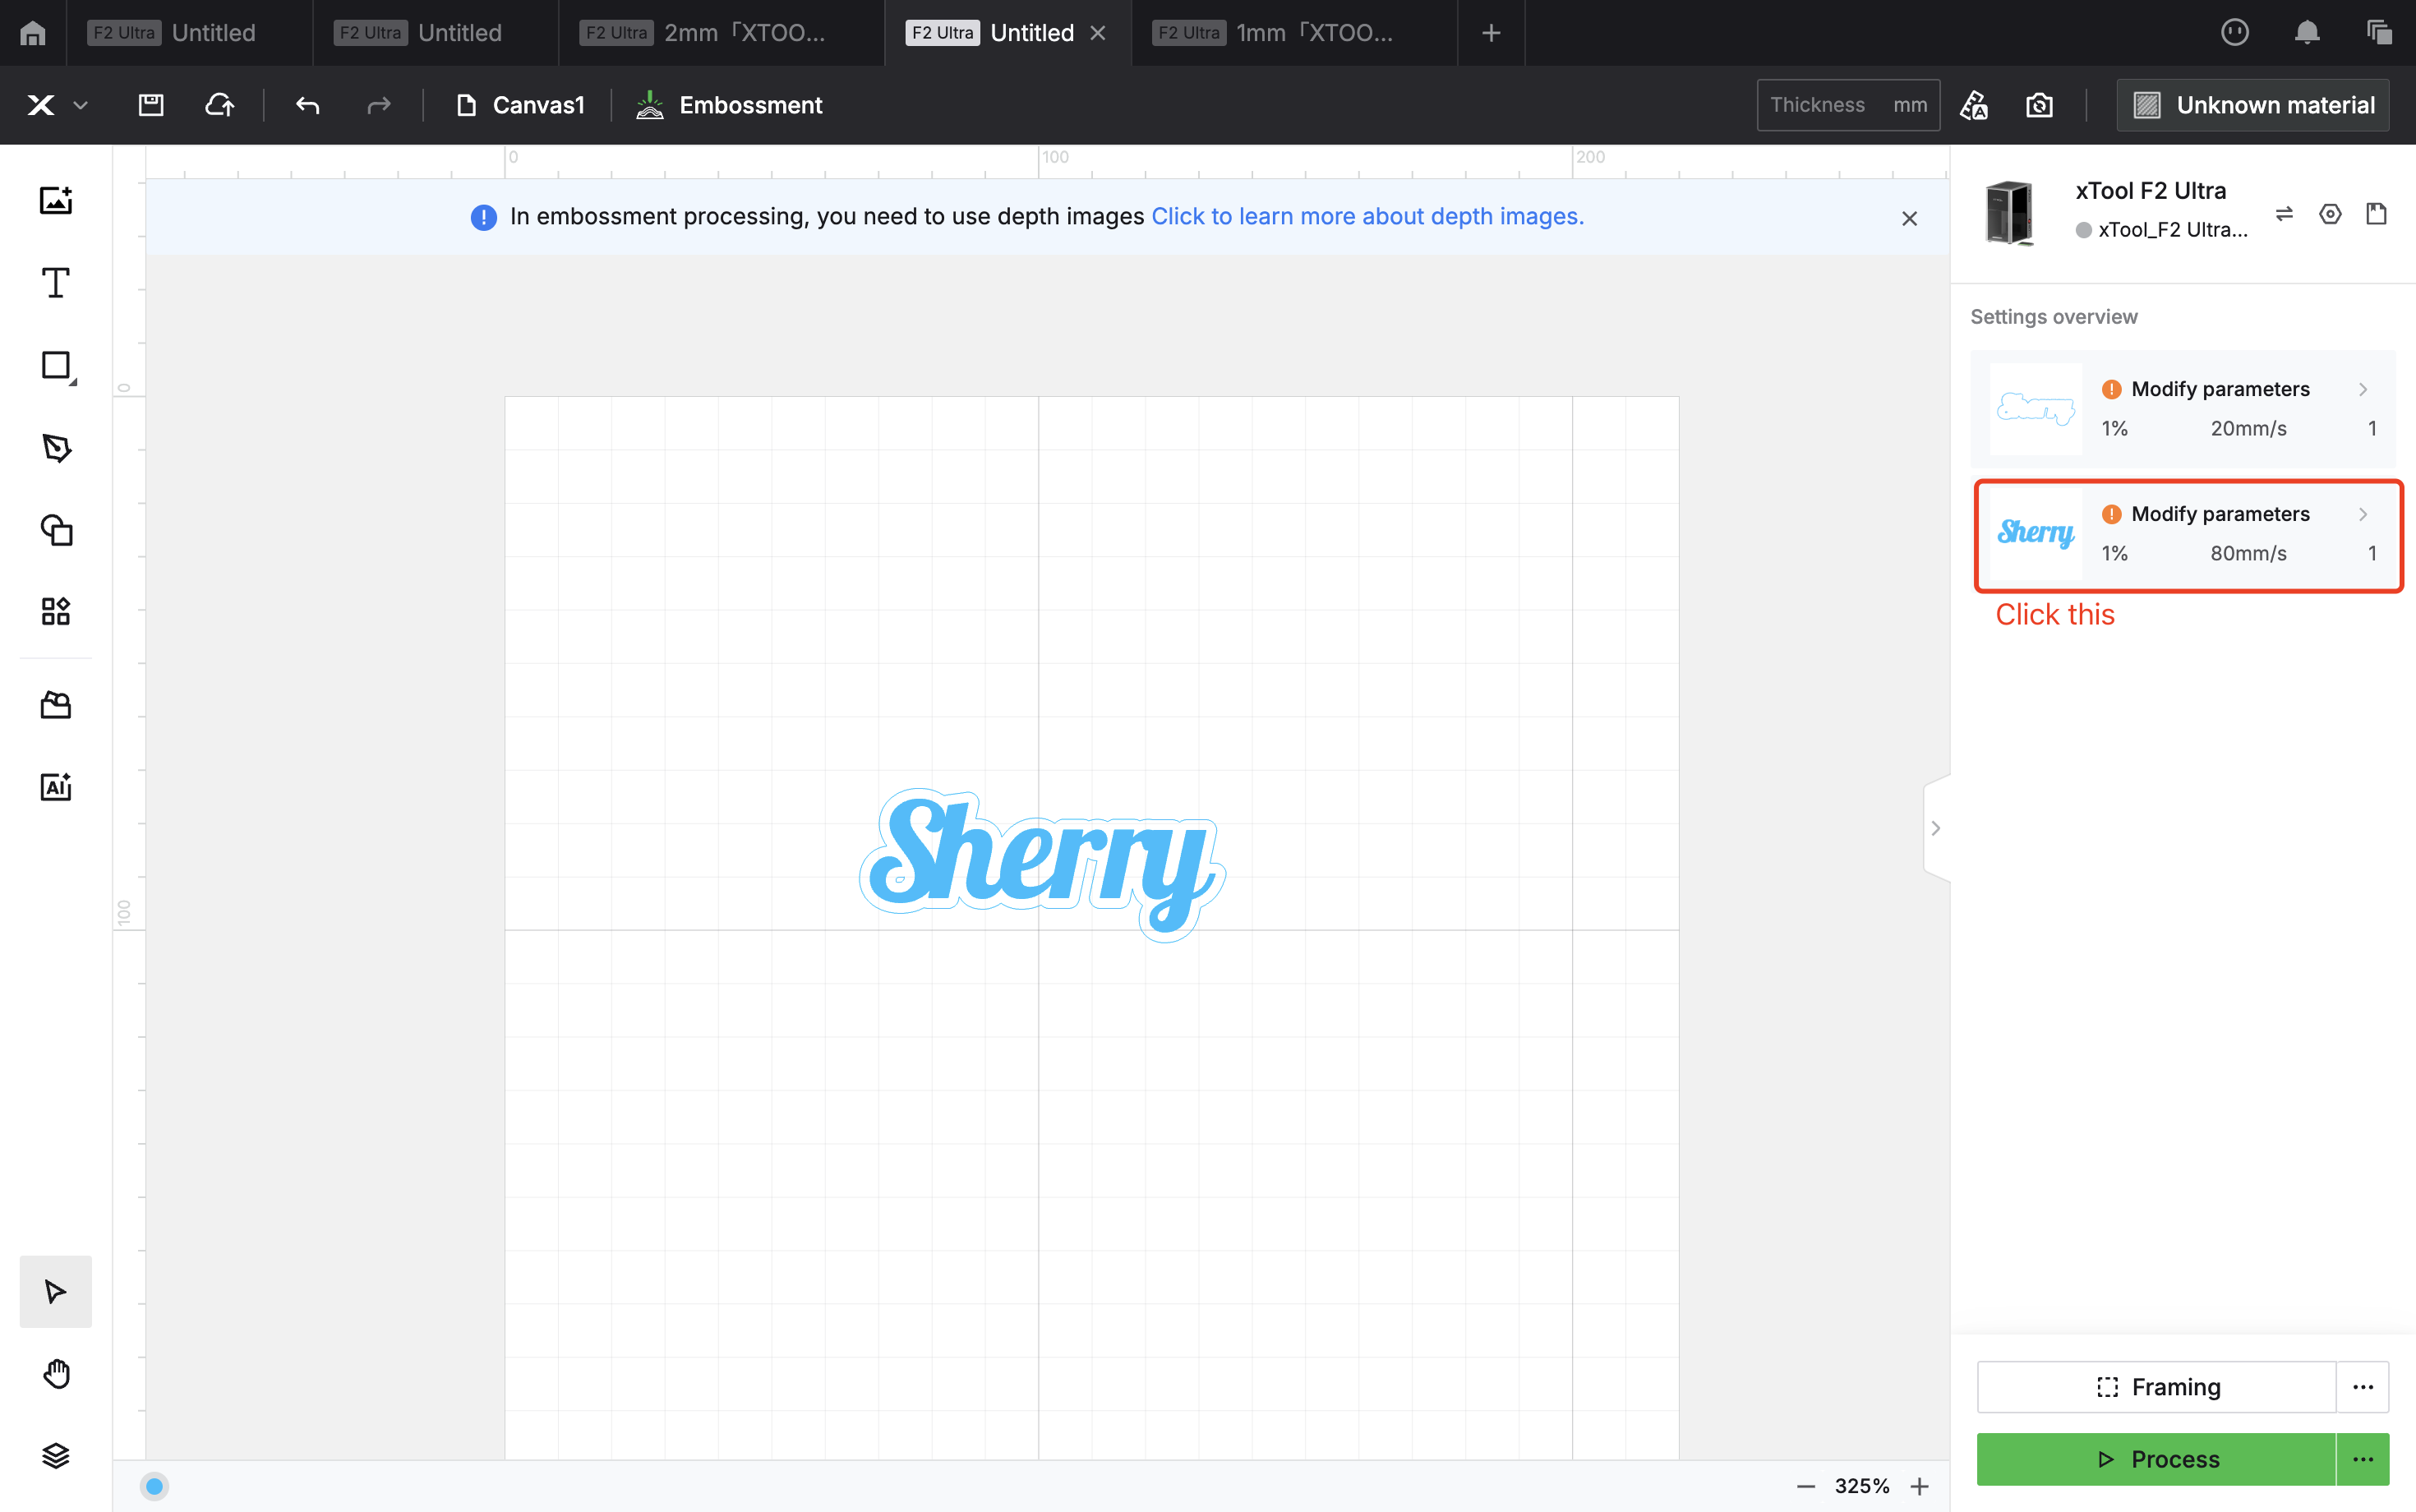
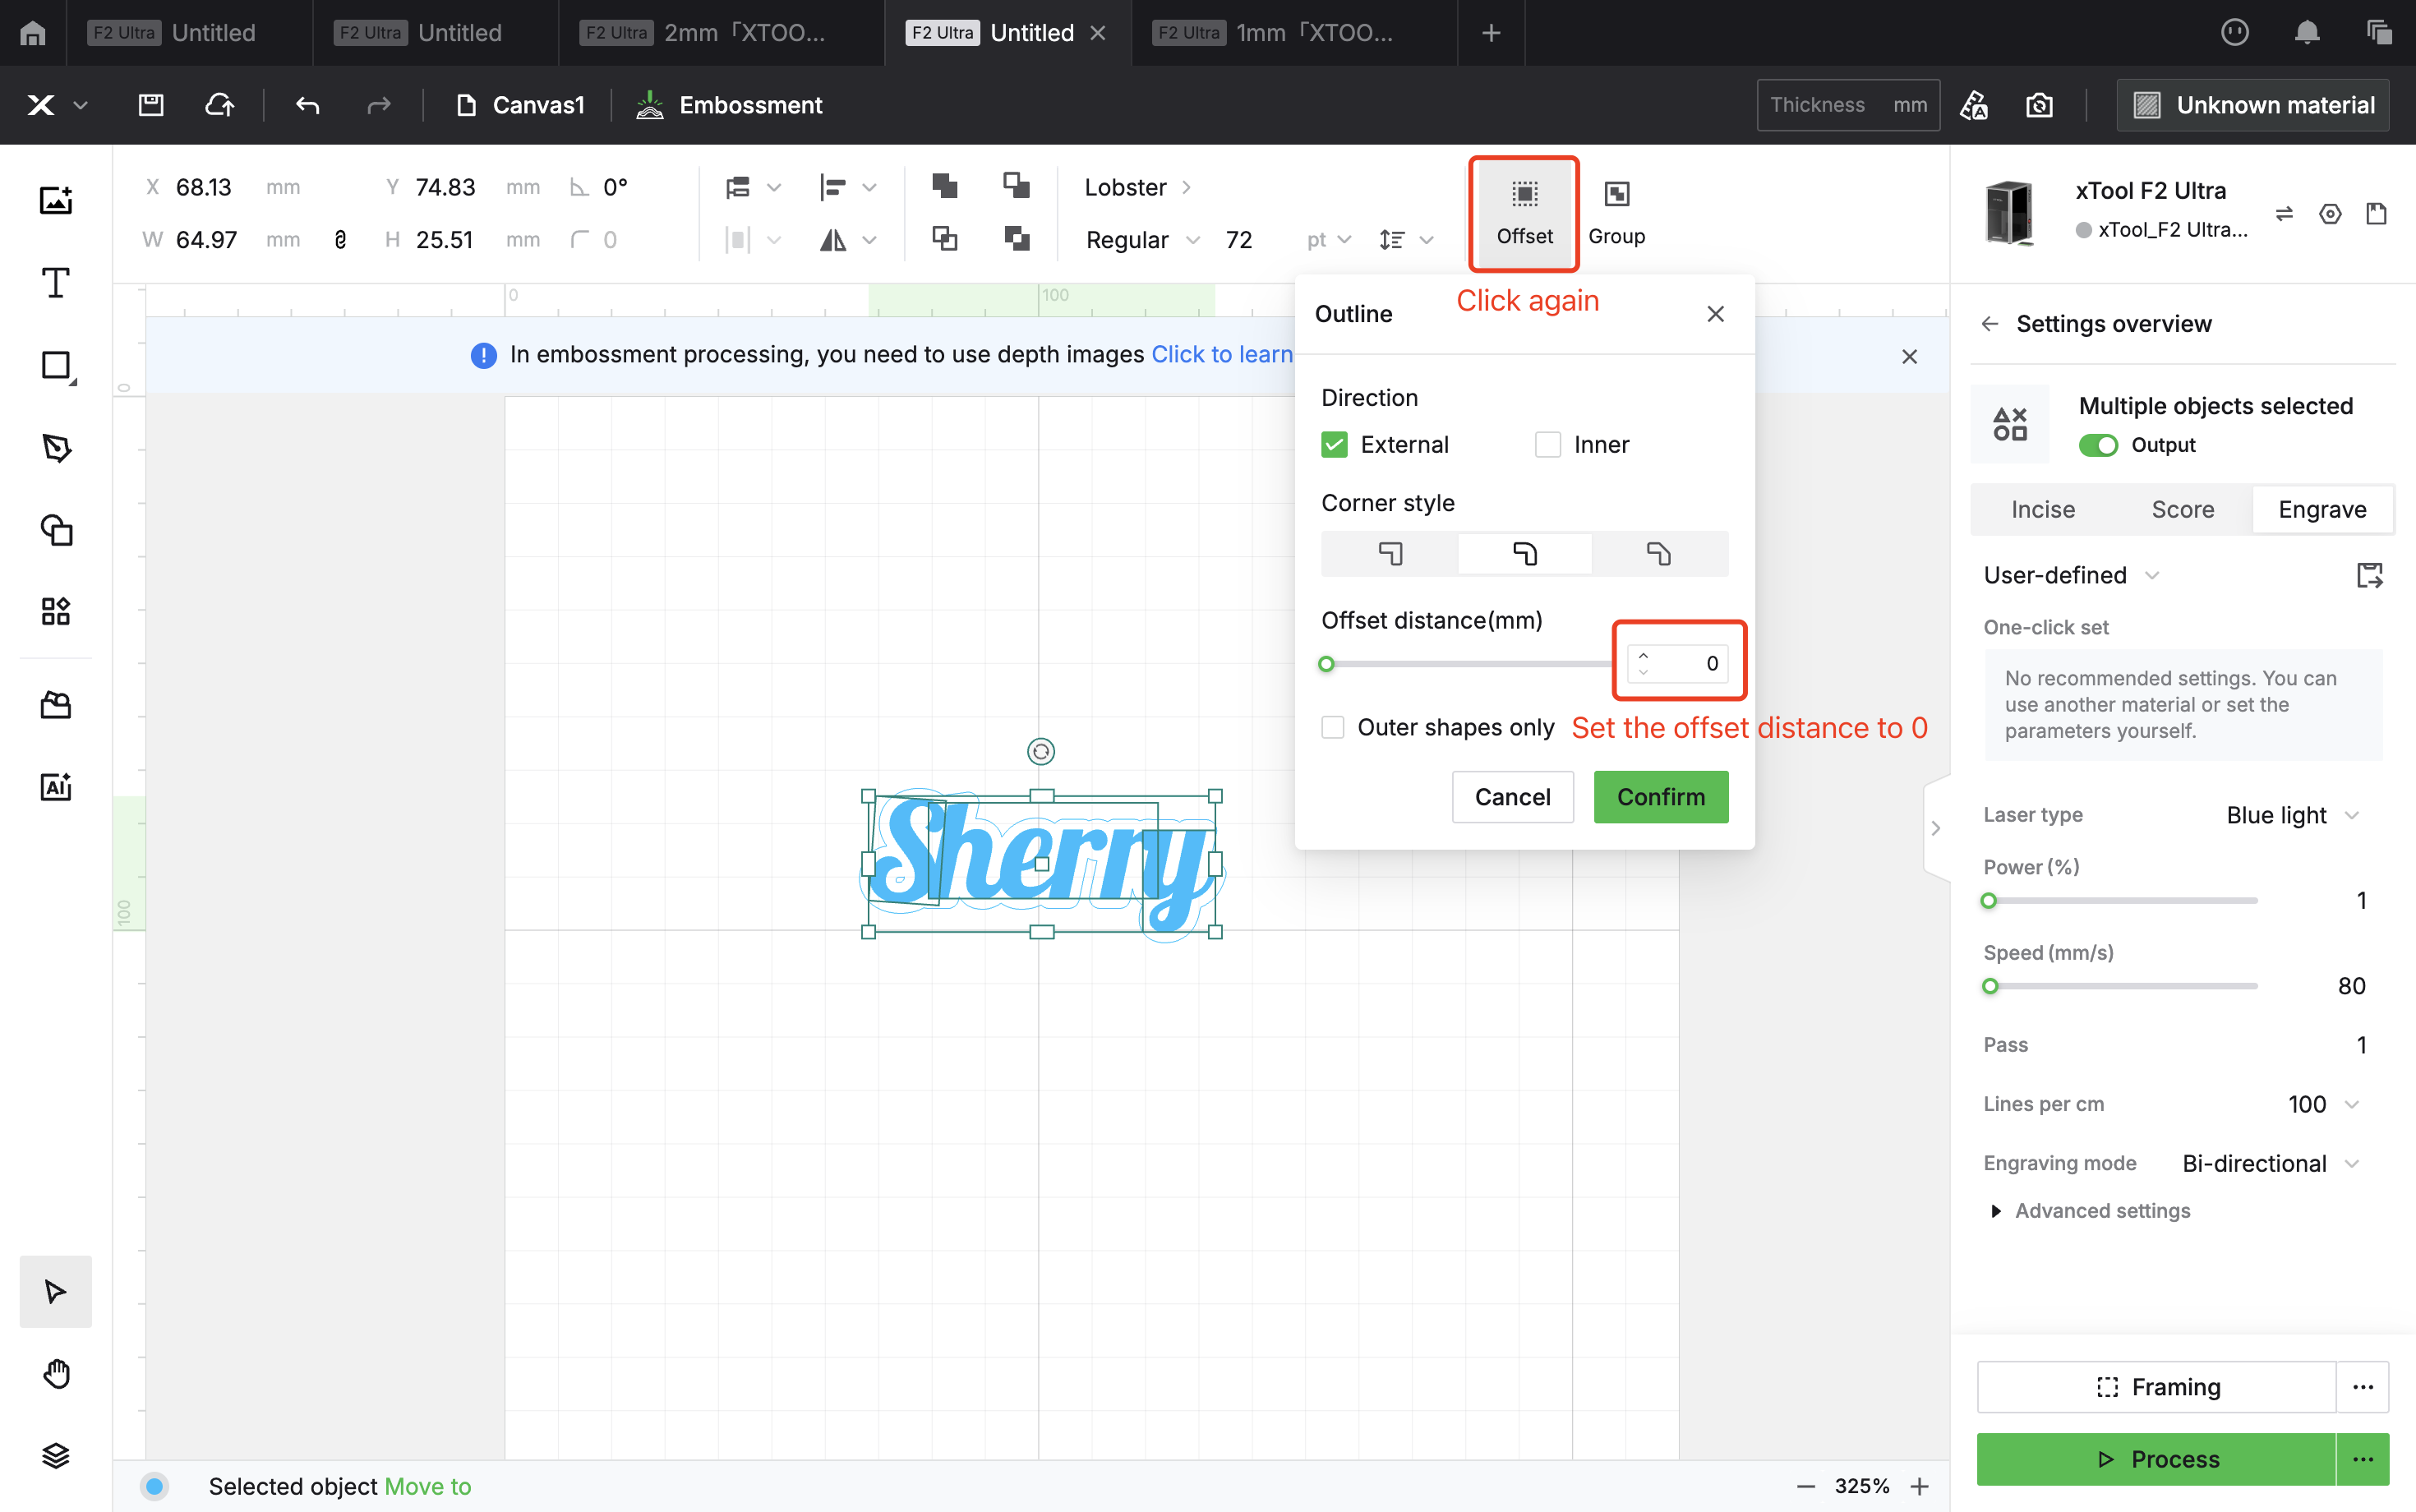
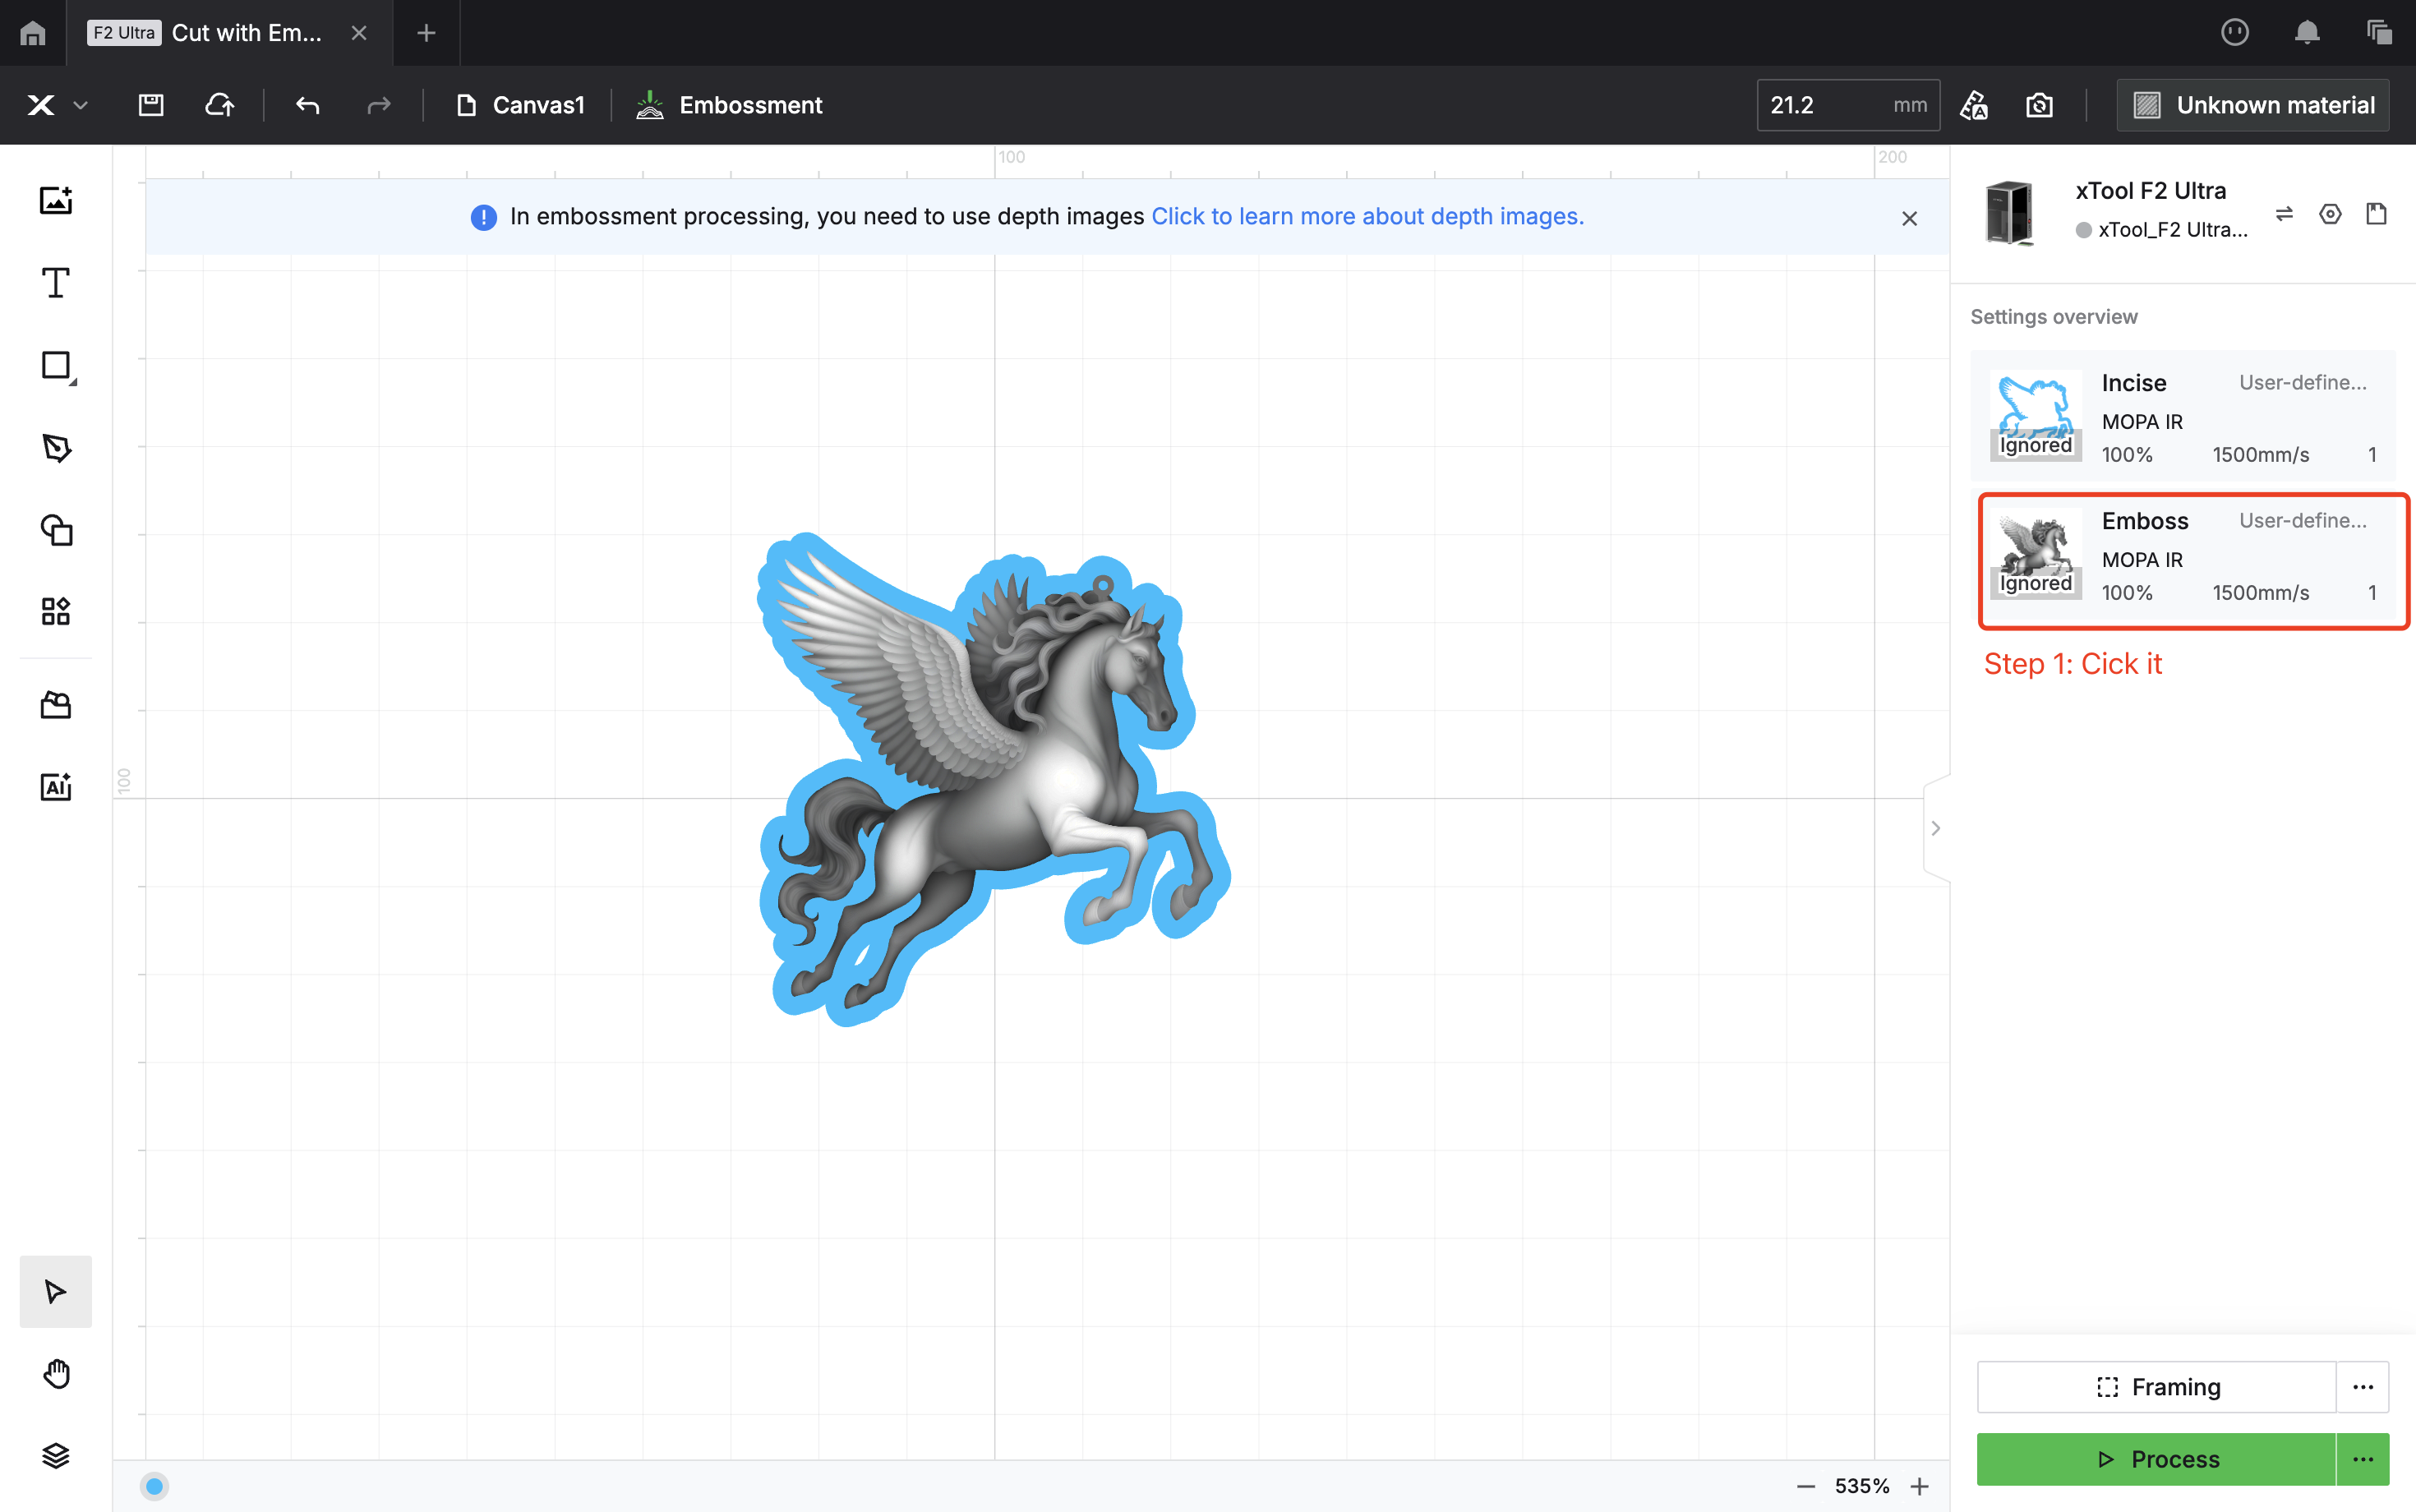
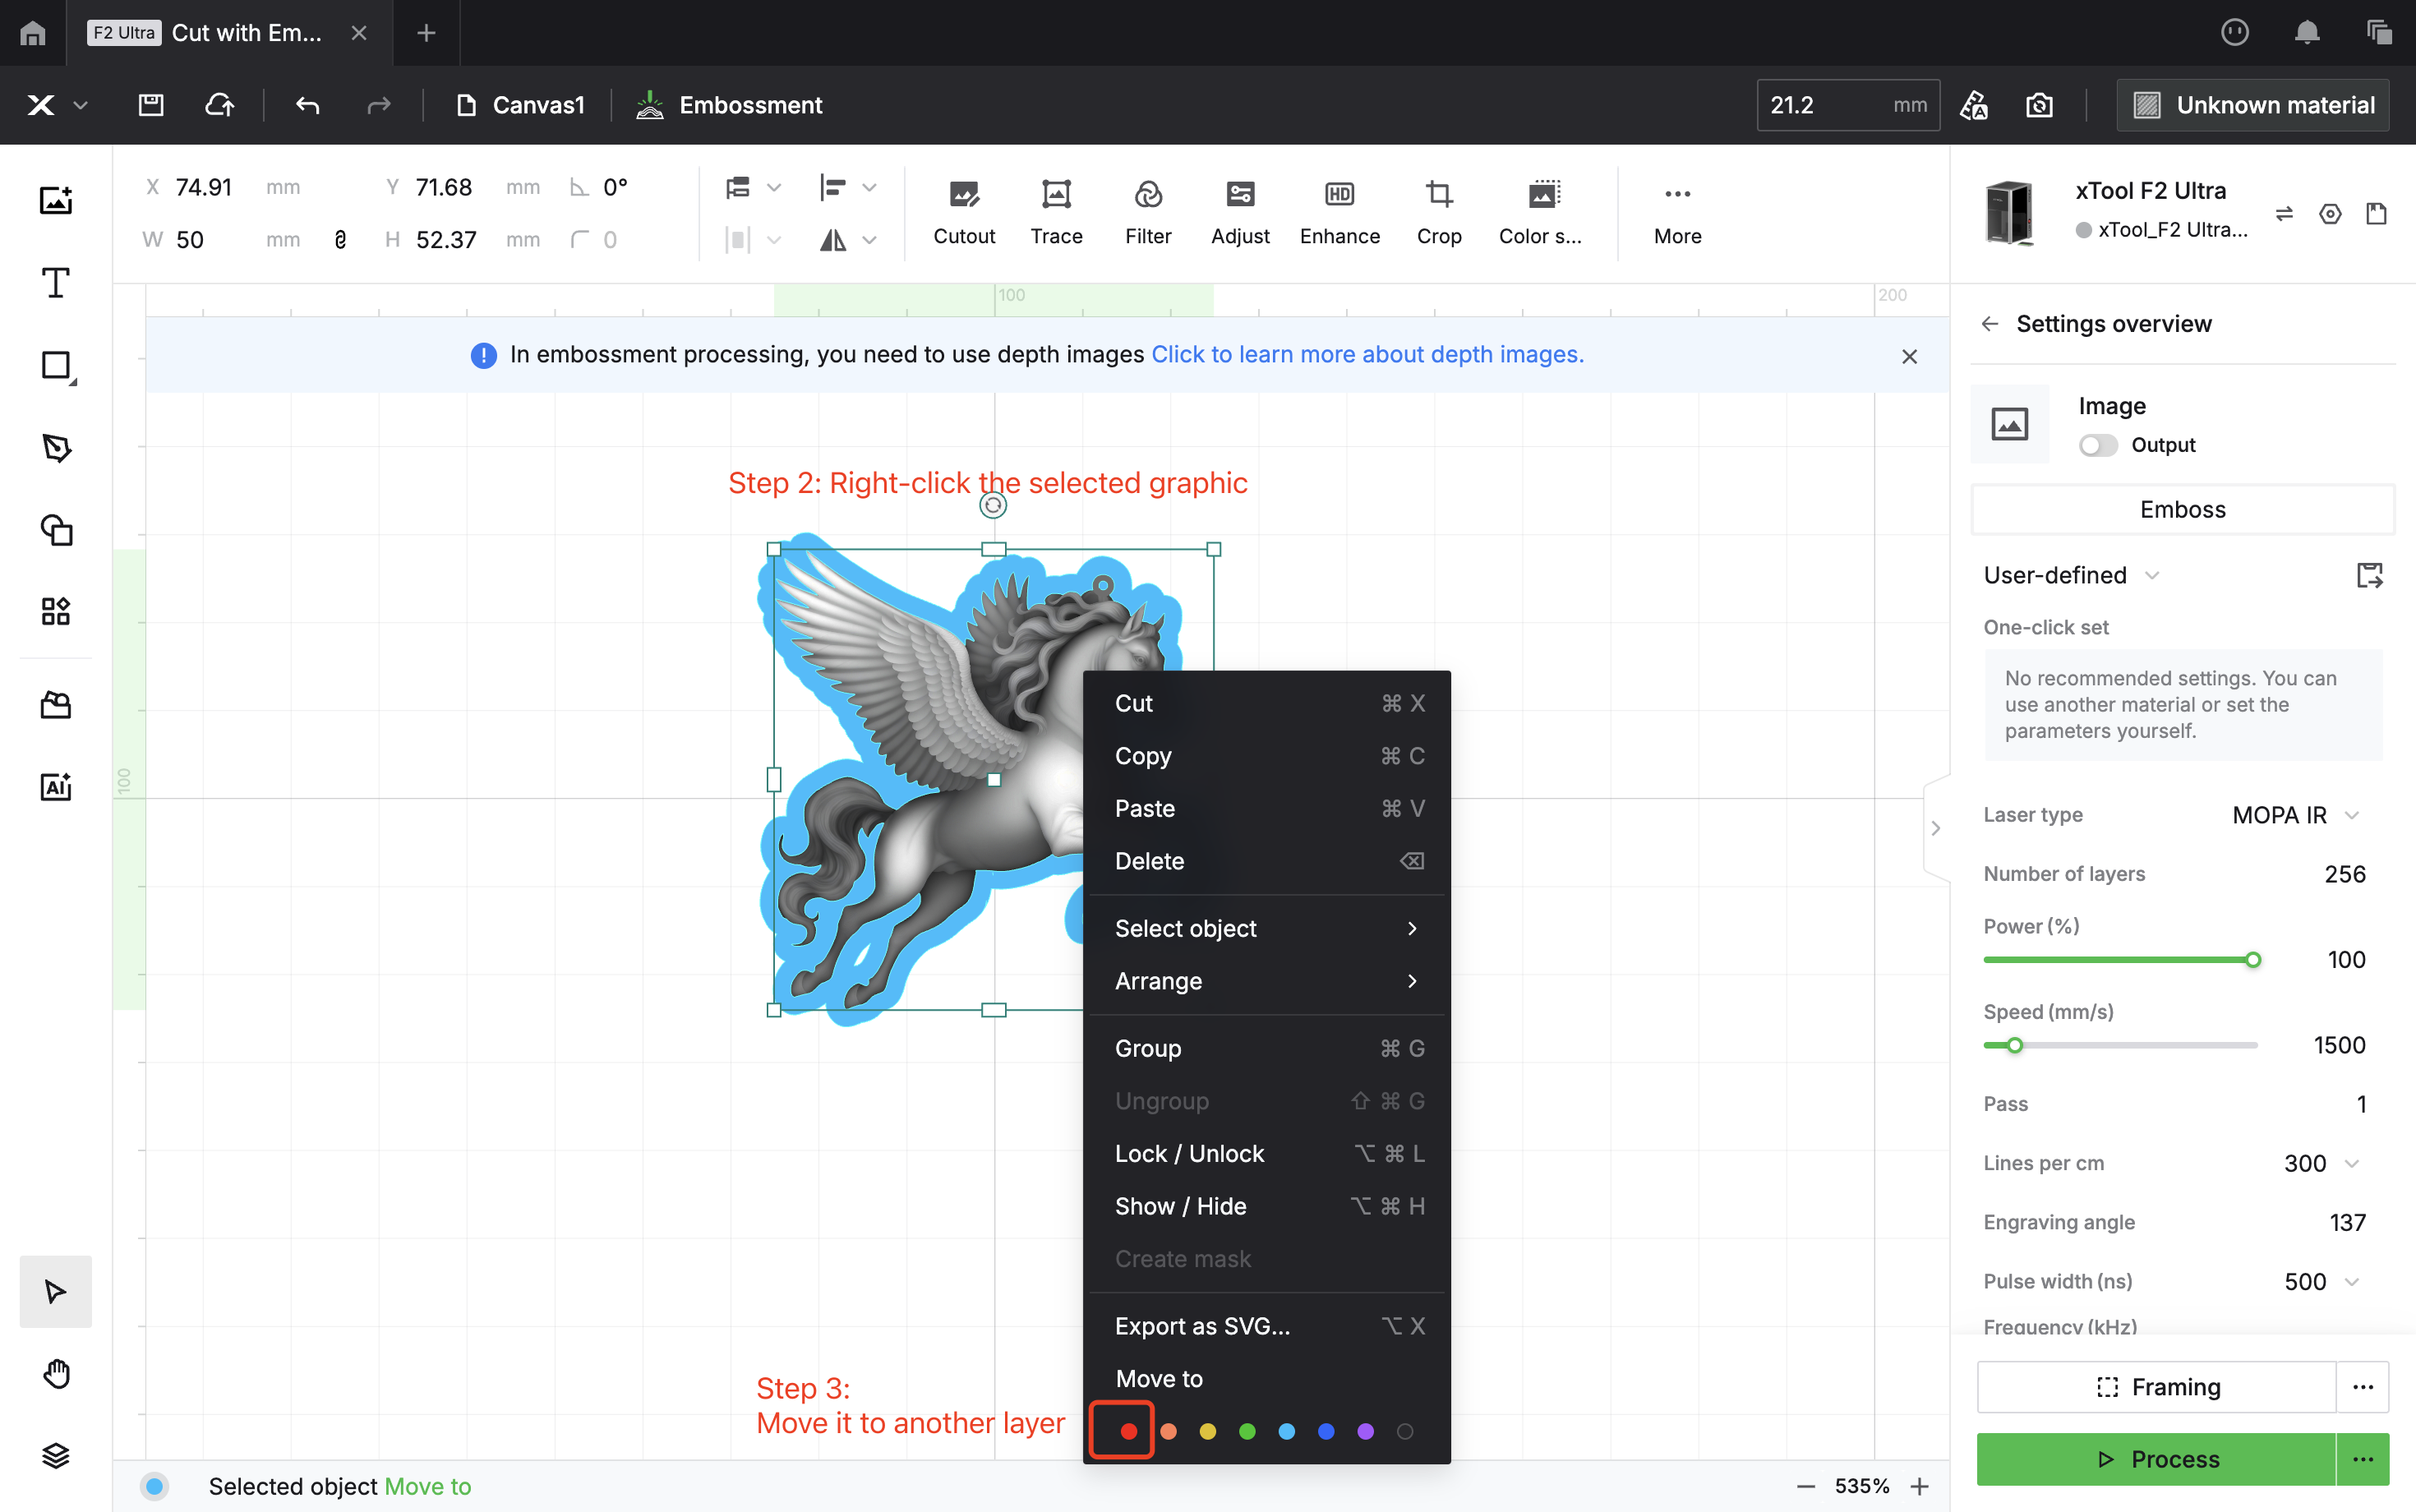
Next, create the outline of the pattern in the same way. Finally, set the incise parameters for the outer edge.

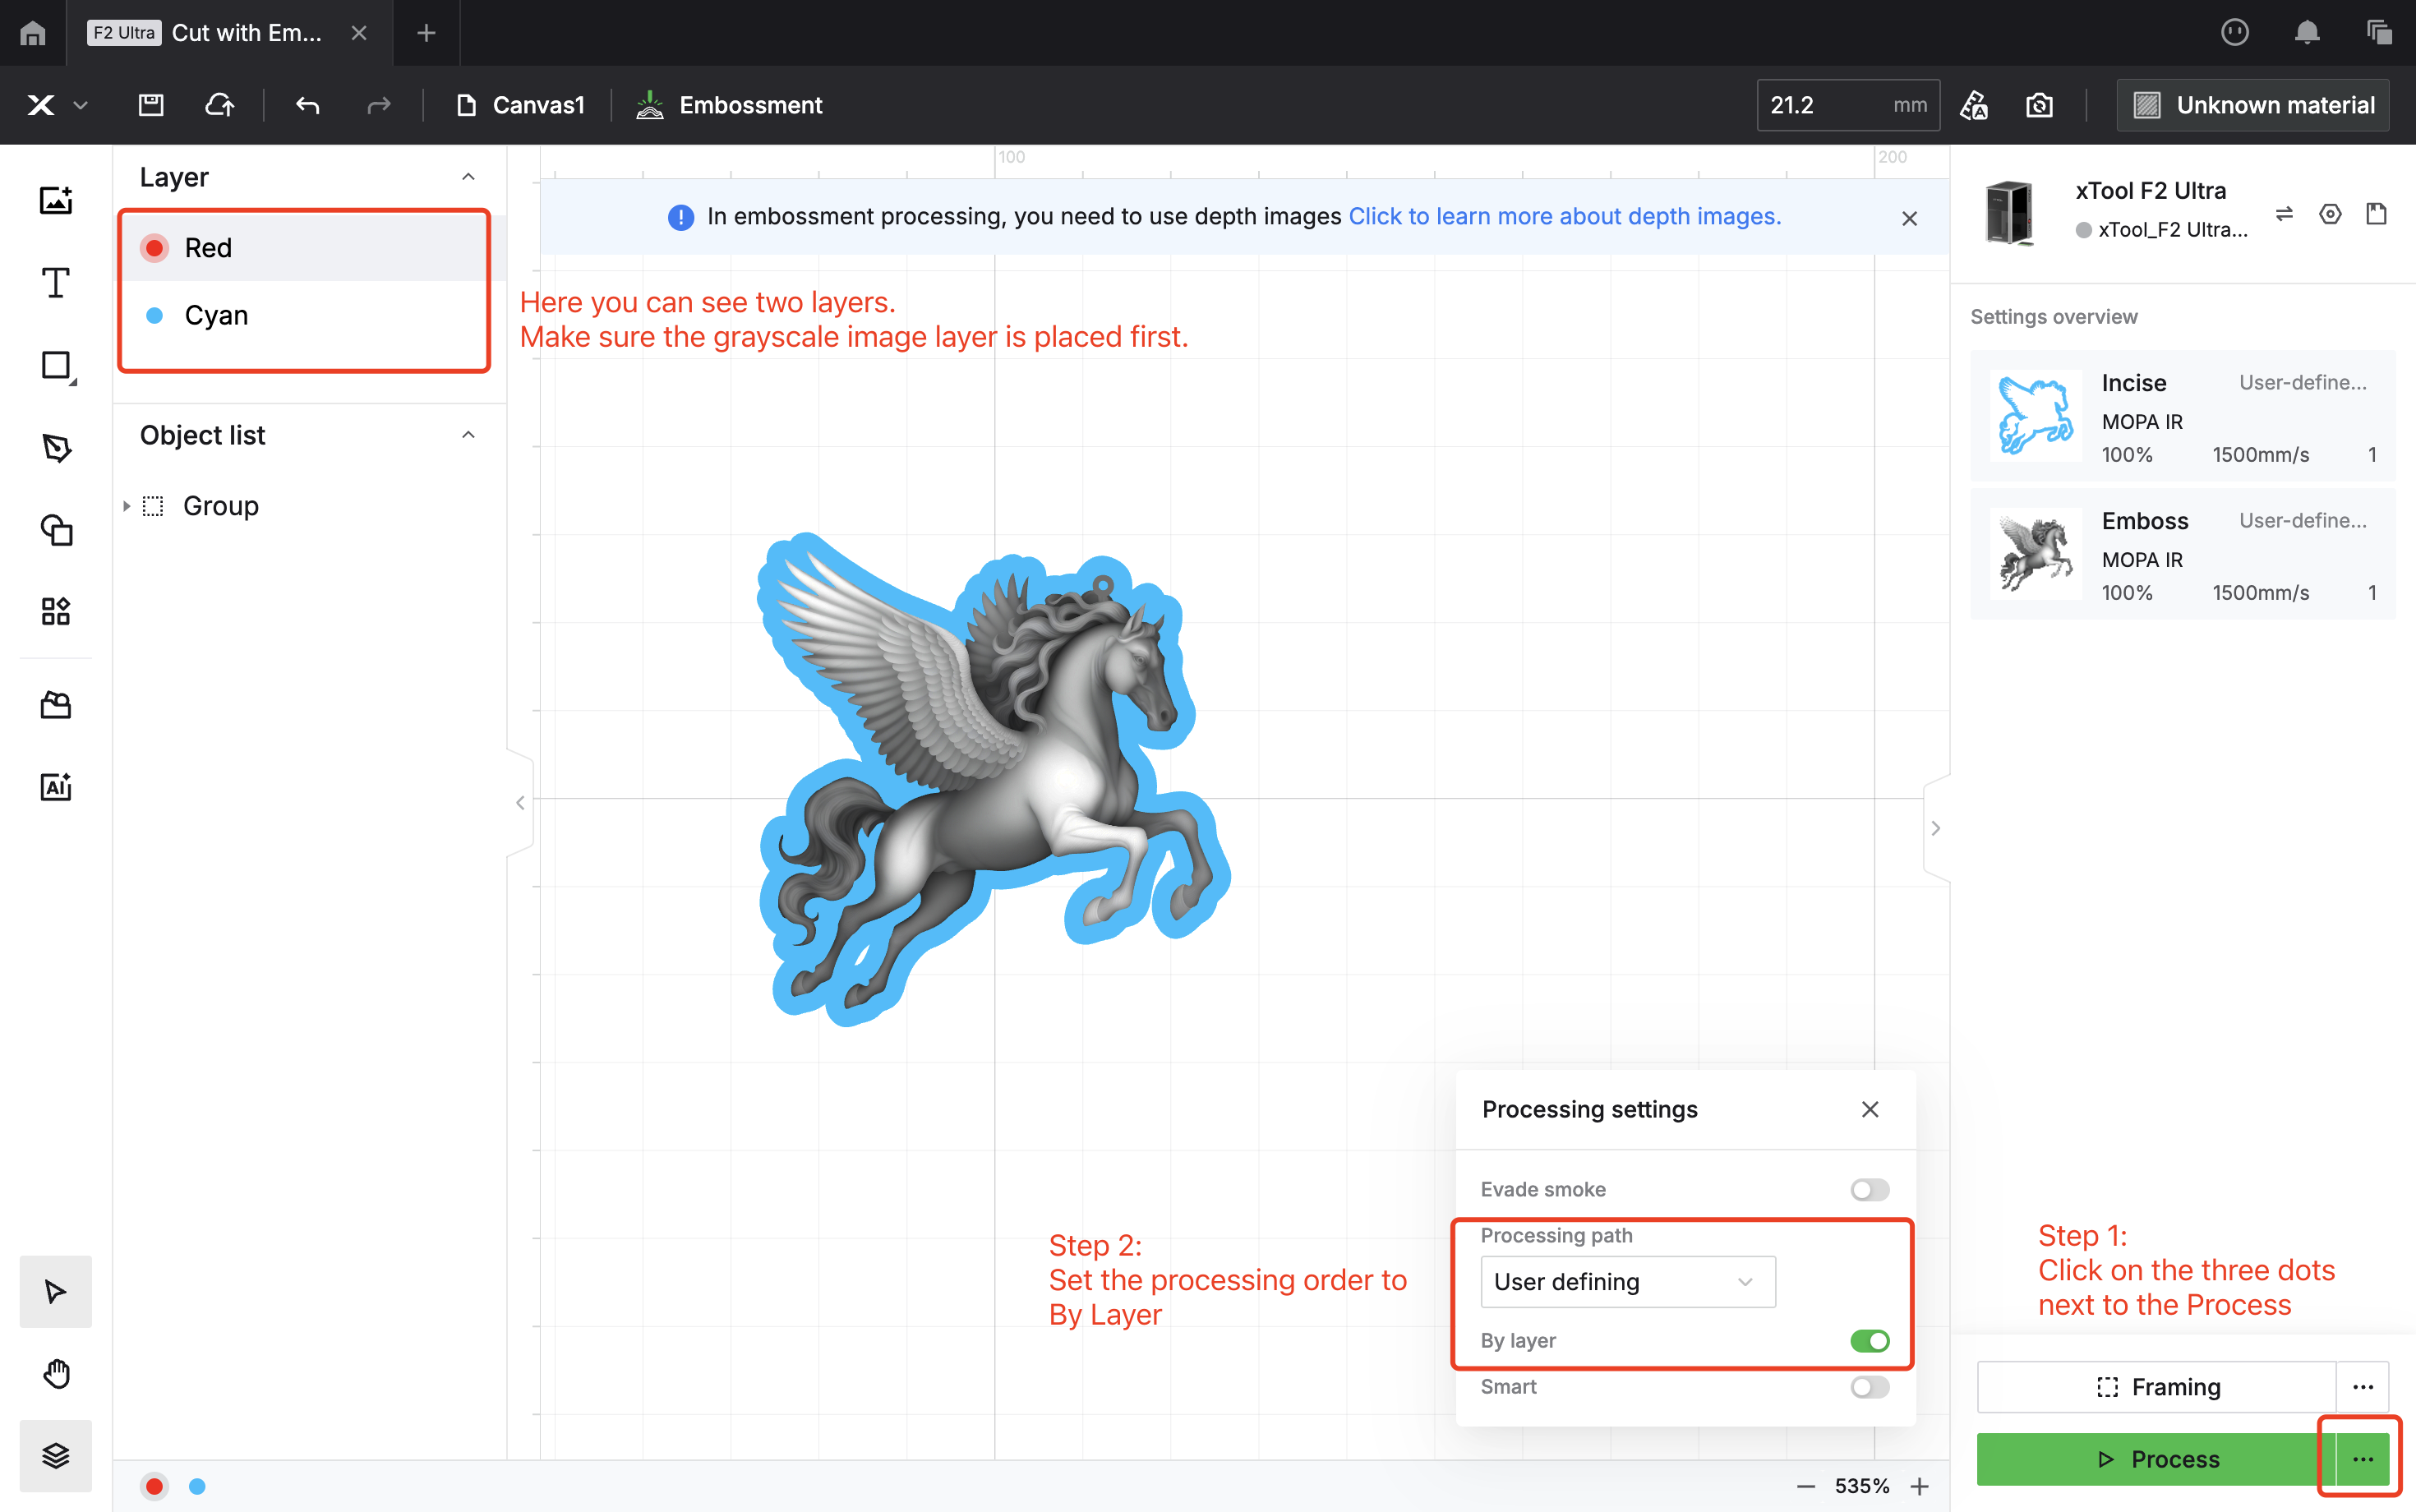
After setting the parameters for both the grayscale image and the outline, adjust the processing order to incise first and cut afterward (cutting first may cause the brass sheet to shift, making relief engraving difficult).
That’s a wrap on xTool F2 Ultra advanced tips and case highlights! Hopefully this guide makes it easier for you to unlock more fun ways to use your machine. Got other projects you’d like us to try out or new ideas you want to see? Just drop us a message—we’re always excited to explore together.