
Das Laserschneiden von Acryl ist ein präzises Verfahren, bei dem fokussierte Strahlen Material entlang von programmierten Pfaden verdampft oder schmelzen. Das erzeugt saubere Schnitte mit glatten Kanten. Erschwingliche Desktop-Geräte stehen jetzt für Werkstätten und Studios zur Verfügung. Dies ermöglicht es Machern und DIY-Handwerkern, professionelle Acrylprojekte von zu Hause aus zu produzieren. Mit benutzerfreundlicher Designsoftware und modernen CO₂- oder Diodenlasersystemen können Sie flache Acrylplatten mit großer Genauigkeit in individuelle Schilder, Schmuck, Modelle und viele andere Gegenstände verwandeln. In diesem Leitfaden erfahren Sie, wie Acryl mit Laserschnitt funktioniert, wie Sie die richtigen Geräte und Materialien auswählen, wichtige Techniken und inspirierende Projektideen, die das kreative Potenzial von Acryl hervorheben.
Warum Laserschneiden für Acryl wählen
 Acryl, auch Plexiglas genannt, ist ein flexibler Kunststoff, der für seine Klarheit und Festigkeit bekannt ist. Laserschneiden von Acryl hat Vorteile, die herkömmliche Methoden nicht bieten können. Fokussierte Strahlen erzeugen glatte, flammenbeschichtete Kanten. Das entfällt dem Schleifen oder Polieren und spart Stunden Arbeit bei klarer Transparenz. Präzisionstechnologie ermöglicht detaillierte Designs von bis zu 0,1 mm, von filigranen Mustern bis hin zu komplexen Formen. Das kontaktfreie Verfahren sorgt für saubere Schnitte ohne Absplittern oder Risse, konstante Ergebnisse über verschiedene Produktionsläufe und keinen Verschleiß an den Werkzeugen. Mit Dicken von 1 mm bis zu 25 mm Platten bietet das Laserschneiden große Flexibilität für individuelle Arbeiten, Prototypen und kreative DIY-Projekte.
Wie Laserschneiden von Acryl funktioniert
Laserschneiden von Acryl verwendet einen fokussierten Lichtstrahl, um thermische Energie an einen bestimmten Punkt auf der Materialoberfläche zu liefern. CO2-Laser senden Infrarotlicht mit einer Wellenlänge von 10,6 Mikrometern aus, was besonders effektiv für Acryl ist. Diese Wellenlänge wird leicht von der Materialstruktur absorbiert, was eine schnelle Erhitzung verursacht, die das Acryl entlang des Schneidwegs verdampft.
Der Prozess beginnt mit deiner Designdatei, die meist in Vektorgrafiksoftware wie xTool Studio erstellt wird. Dann importierst du diese Datei in eine Lasersteuerungssoftware. Die Software übersetzt dein Design in Bewegungsbefehle für den Laserkopf. Er steuert sowohl den Schneidweg als auch wichtige Einstellungen wie Leistungsausgang, Schneidgeschwindigkeit und Brennweite.
Während der Laserstrahl durch die Fokussieroptik fließt, verengt er sich auf einen Punktdurchmesser von etwa 0,1 bis 0,2 mm. Dies schafft eine extrem schmale Schnittbreite, die die Designdetails intakt hält. Wenn die fokussierte Energie auf die Acryloberfläche trifft, steigen die Temperaturen über 160 °C, was die Zersetzungsschwelle für Acryl ist. Dies führt dazu, dass das Material verdampft und als Gas und feine Partikel aus dem Schnittbereich ausgestoßen wird. Während der Laser durch das Acryl schneidet, schmilzt die intensive Hitze das Material kurzzeitig, bevor es verdampft. Dies führt zu der polierten, flammenbeschichteten Kante, die lasergeschnittenes Acryl leicht erkennbar macht.
Welche Acrylarten kann eine Lasermaschine mit
Laserschneider arbeiten? Laser Cutter funktionieren gut mit verschiedenen Acrylarten, die jeweils einzigartige Eigenschaften für Ihre kreativen Projekte bieten. Wenn Sie diese
- Gussacryl: Dies ist die beste Wahl für das Laserschneiden. Sie bietet außergewöhnlich glatte, klare Kanten mit minimalem Zuckerguss. Der Herstellungsprozess schafft eine dichte Molekularstruktur, die gut auf Laserenergie reagiert, was ihn ideal für Ausstellungsstücke, Auszeichnungen und hochwertige Schilder macht, bei denen Kantenklarheit entscheidend ist.
- Extrudiertes Acryl: Günstiger und leicht erhältlich, extrudierte Acrylschnitte schneiden zuverlässig, führen aber zu etwas mehr mattierten Kanten im Vergleich zu gegossenem Acryl. Es eignet sich für Prototyping, Architekturmodelle und Projekte, bei denen Budgetaspekte wichtiger sind als die optische Klarheit.
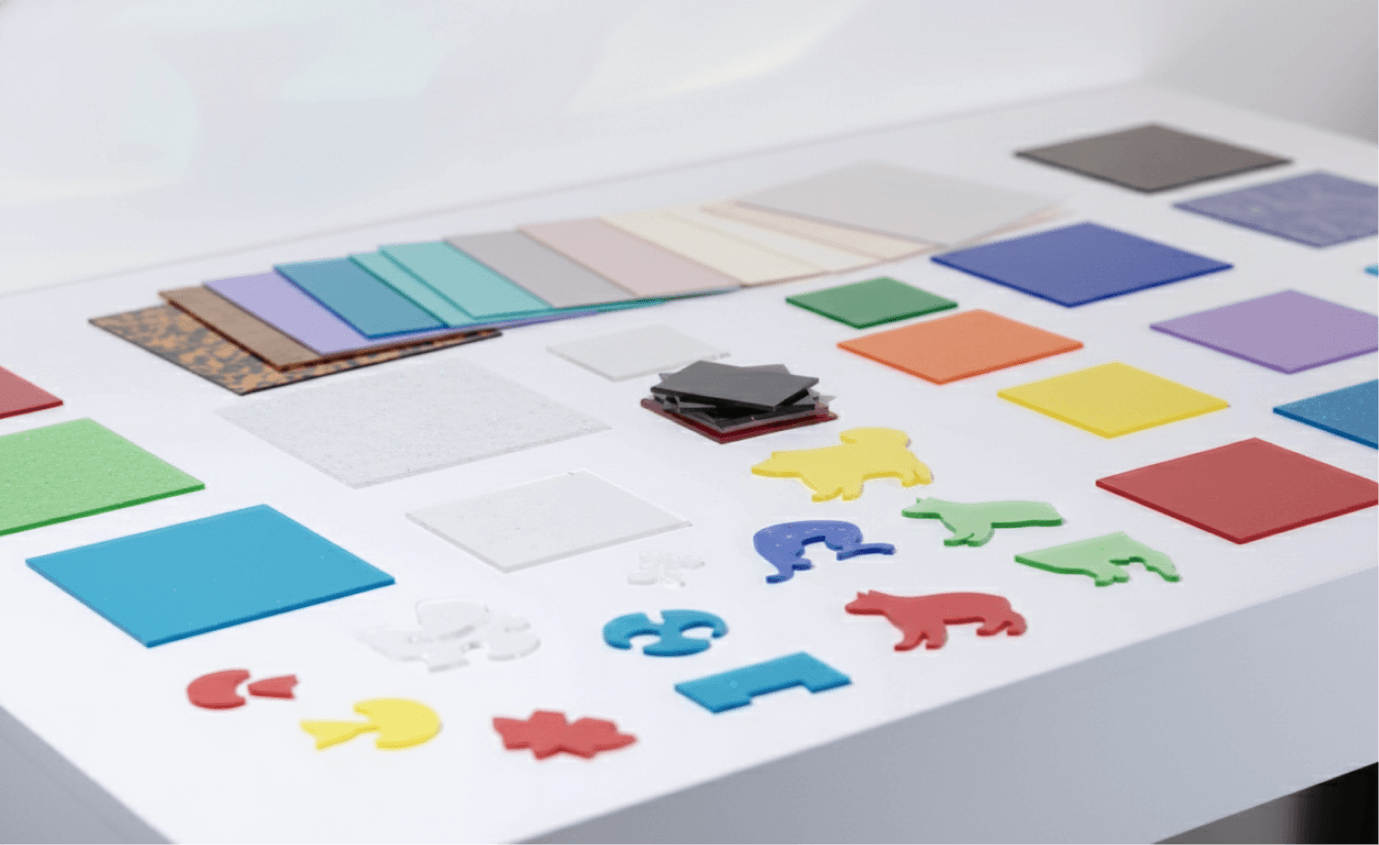
- Farbige und durchscheinende Acrylfarben: Von leuchtend deckenden Farben bis hin zu dezenten Farbtönen und fluoreszierenden Optionen schneiden pigmentierte Acrylfarben genauso gut wie klare Varianten. Dies eröffnet viele kreative Möglichkeiten für geschichtete Designs und dekorative Nutzungen.
- Spiegelacryl: Dieser Typ hat eine reflektierende Rückseite, die beim Schneiden von der richtigen Seite erhalten bleibt. Es schafft wunderschöne, metallisch verarbeitete Projekte ohne das Gewicht von Glasspiegeln.
Wie dick kann Acryl mit einem Laser geschnitten werden? Die Dicke des Acryls, die ein Laser schneiden kann,
hängt hauptsächlich von seiner Wattzahl und Technologie ab. Für CO2-Laser gilt eine gängige Regel von etwa 10 Watt Leistung pro Millimeter Dicke für einen sauberen Schnitt in einem Durchgang. Desktop-CO2-Laser (40W bis 60W) können typischerweise Dicken von 6 mm bis 20 mm verarbeiten. Industriemaschinen mit 150W oder mehr können Platten von bis zu 25 mm bis 50 mm (1 bis 2 Zoll) Dicke schneiden.
Diodenlaser haben mehr Einschränkungen und schneiden meist durch 3 mm bis 15 mm undurchsichtiges Acryl. Sie können in der Regel kein klares oder transparentes Acryl schneiden, da das Material die spezifische Wellenlänge der Diode nicht absorbiert.
Um hochwertige Ergebnisse auf dickeren Materialien zu erzielen, sollten notwendige technische Anpassungen vorgenommen werden. Ein Langfokus-Objektiv (4 oder 5 Zoll) hilft, einen schmalen Strahl durch die Materialtiefe aufrechtzuerhalten. Der Laser sollte in der Mitte des Blattes fokussiert werden und nicht nur auf der Oberfläche. Um eine "flammenpolierte" klare Kante zu erzielen, verwenden Sie einen niedrigen Luftunterstützungsdruck. Hoher Druck kann zu einer trüben oder frostigen Oberfläche führen.
5 Kreative und inspirierende Acryl-Laserschneide-Projektideen
✨ Suchen Sie Inspiration für Ihr nächstes Design? Acryl ist ein vielseitiges Material, das sich gut zum Laserschneiden eignet. Es bietet scharfe Kanten, leuchtende Farben und unendliche kreative Möglichkeiten. Von Dekoration bis hin zu personalisierten Geschenken – die Möglichkeiten stehen offen. Um Ihre Fantasie anzuregen, haben wir fünf kreative Ideen für Acryl-Laserschneidprojekte zusammengestellt. Außerdem findest du mehr laser-schneidende Acrylprojekte in Atomm.
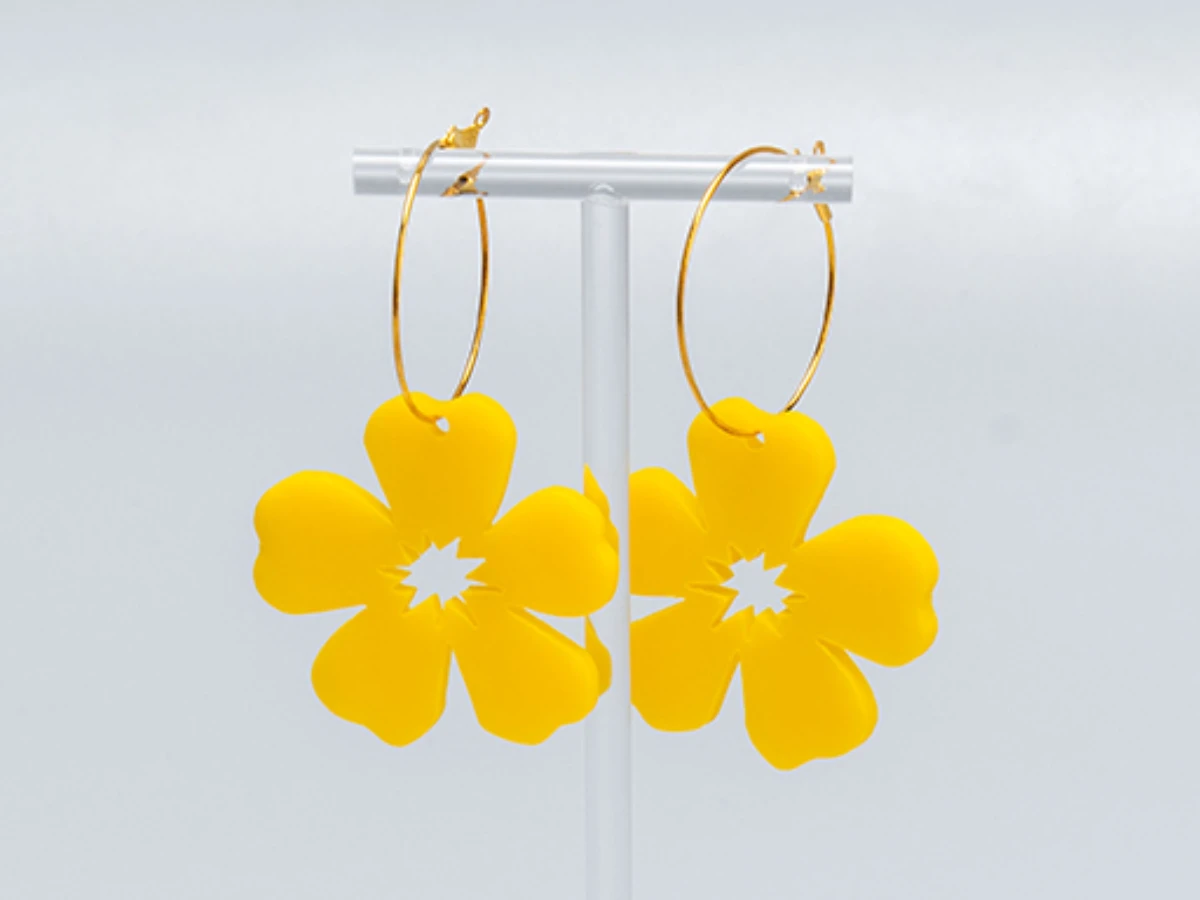
1. Personalisierte Acryl-Ohrringe
Heben Sie Ihren täglichen Stil mit diesen wunderschönen Acryl-Blumen-Ohrringen. Sie verbinden moderne Mode mit naturinspiriertem Design. Diese Ohrringe bestehen aus leichtem, hochwertigem Acryl und bieten den ganzen Tag Komfort und Haltbarkeit. Die zarte Blumenform verleiht jedem Outfit eine auffällige, aber feminine Note und macht sie perfekt für lockere Brunches und elegante Abende. In verschiedenen Farben erhältlich, verleihen diese lasergeschnittenen Blumenohrringe Ihrer Schmucksammlung eine frische, botanische Note. Gönn dir etwas oder schenke sie als durchdachtes Geschenk.
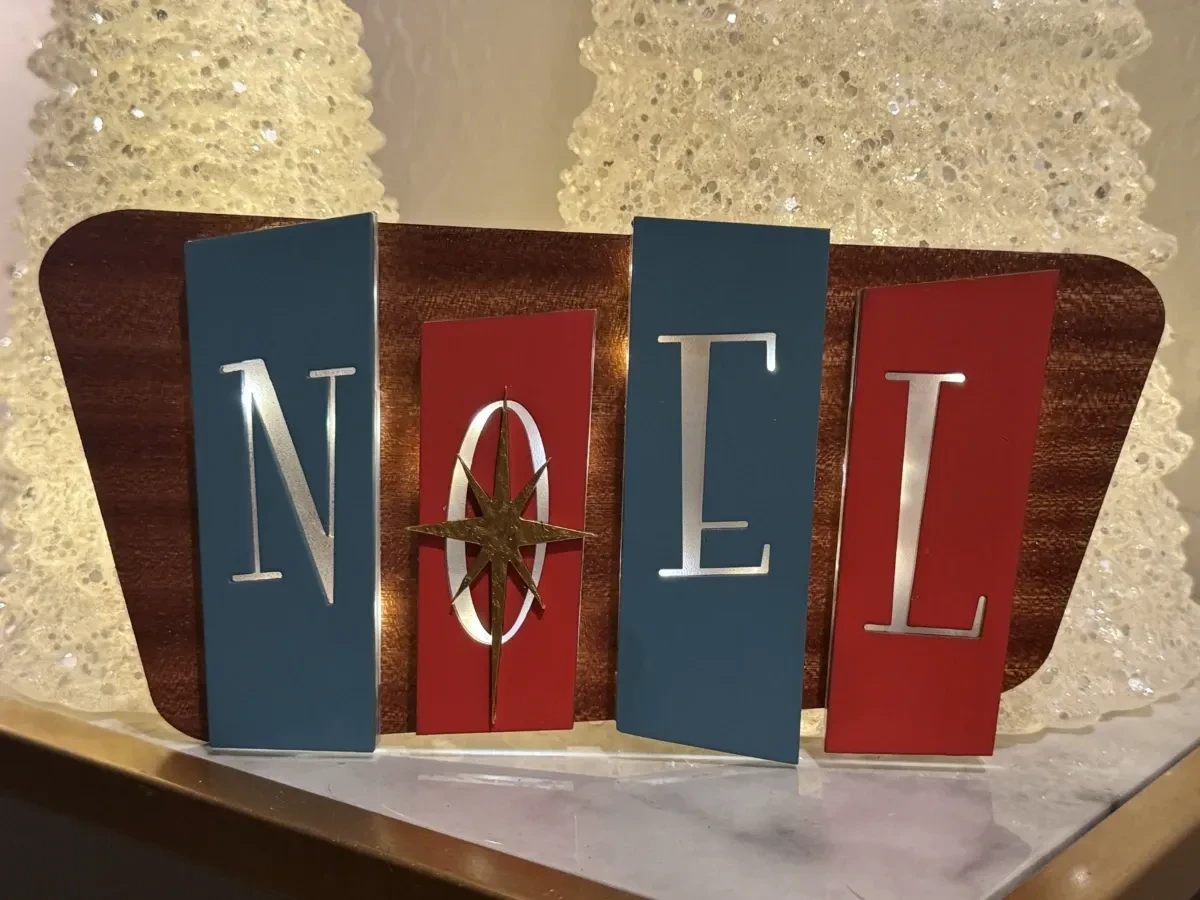
2. Veranstaltungs- und Geschäftsschilder
Bringen Sie mit diesem Mid-Century Modern Backlited Noel Schild einen Hauch der stilvollen 1950er Jahre in Ihre Feiertagsdekoration. Inspiriert vom Atomzeitalter, zeichnet sich dieses Retro-Stück durch eine elegante Typografie und einen warmen, leuchtenden Halo-Effekt aus, der eine festliche Atmosphäre schafft. Ideal für Kaminsimse, Eingänge oder Geschäftsdisplays, verbindet dieses leuchtende Schild Vintage-Charme mit moderner LED-Technologie. Das geschichtete Design verleiht Tiefe und Wärme, sodass Ihre Weihnachtsdekorationen besonders hervorstechen. Machen Sie Ihre Jahreszeit fröhlich und hell mit diesem zeitlosen Stück, das den Charme des Mid-Century-Winterwunderlands einfängt.
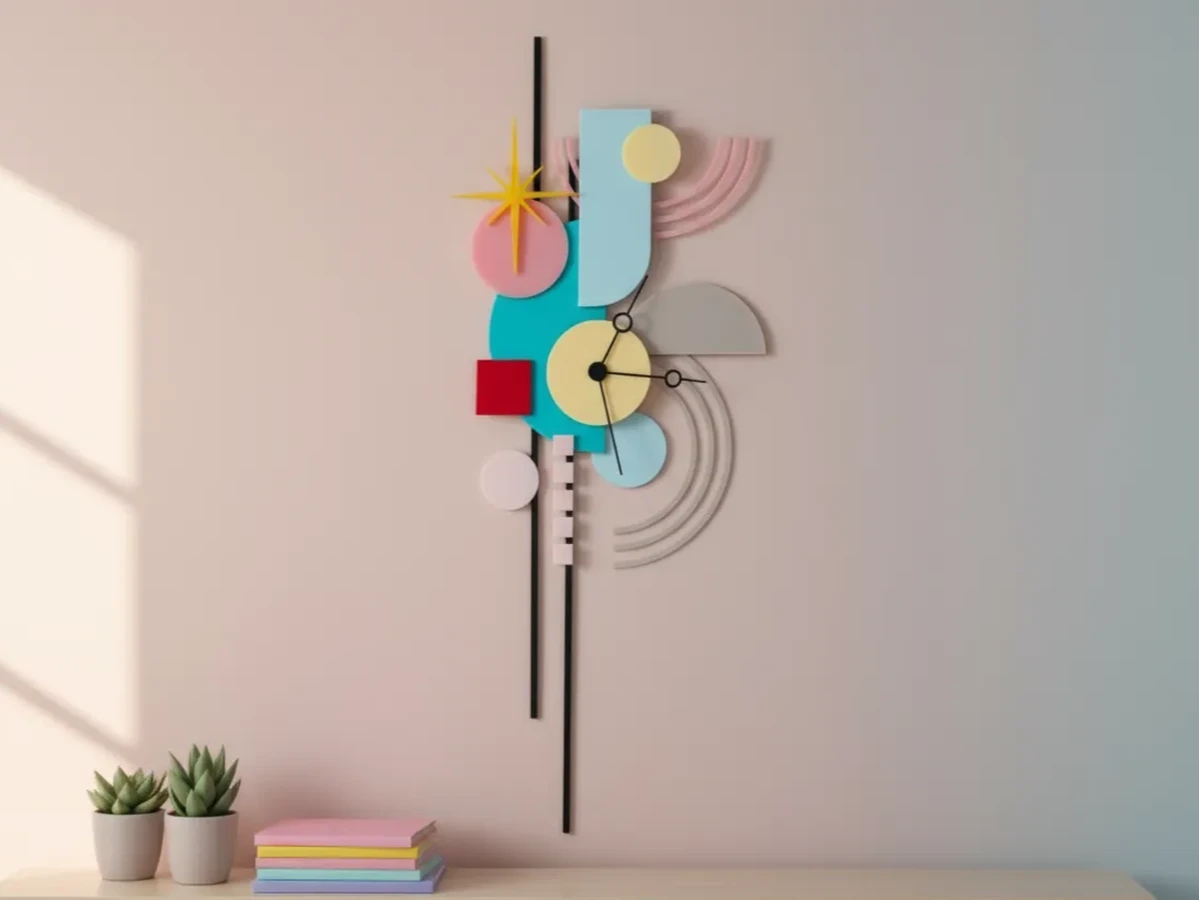
3. Geschichtete Wandkunst & Dekoration
Verwandeln Sie Ihren Wohnraum mit der Bunte, abstrakte, geometrische Wanduhr. Diese markante Uhr zeichnet sich durch ein mehrschichtiges Design mit sich überlappenden geometrischen Formen und eine lebendige Farbpalette aus, die jedem Raum dynamische Energie verleiht. Sie ist mehr als nur eine Uhr und wird zu einem atemberaubenden Blickfang für Homeoffices, Studios oder Wohnzimmer. Die 3D-architektonische Tiefe und der kühne Stil machen es perfekt für Fans von maximalistischem und zeitgenössischem Design. Halten Sie den Rhythmus mit dieser einzigartigen Wandkunst, die präzise Ingenieurskunst mit künstlerischem Ausdruck verbindet, im Stil.
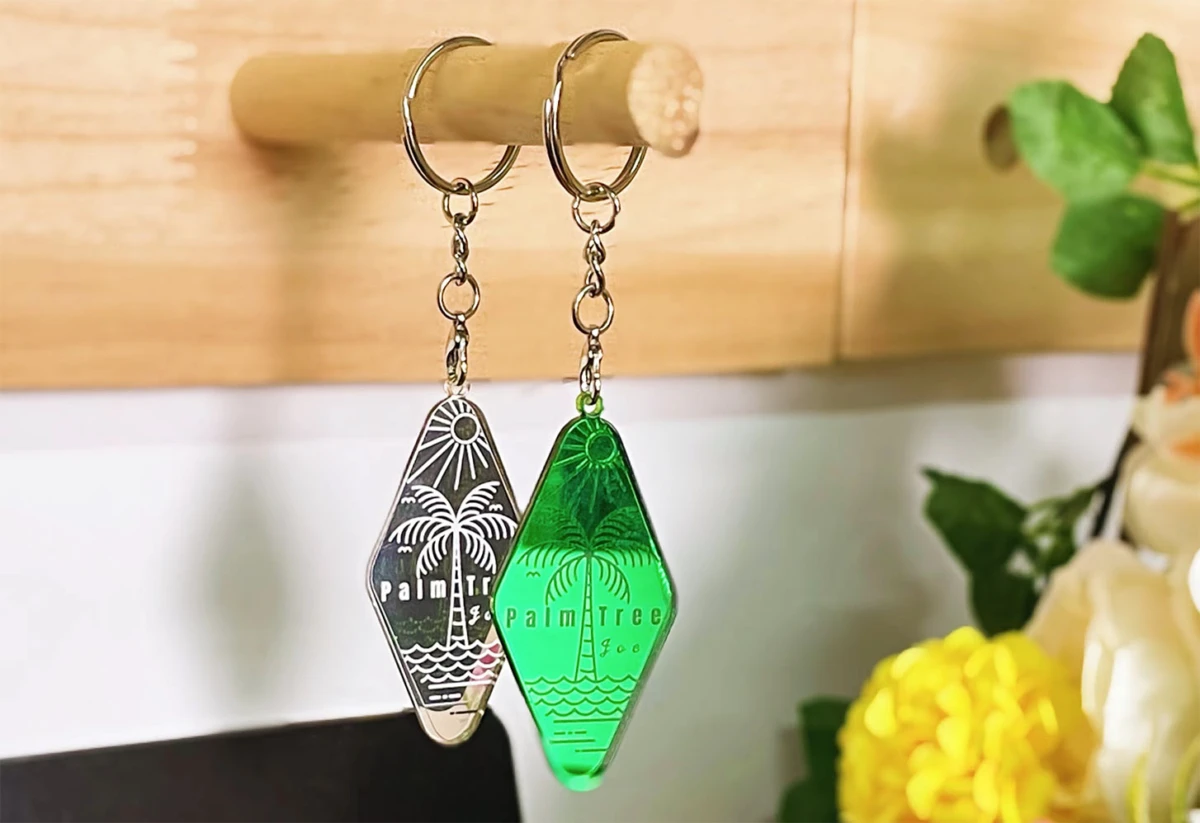
4. Personalisierte
Schlüsselanhänger Tragen Sie die entspannte Atmosphäre des Sommers überall mit Ihnen mit diesem Palmen-Schlüsselanhänger. Dieses kompakte Accessoire verleiht Ihren Schlüsseln, Ihrem Rucksack oder Ihrer Handtasche einen Hauch tropischen Flair. Hergestellt aus robusten Materialien und hält es den täglichen Gebrauch stand, hält es Ihre Schlüssel organisiert und zeigt gleichzeitig Ihre Liebe zur Küste. Die saubere, erkennbare Form macht sie zu einer hervorragenden Wahl für personalisierte Geschenke, Partygeschenke oder Strumpfgeschenke. Mit diesem stilvollen und praktischen Accessoire sind verträumte Strände und Meeresbrisen nie weit entfernt.
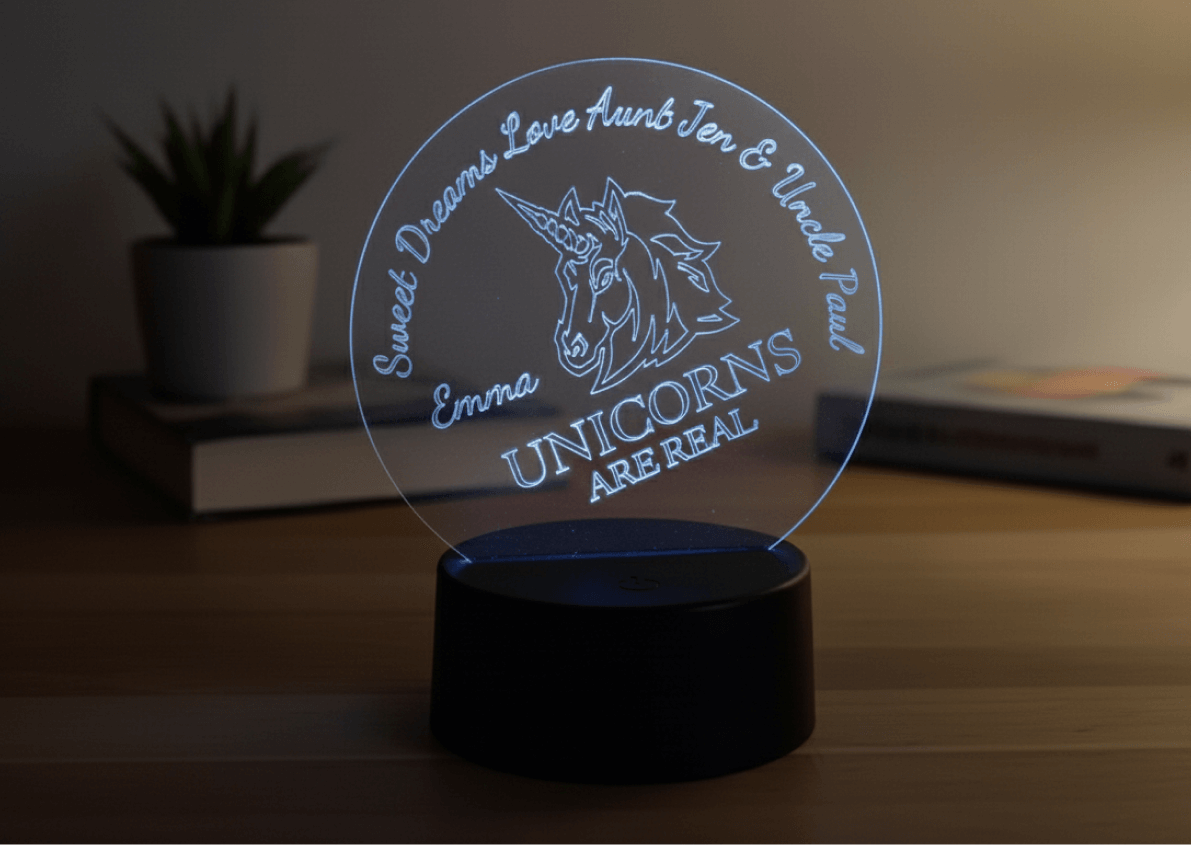
5. Maßgeschneidertes Nachtlicht (klares Acryl)
Erhellen Sie die Welt eines Kindes mit diesem Custom Clear Acryl Nachtlicht. Es ist das ultimative personalisierte Geschenk für Kinderzimmer und Schlafzimmer. Mit randbeleuchteter LED-Technologie scheint das präzise gravierte Design im Dunkeln zu schweben und einen sanften, beruhigenden Schein zu erzeugen, der Ängste vor der Schlafenszeit lindert. Dieses Projekt ermöglicht es Ihnen, einzigartige Designs zu kreieren, von Namen bis hin zu Lieblingscharakteren, und werden damit ein besonderes Andenken für Ihre Nichte, Ihren Neffen oder Ihr Kind. Sicher, energieeffizient und langlebig verleiht diese maßgefertigte Lampe jedem Raum eine warme und professionelle Note. Schenken Sie süße Träume mit einem Nachtlicht, das Kreativität und Funktion verbindet.
Was ist der beste Laserschneider für Acryl?
CO2-Laser sind die beste Wahl zum Schneiden von Acryl. Sie bieten unvergleichliche Kantenqualität und Schneideffizienz, die Diodenlaser nicht erreichen können. Die 10,6-Mikron-Infrarotwellenlänge von CO2-Röhren harmoniert perfekt mit der Struktur von Acryl und erzeugt wunderschön polierte, flammenbeschichtete Kanten. Für ernsthafte Hersteller ist ein 40-60W CO2-Laser ideal, da er genug Leistung liefert, um bis zu 10 mm Acryl zuverlässig zu schneiden, während gleichzeitig Geschwindigkeit und Kantenklarheit erhalten bleiben.
Während Diodenlaser wegen ihrer kompakten Größe und Kosteneffizienz immer beliebter werden, stehen sie bei Acryl vor erheblichen Herausforderungen. Ihre blaue Lichtwellenlänge (meist 450 nm) wird von transparenten und hellen Acrylfarben nicht gut absorbiert. Dies führt zu langsameren Schneidgeschwindigkeiten und Schwierigkeiten, saubere Schnitte auf Materialien mit mehr als 3–5 mm dicker zu erzielen. Diodensysteme sind jedoch hervorragend zum Gravieren von Acryloberflächen und können dünne Platten verarbeiten, was sie für Projekte mit Fokus auf Oberflächendetails nützlich macht.
Wie man Acryl einfach laserschneidet
 Schritt
 1: Bereiten Sie Ihr Design und Material vor
Erstellen SieVektorgrafik mit Haarlinienlinien im SVG- oder DXF-Format. Stellen Sie sicher, dass alle Schneidlinien ordnungsgemäß geschlossen und verbunden sind. Legen Sie Ihre Acrylplatte flach auf das Schneidbett mit intakter Schutzmaske, um die Oberflächen beim Schneiden vor Rauchrückständen zu schützen. Sichern Sie die Ecken mit Malerband oder magnetischen Haltemechanismen, um Verschiebungen während des Betriebs zu verhindern.
Schritt 2: Stell deinen Brennpunkt ein:
Stelle die Höhe des Laserkopfes so ein, dass der Strahl genau auf die Materialoberfläche fokussiert oder 1–2 mm in die Dicke hineinzoomt. Dieser Schritt ist entscheidend für die Kantenqualität. Verwenden Sie die Fokussiermessleiste Ihrer Maschine oder die zuverlässige "Visitenkartenmethode" für Genauigkeit, die den Unterschied zwischen guten und exzellenten Schnitten ausmachen kann.
Schritt 3: Konfigurieren Sie optimale Schneidparameter
Eingabeeinstellungen basierend auf Ihrer Materialdicke und Laserwattzahl. Für 3 mm gegossene Acryl auf einem 50W-CO2-System beginne mit 20 mm/s Geschwindigkeit bei 75 % Leistung. Führen Sie immer zuerst einen Probeschnitt auf Schrottmaterial durch. Die perfekten Parameter zu erreichen, dauert Minuten und spart Stunden an Nacharbeit.
Schritt 4: Führen Sie mit richtiger Belüftung durch
Schalten Sie Ihre Abluftanlage vor dem Start ein, da Acryl Dämpfe erzeugt, die sofort abgeleitet werden müssen. Überwachen Sie die ersten Sekunden des Schneidens, um die Durchschlagstiefe und die Kantenschärfe zu überprüfen, und nehmen Sie bei Bedarf Echtzeitanpassungen vor.
Schritt 5: Reinige und enthülle deine Ergebnisse Sobald
der Schnitt abgeschlossen ist und das Material für 30-60 Sekunden abgekühlt ist, entferne die Stücke und ziehe die Schutzmaske ab. Ein schnelles Abwischen mit Isopropylalkohol entfernt jegliche Rückstände und enthüllt die beeindruckenden, flammenpolierten Kanten.
Tipps für perfektes Acryllaserschneiden
Diese getesteten Tipps adressieren häufige Herausforderungen und Strategien zur Erreichung makelloser Kanten, präzisen Maße und großartiger visueller Klarheit.
Entfernen Sie vor dem Gravieren
das Maskieren Schutzpapier oder -folie vor dem Gravieren vom Acryl. Das Eingravieren durch die Maske lässt sie in das Design schmelzen und hinterlässt einen klebrigen Rückstand und einen schmutzig aussehenden Frost statt einer sauberen Oberfläche.
Verwenden Sie Low Air Assist zum Gravieren
Beim Gravieren sehr Low Air Assist – nur etwas Luft, um das Objektiv sauber zu halten. Zu viel Luft bläst verdampftes Plastik zurück auf die Oberfläche und erzeugt trübe oder streifenförmige Stellen.
Control Power & Speed for a Soft Frost
Zielen Sie auf moderate Leistung mit höherer Geschwindigkeit (z. B. 40-55 % Leistung bei 800-1200 mm/s, je nach Maschine), um eine glatte, mattweiße Oberfläche zu erzielen. Hohe Leistung oder langsame Geschwindigkeit können tiefe, raue Rillen statt feinem Frost erzeugen.
Optimieren Sie DPI / LPI (Linienabstand)
Für mattierte Gravuren beginnen Sie mit einer DPI- (Dots Per Inch) oder LPI-Einstellung (Lines Per Inch) bei etwa 300-350. Eine niedrige Einstellung lässt sichtbare Scanlinien zurück, während eine hohe Einstellung die Arbeitszeit und die Wärmeansammlung erhöht, ohne die Qualität zu verbessern.
Rückengraveur für klares Acryl (Spiegeldesign)
Für professionelle randbeleuchtete Schilder oder Displays gravieren Sie die Rückseite des Acryls mit einem spiegelbildlichen Design. Dadurch bleibt die Vorderseite glatt und glänzend, was bei Beleuchtung einen hochwertigen "schwebenden" Bildeffekt erzeugt.
Lufthilfe für das Schneiden anpassen, um Wellen zu vermeiden.
Verwenden Sie mehr Luft zum Schneiden als zum Gravieren, aber vermeiden Sie es, sie maximal zu sprengen. Übermäßige Luft kann Wellen und Streifen an der Schnittkante verursachen. Streben Sie ein glattes, glasiges Finish an, indem Sie eine zuverlässige Einstellung finden, die in einem Durchgang sauber schneidet.
Unterschied zwischen Acryl und Holzverarbeitung
Acryl schmilzt, während Holz verbrennt. Für Acryl solltest du dich darauf konzentrieren, Schmelzen und Nebel mit den richtigen Luft- und Energieeinstellungen zu kontrollieren. Für Holz verwenden Sie Malerband, höhere Luftunterstützung und Nachbearbeitung wie Schleifen, um Brandspuren zu verhindern und zu entfernen.
Kontinuierlich testen und von Profis lernen
Es gibt keine Einheitseinstellungen. Erstellen und beschriften Sie Testkarten mit unterschiedlichen Geschwindigkeits-, Leistungs- und DPI-Kombinationen für Ihr spezielles Material und Ihre Maschine. Bewahren Sie sie für die Zukunft auf und lernen Sie von bewährten Arbeitsabläufen professioneller Hersteller.
Laserschneiden von Acryl-FAQs: Häufige Fragen beantwortet
1. Wie reinigt man Acryl nach der Lasergravur?
Verwende ein weiches Mikrofasertuch mit mildem Seife und Wasser. Vermeiden Sie aggressive Lösungsmittel. Wischen Sie vorsichtig Rückstände und Fingerabdrücke ab und trocknen Sie sie dann mit einem sauberen, fusselfreien Tuch.
2. Wie erkennt man, ob Acryl laserbar ist?
Prüfen Sie die Materialbeschreibung für "gegossene Acryl" oder "PMMA". Vermeiden Sie PVC oder unbekannte Kunststoffe. Wenn Sie unsicher sind, fragen Sie Ihren Lieferanten oder führen Sie einen kleinen Test abseits Ihres Hauptdesigns durch.
3. Kann man Plexiglas laserschneiden?
Ja, Plexiglas ist ein Markenname für Acryl (PMMA). Es kann wie andere Acrylplatten lasergeschnitten und graviert werden, solange man einen CO₂-Laser verwendet und richtig einstellt.
4. Wie erreiche ich saubere Gravuren auf Plexiglas mit Lasertechnologie?
Entferne die Maskierung, benutze Low Air Assist, stell moderate Leistung bei höherer Geschwindigkeit ein, stelle den DPI auf etwa 300–350 ein und führe Tests durch, bis du einen gleichmäßigen Frost-Effekt ohne tiefe Rillen bekommst.
Beginnen Sie Ihr Abenteuer beim Laserschneiden von Acryl mit Atomm
Ihre Reise mit Laserschneiden von Acryl beginnt hier. Mit den Techniken und Ideen aus diesem Leitfaden können Sie einfache Acrylplatten in außergewöhnliche Stücke verwandeln, die Ihre künstlerische Vision widerspiegeln.
Egal, ob Sie Ihren ersten maßgefertigten Schlüsselanhänger anfertigen, eleganten Schmuck anfertigen, der das Licht einfängt, oder atemberaubende Dekorationen für Ihr Zuhause gestalten – das Laserschneiden von Acryl bietet Ihnen die richtige Mischung aus Präzision und kreativer Freiheit. Diese wunderschönen, flammenpolierten Kanten und detaillierten Designs verleihen jedem Projekt eine professionelle Note.
Die Atomm-Community unterstützt Macher auf allen Ebenen. Warte nicht auf den perfekten Moment. Schnappen Sie sich etwas buntes Acryl, starten Sie Ihre Maschine und lassen Sie Ihre Fantasie den Weg leiten. Jedes Stück, das Sie schaffen, stärkt Selbstvertrauen und bringt die Zufriedenheit von handgefertigter Arbeit. Ihre Reise zum Laserschneiden von Acryl beginnt heute, und wir können es kaum erwarten, die wunderschönen Kreationen zu sehen, die Sie schaffen werden!