
Report
![[Laser cut and engrave] Laser Engraved Wooden Heart Wind Chime with Inspirational Quote](https://image-res.atomm.com/resource/xtool/community/attachment/xtool-community/bfd80d13-9be5-4cc7-bfb1-3b75a16847a9.png?x-oss-process=image/resize,w_1200,h_900,limit_0/interlace,1/format,webp/auto-orient,1)
![[Laser cut and engrave] Laser Engraved Wooden Heart Wind Chime with Inspirational Quote](data:image/png;base64,iVBORw0KGgoAAAANSUhEUgAAAAoAAAAKCAYAAACNMs+9AAAAAXNSR0IArs4c6QAAABdJREFUKFNjZCASMBKpjmFUId6QIjp4AAppAAuXjCs4AAAAAElFTkSuQmCC)
![[Laser cut and engrave] Laser Engraved Wooden Heart Wind Chime with Inspirational Quote](https://image-res.atomm.com/resource/xtool/community/attachment/xtool-community/bfd80d13-9be5-4cc7-bfb1-3b75a16847a9.png?x-oss-process=image/resize,w_200,h_150,limit_0/interlace,1/format,webp/auto-orient,1)
![[Laser cut and engrave] Laser Engraved Wooden Heart Wind Chime with Inspirational Quote](https://image-res.atomm.com/resource/xtool/community/attachment/xtool-community/21afe675-3c32-4861-b60c-43be12f3ca6e.png?x-oss-process=image/resize,w_200,h_150,limit_0/interlace,1/format,webp/auto-orient,1)
![[Laser cut and engrave] Laser Engraved Wooden Heart Wind Chime with Inspirational Quote](https://image-res.atomm.com/resource/xtool/community/attachment/xtool-community/49d66294-7b83-4206-96cd-218c7a8216e6.png?x-oss-process=image/resize,w_200,h_150,limit_0/interlace,1/format,webp/auto-orient,1)
![[Laser cut and engrave] Laser Engraved Wooden Heart Wind Chime with Inspirational Quote](https://image-res.atomm.com/resource/xtool/community/attachment/xtool-community/ef4f2d86-a8d9-44cf-b78f-5cad39766639.png?x-oss-process=image/resize,w_200,h_150,limit_0/interlace,1/format,webp/auto-orient,1)
Custom Engraved Wind Chime Personalized Garden Decor
 Instruction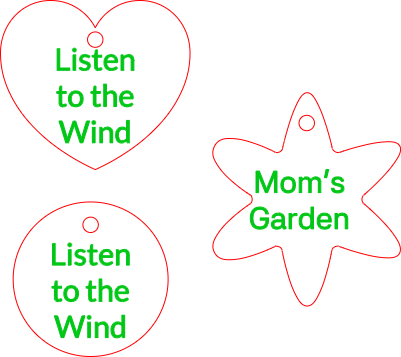
Custom Engraved Wind Chimes
.xcs
Application scenario
Laser processing
Machine & module

xTool D1 Pro
20WCompatible xTool Machine
New
M2
10W, 20WF1 Ultra
20WM1
5W, 10WD1
5W, 10W, 20WD1 Pro
5W, 10W, 40WP2
55WF1
10WS1
10W, 20W, 40WM1 Ultra
10W, 20WP2S
55WMaterial used

1/2"(12mm) Black Walnut Plywood

1/4"(6mm) Red Oak Plywood

34
1518
Information
      Every time the wind blows, she’ll think of you. 🌬️🎶

Add a touch of magic to her garden, porch, or patio with our Custom Engraved Wind Chimes. While flowers fade, the soothing, melodic tones of a beautiful wind chime offer a lasting reminder of love, family, and cherished memories.

Crafted with care at DIY Life, we take high-quality, musically tuned wind chimes and replace the standard wind catcher (the "sail" at the bottom) with a beautiful, custom-cut piece of wood. Whether you choose a classic circle, a rustic flower, or a sweet heart, we will permanently laser-engrave your special message right into the wood.
Instruction
1
Step1
Preparation and Safety
- Ventilation: Ensure your smoke purifier is on or your exhaust fan is venting outside. Cutting wood produces significant smoke and char.
- Air Assist: Always use Air Assist when cutting wood. It blows away debris and prevents the wood from catching fire, resulting in cleaner cuts.
- Fire Safety: Never leave your laser unattended while cutting.
2
Step2
Configuring xTool Studio
- Connect Your Device: Open XCS and connect to your S1 or P2 via USB, Wi-Fi, or IP.
- Import Your Design: Open the xcs file you downloaded from Atomm.
- Select Mode:
- S1: Choose Process on Flat (unless using the riser base/rotary).
- P2: Choose Slat Flat.
- S1: Choose Process on Flat (unless using the riser base/rotary).
- Capture the Canvas: * On the P2, click Refresh to take a wide-angle photo of your wood.
- On the S1, use the Twin-Point Positioning feature to define your work area, as it does not have a camera.
- On the S1, use the Twin-Point Positioning feature to define your work area, as it does not have a camera.
3
Step3
Setting the Focus
Proper focus is the difference between a clean cut and a scorched mess.
- Auto-Measure: In the right-hand panel, click the Auto-measure icon (it looks like a small ruler/target).
- S1: The probe will drop down to touch the wood.
- P2: The laser head will move over the material to measure the height via the built-in sensor.
4
Step4
Framing and Starting
- Framing: Click Framing on the bottom right. The laser head will move in a rectangle to show you exactly where the cut will happen. Ensure it doesn't hit any pins or magnets.
- Process: Click Process, then Start.
- Physical Button: Finally, press the Start button on the machine itself to begin the cut.
Comments
Remixes



'/%3e%3cdefs%3e%3clinearGradient%20id='paint0_linear_1433_15752'%20x1='12.5'%20y1='5'%20x2='12.5'%20y2='19.2596'%20gradientUnits='userSpaceOnUse'%3e%3cstop%20stop-color='%232F7FFF'/%3e%3cstop%20offset='1'%20stop-color='%232661F1'/%3e%3c/linearGradient%3e%3c/defs%3e%3c/svg%3e)

You may also like

$2.99
$2.99
Credits299
Zombie Hand Garden Stake Laser Cut

1

Laser Cut Wooden Birdhouse with Decorative Roof and Small Gate

8
31

'/%3e%3cdefs%3e%3clinearGradient%20id='paint0_linear_1433_15726'%20x1='12'%20y1='5.25'%20x2='12'%20y2='18.75'%20gradientUnits='userSpaceOnUse'%3e%3cstop%20stop-color='%23FFC654'/%3e%3cstop%20offset='1'%20stop-color='%23FF8D12'/%3e%3c/linearGradient%3e%3c/defs%3e%3c/svg%3e)
Butterfly Birdfeeder

61
281

Believe! Bigfoot UFO Personalized Garden Address Stake

0
6

Rustic Olive Wood Outdoor Wall Thermometer

0
1

Laser Cut Easter Bunny Garden Decoration with Paintbrush and Egg

21
230

Rainbow Birdhouse

9
17

Garden Gnome Silhouette Lawn Stake

2
45

PNW Haven laser-cut birdhouse

35
261

Wedding Arch and Table with Floral Design Laser Cut. Floral Design. Wedding Decorations. Outdoor Decor. Garden Arch

6
32

$5.99
$5.99
Credits599
Patriotic Garden Stakes Bundle
1

Black Stainless Steel Flask with Custom Koi Fish Laser Engraving

5
40

Hanging Birdfeeder with Butterfly Accents
15
72

Laser Cut Gourd Birdhouse with Veneer Cut Out Bird Design

15
20

Acrylic shed door catch

4
6

Engraved Stainless Steel Personalized Multi-Tool Pocket Knife

3
24

Personalized Golf Tees with Father's Day Messages For Dads

3
8

Laser Cut Merry Christmas Yard Sign with Santa, Reindeer, and Tree

5
47