
![[Laser cut and engrave] Laser Cut Wooden Coffee Storage Box with Sliding Door and Labeled Drawers](https://image-res.atomm.com/resource/xtool/community/attachment/xtool-community/159479f2-058f-445f-9197-521bc166ed54.jpg?x-oss-process=image/resize,m_fill,w_1280,h_960,limit_0/interlace,1/format,webp/auto-orient,1)
![[Laser cut and engrave] Laser Cut Wooden Coffee Storage Box with Sliding Door and Labeled Drawers](data:image/png;base64,iVBORw0KGgoAAAANSUhEUgAAAAoAAAAKCAYAAACNMs+9AAAAAXNSR0IArs4c6QAAABdJREFUKFNjZCASMBKpjmFUId6QIjp4AAppAAuXjCs4AAAAAElFTkSuQmCC)
![[Laser cut and engrave] Laser Cut Wooden Coffee Storage Box with Sliding Door and Labeled Drawers](https://image-res.atomm.com/resource/xtool/community/attachment/xtool-community/159479f2-058f-445f-9197-521bc166ed54.jpg?x-oss-process=image/resize,m_fill,w_160,h_120,limit_0/interlace,1/format,webp/auto-orient,1)
![[Laser cut and engrave] Laser Cut Wooden Coffee Storage Box with Sliding Door and Labeled Drawers](https://image-res.atomm.com/resource/xtool/community/attachment/xtool-community/f3c579f4-fbe0-4b3b-957a-66b64d397edf.jpg?x-oss-process=image/resize,m_fill,w_160,h_120,limit_0/interlace,1/format,webp/auto-orient,1)
![[Laser cut and engrave] Laser Cut Wooden Coffee Storage Box with Sliding Door and Labeled Drawers](https://image-res.atomm.com/resource/xtool/community/attachment/xtool-community/ee0480d8-88e0-4312-aefc-bf1f38b0ccf2.jpg?x-oss-process=image/resize,m_fill,w_160,h_120,limit_0/interlace,1/format,webp/auto-orient,1)
Tambour Expresso/Coffee Cabinet
 Instruction


Information
I wanted to make a Tambour cabinet, which usually requires multiple tools, so I decided to make one only using Xtool S1 20W. I also created sugar and creamer boxes using a box generator. Additionally, I used scrap pieces of wood to build a shelf to hold the sugar and creamer. Finally, I added some mini espresso tumblers with the saying "Adventures Await. Outln" This space could also be used to hold the Outln machine or additional tools.
Instruction
Step1


1st photo is building the box using the box generator.
2nd & 3rd photo is adding the track the top and bottom of the box. Make sure the edge of the track and box line up in the front and to the side.
4th photo is how both tracks should look. I like to use clothespins to hold down the track while it is drying.
5th photo assembled the door by using the pieces and cutting out the slats as decor.
6th photo This is how the door looks before it is glued to the duck canvas. When you glue the duck canvas, make sure to apply masking tape around the edges to prevent the canvas from adhering to the slats that will eventually fit into the track.
7th photo The slat pieces that were cut out, and the arrow indicates where I sourced the decorative pieces for the door.
8th photo is how the door looks with the excess duck canvas removed. You can see how the outside of the door does not have canvas attached to it, as the outside of the door goes into the track.
9th photo After the door has dried and cured, you will need to roll it up and carefully break apart any slats that have stuck together. Go slowly, as you do not want to accidentally break a slate.
If you have any questions, please reach out.
Thank you!
Remixes



You may also like

Laser-engraved wooden coffee box with a decorative lid


Coffee Storage Cabinet with pod and frother holder


Laser Engraved Wooden Box for Sugar Pouches


'/%3e%3cdefs%3e%3clinearGradient%20id='paint0_linear_1433_15726'%20x1='12'%20y1='5.25'%20x2='12'%20y2='18.75'%20gradientUnits='userSpaceOnUse'%3e%3cstop%20stop-color='%23FFC654'/%3e%3cstop%20offset='1'%20stop-color='%23FF8D12'/%3e%3c/linearGradient%3e%3c/defs%3e%3c/svg%3e)
Laser Engraved Wooden Kitchen Shelf with Just Coffee Lettering


Coffee K Cup Holder with Drawer


Coffee Bar Organizer – All-in-One Accessory Holder


Laser Cut Wooden Coffee Pod Holder x OutIn
.jpg?x-oss-process=image/resize,m_fill,w_80,h_80,limit_0/interlace,1/format,webp/auto-orient,1)

Laser Engraved Wooden Coffee Storage Box with Vintage Design


Coffee Mug, Coaster and Pod Organizer


Gravity-Fed Pod Tower


Coffee Corner Shelf


Coffee station Organizer

Decorative Tier Tray for Coffee Bar

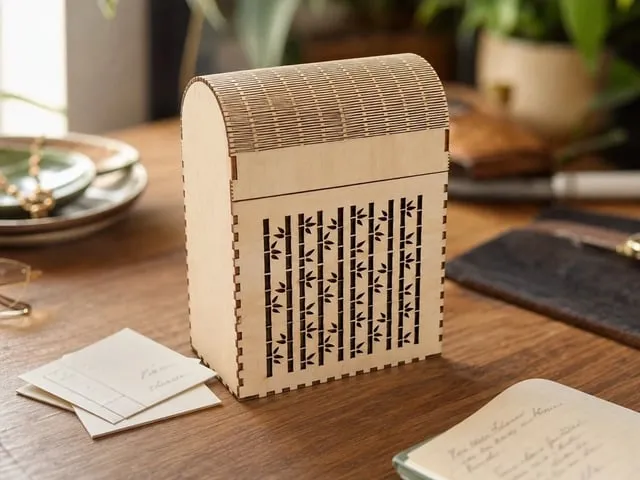
Wooden box with flexible lid and bamboo pattern, casket, utensil silo


Coffee stir Stick Holder


Laser Cut Wooden Smart Coffee Station


Wooden storage box with bear motif and rolling lid


Laser Engraved Wooden Coffee Sign with Coffee Beans Design
