
Cięcie przezroczystego akrylu laserem diodowym może być trudne. Podczas gdy lasery diodowe są idealne do grawerowania i cięcia drewna, skóry oraz ciemnego akrylu, przezroczysty akryl nie absorbuje efektywnie długości fali lasera.
Efekt? Twój laser może przejść przez materiał bez cięcia albo skończyć z brudnymi, stopionymi krawędziami.
Na szczęście, przy odpowiednim przygotowaniu, ustawieniach i technikach, możesz uzyskać czyste i skuteczne cięcia na przezroczystym akrylu za pomocą lasera diodowego. Ten przewodnik pokaże Ci, jak to zrobić.
⃣ 1️Dlaczego przezroczysty akryl jest trudny dla laserów diodowych
W przeciwieństwie do ciemnych lub nieprzezroczystych materiałów, przezroczysty akryl przepuszcza większość światła laserowego. Ponieważ laser diodowy emituje światło widzialne (zwykle około 450nm niebieskiego), akryl prawie nie pochłania tej energii.
Typowe problemy to:
- cięcia nie przechodzą całkowicie
- , krawędzie topią się lub stają się szorstkie,
- odbicia lasera mogą obniżać efektywność
💡 cięcia. Dlatego lasery diodowe tną czarne lub kryjące akryl znacznie łatwiej niż przezroczyste arkusze.
⃣ 2️Przewodnik krok po kroku po cięciu przezroczystego akrylu
Krok 1: Przygotowanie materiału
- Nałóż czarną taśmę maskującą lub matową czarną farbę w sprayu na powierzchnię cięcia
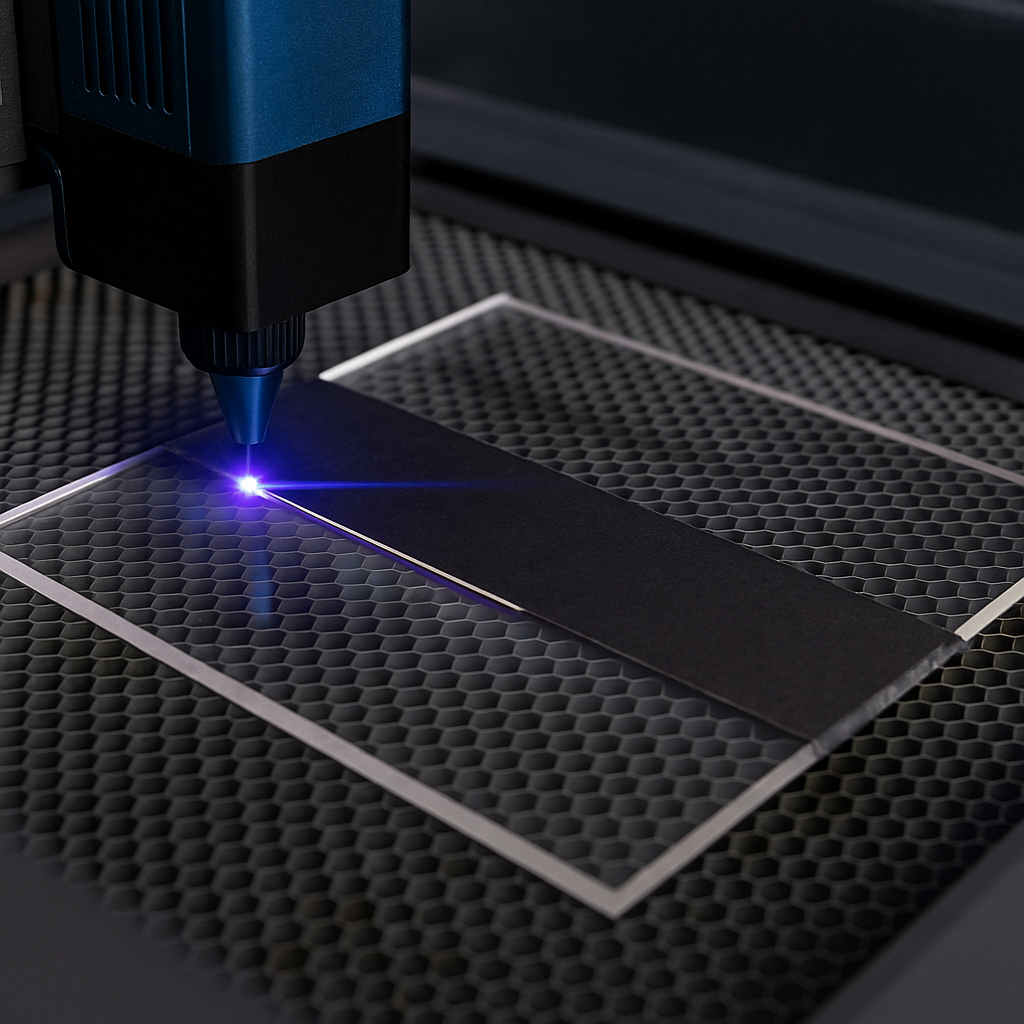
- Pomaga to laserowi diodowemu pochłaniać energię zamiast przechodzić
- przez niąDo farb w sprayu użyj zdejmowalnej, rozpuszczalnej w wodzie powłoki
Krok 2: Ustaw ostrość lasera i moc lasera
- Często potrzebna jest wysoka moc (80–100%).
- Wolna prędkość i wielokrotne przejścia dają czystsze cięcia niż pojedyncze wolne wypalanie
- . Upewnij się, że ostrość lasera jest precyzyjna — nawet niewielkie rozmycie może zapobiec pełnej penetracji
Krok 3: Zastosowanie wielokrotnych przejśćKrok 3: Zastosowanie wielokrotnych przejść
- "Wykonaj 2–5 lżejszych przejść zamiast jednego mocnego cięcia
- Pozwól na krótkie przerwy między przejściami, aby uniknąć przegrzania i topienia
krawędzi
Krok 4: Upewnij się o odpowiednią wentylację
- Opary akrylowe mogą być nieprzyjemne i potencjalnie szkodliwe
- Zawsze włączaj wentylator powietrza lub wyciąg podczas cięcia
⃣ 3️Dodatkowe wskazówki dla lepszych rezultatów
- Wybierz odlewany akryl zamiast wytłaczanego akrylu, odlewany akryl tnie czyści i lepiej poleruje
- . Lekko podnieś arkusz akrylowy. Zapobiega odbijaniu i śladom ciepła,
- używaj wentylatora lub lekkiego spryskiwania wodą na ścieżce cięcia. Pomaga zminimalizować topnienie i poprawia klarowność krawędzi. Najpierw
- przetestuj kawałki odpadów. Dostosuj prędkość, moc i liczbę przepustów przed podjęciem
końcowego
⃣ Kiedy rozważyć laser CO₂ Podczas gdy lasery diodowe mogą ciąć przezroczysty akryl przy odpowiednim przygotowaniu, laser CO₂ da: Szybsze, czystsze cięcia z polerowanymi krawędziami Brak konieczności maskowania czy malowania Możliwość stosowania grubszych arkuszy akrylowych (3–10mm+) 4️
Jeśli planujesz regularnie tworzyć przezroczyste projekty akrylowe — takie jak szyldy LED, nagrody czy warstwowe dekoracje — laser CO₂ może zaoszczędzić czas i poprawić jakość.
Podsumowanie Cięcie przezroczystego akrylu laserem diodowym jest wyzwaniem, ale możliwe, jeśli:
- Maskujesz materiał taśmą lub matową farbą ,
- używasz wysokiej mocy, wolnej prędkości i wielokrotnych przejść
- Utrzymuj powierzchnię czystą, wentylowaną i dobrze przygotowaną
Z cierpliwością i testowaniem możesz tworzyć czyste krawędzie i profesjonalnie wyglądające projekty — od spersonalizowanych breloczków i ozdób po małe panele świetlne i dekoracje DIY.
✨ Chcesz więcej inspiracji do cięcia akrylem? Odwiedź społeczność Atomm, aby zobaczyć prawdziwe projekty makerów i uczyć się od innych entuzjastów laserów.