
Metal is the most intimidating material to engrave — and the most rewarding. A mark in steel or brass feels permanent in a way wood and acrylic never do. But metal also punishes the wrong tool: a regular blue-diode laser bounces right off bare stainless, a heavy hand snaps engraving bits, and "just use acid" advice can go badly.
The short answer:
- Fiber or infrared laser — engraves bare metal beautifully.
- Rotary tool — freehand marks and one-offs.
- Salt-water electro-etching — deep, permanent marks in steel with a battery and kitchen salt.
- Hammer and graver — the classic jeweler's craft.
This guide covers all four — what you need, the real steps, and which metals suit each.

Which metals can you engrave?
Not all metal behaves the same under a tool or a beam:
- Anodized aluminum — the easiest of all. Even a basic diode laser marks it crisply, because the beam removes the dyed surface layer for instant contrast.
- Stainless steel — excellent with a fiber/IR laser, takes color marking, and electro-etches beautifully. Polished stainless needs reflection precautions under a laser.
- Brass and copper — engrave deep and detailed with fiber/IR; too reflective for a diode.
- Titanium — the star of color marking; oxide layers produce vivid hues.
- Chrome-plated and mirror-polished metal — caution. The reflectivity can bounce a laser beam back into the machine; use an IR laser, tilt the piece slightly, and test carefully.
Method 1: How to Laser Engrave Metal
The laser is the fastest, most precise way to mark metal — logos, photos, serial numbers, even full-color art on stainless and titanium. But the laser type decides everything.
How to pick a laser for metal
This is the mistake that wastes the most money, so here it is plainly — straight from xTool's own documentation:
| Laser type | Bare metal? | Coated / anodized metal? |
|---|---|---|
| Fiber / 1064nm IR (xTool F1 Ultra, F2 Ultra, IR modules for D1/S1/F1) | ✅ engraves stainless, brass, copper, titanium, gold, silver | ✅ |
| Blue diode (xTool D1, S1 blue module) | ❌ bare, reflective metal | ✅ anodized, painted, or sprayed metal; heat-oxide marks on stainless |
| CO2 (xTool P2) | ❌ without help | ✅ with laser marking spray |
So: for bare metal, you want a fiber or IR laser. A diode still covers a lot — anodized aluminum tags, coated tumblers, painted steel — and a CO2 machine works via marking spray. Beyond type, consider whether you want deep engraving (repeated passes for tactile depth), surface marking, or MOPA color engraving — xTool's F2 Ultra documentation shows full-color marks on 304 stainless, where tiny shifts in power and speed change the hue.
The benefits: permanent marks in seconds, photographic detail, batch repeatability, and effects (like color on titanium) no hand tool can produce.

If you'd rather buy once and cover the hardest rows of that table, the premium pick is the xTool F2 Ultra UV: its UV source cold-marks bare stainless and titanium with ultra-fine, high-contrast detail — no marking spray, no coating — and the same machine handles glass, plastics, and even 3D engraving inside clear crystal blocks. The steps below work the same on any of these laser types — step 2 tells you which prep, if any, your machine needs.
What You Need
- A laser suited to your metal (fiber/IR for bare metal; diode for anodized/coated; CO2 + marking spray)
- xTool Creative Space (XCS) and your design file
- Laser marking spray if you're on CO2 (clean, spray, dry 3–5 minutes)
- 1064nm-rated goggles, magnetic clamps or tape, ventilation
Steps to Laser Engrave Metal

Following xTool's own metal processing guide:
- Clean and degrease the metal — even a fingerprint shows up in the finished mark.
- Prep by laser type. Bare metal on fiber/IR needs nothing. On CO2, spray a thin, even coat of marking spray and let it dry 3–5 minutes (a light second coat adds depth). On a diode, work with anodized or coated metal.
- Secure the piece with magnetic clamps or tape so heat can't warp or shift it. For shiny metal, xTool documents slipping a ~1 mm spacer under one edge to tilt it slightly, so reflections don't bounce straight back into the module.
- Set up in XCS and load settings from the built-in material presets for your machine and metal — xTool points users to these rather than one-size numbers. For photos on metal, use bitmap engraving with Jarvis mode on IR lasers.
- Focus, frame, and engrave. For deeper marks, add passes rather than maxing power in one go.
- Finish. Wash off marking-spray residue with water; for color engraving, xTool documents applying a protective balm to stop the oxide colors dulling.
Tip: Engraving something shiny? Increase power and reduce speed for a visible mark, and always wear goggles rated for your laser's wavelength — a 1064nm IR beam is invisible, and xTool's own FAQ warns reflections can cause irreversible eye damage.
Method 2: How to Engrave Metal with a Rotary Tool (Dremel)
A rotary tool with carbide or diamond bits is the accessible way to put freehand marks in metal — nameplates, tool marking, and personalizing finished goods.

What You Need
- A rotary tool, ideally with a flex-shaft for pen-like control
- Tungsten-carbide engraving cutters for aluminum, brass, and mild steel
- Diamond-point bits for stainless and hardened steel
- A vise or clamps, marker or stencil, safety glasses
Steps to Engrave Metal with a Rotary Tool
- Clean the metal and clamp it — never hold a small piece against a spinning bit.
- Transfer the design with a fine permanent marker or a taped stencil scribed through.
- Trace the outline at low-to-medium speed with light passes — depth comes from repetition, not pressure.
- Deepen and widen gradually, brushing away metal dust as you go.
- Make it pop: rub black enamel into the lines, wipe the surface clean, and polish.
Method 3: How to Etch Metal with Salt Water and Electricity
The knife-maker's favorite: a 9V battery, salt water, and a vinyl stencil put a deep, permanent etch in steel. No strong acids involved, and the results look professionally done.

What You Need
- A DC power source — a 9V battery for small marks, a 12V charger for deeper etches
- Two wires with alligator clips and cotton swabs
- Table salt and water (about 2 tablespoons per liter)
- An adhesive vinyl stencil, degreaser, and nitrile gloves
Steps to Etch Metal with Salt Water
- Degrease the metal completely — oil causes a splotchy etch.
- Apply the vinyl stencil and burnish the edges down hard.
- Connect positive (+) to the workpiece and negative (−) to a salt-water-soaked swab. Polarity matters: this direction removes metal; reversed, it deposits a dark mark instead (some makers alternate for a black-filled etch).
- Dab — don't rub — the swab onto the exposed metal a few seconds at a time, wiping away the gray sludge between dabs.
- Repeat until the etch is deep enough (30 seconds to a few minutes), then disconnect, peel, rinse, and oil the metal.
Tip: Work ventilated and glove up — the process releases a little hydrogen gas, and etching stainless leaves chromium-bearing sludge that shouldn't go down the drain in quantity. Small hobby amounts are manageable; just don't make a habit of pouring it away.
Method 4: How to Hand Engrave Metal with a Graver
The traditional jeweler's and gunsmith's craft: pushing or tapping a razor-sharp graver through the metal. The steepest learning curve, the most personal result.

What You Need
- Gravers (a 90° square/V-point for lines, flat and round profiles for shading)
- A chasing hammer, or a palm-push handle — or a modern pneumatic engraving pen
- An engraver's ball vise or sandbag, magnification, and sharpening stones
- A friendly metal to learn on: copper, brass, or silver
Steps to Hand Engrave Metal
- Secure the work in a rotating vise and transfer your design.
- Hold the graver at a low angle (~15–20°) and push, or tap with light hammer blows, raising a fine curl of metal along the line.
- Turn the work into the cut for curves — the vise rotates while your hand stays steady.
- Cut shallow first, then re-cut for depth and shading with different graver profiles.
- Deburr, polish, and optionally fill the cuts with wax or ink for contrast.
How do the metal engraving methods compare?
| Method | Best for | Tools & cost | Detail | Repeatability | Difficulty |
|---|---|---|---|---|---|
| Laser (fiber/IR) | Batches, photos, color marks | Laser machine ($$$$) | Excellent | Perfect | Easy–medium |
| Rotary tool | Freehand, one-offs | Rotary + bits ($$) | Medium | Low | Medium |
| Salt-water etch | Deep marks in steel, knife logos | Battery + stencil ($) | Stencil-limited | Good | Easy |
| Hand graver | Heirloom jewelry, gun art | Gravers + vise ($$$) | Very high (slow) | Low | Very hard |
10 Metal Engraving Examples to Try
Engraved metal feels permanent, premium, and personal — which is why these projects sell so well. Here are ten popular metal engraving ideas, each a real community design you can open and make for free.
1. Engraved Knife Blades
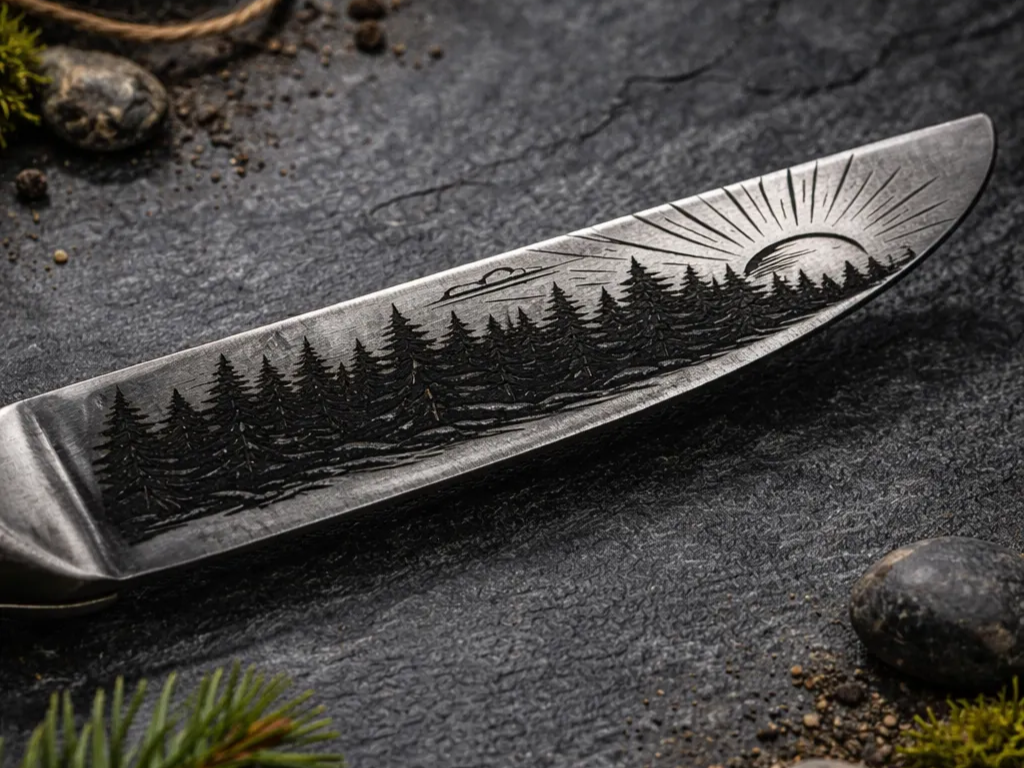
An engraved blade is the classic metal project: a mountain scene, a name, or a maker's mark fiber-lasered or electro-etched into the steel. The mark survives sharpening and daily use. Knife blanks are affordable, and a single design elevates them into gifts — browse more ideas in the metal projects collection.
2. Couple Matching Tags
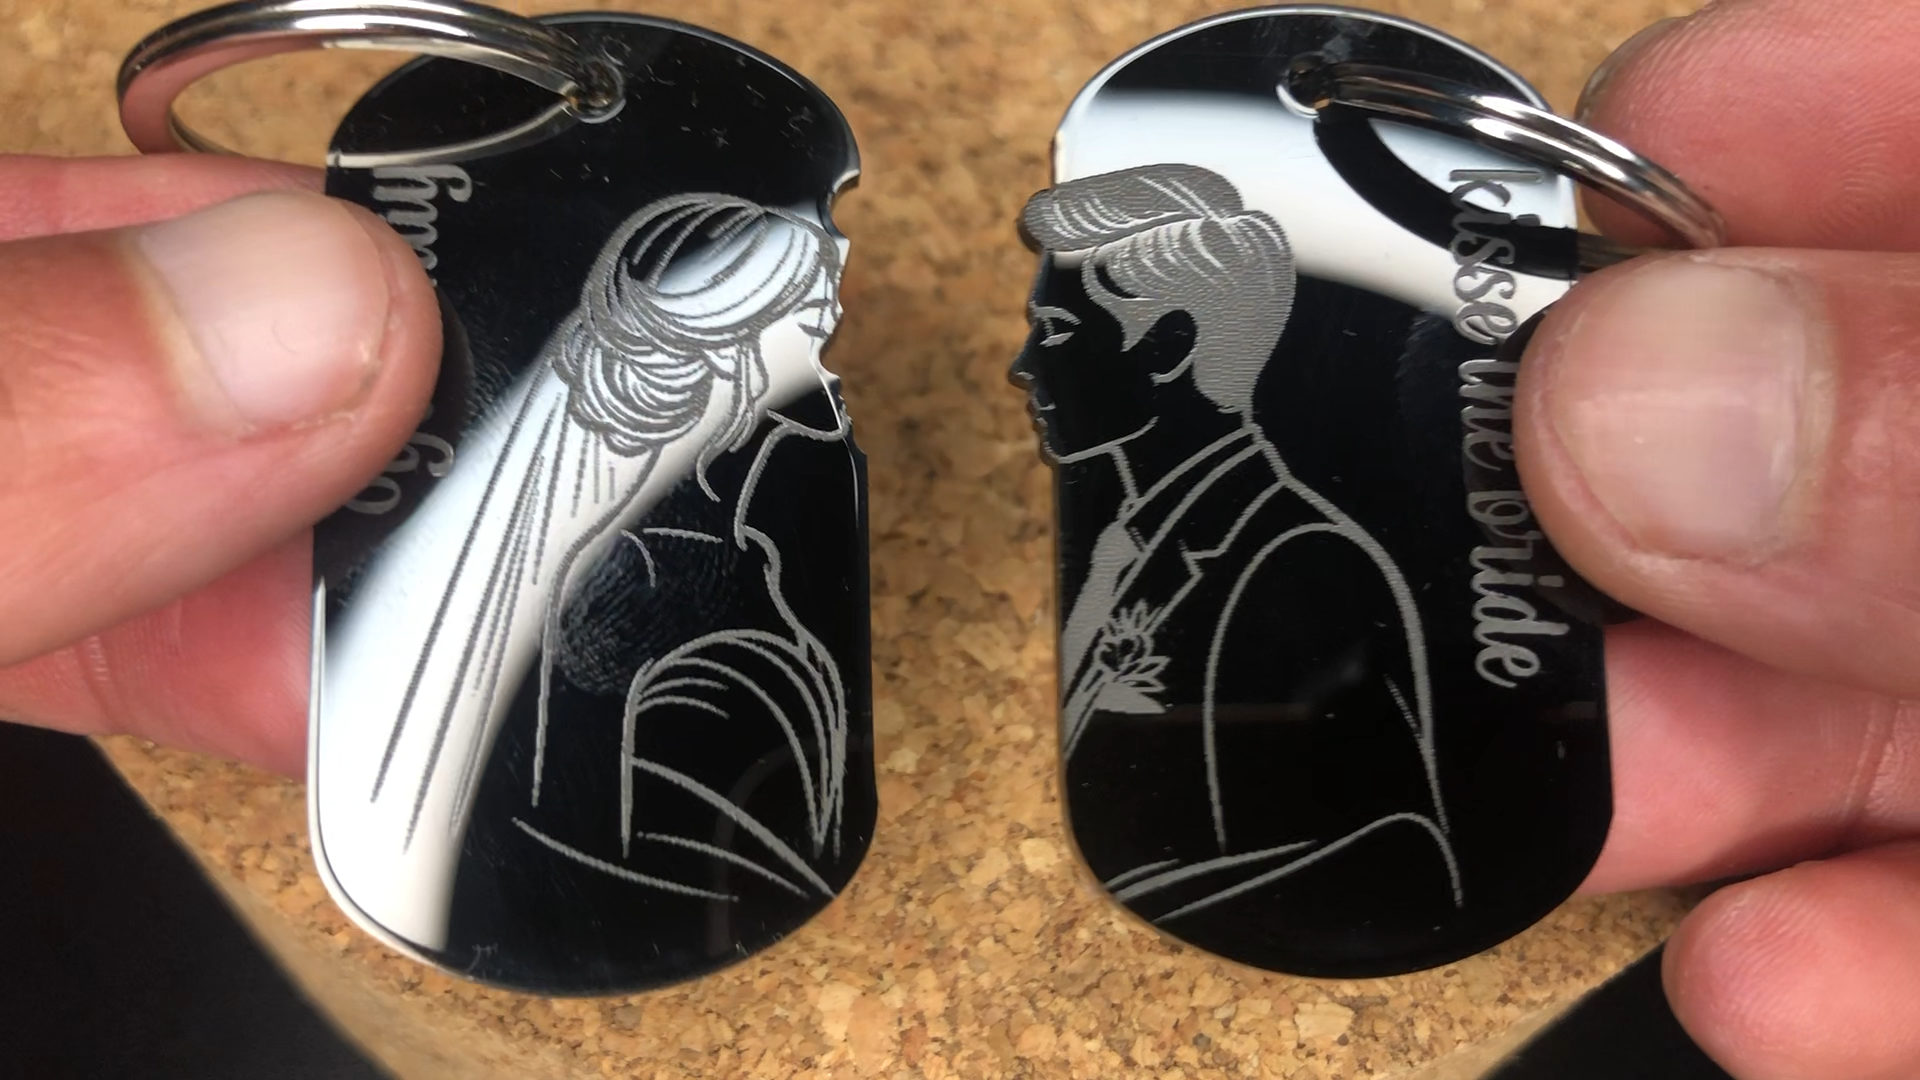
Split-design tags — two halves of one picture, one for each person — are a bestselling personalized gift. Engrave the pair from a single file so the halves line up perfectly. Anniversaries, weddings, best friends: one idea, endless variations, and more inspiration in the pendant project gallery.
3. Color-Engraved Medallions
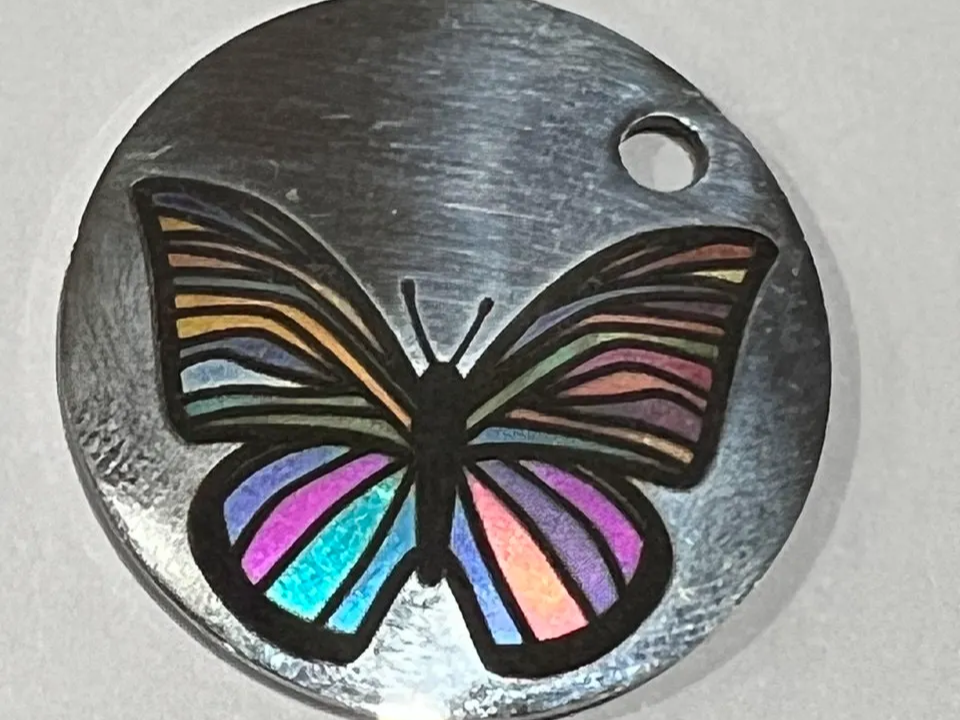
This butterfly isn't painted — the colors are microscopic oxide layers grown by a MOPA fiber laser on stainless steel. Tiny shifts in power and speed change the hue, letting you 'paint' with the beam. Color marking is the most jaw-dropping trick in metal engraving; see more in the color engraving gallery.
4. Custom Dog Tags
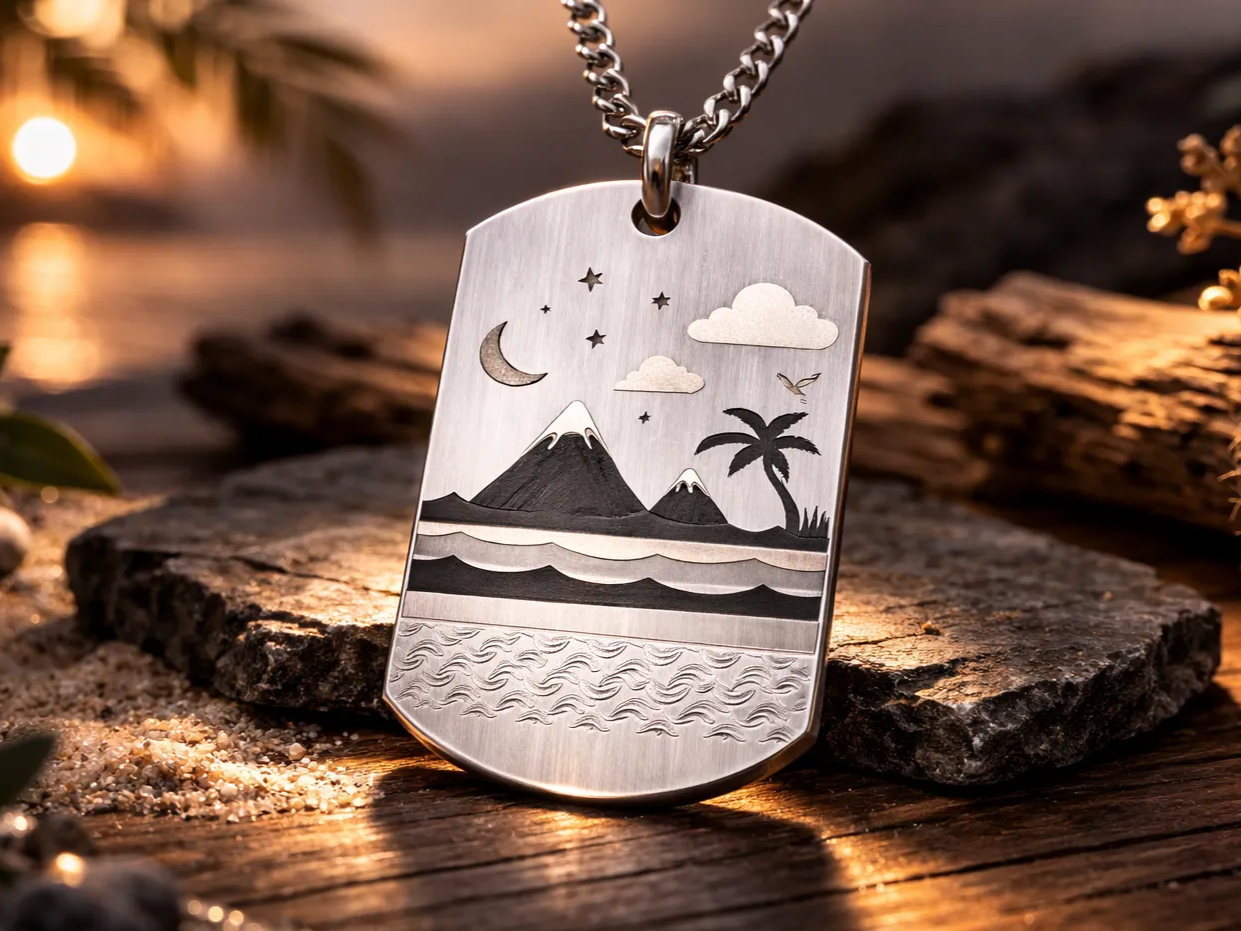
The military-style dog tag is a blank canvas: engrave a scene, coordinates, or a pet's name and it becomes jewelry. Stainless blanks cost pennies, engrave in minutes on an IR laser, and sell reliably at markets. A perfect first bare-metal project. More shapes and looks live in this name-tag idea gallery.
5. Engraved Flasks
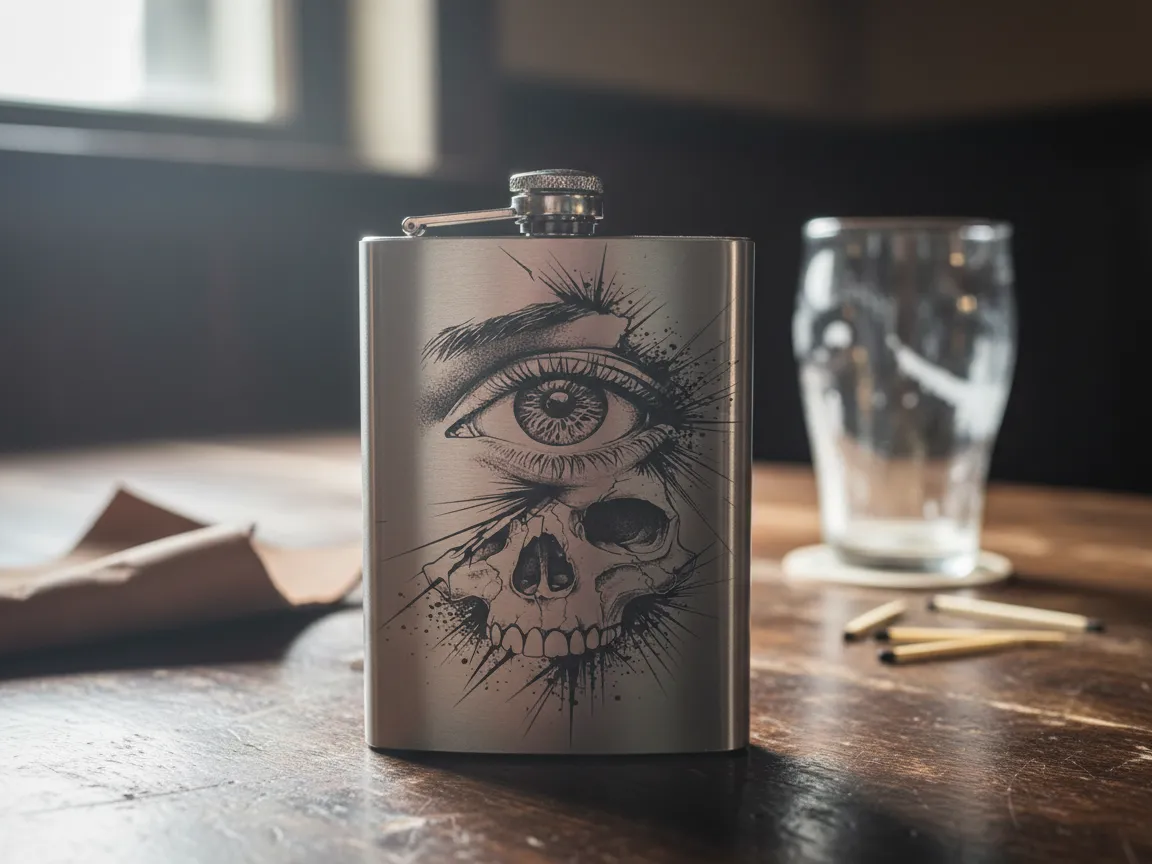
A hip flask's broad, gently curved face takes a big, detailed engraving — full illustrations, monograms, groomsman names. Coated flasks work on a diode laser; bare stainless wants fiber/IR. Tape the flask steady, engrave, and you've turned a $10 blank into a $40 gift.
6. Insulated Tumblers
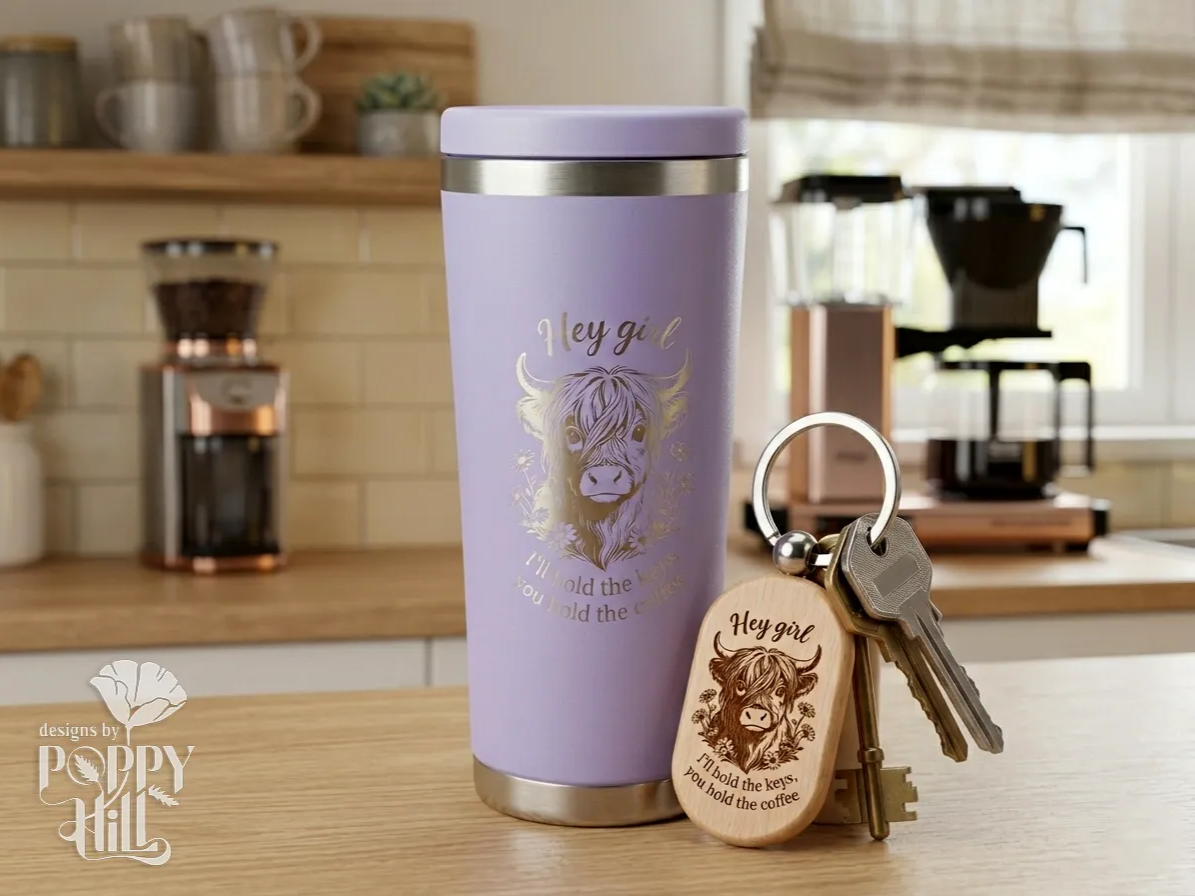
Powder-coated tumblers are the friendliest metal project for diode-laser owners: the beam removes the coating to reveal bright steel underneath, giving crisp, high-contrast art. Add a matching keychain from the offcut of the same design. See what's possible in the engraved tumblers collection.
7. Metal Business Cards
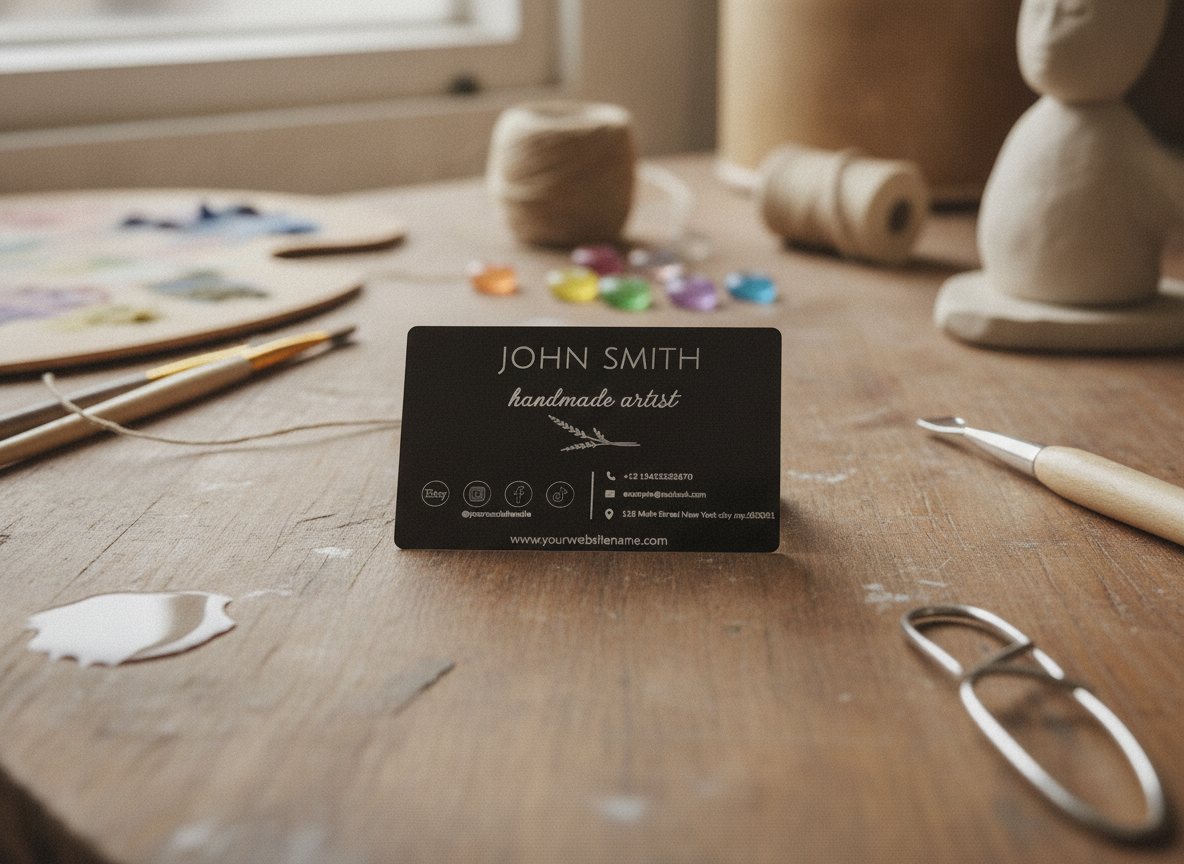
A black-anodized metal business card gets remembered. The laser strips the coating to expose silver aluminum, so text and logos come out razor sharp — and even an entry-level diode machine handles it. Batch a box of fifty in an afternoon. The same anodized trick powers professional desk nameplates too.
8. Bottle Openers
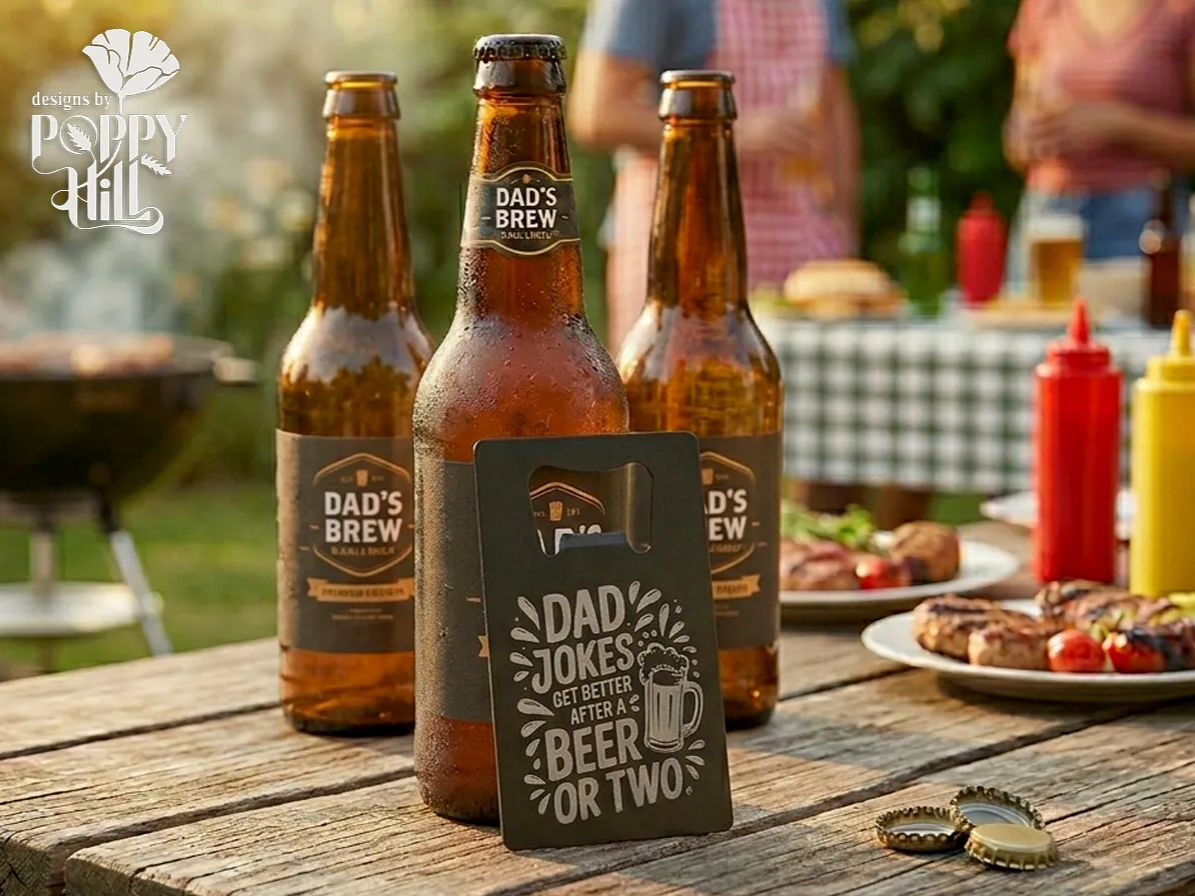
Metal bottle openers are quick, cheap, and endlessly giftable — engrave a joke, a name, or a wedding date. Coated blanks mark beautifully on any laser, and they make ideal party favors or Father's Day gifts. One file, a stack of blanks, and an hour of machine time.
9. Pendant Necklaces
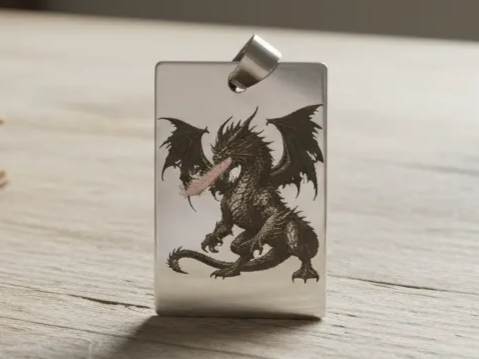
A detailed illustration — a dragon, a portrait, a sigil — engraved on a polished pendant shows off what fiber lasers do best: fine grayscale shading on bare metal. Add a chain and it's finished jewelry. Explore the necklace project gallery for more styles.
10. Engraved Keychains
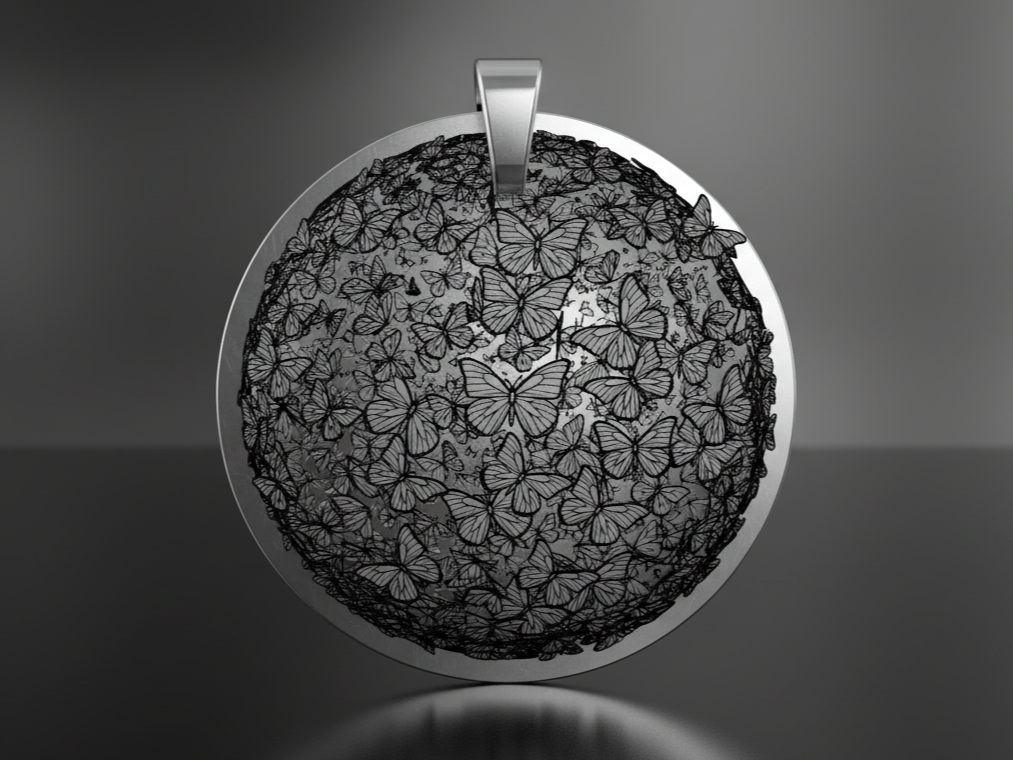
Metal keychains are the highest-detail-per-dollar project in engraving: a mandala like this packs thousands of lines into a few centimeters of steel. Great for testing new machines and settings, and easy to personalize — start from a ready-made keychain template and make it yours.
Metal Engraving Safety Tips
- Reflection is the metal-specific hazard. Shiny surfaces can bounce a laser beam back into the machine — or your eyes. Tilt the workpiece, and wear goggles matched to your laser's wavelength (1064nm IR beams are invisible).
- Ventilate. Marking spray, metal oxide fumes, and etching gases all want airflow.
- Clamp everything. Spinning bits and pushed gravers both punish loose workpieces.
- Dispose of etching sludge responsibly, especially from stainless steel.
Common Metal Engraving Mistakes to Avoid
- Buying a diode laser to engrave bare stainless. It can't — you need a fiber/IR laser, or stick to anodized and coated metal.
- Skipping the degrease. Fingerprints and oil ruin lasers marks and etches alike.
- Rubbing instead of dabbing when electro-etching. It lifts the stencil and blurs the edges.
- One deep pass. Whether it's a laser, a bit, or a graver — depth comes from repeated light passes.
- Ignoring reflectivity. Mirror finishes and chrome need extra caution, tilt, and testing.
The bottom line
Match the tool to the metal and the job: a fiber/IR laser for bare metal, batches, and color marks; a diode if you're working with anodized or coated pieces; salt-water etching for deep marks in steel on a $5 budget; and a graver if you're ready to learn the traditional craft. Start with anodized aluminum or a scrap of stainless, test small, and the permanence of metal becomes the reason you love it. And when a project calls for cutting metal rather than marking it, that's a different beast entirely.
Frequently Asked Questions
Can you engrave metal with a regular laser engraver?
It depends on the laser. A fiber or 1064nm infrared laser engraves bare metal directly. A blue diode laser can't mark bare, reflective metal — but it handles anodized aluminum and coated metals well. A CO2 laser needs a marking spray to leave a mark on metal.
How do you engrave stainless steel?
The cleanest route is a fiber/IR laser, which engraves bare stainless directly and can even produce color marks through controlled oxide layers. On a budget, salt-water electro-etching with a vinyl stencil puts a deep, permanent mark in stainless using just a battery and salt water.
What's the easiest metal to engrave?
Anodized aluminum. The laser only has to remove the thin dyed surface layer, so even entry-level diode machines produce crisp, high-contrast results — which is why anodized tags, cards, and tumblers are so popular.
Is laser engraving on metal permanent?
Yes. The mark is physically burned, oxidized, or removed from the surface — it won't rub, wash, or fade off. Deep-engraved marks survive even heavy wear, which is why serial numbers are laser-marked.
Can you engrave metal in color?
Yes, on stainless steel and titanium with a MOPA fiber laser. The laser grows a microscopic oxide layer whose thickness determines the color you see — xTool's F2 Ultra documentation shows tiny power and speed shifts changing the hue. A protective balm keeps the colors vivid.