
A great birthday setup isn't about spending more — it's about putting the effort where eyes actually land. Guests remember three things: the first thing they see at the door, the table where everyone gathers, and the cake moment. Decorate those three well and the whole party feels considered.
The short answer:
- Pick a theme and two or three colors.
- Build one focal wall with a banner or balloon arch.
- Style the party table as the anchor.
- Give the cake a stage — height, light, and a topper.
- Add one personalized touch with the birthday person's name on it.
Here's the step-by-step, zone by zone.

Step 1: Pick a Birthday Theme and Color Palette
Everything gets easier once you commit to a palette. Choose two main colors plus one accent (say, sage and cream with gold) or a theme that implies them — dinosaurs, soccer, florals, a milestone number.
- For kids: let the current obsession pick the theme; the palette follows.
- For adults: a color story usually beats a "theme" — metallics with one strong color reads instantly elegant.
- For milestones: make the number the theme. A giant 30, 50, or 70 does the decorating for you.
Write the palette down and buy only within it — that discipline is what makes a $40 setup look like a $200 one.
Step 2: Create a Focal Wall with a Birthday Banner
Every party needs one wall that says "this is the spot" — it anchors photos and tells guests where the celebration lives.
What You Need
- A "Happy Birthday" banner or garland (store-bought, printed, or laser-cut)
- Balloons, streamers, or a fringe curtain in your palette
- Command hooks or removable tape
Steps to Style the Focal Wall
- Pick the wall guests see first — behind the cake table or facing the entrance.
- Hang the banner at eye level or slightly above, with a gentle swag rather than pulled tight.
- Layer behind and around it: a fringe curtain, a balloon cluster in one corner, or paper fans.
- Test the photo: stand where guests will and take one — adjust until the frame looks full.
Tip: Making the banner yourself? Cut letters in a party-worthy style with the free Happy Birthday font generator — print and string them, or laser-cut them from card or thin ply for a banner that gets reused every year.
Step 3: Decorate with Balloons (Without a Pro Budget)
Balloons deliver the most visual volume per dollar — if you cluster them.

Steps to Get the "Styled" Balloon Look
- Cluster, never scatter. Odd-numbered groups of 3–7 balloons in your palette look styled; single balloons taped around look sparse.
- Vary the sizes. Mixing 5", 11", and one or two jumbo balloons is the trick behind every professional balloon garland.
- Build a mini garland: thread inflated balloons onto balloon tape (a strip with holes), then shape it along a doorway, table edge, or the focal wall.
- Skip the helium unless you need floating bunches — air-filled garlands last days and cost a fraction.
Step 4: Style the Birthday Party Table
The table is where the party actually happens — food, cake, and every seated photo.

Steps to Style the Table
- Start with a base layer: a tablecloth or runner in a main color.
- Create height in the center — the cake on a stand, or a small centerpiece cluster (flowers, a number sign, a photo of the birthday person through the years).
- Repeat the palette in the details: napkins, cups, and plates in your two-plus-one colors.
- Add one conversation piece per table — a personalized coaster at each seat, a mini banner across the cake, or place cards guests take home.
- Leave working room. A beautiful table you can't serve from gets destroyed in ten minutes.
Step 5: Give the Cake a Stage (and a Topper)
The cake is the ceremony — and if you're frosting it yourself, these cake-decorating idea sets cover that half of the job. Give it three things: height, light, and a topper.
Steps to Stage the Cake
- Raise it on a cake stand — even a plate on an upturned bowl works.
- Place it against the focal wall so the singing photo has a backdrop.
- Crown it with a topper. A personalized name or milestone-number topper turns a supermarket cake into a centerpiece — design one in minutes with the free cake topper generator, or start from a ready-made cake topper template. For finished-look inspiration, these custom topper ideas show the range.
- Light it: candles obviously, but a string of fairy lights along the table edge makes the whole zone glow in photos.
Step 6: Add One Personalized Touch
The decorations guests talk about are the ones with a name on them. Pick one:
- A name cake topper — the highest-impact five minutes of making you can do.
- Personalized favors: engraved coasters, keychains, or tags at each place setting.
- A keepsake sign or frame — a birthday plaque or photo frame the birthday person keeps after the balloons are gone. Design either free with the name gift generator or the photo frame generator.
- A birthday card box for cards and well-wishes at milestone parties.
The fastest way to make any of these is a laser cutter — here's the actual workflow.
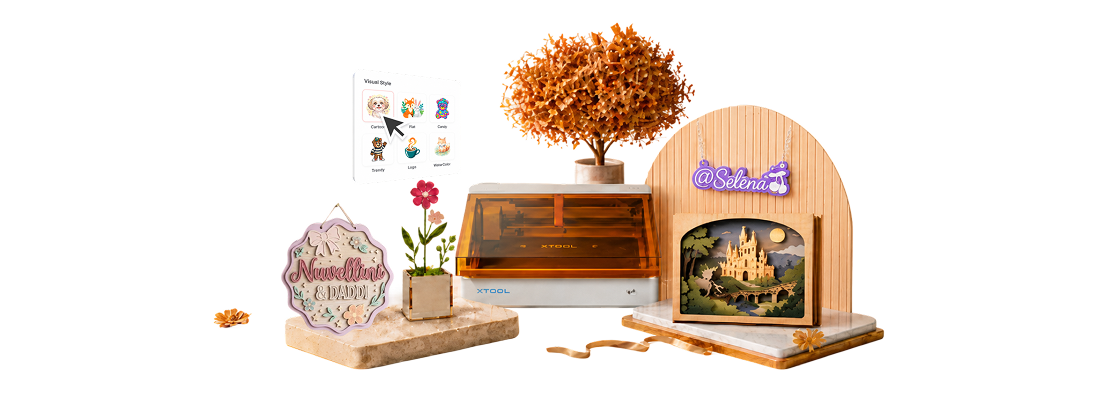
If you're shopping for a machine for exactly this kind of project, the xTool M2 is the current do-it-all starter: an enclosed Class 1 diode laser (10W or 20W) that also swaps in a CMYK inkjet head, so it prints a full-color design and cuts it out in one session — dual cameras handle placement and air assist is built in. For a party that means the name banner, the cake topper, and the keepsake plaque all come off one desktop machine.
What You Need
- A desktop laser cutter (a 10W diode handles 3 mm plywood and opaque acrylic)
- 3 mm basswood plywood, or colored acrylic for glossy toppers
- xTool Creative Space (free) and a design — any of the 10 free designs below works
- Cake topper sticks and wood glue
Steps to Laser Cut a Cake Topper or Party Sign

Following xTool's own plywood and acrylic processing guides:
- Pick or design the topper. Grab any of the 10 free designs below, or set the name in a bold script font — connected letters survive cutting (add a thin backing bar if they don't touch).
- Load the material — 3 mm ply or acrylic, dead flat, protective film peeled — and let the cameras place the design on the sheet.
- Set the operation to Cut and load settings from the material library for your exact sheet, then frame the job to confirm placement.
- Cut with air assist on, then glue the topper to its stick — cake-ready in under an hour.
Tip: Decorations get thrown away; keepsakes get kept. Budget one item that survives the party — a wooden family-tree coaster, an engraved frame, a milestone plaque — and make that your gift-plus-decoration in one.
How much do birthday decorations cost?
| Approach | Focal wall | Table | Cake | Total ballpark |
|---|---|---|---|---|
| Budget DIY | Paper banner + balloons ($10) | Cloth + repeated palette ($10) | Homemade topper ($2) | ~$25 |
| Styled DIY | Balloon garland + fringe ($25) | Runner, napkins, centerpiece ($25) | Custom topper + stand ($10) | ~$60 |
| Bought-in | Backdrop kit ($40+) | Themed tableware set ($40+) | Ordered topper ($15+) | $100+ |
The styled-DIY middle path is the sweet spot — and if you have a laser cutter, the topper, banner, and favors drop to material cost.
10 Birthday Decoration Ideas to Make
Need concrete ideas? These ten community designs cover toppers, banners, and keepsakes — every one a real file you can open and make for free.
1. Milestone Cake Topper Bundles
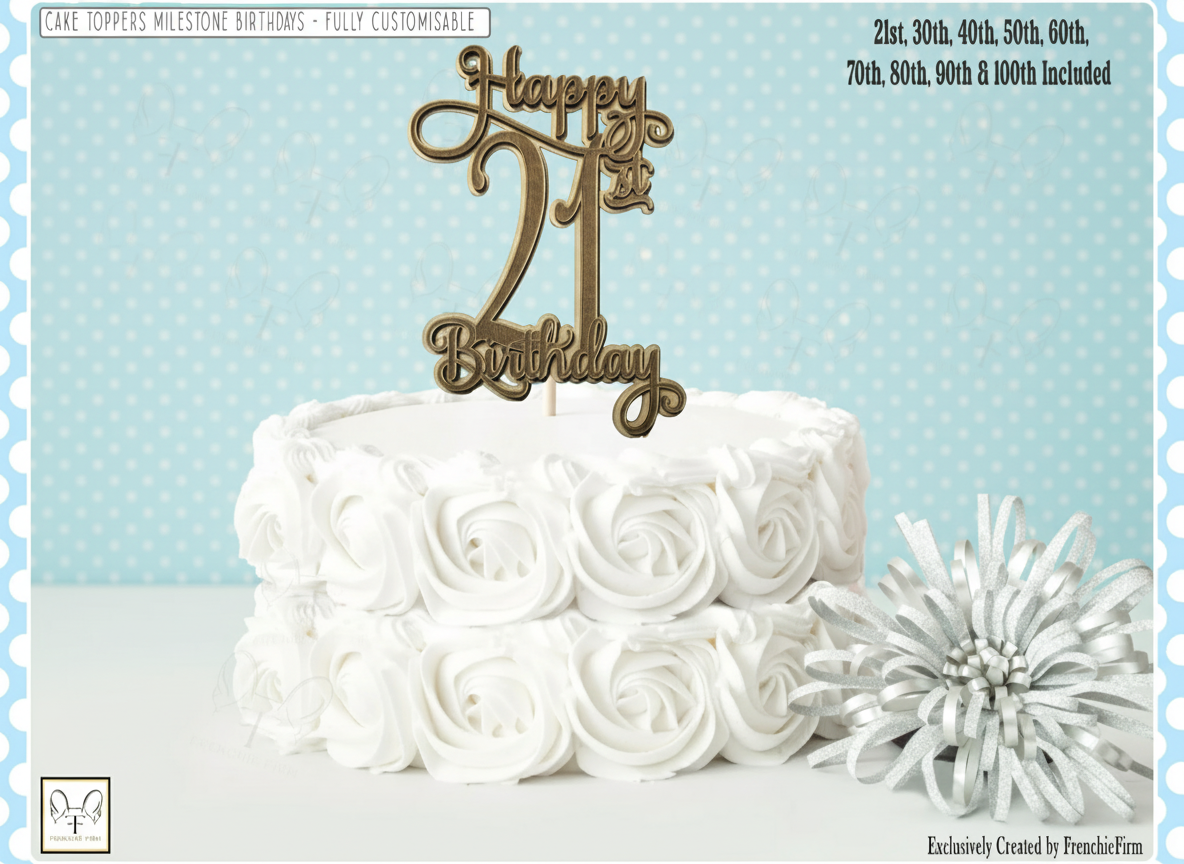
One file, every milestone: this bundle covers 21st through 100th birthdays with elegant script numbers. Cut in gold-painted ply or glitter acrylic, a milestone topper makes the age the centerpiece — and you'll reuse the bundle for every party in the family.
2. Funny Milestone Toppers
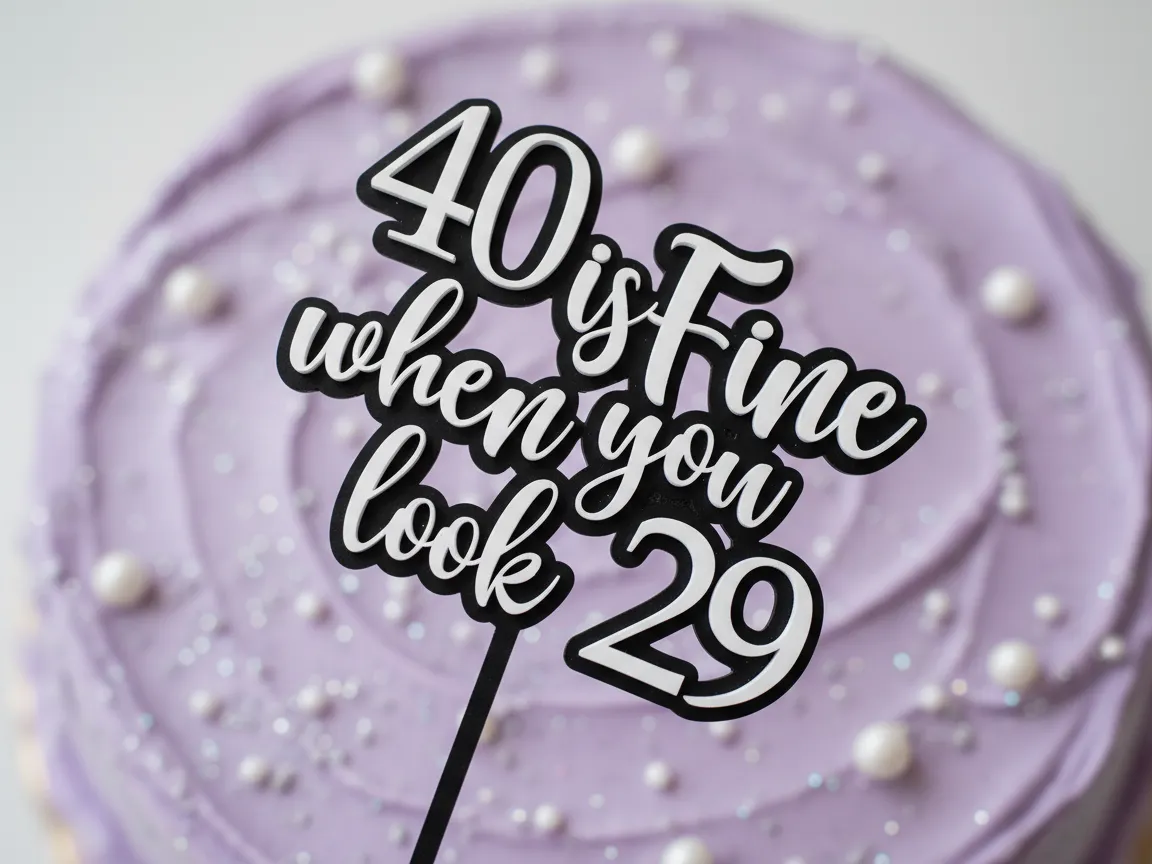
Milestone humor beats milestone dread — '40 is fine when you look 29' gets the laugh before the candles are lit. Glossy black acrylic reads sharp against any frosting color. Swap the numbers for whatever birthday needs defusing.
3. Personalized Name Toppers
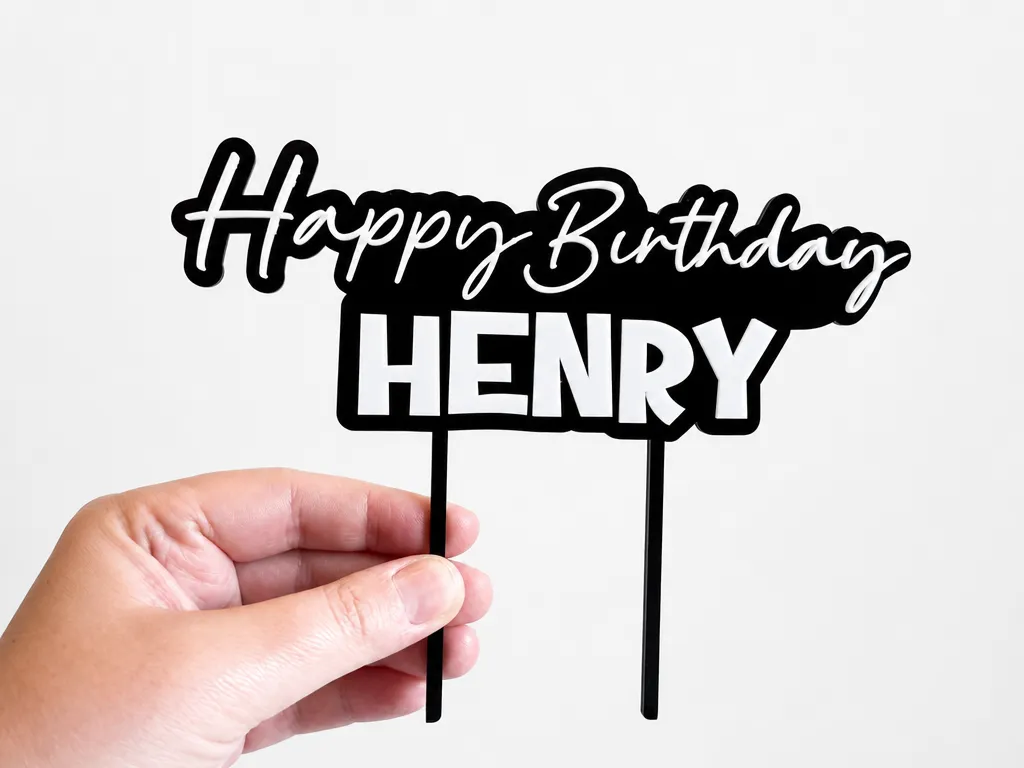
The single highest-impact decoration at any party: the birthday person's own name over the cake. Layered script on food-safe picks, cut in ten minutes. Change the name in the file and this one design serves every birthday you'll ever host.
4. Theme Cupcake Toppers
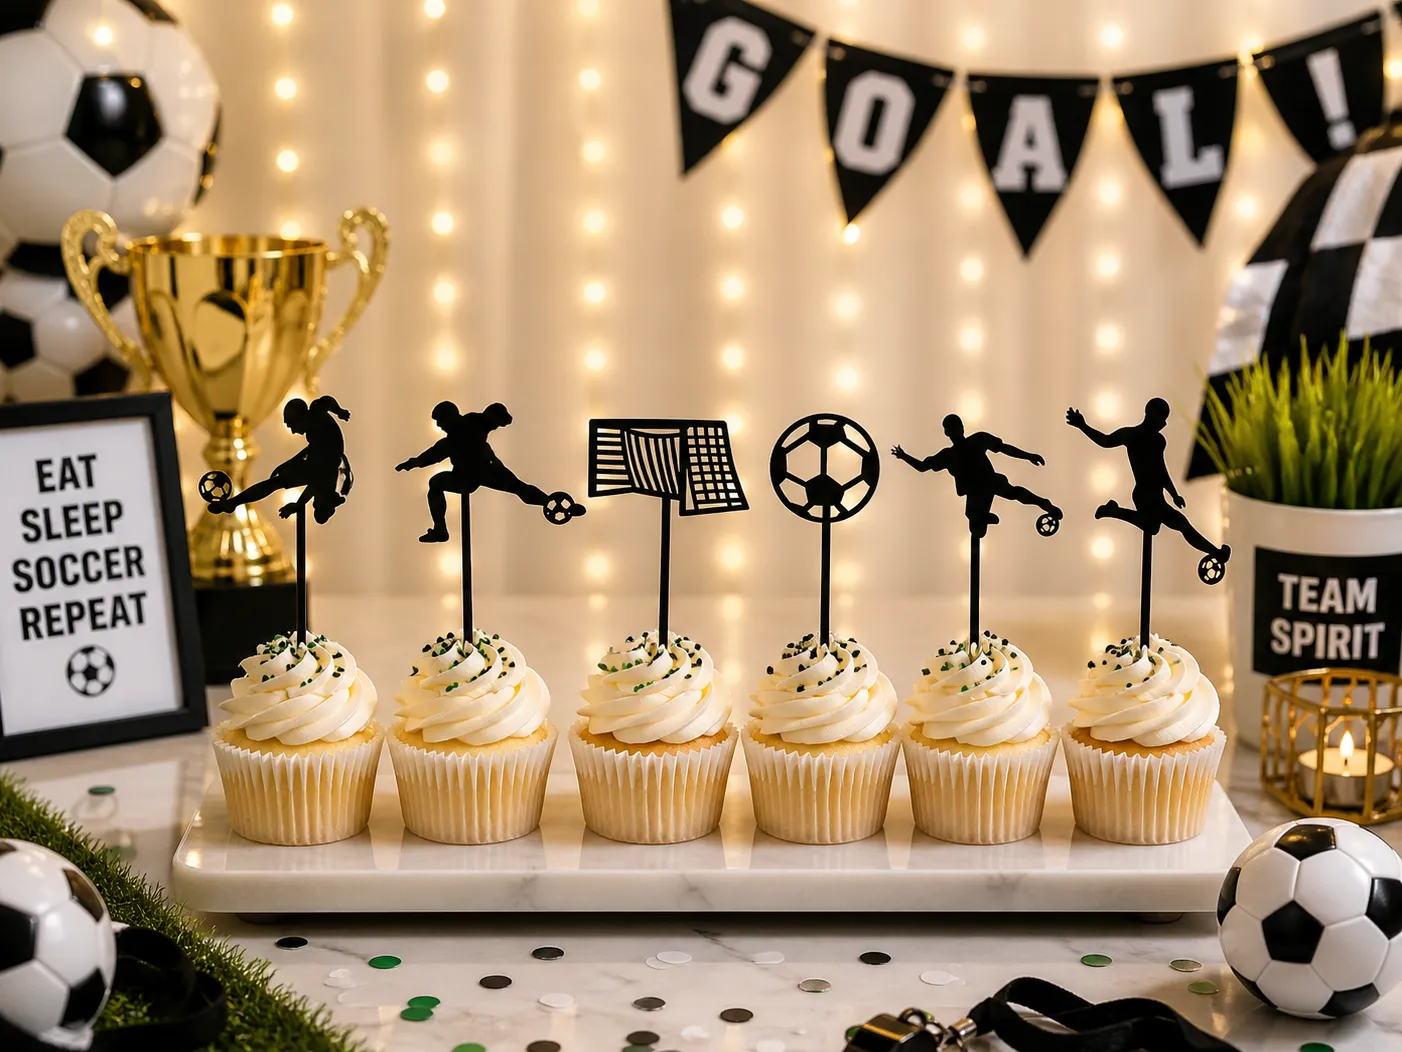
Theme parties live or die on repetition — and cupcake toppers repeat your theme a dozen times across the table. This soccer set turns plain cupcakes into a matching squad. One SVG bundle covers the toppers, the banner vibe, and the favor tags.
5. Elegant Bow Toppers
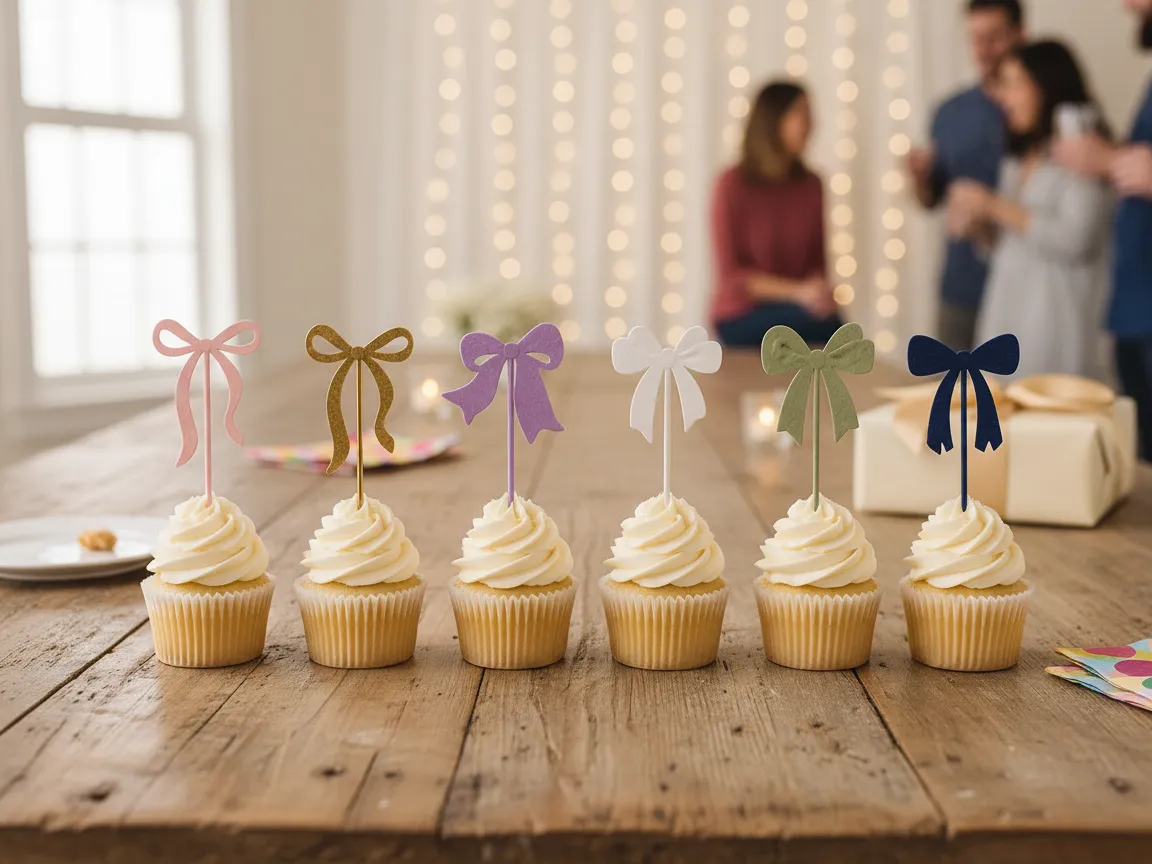
Not every party wants a cartoon theme — pastel bows in mixed colors style a table that's more garden-party than game-day. Cut from card or painted ply, they take a batch of supermarket cupcakes from plain to boutique in minutes.
6. Mini Banner & Topper Sets
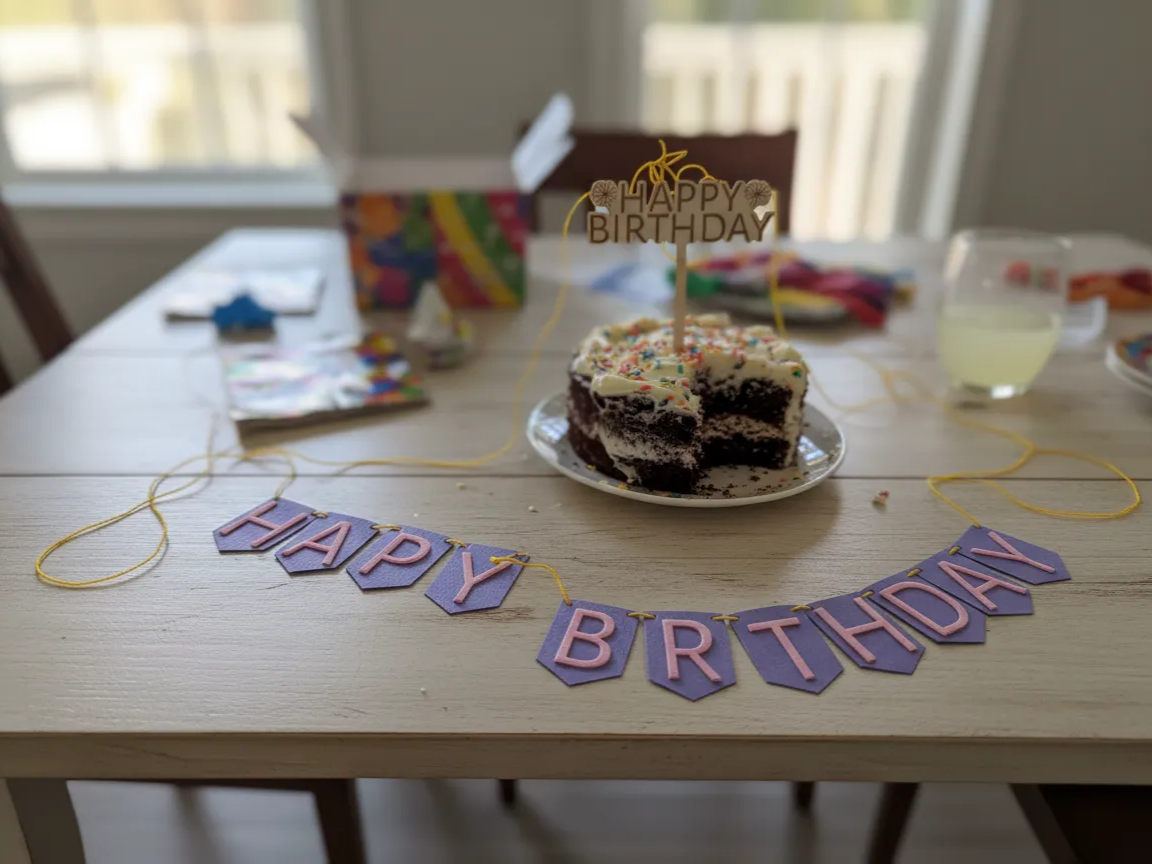
A matched set — mini banner across the table front, coordinating topper on the cake — pulls a whole zone together with two pieces. Minis are also forgiving: no wall required, no ladder, and they pack away flat for next year.
7. Cake Garland Banners
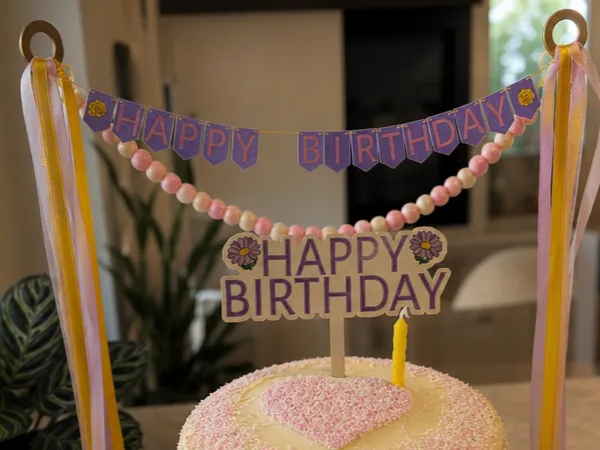
A cake garland — a miniature banner strung between two poles planted in the cake — gives the topper effect with storybook charm. Print-and-cut card or engraved ply both work. It's the detail that makes a homemade cake photograph like a bakery one.
8. Birthday Keepsake Plaques
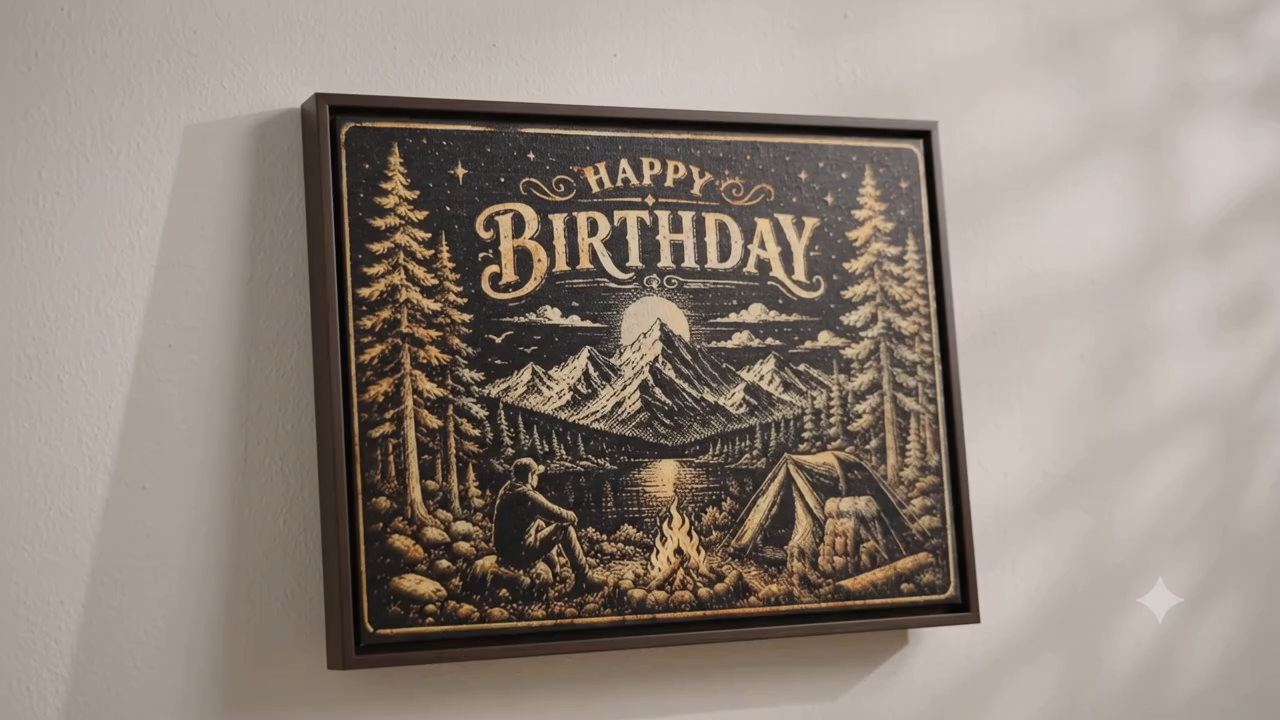
For the person who has everything: a personalized engraved plaque that decorates the party and then their shelf. This campfire scene version suits the outdoorsy; swap the art for any hobby. It's decoration and gift in one object.
9. Family Tree Coasters
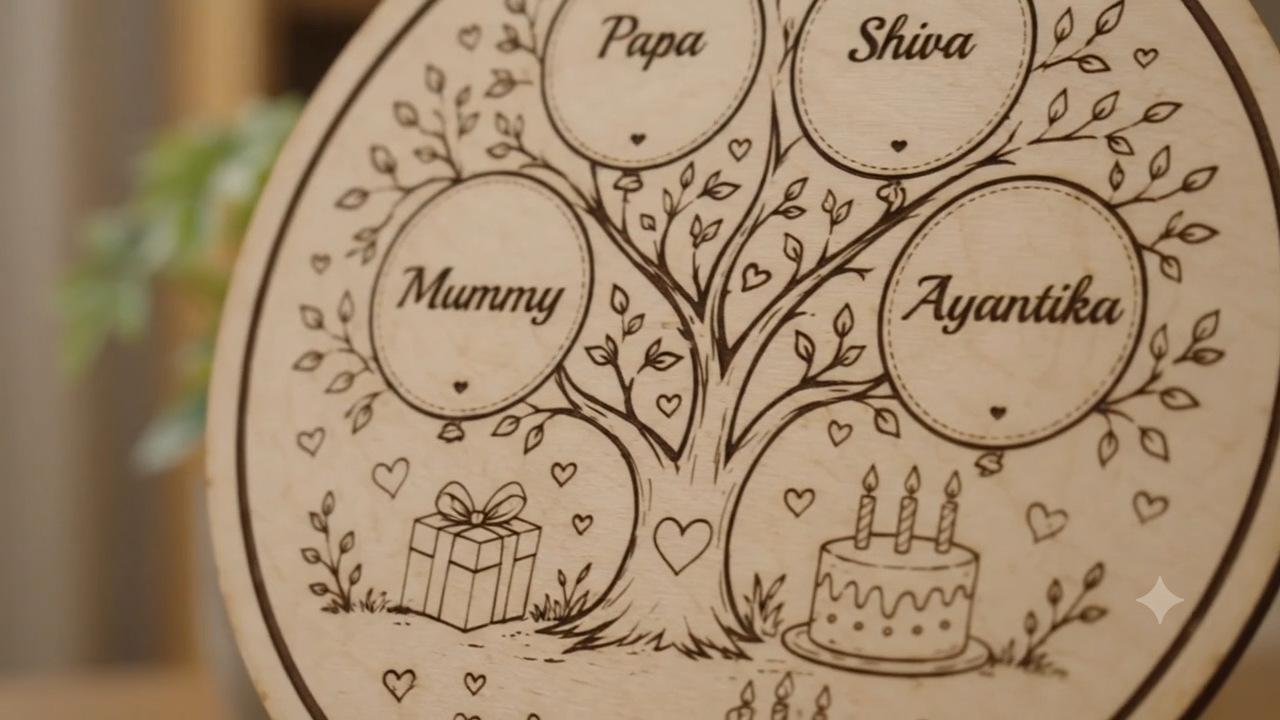
A birthday family-tree coaster puts every family member's name around the birthday person's — a working decoration guests actually use during the party, then a keepsake after. Cut one per table and watch them disappear into pockets.
10. Pet Birthday Frames
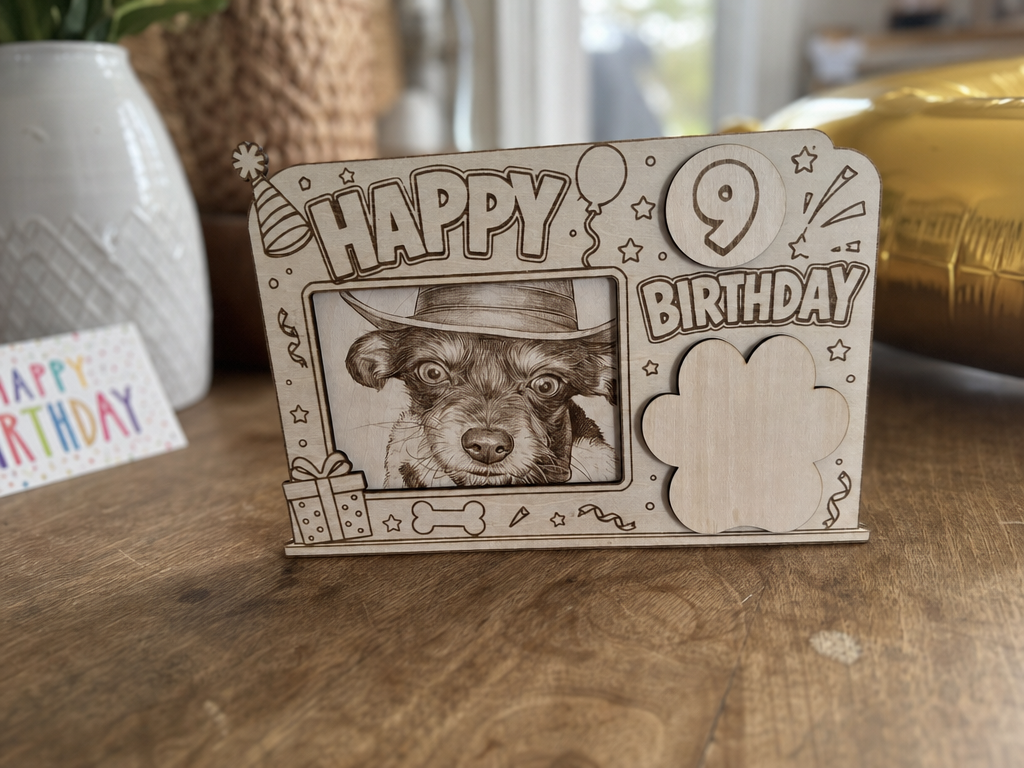
Dog birthdays are real birthdays. A photo frame with the pup's age and paw prints stages the party photo — and stays on the shelf until next year's upgrade. Equally good for the cat, if the cat permits celebration.
The bottom line
Decorate the three zones that matter — focal wall, table, cake — inside one disciplined color palette, and add a single personalized keepsake. That's the whole formula. Everything else is optional volume.
Frequently Asked Questions
How can I decorate for a birthday at home cheaply?
Cluster balloons instead of scattering them, commit to a two-color palette, and build one focal wall instead of decorating every room. A paper banner, one balloon garland, and a styled table run about $25 and photograph far better than twice the budget spent randomly.
How do you decorate a birthday table?
Layer it: tablecloth base, height in the center (the cake or a centerpiece), palette repeated in napkins and cups, and one personal detail per seat. Keep serving space clear — the prettiest table still has to work.
What should I decorate first for a birthday party?
The focal wall — it sets the palette and becomes the photo backdrop. Then the table, then the cake stage. Entryway and everywhere-else decor is optional once those three zones are done.
How far in advance should I decorate?
Air-filled balloon garlands and banners hold up fine overnight, so do the focal wall and table the evening before. Save fresh flowers, food, and helium balloons for party day.
What makes a birthday party feel personalized?
A name, an age, or a photo where guests can see it: a custom cake topper, a milestone sign, or favors with each guest's name. One personalized piece does more than a room full of generic decorations.
