
Wood is the friendliest material to engrave — it's cheap, forgiving, and even a simple burned line looks warm and handmade. But "engraving wood" covers four very different crafts, from a $20 burning pen to a laser that renders photographs in toasted grain. Pick the wrong one for your project and you'll fight the tool the whole way.
The short answer:
- Laser engraver — detail, photos, and repeatable batches.
- Rotary tool — freehand line work.
- Wood-burning pen — hand-drawn, artistic pieces.
- Chisels — deep, classic carved lettering.
This guide walks through all four — what you need, the steps, and how they compare.

What wood is best for engraving?
The wood you pick matters as much as the tool. Four things to check:
- Grain. Fine, even grain (basswood, alder, birch, maple, cherry) engraves consistently. Wild-grain woods like oak vary in hardness across the surface, so the engraving depth comes out uneven — xTool specifically warns against photo engraving on strongly varied grain.
- Hardness. Softer woods suit pyrography and hand carving; harder woods need more laser power but hold crisper carved edges.
- Resin. Resinous softwoods like pine give off sap and tar when lasered — it condenses inside the machine and burns unevenly under a pen. Basswood is the classic beginner's choice for every method.
- Plywood vs. solid. Basswood or birch plywood is flat, cheap, and consistent — ideal for lasers. Solid wood is better for chisels and deep engraving; plywood's glue layers carve poorly.
Light-colored woods show a dark engraving best — that contrast is most of what makes a piece pop.
Method 1: How to Laser Engrave Wood
The laser is the detail king: photographic shading, tiny lettering, and identical pieces every time. It's also the fastest way to go from a design file to a finished product.
How to pick a laser for wood
Wood is the easiest material for any laser, so nearly every machine works — the choice is about depth and scale:
- Diode lasers (e.g. xTool D1 Pro, S1, F1) engrave all common woods beautifully and cut thin plywood — xTool's tests show a 20W diode cutting up to 10 mm basswood ply in one pass.
- CO2 lasers (e.g. xTool P2) cut thicker stock — up to 18 mm solid walnut or cherry — and engrave faster across big pieces.
- Software matters: xTool Creative Space (XCS) ships a Material EasySet Library with tested settings per material, plus a material test array that finds perfect settings for anything unusual.
The benefits: photo-real engraving, perfect repeatability for batches, engraving and cutting in one job, and no physical skill curve — the design file does the work.
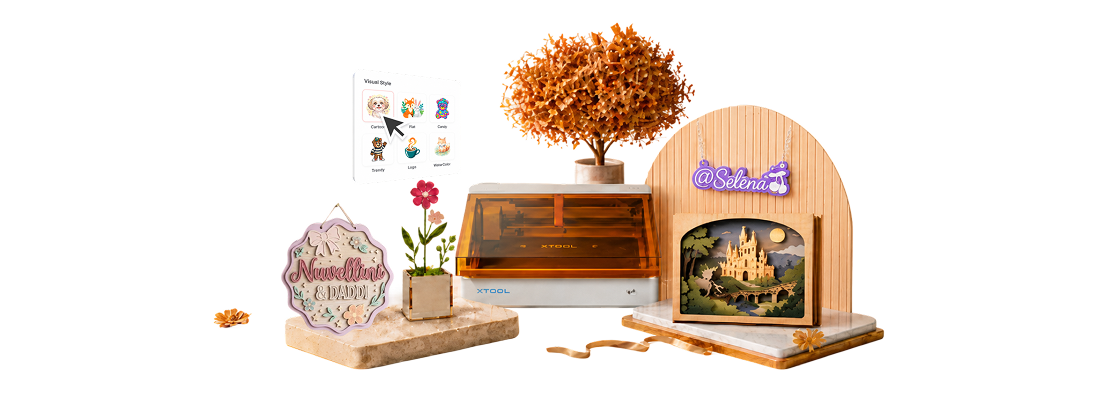
If you're shopping for a machine for exactly this kind of project, the xTool M2 is the current do-it-all starter: an enclosed Class 1 diode laser (10W or 20W) that also swaps in a CMYK inkjet head, so it prints a full-color design and cuts it out in one session — dual cameras handle placement and air assist is built in. On plywood it prints the artwork and cuts the outline without you ever moving the sheet.
What You Need
- A laser engraver (any diode or CO2 machine handles wood)
- xTool Creative Space (or similar) and your design file
- Fine-grain, light-colored wood — basswood plywood is the go-to
- Paper masking tape, clamps or a honeycomb bed, air assist, goggles, and ventilation
Steps to Laser Engrave Wood

Following xTool's own solid wood and plywood processing guides:
- Prep the surface. It should be smooth, dry, and unvarnished — thick varnish blurs the engraving (sand it off), and damp wood scorches and warps.
- Mask against scorch. Apply paper masking tape over the engraving area and press it down with a squeegee — this is xTool's documented trick for clean, burn-free edges. The scorch lands on the tape, not the wood.
- Import your design in XCS and set the operation to Engrave. For photos, use Bitmap Engrave — start from a sharp image at least 1000×1000 px — upscaling a small photo first pays off here — boost the contrast, and pick Grayscale or Jarvis mode for smooth shading.
- Load settings from the EasySet library for your exact material, or run a material test array on scrap. As a reference point, xTool's own demo engraves 3 mm basswood on a D1 Pro at 80% power / 175 mm/s / 2 passes — the same library carries presets for the M2 and every current machine, so treat any single number as machine-specific.
- Secure and elevate the wood on a honeycomb panel or blade strips — direct contact with the metal base traps heat and carbonizes the underside.
- Frame, turn on air assist, and engrave. Never leave the machine running unattended.
- Finish. Peel the tape promptly, wipe soot with a barely-damp cloth, sand lightly around (not into) the engraving, and finish with mineral or Danish oil to deepen the contrast.
Tip: Engraving a photo? Test a small crop first — xTool's photo-engraving course suggests running just the eyes of a portrait before committing to the full picture. Two minutes of testing saves an hour-long job.
Method 2: How to Engrave Wood with a Rotary Tool (Dremel)
A rotary tool with engraving bits gives you freehand control at a low price — great for signatures, line art, and personalizing finished objects you can't fit in a laser.
What You Need
- A rotary tool (Dremel-type)
- Engraving cutters — a 1/32" bit for fine detail, 1/16" for bolder lines
- Larger carving bits for widening lines or clearing backgrounds
- A pencil or stencil, clamps, goggles, and a dust mask
Steps to Engrave Wood with a Rotary Tool
- Sketch or transfer your design onto the wood in pencil.
- Clamp the workpiece and hold the tool like a pen for control.
- Trace the outlines with a fine bit at moderate speed, using light, repeated passes — never one deep gouge.
- Switch to larger bits to widen lines or remove background around the design.
- Sand lightly, clear the dust, and finish with oil or lacquer.
Method 3: How to Engrave Wood by Burning (Pyrography)
A wood-burning pen draws directly onto the grain with heat — the most artistic, hand-made feel of the four methods, and the cheapest way in.
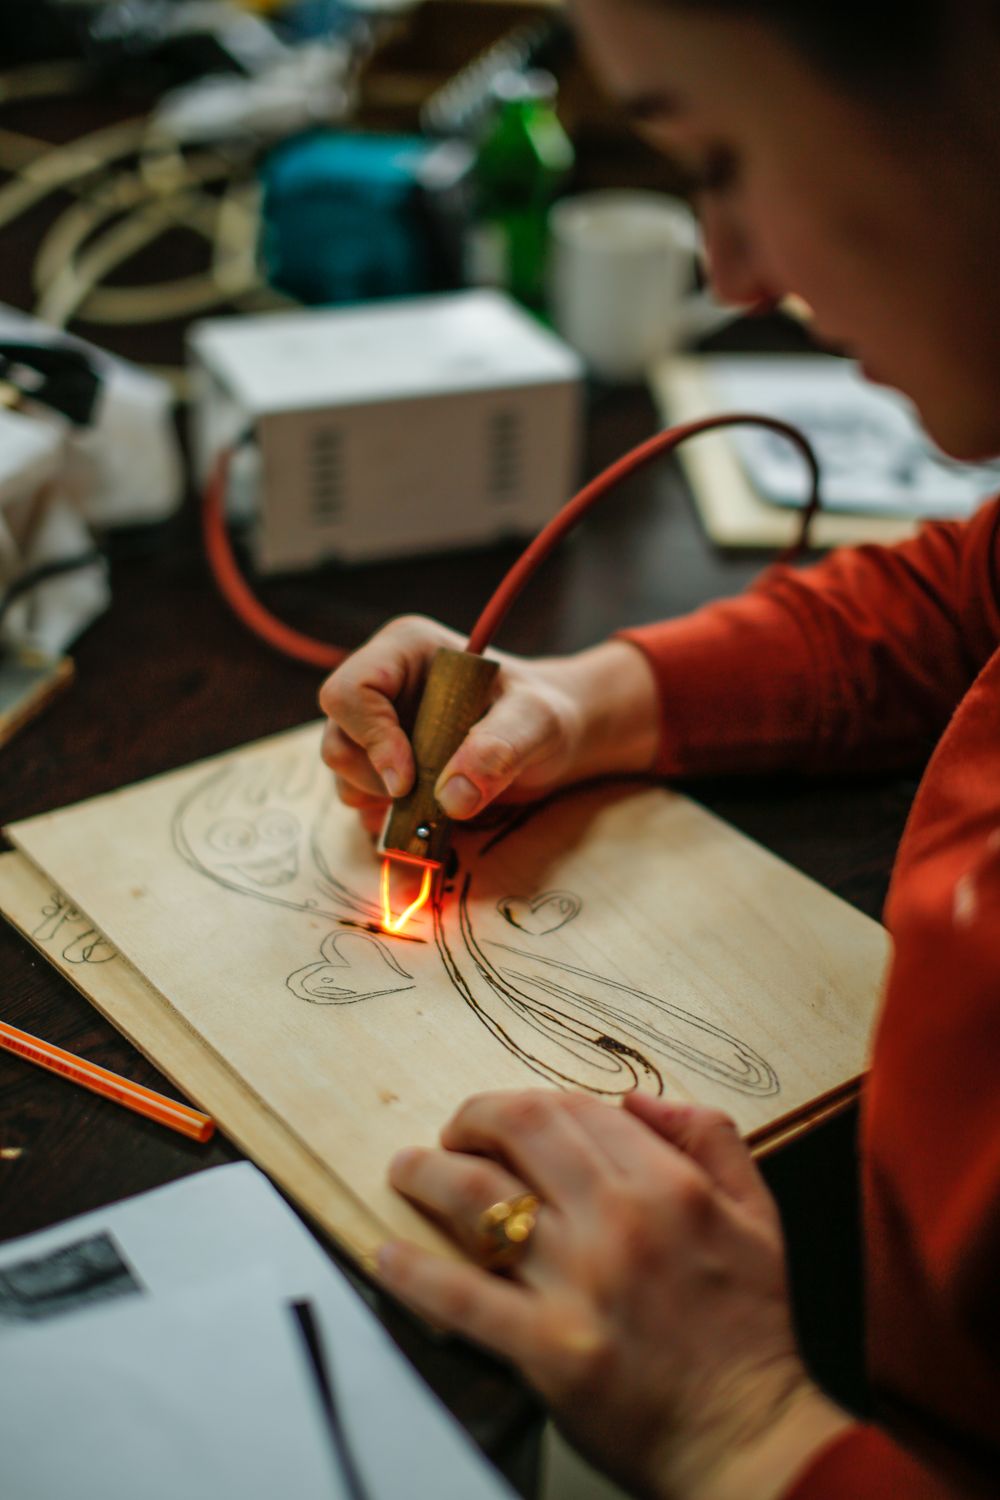
What You Need
- A pyrography pen — solid-tip burners are cheap starters; wire-nib burners with temperature control are better for shading
- A set of tips: a writing tip for lines, a shading spoon for fills, a skew for crisp edges
- Light, fine-grain wood (basswood), sanded smooth
- Graphite paper for transferring designs, plus ventilation and a heat-proof stand
Steps to Burn a Design into Wood
- Sand the wood smooth and transfer your design with graphite paper.
- Heat the pen and test your strokes on a scrap of the same wood.
- Burn slowly and steadily — your speed and pressure control the darkness as much as the temperature. Rushed strokes show.
- Clean the tip on a brass brush as carbon builds up, or the burn quality fades mid-piece.
- Erase leftover pencil, add color if you like, and seal with oil or a spray finish.

Method 4: How to Carve Letters into Wood by Hand
Chisel-carved lettering is the classic look — deep, shadowed, and unmistakably handmade. It's the slowest method and the most satisfying.

What You Need
- A V-gouge (V-parting tool) for letter outlines
- A straight chisel and shallow gouges for faces and curves
- A wooden mallet, a sharpening strop, and clamps
- Soft, even-grained wood — basswood or butternut for a first project
Steps to Carve Letters into Wood
- Draw baseline and cap-height guides, then transfer your letters with a stencil or transfer paper.
- Clamp the board and score the outlines with the V-gouge, staying just inside the lines.
- Chisel from the outline toward each letter's centerline at a consistent angle, forming the classic V-shaped trench. Work with the grain and flip direction when it changes.
- Refine with smaller tools and clean up the edges.
- Sand lightly and finish — a dark stain brushed into the incisions makes the letters jump out.
Tip: Keep your carving tools razor sharp and always cut away from your body. A dull chisel is the dangerous one — it slips instead of slicing, and it tears the grain instead of cutting it.
How do the wood engraving methods compare?
| Method | Best for | Tools & cost | Detail | Repeatability | Difficulty |
|---|---|---|---|---|---|
| Laser | Photos, batches, fine text | Laser machine ($$$$) | Excellent | Perfect | Easy–medium |
| Rotary tool | Freehand lines, touch-ups | Rotary + bits ($$) | Medium | Low | Medium |
| Wood burning | Artistic, hand-drawn pieces | Pyrography pen ($) | Medium–high | Low | Medium |
| Hand carving | Deep classic lettering | Chisels + gouges ($$) | High (slow) | Low | Hard |
10 Wood Engraving Examples to Try
Wood rewards every skill level — a scrap of plywood becomes a keychain, a slab becomes an heirloom. These ten projects show the range, and every one is a real community design you can open and make for free.
1. Engraved Cutting Boards
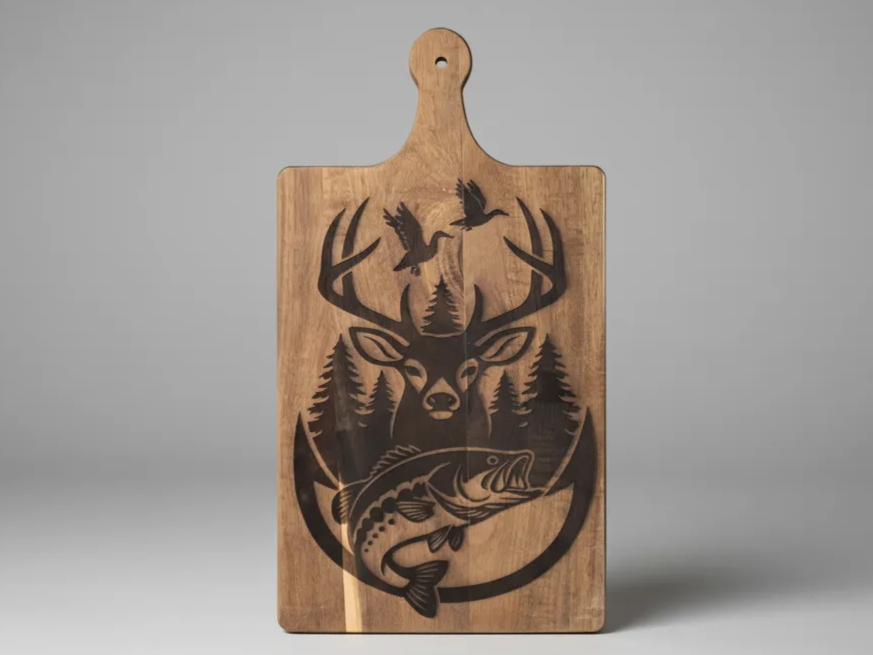
The cutting board is wood engraving's bestseller — a big, flat canvas that turns a kitchen staple into a wedding or housewarming gift. Engrave a name, a recipe, or a full scene like this deer-and-forest design; the toasted engraving contrasts beautifully against oiled hardwood. Mask, engrave, then re-oil with a food-safe finish. (Boards are a craft of their own — here's the full cutting-board workflow.)
2. Photo & Scene Engraving
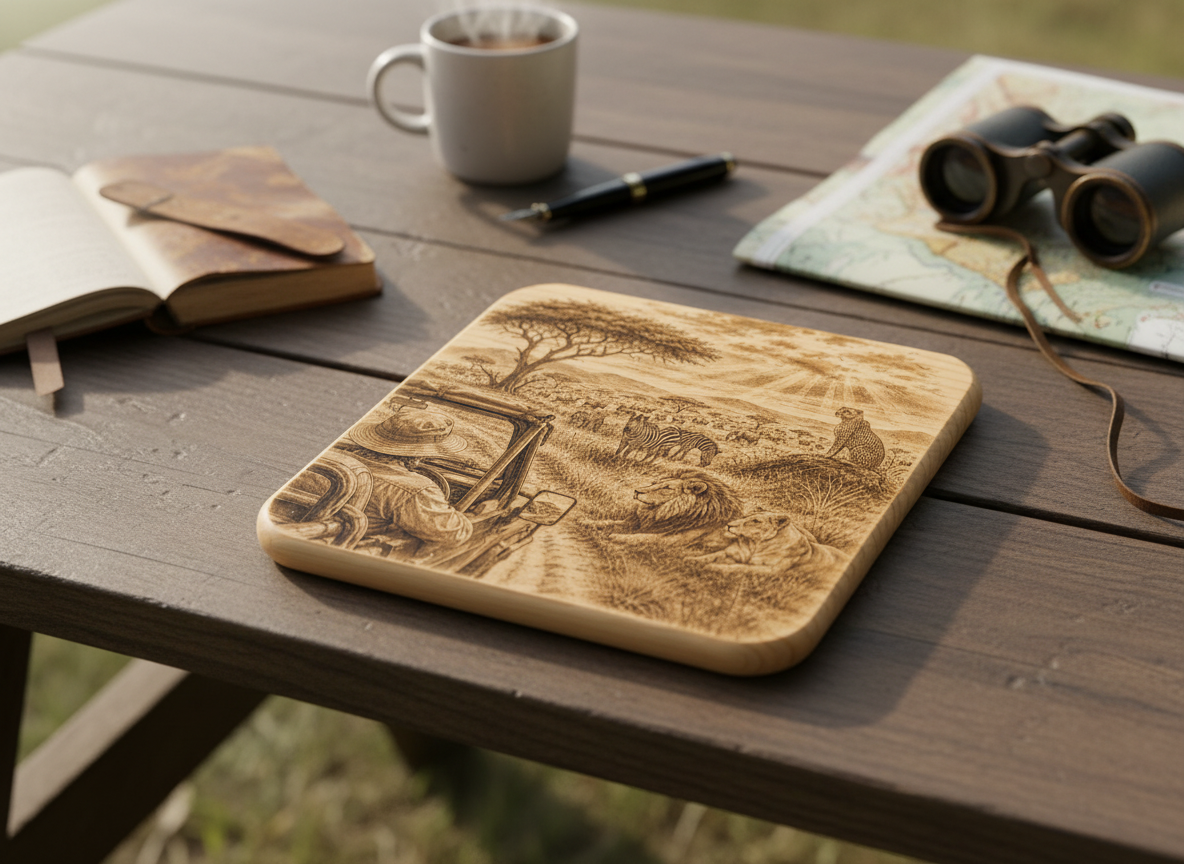
With grayscale engraving, a laser can render an entire landscape — or a family photo — as smooth toasted shading in the grain. Fine-grain wood like basswood keeps the tones even, and a small test crop dials in the settings. Scene boards like this safari make striking wall art straight off the machine.
3. Personalized Wood Signs
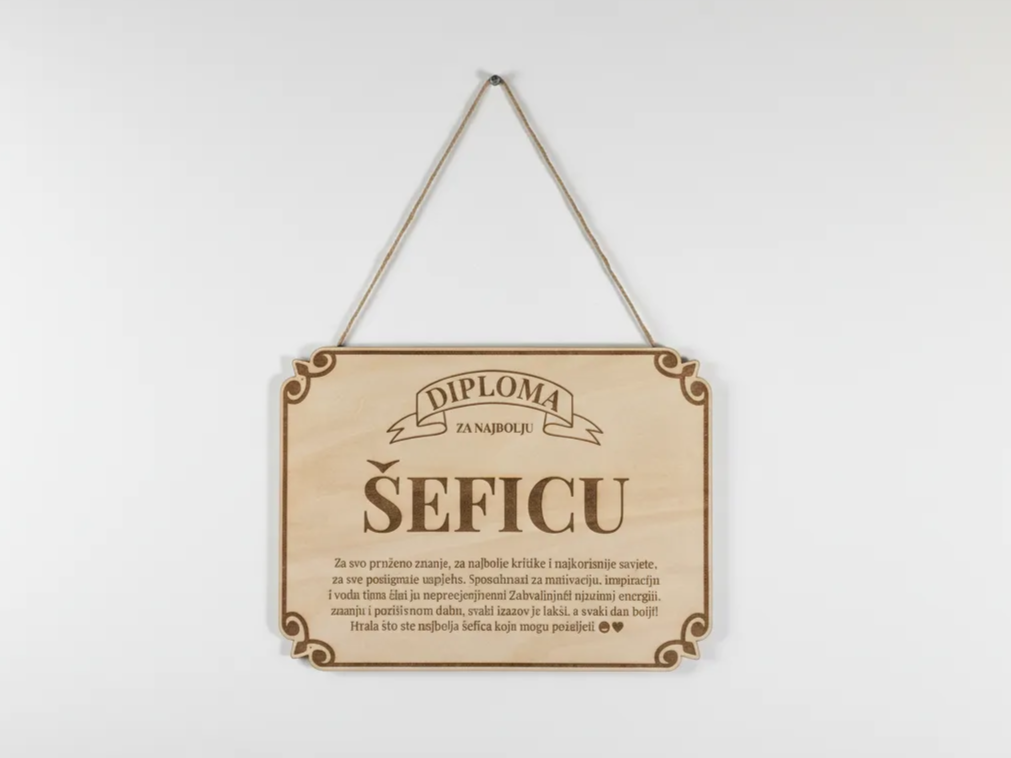
A personalized sign is the fastest way from file to gift: engrave a name, title, or in-joke inside a decorative border, drill two holes, and add twine. Light plywood keeps the engraving crisp and the weight down. Batch a few blanks and you can personalize each one in minutes.
4. Wood Keychains
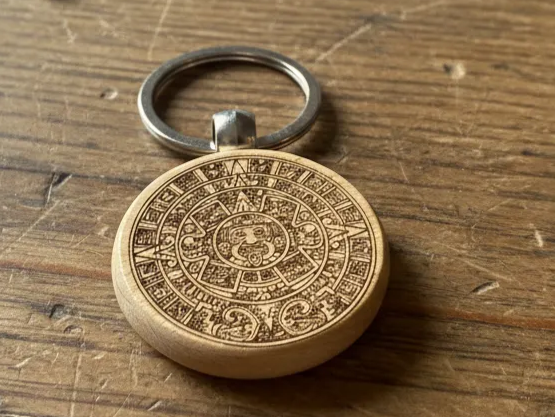
Keychains are the perfect scrap-wood project — small, quick, and detailed enough to show off what your machine can do. This Aztec calendar packs remarkable detail into a few centimeters. Cut the disc and engrave the design in one job, then add a ring. Ideal for markets, favors, and testing new woods.
5. Wooden Earrings
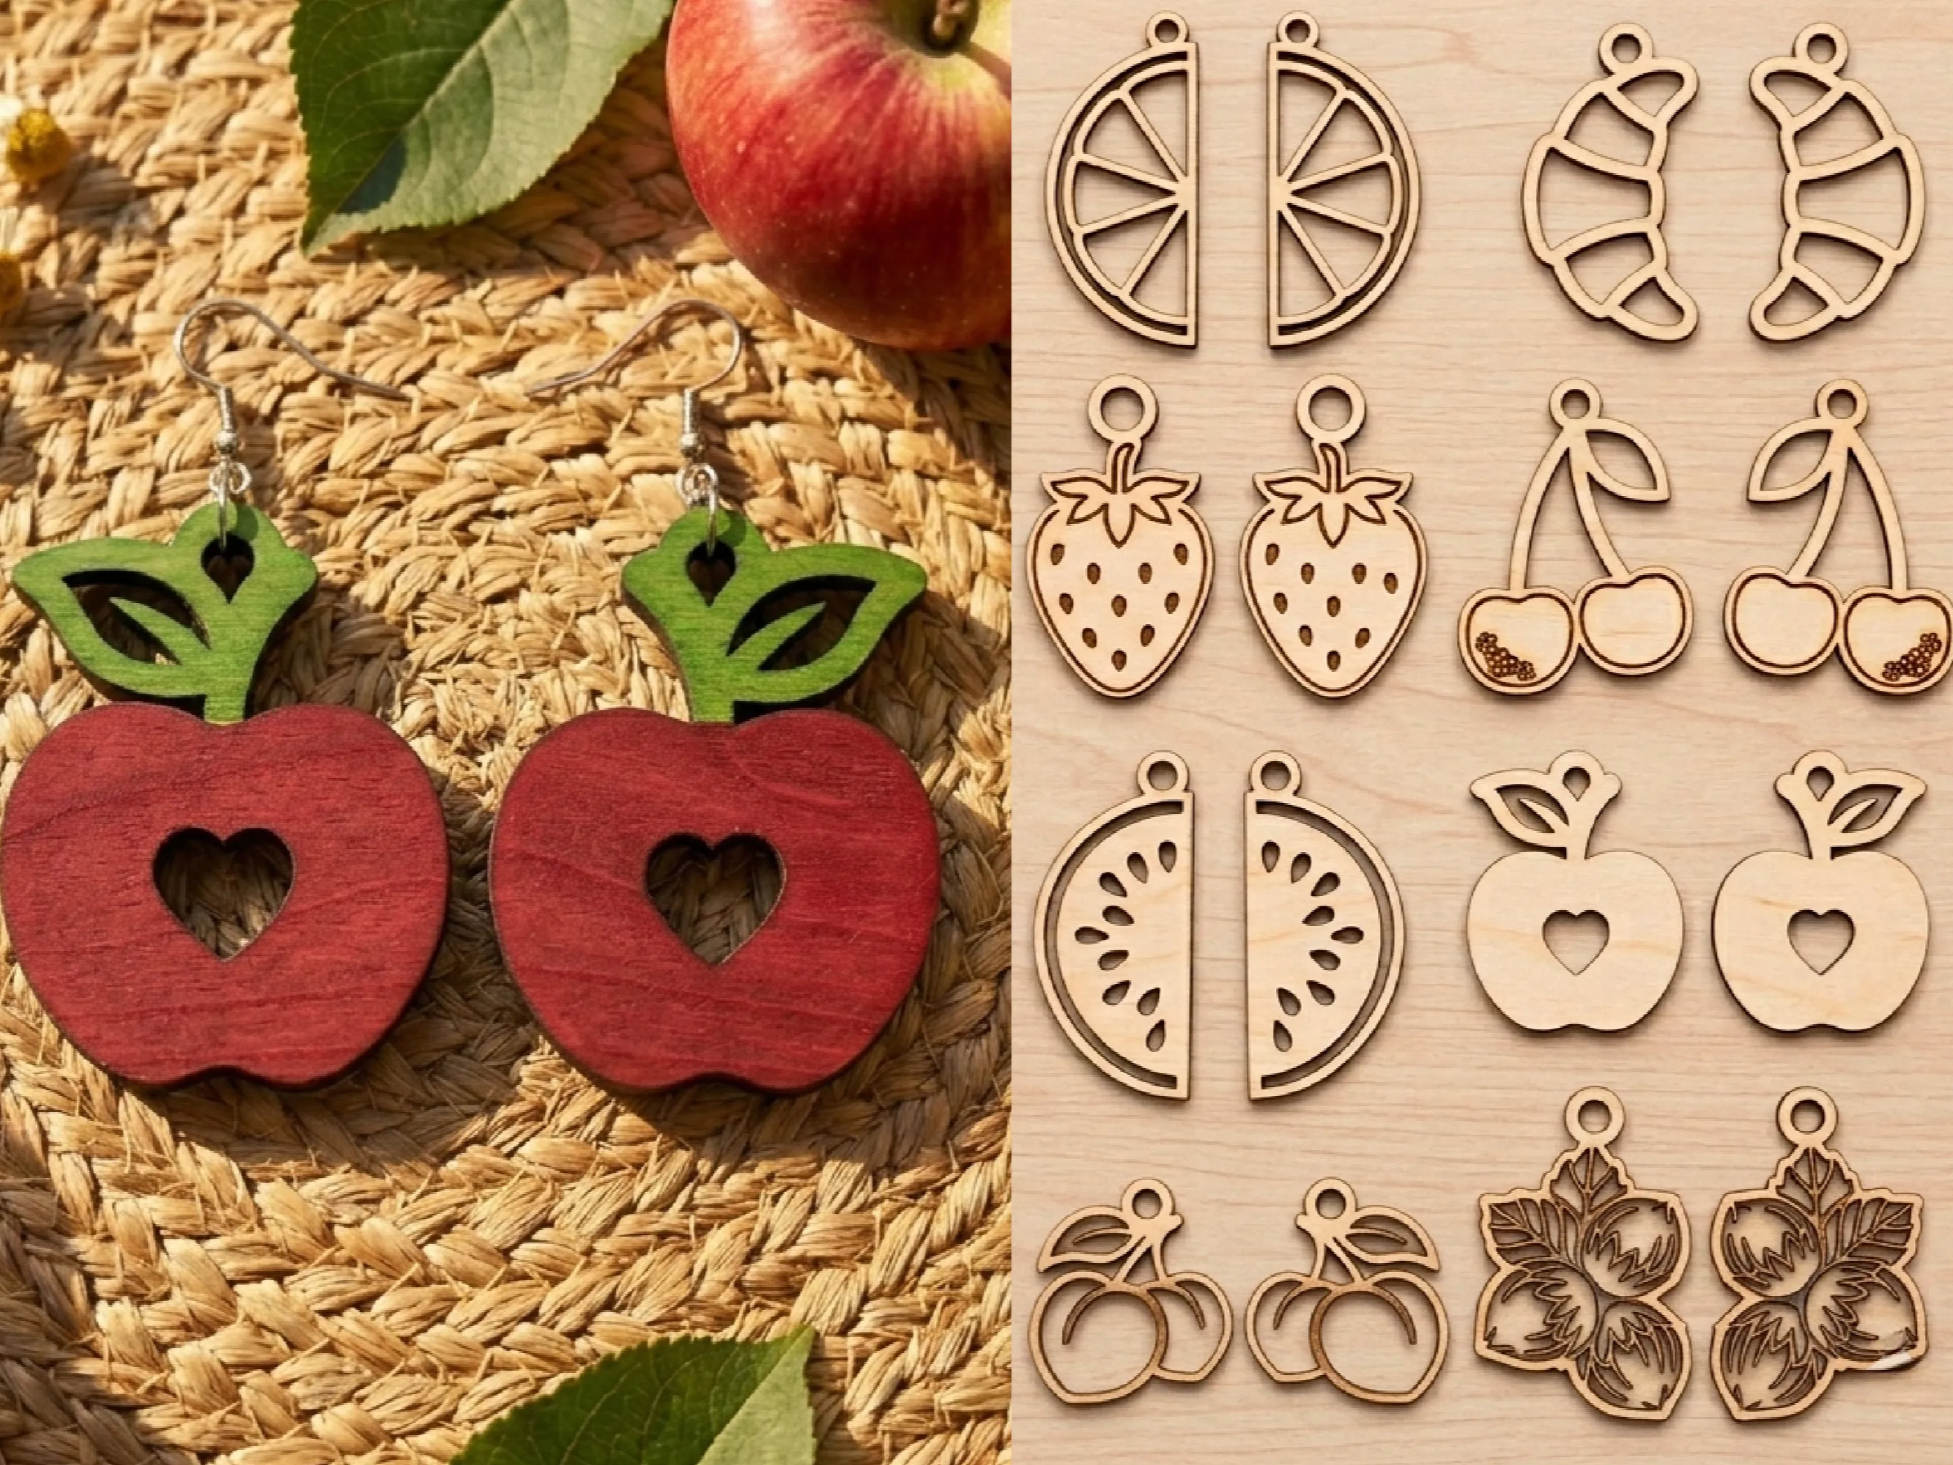
Thin plywood cuts into feather-light earrings that no saw could manage — fruit shapes, filigree, anything your file holds. Engrave surface detail, cut the outlines, then leave them natural or add paint for a pop of color. A sheet of 3 mm ply yields dozens of pairs, making earrings a favorite craft-fair earner.
6. Wood Map Wall Art
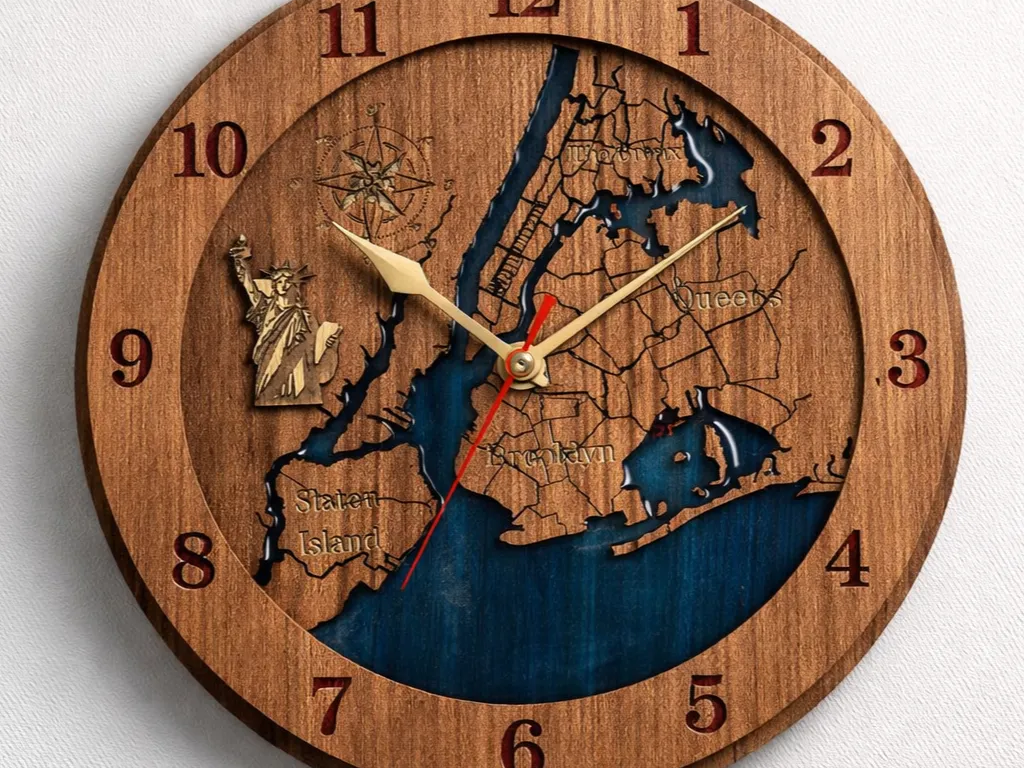
Layered map art — a city grid, a lake shoreline, a favorite hiking area — is one of the most impressive things a laser can make. Engrave the streets, cut the water layer, and stack for depth; this New York piece even doubles as a clock. A meaningful, high-value gift for hometowns and honeymoon spots.
7. Coaster Sets with Holder
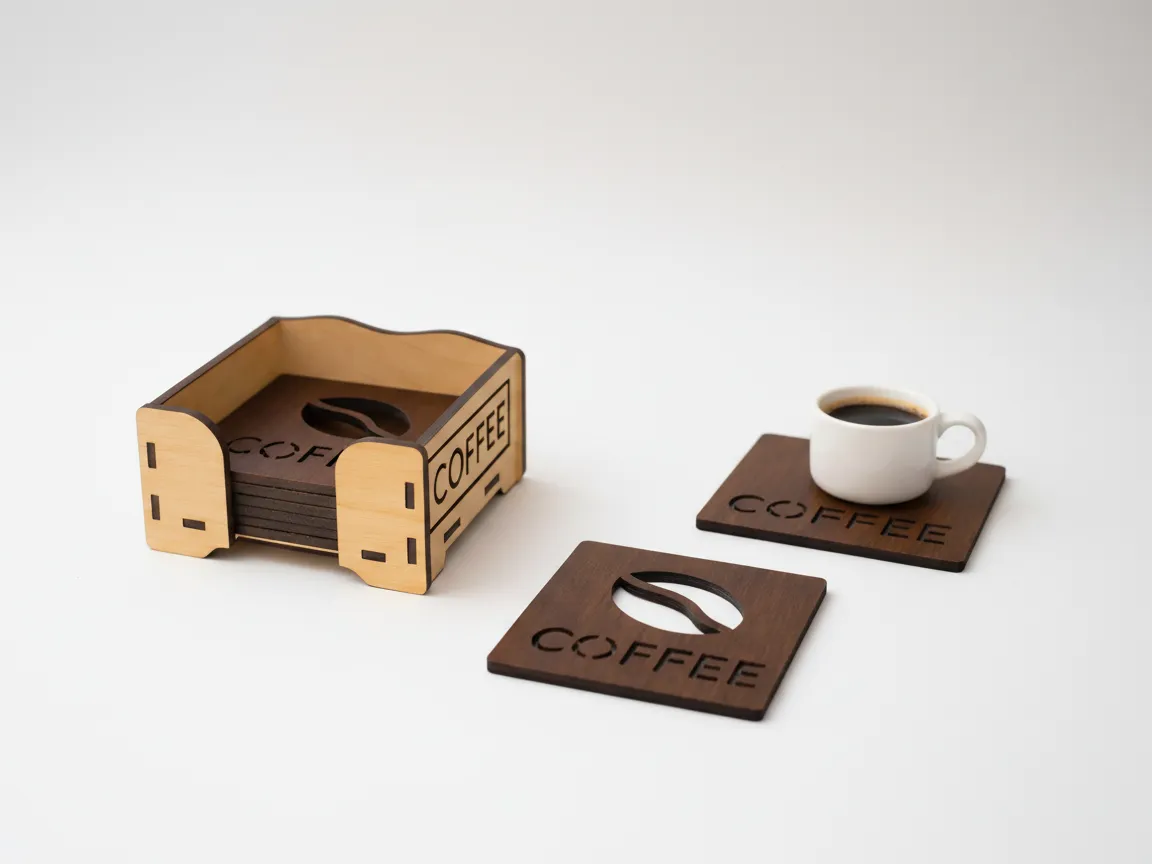
A coaster set with a matching holder feels like a boutique product but is a beginner-friendly job: four engraved squares plus a slot-together caddy from one sheet. Engrave a theme — coffee icons, monograms, line art — and the set gifts beautifully. Seal with oil so they shrug off mugs and moisture.
8. Filigree Bookmarks
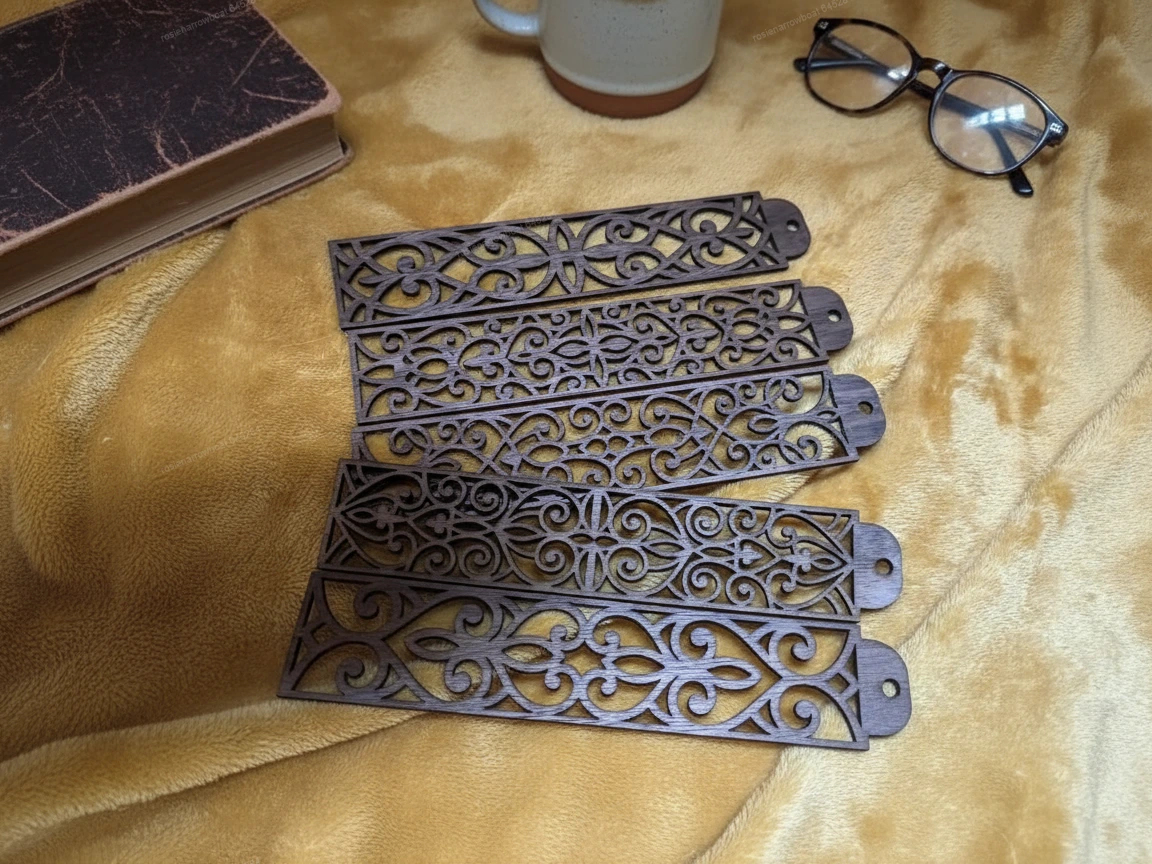
Delicate scrollwork bookmarks show off the laser's precision — lace-like cutouts in thin wood that would snap under any blade. They use almost no material, cut in minutes, and make elegant gifts for readers. Engrave a name along the spine to personalize each one.
9. Ring & Gift Boxes
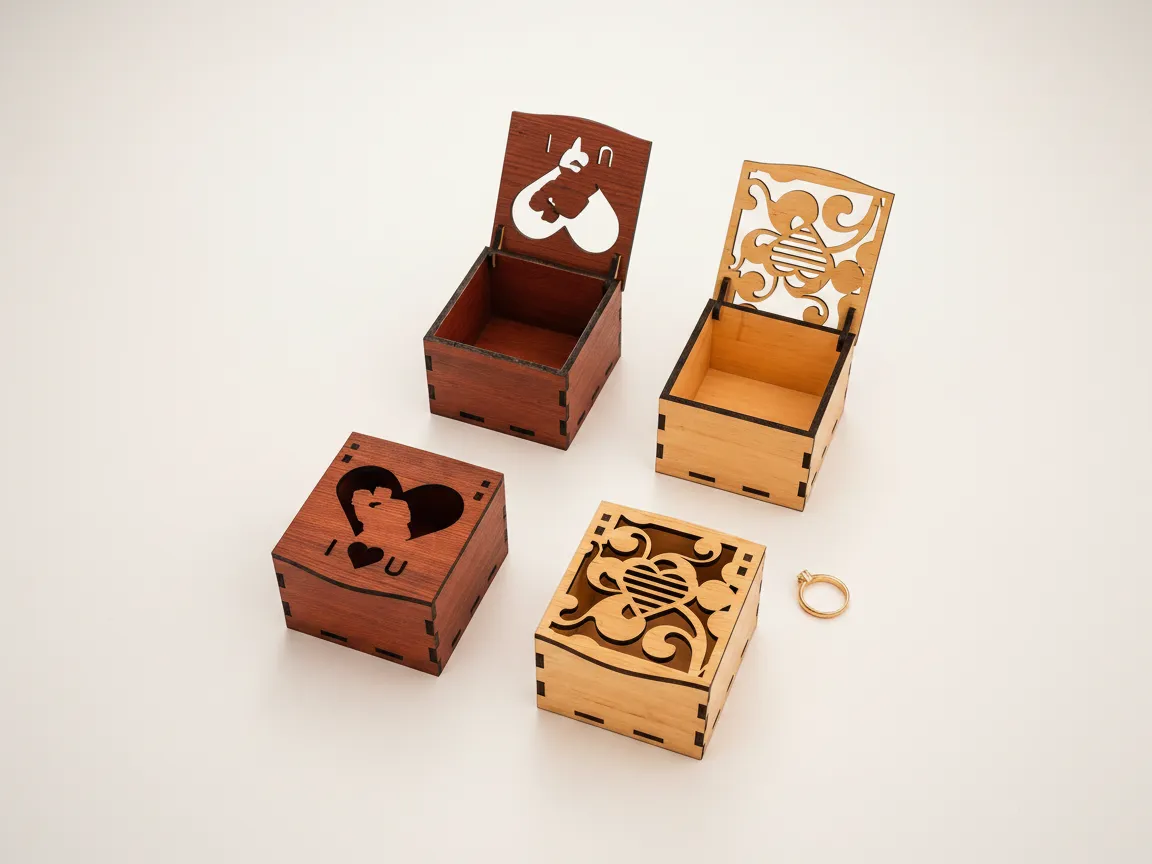
A tiny hinged or slide-top box elevates any small gift — and the box itself becomes the keepsake. Cut the parts flat, glue or slot them together, and engrave the lid with initials or a motif. Ring boxes like these are a wedding favorite: proposals deserve better than velvet plastic.
10. Live-Edge Plaques
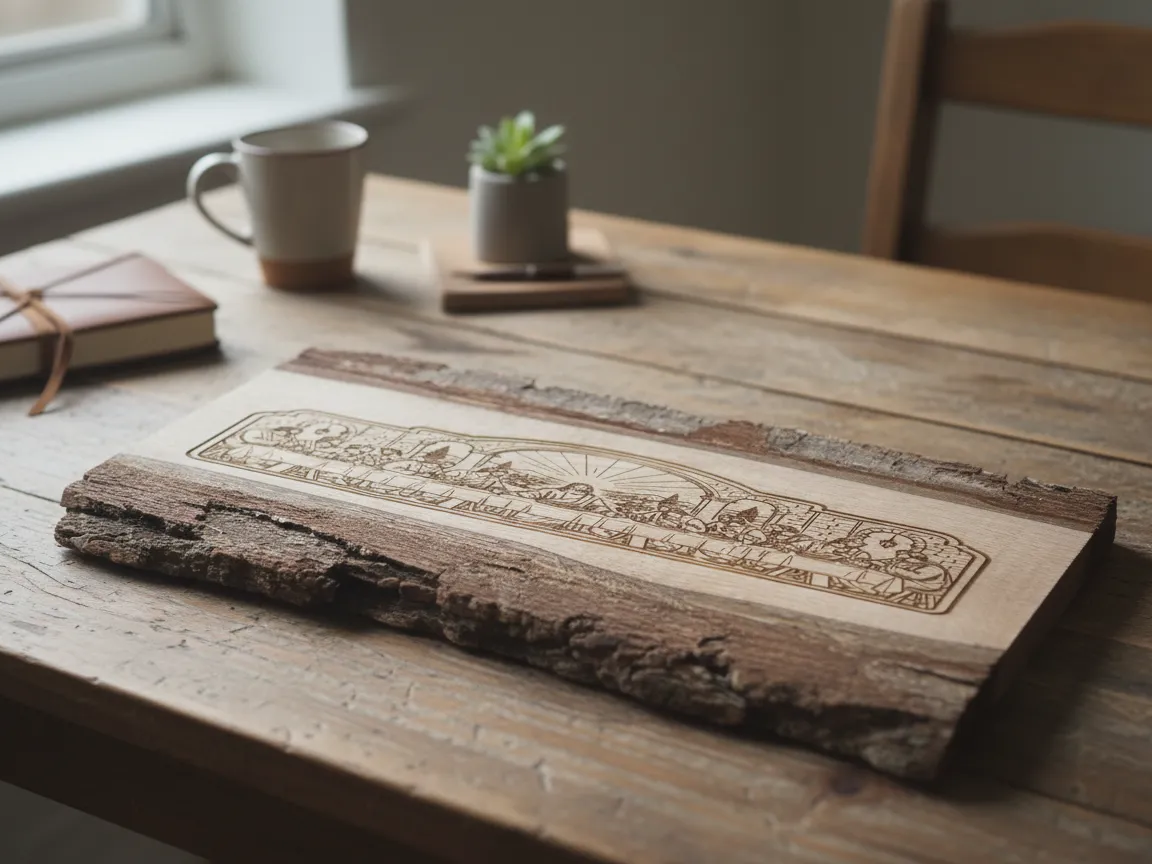
Engraving onto live-edge wood — a slab with its natural bark line — pairs machine precision with organic character. Each plaque is one of a kind because no two slabs match. Flatten and sand the face, engrave your scene or dedication, and finish with oil. Perfect for awards, memorials, and rustic decor.
Wood Engraving Safety Tips
- Ventilate. Burning and lasering wood produce smoke; carving and rotary work produce fine dust. Use extraction and a mask.
- Watch for fire. Never leave a laser or a hot pyrography pen unattended, and don't laser-cut plywood thicker than 12 mm — xTool flags it as a fire risk.
- Protect your eyes — goggles for rotary and laser work.
- Sharp-tool discipline for carving: cut away from yourself, keep tools honed, consider a carving glove.
Common Wood Engraving Mistakes to Avoid
- Skipping the masking tape on a laser. Scorch and smoke stains land on the wood instead of the tape.
- Engraving over varnish. It blurs the result — sand it back first.
- Using pine for detail work. The resin burns unevenly and gums up machines and pens alike.
- One deep pass with a rotary tool or pen. Light, repeated passes give control; force gives gouges.
- Photo engraving on wild grain. Hardness varies across the grain, so the shading comes out blotchy — use basswood or maple.
The bottom line
All four methods earn their place: a laser for detail, photos, and anything you'll make more than once; a rotary tool for quick freehand lines; a pyrography pen for hand-drawn warmth; and chisels for deep, classic lettering. Start with the project you want to make, pick the method that matches, and use basswood while you learn. Still choosing sheets? Our rundown of which woods behave best under a laser will save you some scrap.
Frequently Asked Questions
What's the easiest way to engrave wood at home?
A wood-burning pen is the cheapest and simplest start — plug in, sketch in pencil, and trace with heat. If you want detail, speed, or repeatable batches, a laser engraver is the easiest to get consistently good results with, since the design file does the work.
Can you engrave a photo on wood?
Yes — with a laser. Software like xTool Creative Space converts a photo into a dot pattern (Grayscale or Jarvis mode) and burns it into the grain. Start from a sharp, high-contrast image on fine-grain wood like basswood, and test a small crop first.
What wood is best for laser engraving?
Basswood and birch plywood are the favorites: flat, affordable, fine-grained, and light enough for the dark engraving to pop. Maple, cherry, alder, and walnut also engrave beautifully. Avoid resinous pine and anything with heavy varnish.
How do you engrave wood without burning the edges?
Mask the surface with paper masking tape before engraving — the scorch lands on the tape. Add air assist to blow smoke clear, keep the wood dry, and dial settings in on scrap first.
How do you make an engraving darker?
On a laser, increase power modestly or add a pass. With a pyrography pen, slow down rather than cranking the heat. For carved letters, brush a dark stain into the incisions and wipe the surface clean.
