
A nameplate is a small object with a big job: it says this desk, this door, this room belongs to someone. Which is why the handmade version beats the office-supply one every time — a name deserves better than sliding black plastic.
The short answer: you can make a nameplate four ways —
- Laser-cut wood or acrylic — the most polished and personal.
- Engraved metal — the professional desk classic.
- Vinyl lettering on a blank — no engraving gear needed.
- Hand-painted — the charming one.
Here's each method with steps, a comparison, and ten real designs to start from.

What kind of nameplate are you making?
Decide the destination first — it sets the size and style:
- Desk nameplate: a standing wedge or plate, roughly 2×8 inches, name plus title.
- Door or office sign: flat, wall-mounted, readable from a few steps away.
- Nursery or bedroom name sign: bigger, decorative, often layered or lit.
- Badge or tag: pocket-sized with a pin or magnet backing.
Method 1: How to Make a Laser-Cut Wood or Acrylic Nameplate
The laser method gives you what no store offers: any font, any shape, layered colors, and even built-in stands — cut in one job.
What You Need
- A laser cutter (any diode or CO2 machine)
- 3 mm plywood or acrylic
- A design — generate one in seconds with the free Atomm door sign generator or start from a name sign template
- Wood glue for layered or standing designs
Steps to Make a Laser-Cut Nameplate

Following xTool's own plywood and acrylic processing guides:
- Set the name in a font that survives cutting — script fonts need connected letters or a backing plate holding them together; the free name gift generator handles this automatically. If lettering choices stall you, generating a custom font is the fun way in.
- Design the base: a simple rectangle, a shaped plaque, or a slot-together stand for a desk version.
- Engrave first, then cut. Engrave any title, border, or detail before cutting the outline and stand slots.
- Assemble: glue layered pieces, slot the stand, and finish with oil or leave the acrylic glossy.
- For a nursery sign, go big — a 30–40 cm layered name with a moon, clouds, or florals turns a nameplate into wall art.
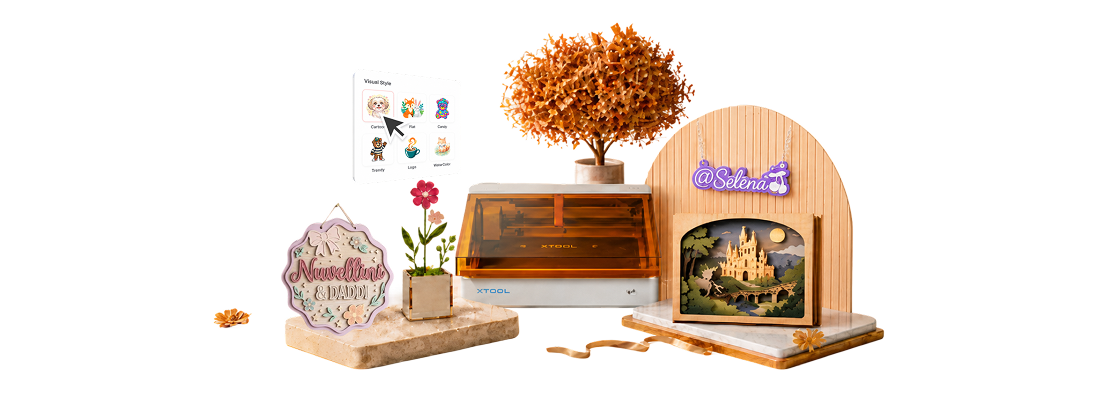
If you're shopping for a machine for exactly this kind of project, the xTool M2 is the current do-it-all starter: an enclosed Class 1 diode laser (10W or 20W) that also swaps in a CMYK inkjet head, so it prints a full-color design and cuts it out in one session — dual cameras handle placement and air assist is built in. Name signs can be printed in full color and cut out in a single pass.
Tip: Cutting a name in a connected script font? Add a thin horizontal backing bar behind the letters in the design. It keeps delicate connections from snapping and makes wall mounting trivial.
Method 2: How to Make an Engraved Metal Nameplate
The boardroom classic: brushed metal, crisp engraving, unmistakably permanent. (For the full which-laser-marks-which-metal picture, see our metal engraving guide.)
What You Need
- An anodized aluminum or stainless blank (anodized is easiest — even entry-level diode lasers mark it crisply)
- A fiber/IR laser for bare metal, or any diode laser for anodized blanks
- A wedge-shaped desk holder (buy one, or laser-cut a wooden one)
Steps to Engrave a Metal Nameplate
- Choose the blank: black anodized aluminum gives silver-on-black text with zero prep.
- Degrease the surface — fingerprints show in the final mark.
- Engrave name and title, keeping generous margins; simple layouts read as more professional.
- Mount it in a desk wedge or stick it to a door plate with foam tape.
Method 3: How to Make a Vinyl Nameplate (No Laser)

Adhesive vinyl on a ready-made blank gets you a clean, professional nameplate with just a cutting machine — or scissors and patience.
What You Need
- A blank: acrylic bar, wood plaque, or office plate
- Adhesive vinyl and transfer tape
- A vinyl cutter (Cricut-type), or pre-cut vinyl letters
Steps to Make a Vinyl Nameplate
- Cut the name from vinyl in a bold, readable font.
- Weed the excess vinyl away, leaving just the letters on the backing.
- Apply transfer tape, position on the blank, squeegee down, and peel.
- Seal with a clear spray if the plate will be handled a lot.
Method 4: How to Hand-Paint a Nameplate
For nurseries, classrooms, and gifts where charm beats precision.
What You Need
- A wood or MDF plaque blank
- Acrylic paints, brushes, and a pencil
- Optional: letter stencils and a clear sealer
Steps to Hand-Paint a Nameplate
- Base-coat the plaque and let it dry fully.
- Sketch the name in pencil (or trace through a printed template).
- Paint the letters with a small flat brush — two thin coats beat one thick one.
- Add flourishes — dots, vines, stars — and seal when dry.
How do the nameplate methods compare?
| Method | Best for | Cost | Look | Difficulty |
|---|---|---|---|---|
| Laser wood/acrylic | Desks, doors, nurseries | $2–5 | Polished, custom shapes | Easy–medium |
| Engraved metal | Office desks, badges | $5–10 | Professional, permanent | Easy (with the right laser) |
| Vinyl on blank | Quick office signs | $3–8 | Clean, graphic | Very easy |
| Hand-painted | Kids' rooms, gifts | $3–6 | Warm, one-of-a-kind | Medium |
10 Nameplate Ideas to Make
From boardroom to nursery door, these ten community designs show the range a name can take — and every one is a real file you can open and make for free.
1. 3D Desk Nameplates
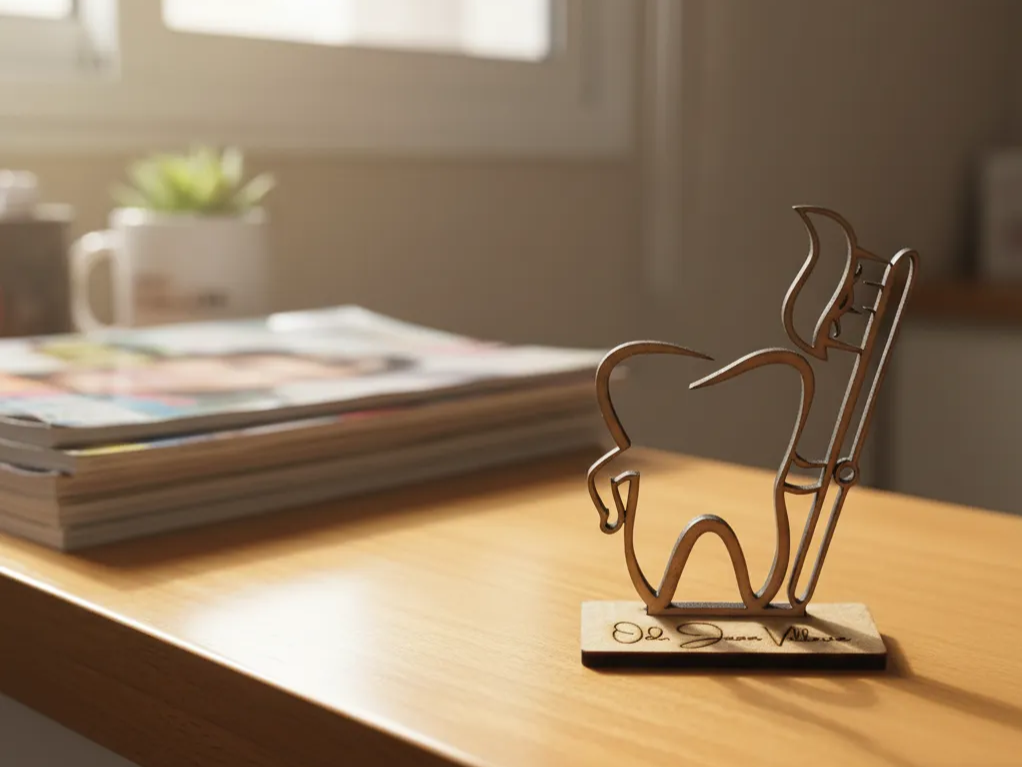
A desk nameplate doesn't have to be a rectangle — this dentist version silhouettes a tooth and tools into the stand itself. Profession-shaped nameplates make brilliant coworker gifts: swap the silhouette for a guitar, a scalpel, a whisk, or a paw.
2. Classic Desk Name Plates
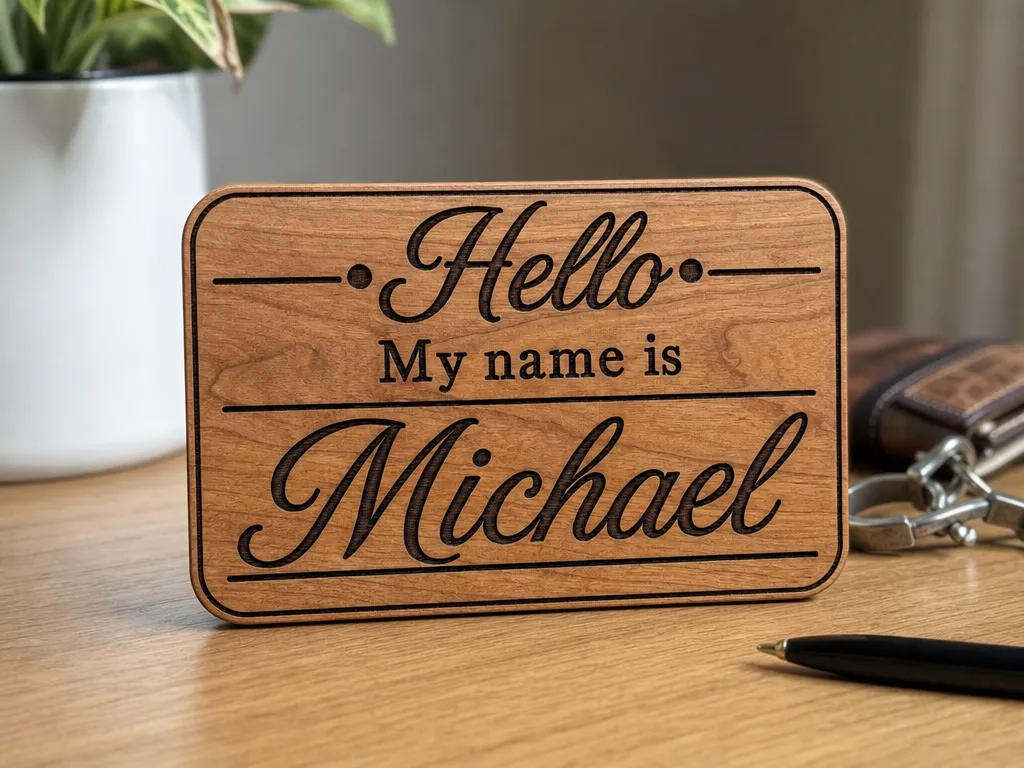
The office classic, upgraded to warm engraved wood. A clean layout — greeting up top, name in script below — reads professional without the plastic. Cut a matching wedge stand from the same sheet and it's a five-minute batch job for the whole team.
3. Office Door Sign Sets
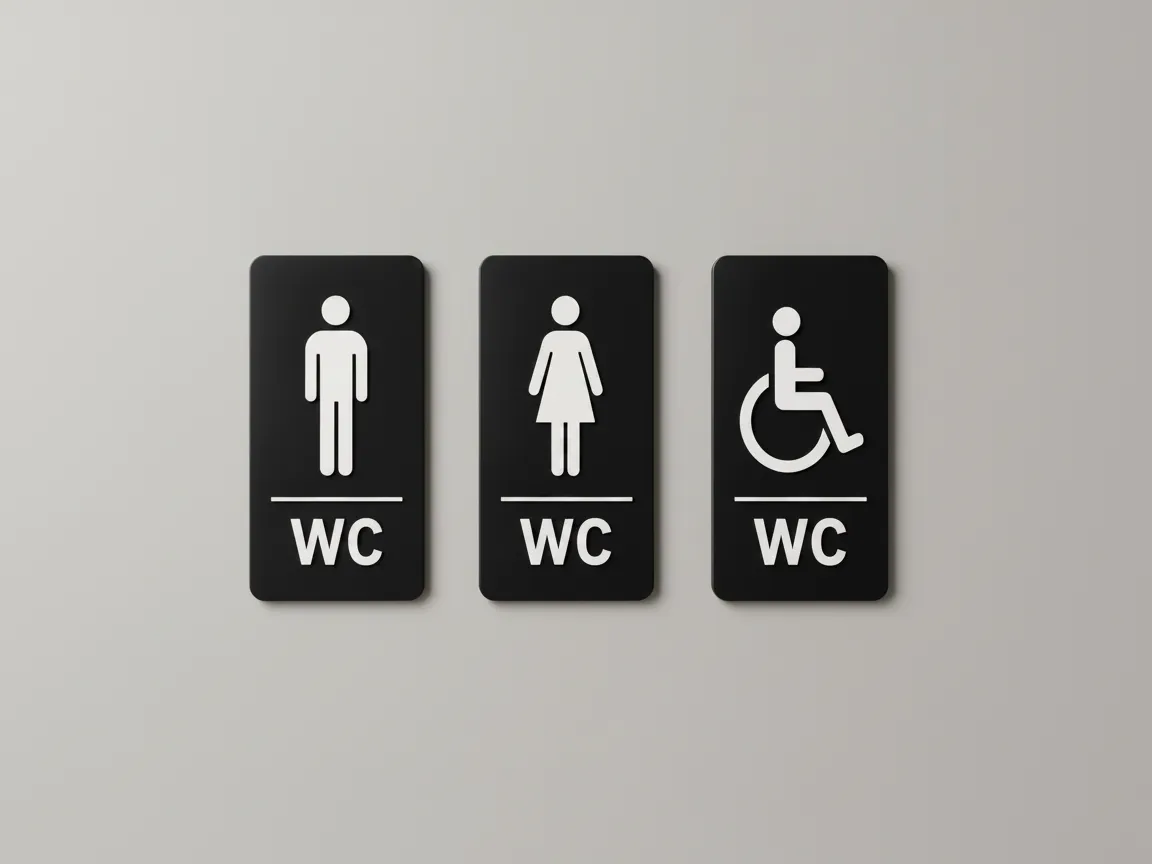
Beyond names: a matching set of office signs (restrooms, meeting rooms, kitchen) makes a workspace feel finished. Black acrylic with engraved icons is the timeless look. Cut the full bundle in one session and the whole floor matches.
4. Meeting Status Flip Signs
The nameplate's funny cousin: a flip sign that says 'in a meeting' on one side and 'available' on the other. Hang it on a hook by the desk or door. The shushing face does the diplomacy so you don't have to.
5. Hobby Desk Signs
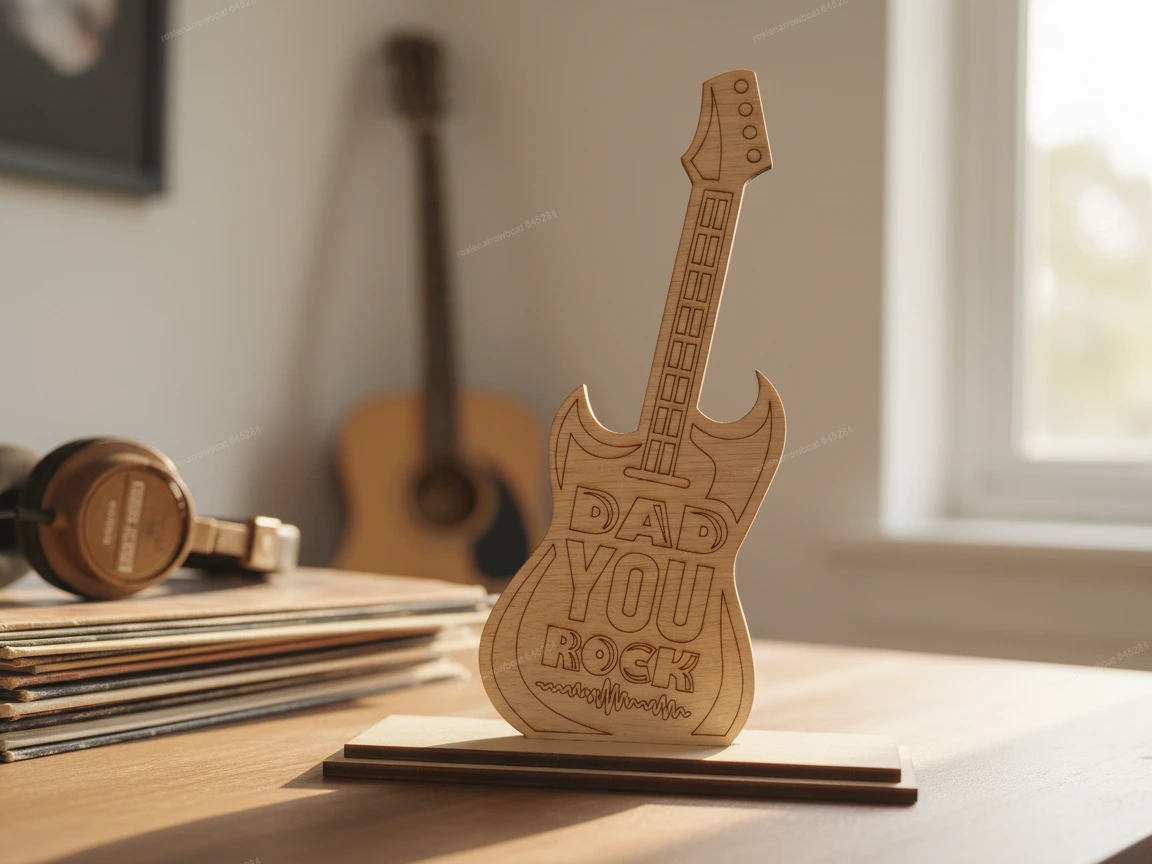
Shape the whole sign like the thing they love — this Father's Day guitar stands on a slot base and says it all. Hobby-shaped desk signs personalize a workspace beyond just the name: fishing rods, race cars, knitting needles, you name it.
6. Family Name Door Rounds
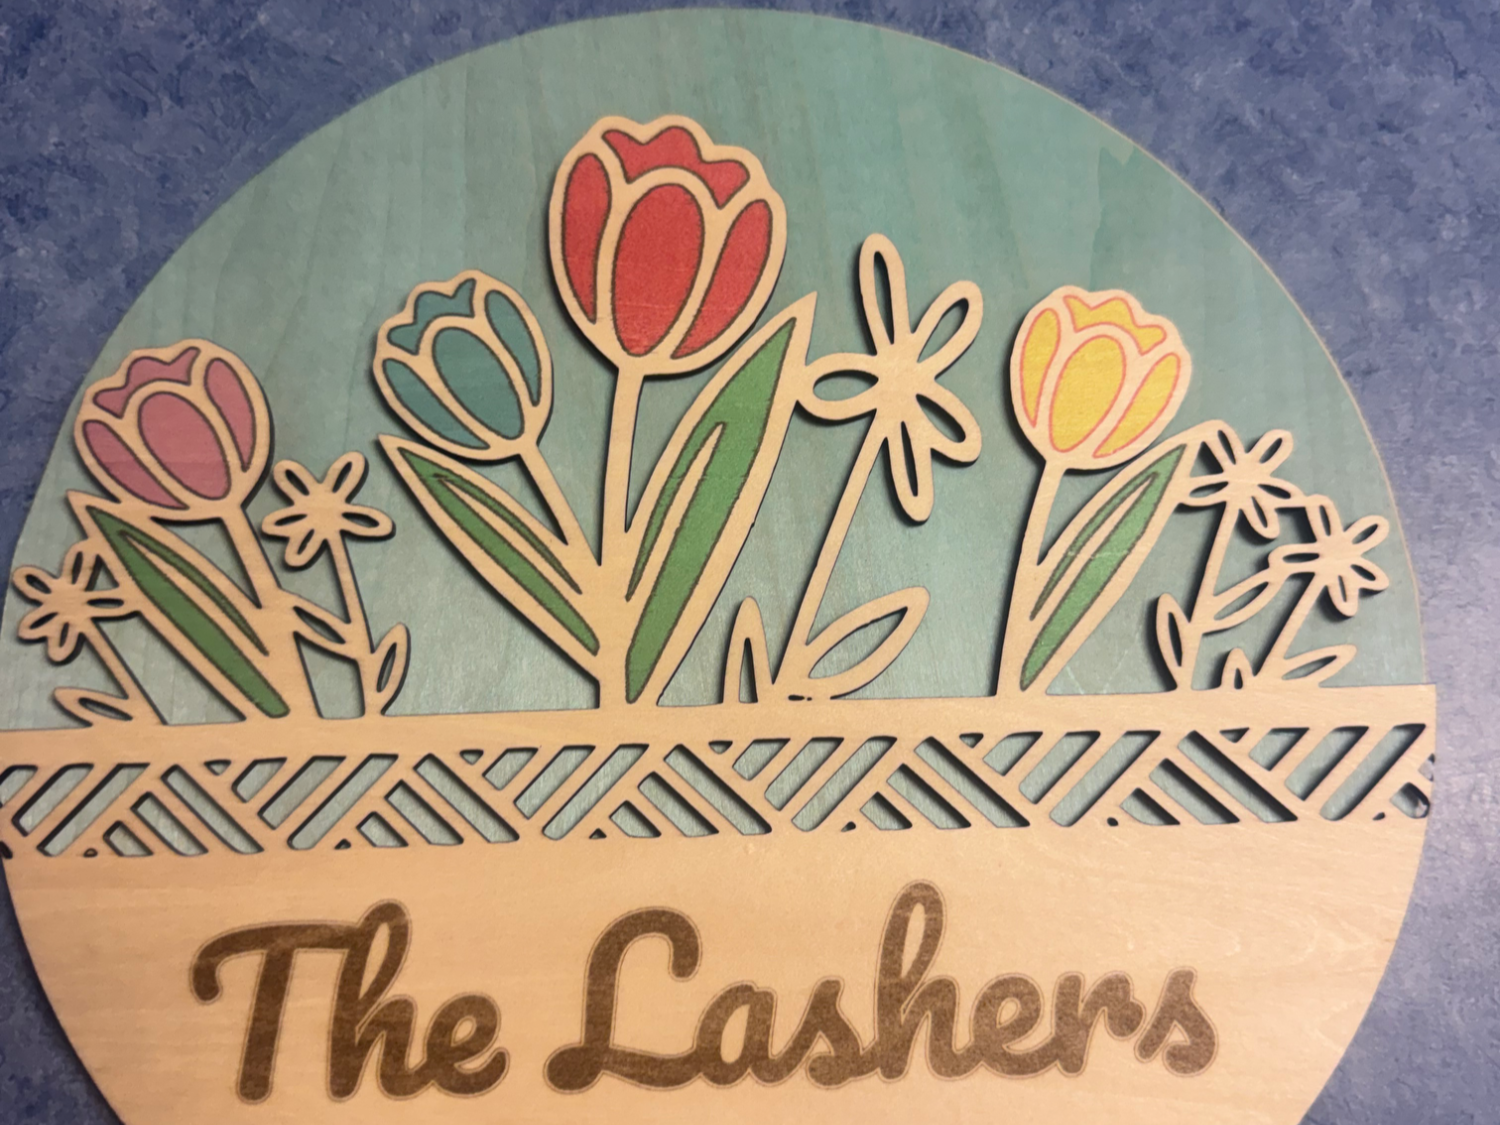
A layered family-name round — florals on top, script below — is the front-door handshake. Painted layers lift it from craft to boutique. Swap the flowers seasonally and keep the name base all year.
7. Seasonal Welcome Signs
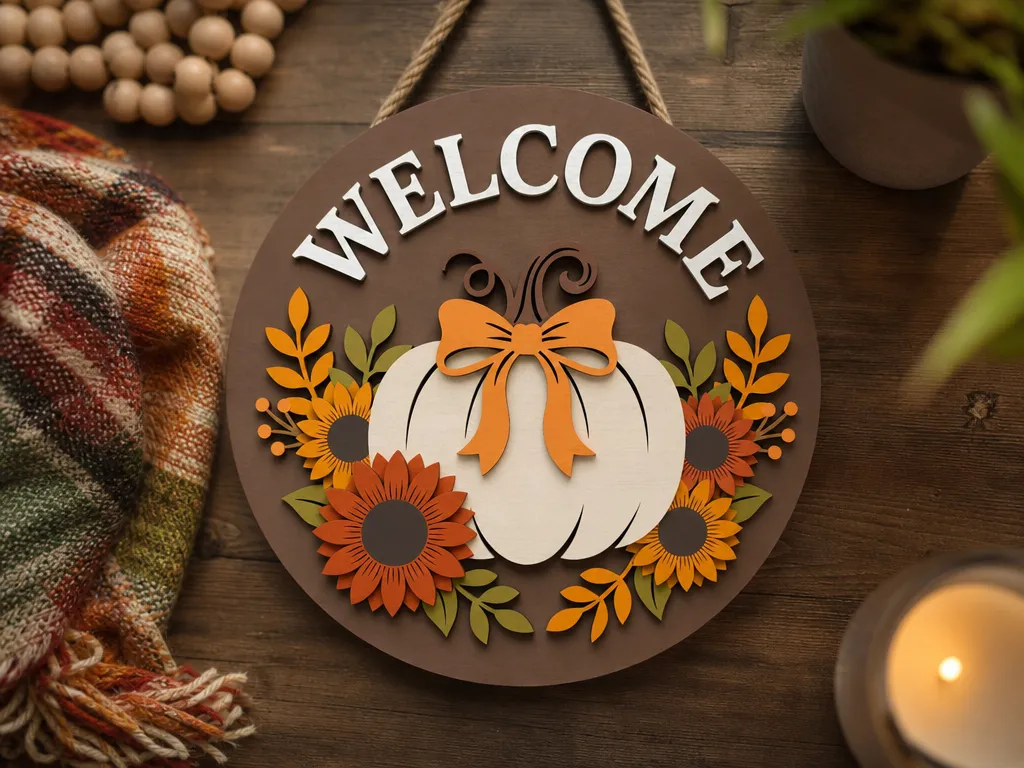
Welcome signs are nameplates for the whole household. This fall version layers a pumpkin and sunflowers under an arched WELCOME — change the centerpiece per season and the door stays fresh. A hallmark porch project.
8. Kids' Room Name Plaques
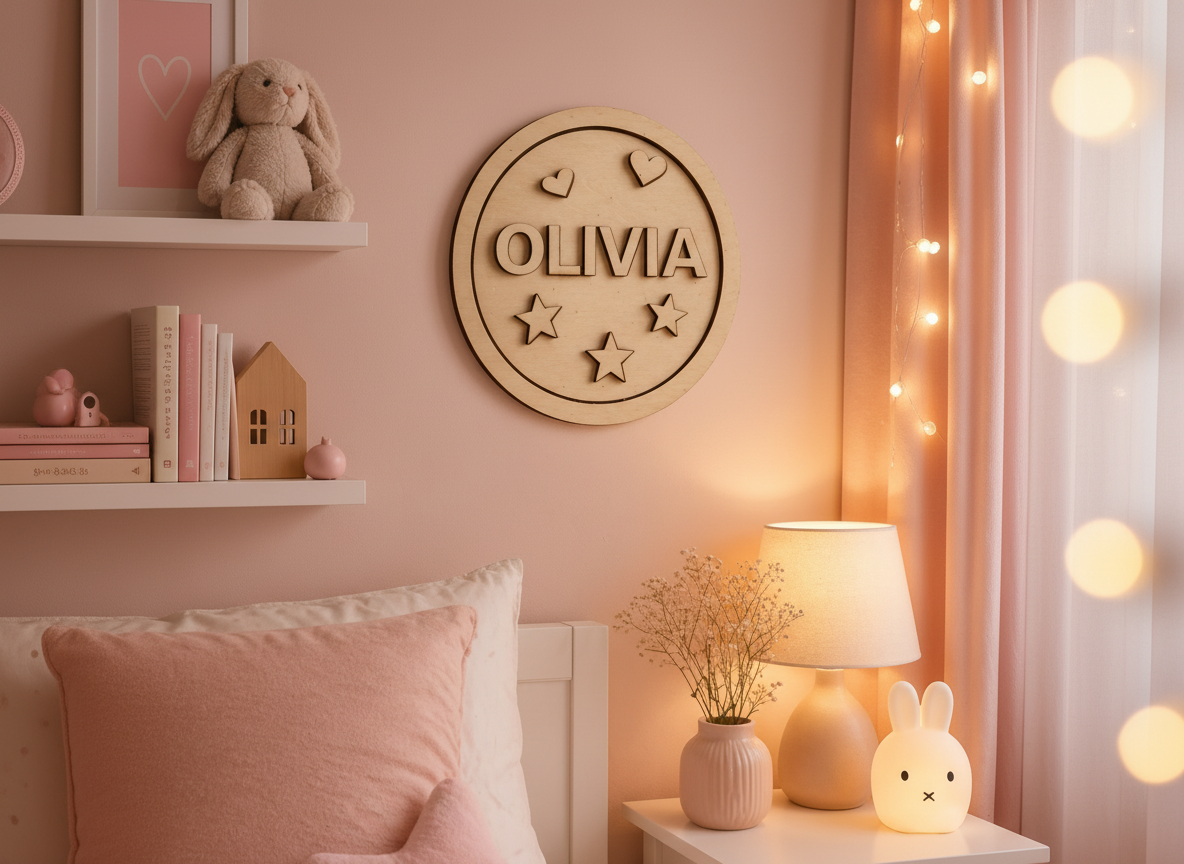
A simple round with the name, a star, and a heart — sized for a bedroom door or shelf. Kids' name plaques are quick to cut and endlessly re-themed: dinosaurs, rockets, crowns. The kind of gift that stays up for years.
9. Baby Birth Signs
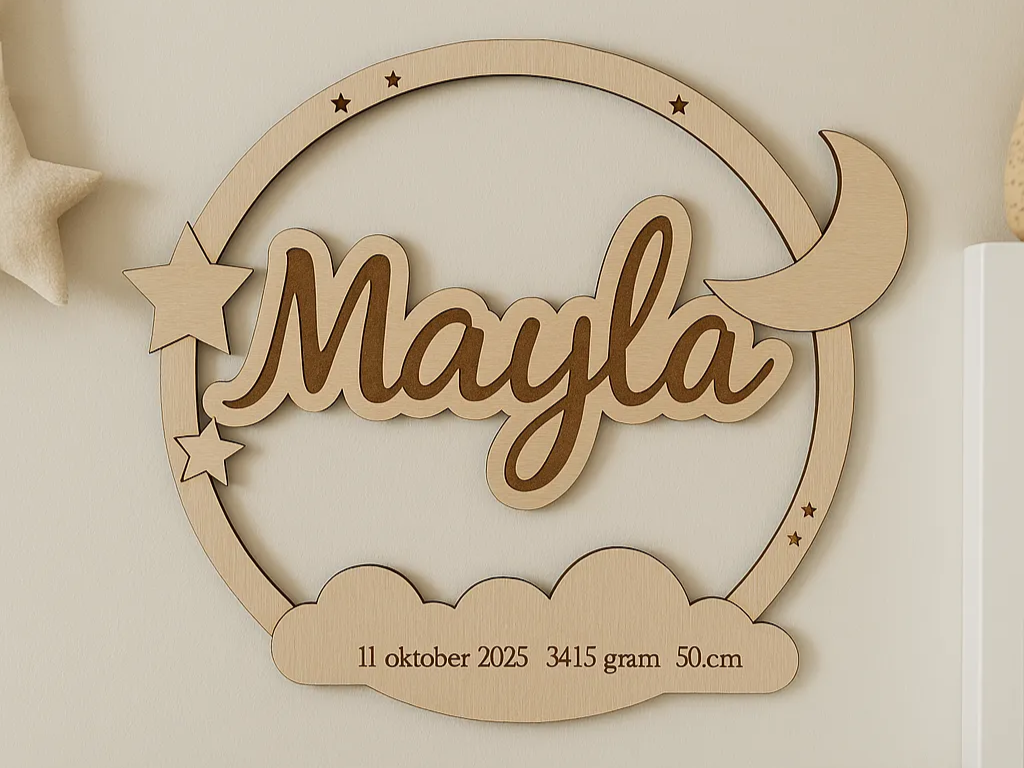
Part nameplate, part birth certificate: name in script, moon and stars around it, and the date, weight, and length on a cloud below. Birth signs are the most treasured nameplate format there is — one of the best new-parent gifts you can make.
10. Light-Up Nursery Name Signs
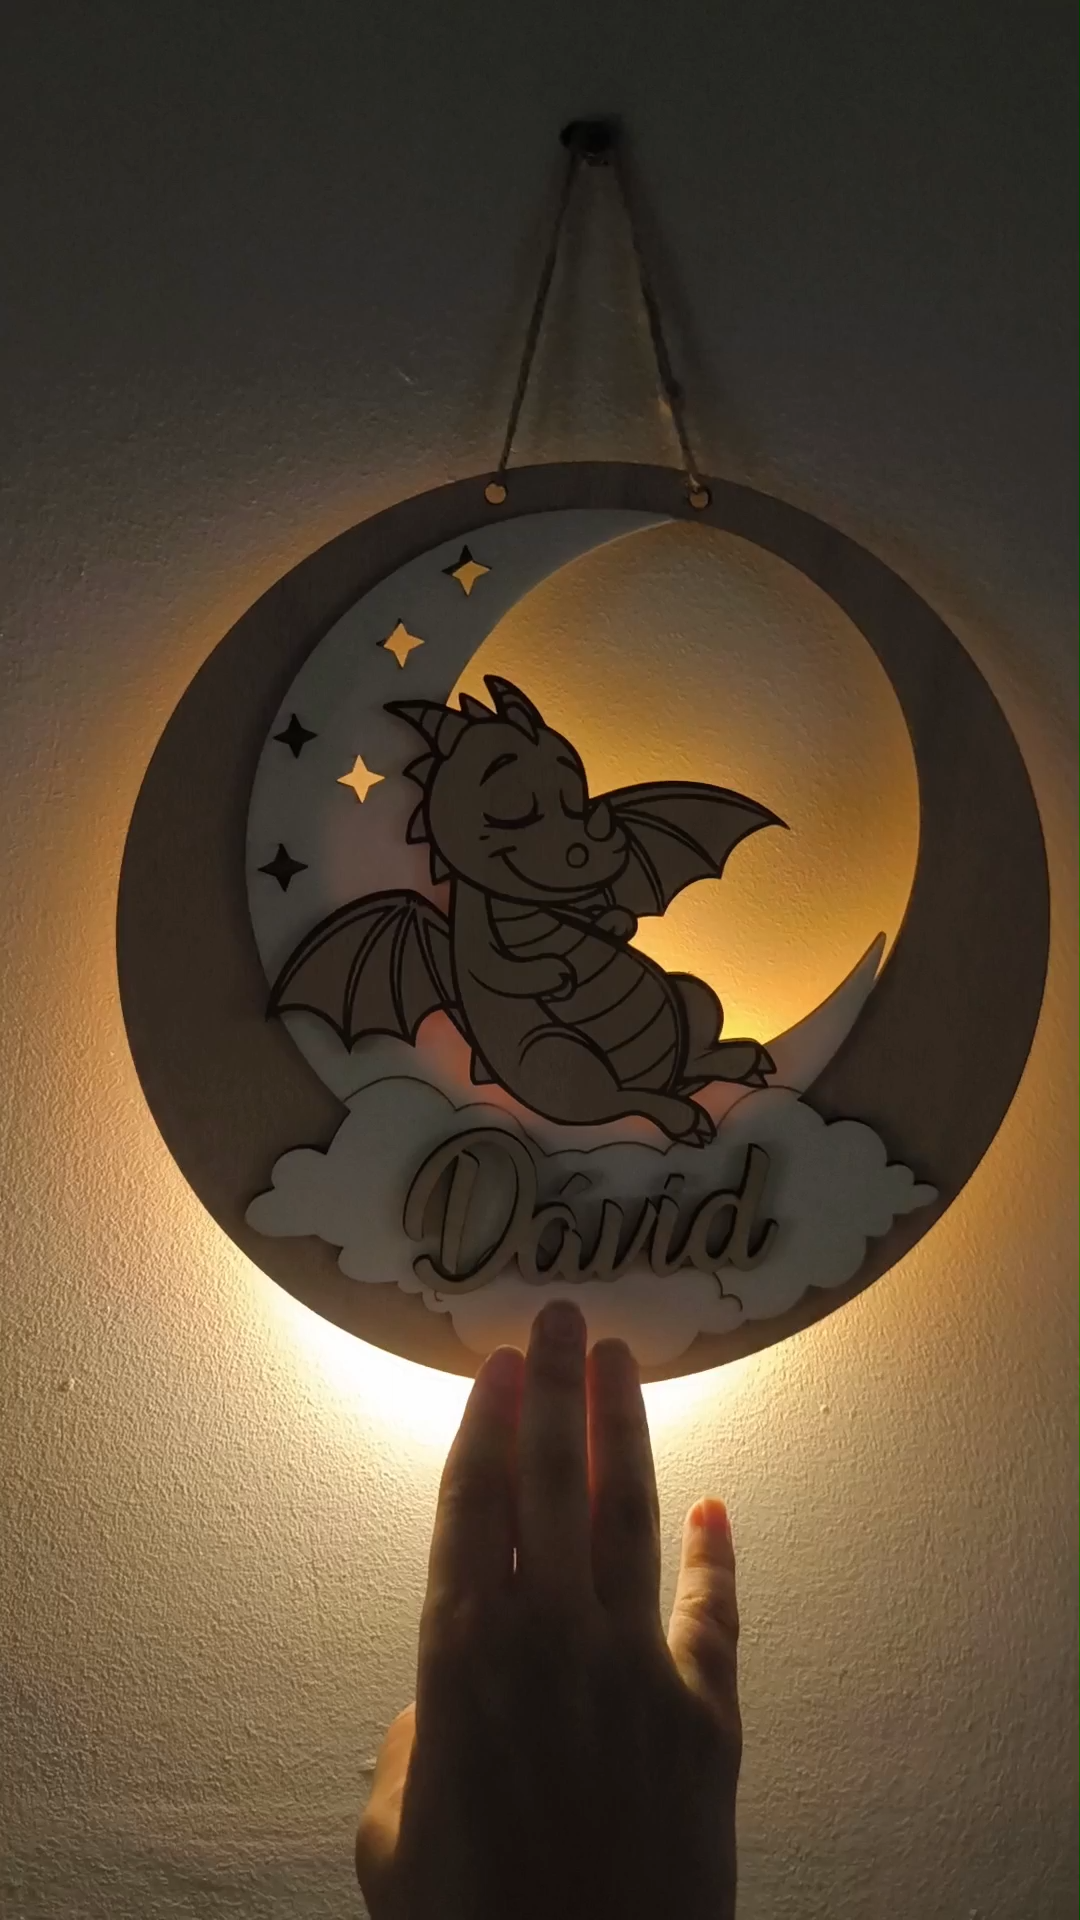
Add a backlight and the name sign becomes a night light. This baby dragon dozes on a moon over the child's name, glowing warm after lights-out. Layered ply plus an LED strip — the showstopper tier of nameplate making.
The bottom line
Match the method to the destination: laser-cut for custom shapes and nursery showpieces, engraved metal for the professional desk, vinyl for fast clean office signs, and paint for charm. Keep the layout simple, test the font at reading distance, and put a stand or hanger in the plan from the start.
Frequently Asked Questions
What is the standard size for a desk nameplate?
Around 2 × 8 inches (5 × 20 cm) for the plate itself — big enough to read across a desk, small enough not to dominate it. Door signs run slightly larger; nursery name signs can be 30–40 cm wide.
How do you make a nameplate stand up?
Three options: cut a slot-together wedge stand as part of your laser design, buy a standard metal desk wedge and slide the plate in, or glue a simple triangular block behind a flat plate.
What font is best for a nameplate?
Bold, simple sans-serifs read best at desk distance; connected scripts look elegant for nursery and wedding signs but need a backing bar when laser-cut. Test readability at two meters before committing.
Can you make a nameplate without a laser or cutting machine?
Yes — vinyl letters on a store blank, or hand-painting with stencils, both produce clean results with zero machines. The laser only wins on custom shapes, layered designs, and batch quantities.
What material is best for an outdoor name plate?
Exterior-grade acrylic or sealed hardwood handle weather best; anodized aluminum is effectively weatherproof. Whatever the material, use UV-resistant sealant and stainless mounting hardware.