Report
![[Laser cut and engrave] Laser Engraved Glass Tumbler with Arrow and Heart Pattern](https://image-res.atomm.com/resource/xtool/community/attachment/xtool-community/241f58e7-be6c-4ebd-8e7b-0e88d2c2d4c8.png?x-oss-process=image/resize,w_1200,h_900,limit_0/interlace,1/format,webp/auto-orient,1)
![[Laser cut and engrave] Laser Engraved Glass Tumbler with Arrow and Heart Pattern](data:image/png;base64,iVBORw0KGgoAAAANSUhEUgAAAAoAAAAKCAYAAACNMs+9AAAAAXNSR0IArs4c6QAAABdJREFUKFNjZCASMBKpjmFUId6QIjp4AAppAAuXjCs4AAAAAElFTkSuQmCC)
![[Laser cut and engrave] Laser Engraved Glass Tumbler with Arrow and Heart Pattern](https://image-res.atomm.com/resource/xtool/community/attachment/xtool-community/241f58e7-be6c-4ebd-8e7b-0e88d2c2d4c8.png?x-oss-process=image/resize,w_200,h_150,limit_0/interlace,1/format,webp/auto-orient,1)
![[Laser cut and engrave] Laser Engraved Glass Tumbler with Arrow and Heart Pattern](https://image-res.atomm.com/resource/xtool/community/attachment/xtool-community/e36e8775-0578-4065-83a1-ee670d304f90.png?x-oss-process=image/resize,w_200,h_150,limit_0/interlace,1/format,webp/auto-orient,1)
![[Laser cut and engrave] Laser Engraved Glass Tumbler with Arrow and Heart Pattern](https://image-res.atomm.com/resource/xtool/community/attachment/xtool-community/ad5818b2-844b-4d89-b8cf-251dccee137a.png?x-oss-process=image/resize,w_200,h_150,limit_0/interlace,1/format,webp/auto-orient,1)
![[Laser cut and engrave] Laser Engraved Glass Tumbler with Arrow and Heart Pattern](https://image-res.atomm.com/resource/xtool/community/attachment/xtool-community/1b559312-2405-4892-be88-ed11373f2224.png?x-oss-process=image/resize,w_200,h_150,limit_0/interlace,1/format,webp/auto-orient,1)
Valentine’s Day Iced Coffee Glass
 Instruction
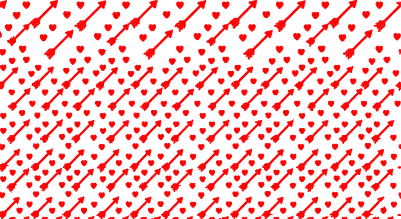
Cupid Glass Heart Arrow
.xcs
Application scenario
Laser processing
Machine & module
xTool S1
20WCompatible xTool Machine
F2 Ultra UV
5WF2
5WP3
80WF2 Ultra
40W, 60WF1 Ultra
20WP2
55WF1
2WP2S
55WF2 Ultra (Single)
60WMaterial used

3mm Clear Soda-Lime Glass

22
836
Information
      Love at First Sip! 💘

Elevate your iced coffee game this Valentine's Day with our "Cupid's Arrow" Glass Can. Whether you’re treating yourself or gifting it to your bestie for Galentine's Day, this aesthetic cup is the perfect way to hold your favorite cold brew, matcha, or cocktail.
Instruction
1
Step1
Preparation & Masking
- Clean the Glass: Wipe the glass down with isopropyl alcohol to remove fingerprints and oils.
- Mask the Glass (Crucial for Diode Lasers):
- Method A (Best for Diode): Spray the engraving area with Cold Galvanizing Compound (a spray paint found at hardware stores) or black tempera paint/chalk spray. The laser heats the pigment/metal, which transfers heat to the glass to create the fracture.
- Method B (Best for CO2/P2): Wet a single layer of paper towel and smooth it over the glass (no air bubbles). This keeps the glass cool and prevents shards from chipping off.
- Method A (Best for Diode): Spray the engraving area with Cold Galvanizing Compound (a spray paint found at hardware stores) or black tempera paint/chalk spray. The laser heats the pigment/metal, which transfers heat to the glass to create the fracture.
- Install the Rotary Attachment:
- Plug your RA2 Pro (or similar rotary) into the machine.
- Set it to Chuck Mode (gripping the glass) or Roller Mode (resting the glass), depending on the shape. For a straight-walled whiskey glass, Rollers are fine. If it tapers or is heavy, Chuck mode is safer.
- Tip: Use the leveling tool (the little spirit level) to ensure the surface of the glass is perfectly flat horizontally. If the glass is tilted, the laser focus will drift.
- Plug your RA2 Pro (or similar rotary) into the machine.
2
Step2
xTool Studio Setup
- Connect & Select: Open XCS and connect your machine. Select "Laser Cylindrical" mode on the right-hand panel.
- Input Diameter: Measure the diameter of your glass (in mm) and enter it into the software so the rotary spins at the correct speed.
- Import Design:
- Import your .xcs file into Studio
- Rotate the design 90 degrees if necessary (depending on how your rotary is oriented—usually the top of the glass faces left).
- Import your .xcs file into Studio
- Settings (Starting Point):
- These vary by machine wattage, but here are safe starting points for a 10W Diode:
- Power: 100%
- Speed: 50–70 mm/s
- Lines per cm (LPC): 100–120 (Too high causes heat stress/cracking; too low looks faint).
- These vary by machine wattage, but here are safe starting points for a 10W Diode:
For CO2 (P2): Lower power (15-20%) and higher speed (150+ mm/s) is usually sufficient
3
Step3
Focusing & Framing
- Focus the Laser:
- Move the laser head over the highest point of the glass curve.
- Use the kickstand lever (D1/M1) or the auto-measure (P2) to set the focus distance right on top of the glass surface.
- Move the laser head over the highest point of the glass curve.
- Framing:
- Click "Framing" in XCS.
- Watch the laser head move and the glass spin.
- Ensure the design isn't hitting the heavy rim at the bottom or the lip at the top. It should be centered in the clear area.
- Click "Framing" in XCS.
4
Step4
Engraving & Cleanup
- Run the Job: Put on your safety goggles (glass reflects laser beams!) and hit "Start."
- Cool Down: Let the glass sit for a minute or two after the job finishes. It will be hot.
- Remove Masking:
- Take the glass to a sink.
- Use a scouring pad (like a green Scotch-Brite) or a "Magic Eraser" with water to scrub off the paint or galvanizing spray.
- Note: The paint might look stubborn, but the laser has permanently etched the glass underneath. Once the paint is gone, you will see the frosted white look.
- Take the glass to a sink.
5
Step5
Quality Check
- Check for "Shards": Run your finger gently over the engraving. If it feels extremely rough or sharp like sandpaper, you may have used too much power or too slow a speed (causing deep fracturing).
- Solution: lightly sand the engraving with high-grit sandpaper (2000 grit) or steel wool to smooth it out for the customer.
Comments
Remixes


You may also like
valentine's day gift
valentine's day holder
valentine's day card
valentine's day keychain
valentine's day puzzle

Happy Valentine’s Day with Cats Embracing

1
10

$2.39
$2.39
$2.99
Credits239
Hearts 20oz Coffee Tumbler

1

Valentines Tumbler With Hearts

70
224

Corgi Valentines day 20oz Tumbler

5
11

20 oz skinny Valentine's candy heart Tumbler

3
25

Laser Engraved Glass Can Set with Floral Designs

11
36

Laser Engraved Glass Wine Tumbler with Festive Christmas Tree Design / Weinglas mit Weihnachtsbaum, Wunsch und Name

7
35

Happy Valentine Day - 20 oz Tumbler

0
1

Whiskey Glass with 'You're Neat' Text and Ice Cube Icon

13
46

Orange Stainless Steel Tumbler with Laser Engraved Floral Design

4
26

Engraved Whiskey Glass for Fathers day

11
105

Pink Stainless Steel Tumbler with Laser Engraved Teddy Bear Design

0
8

Laser Engraved Navy Blue Coffee Tumbler with Fueled by Coffee & Chaos
9
30

Glass tumbler featuring a detailed skull motif

1
9

Engraved Glass with perfect results
20
173

Laser Engraved Custom Colorful Thermos & Lids
19
121

Glass tumbler featuring a detailed Celtic knotwork ram head design

4
21

Etched Glass Tumbler with Sea Turtle Design on Beach
17
126