
Report
![[Laser cut and engrave] Laser Cut Coordinates Wall Art Sign with Heart Symbol](https://image-res.atomm.com/resource/xtool/community/attachment/xtool-community/e178f2a5-35ff-47a2-928d-3eb62d835a11.png?x-oss-process=image/resize,w_1200,h_900,limit_0/interlace,1/format,webp/auto-orient,1)
![[Laser cut and engrave] Laser Cut Coordinates Wall Art Sign with Heart Symbol](data:image/png;base64,iVBORw0KGgoAAAANSUhEUgAAAAoAAAAKCAYAAACNMs+9AAAAAXNSR0IArs4c6QAAABdJREFUKFNjZCASMBKpjmFUId6QIjp4AAppAAuXjCs4AAAAAElFTkSuQmCC)
![[Laser cut and engrave] Laser Cut Coordinates Wall Art Sign with Heart Symbol](https://image-res.atomm.com/resource/xtool/community/attachment/xtool-community/e178f2a5-35ff-47a2-928d-3eb62d835a11.png?x-oss-process=image/resize,w_200,h_150,limit_0/interlace,1/format,webp/auto-orient,1)
![[Laser cut and engrave] Laser Cut Coordinates Wall Art Sign with Heart Symbol](https://image-res.atomm.com/resource/xtool/community/attachment/xtool-community/279b2c8f-c360-4a3c-9524-eb62ee943b7b.png?x-oss-process=image/resize,w_200,h_150,limit_0/interlace,1/format,webp/auto-orient,1)
![[Laser cut and engrave] Laser Cut Coordinates Wall Art Sign with Heart Symbol](https://image-res.atomm.com/resource/xtool/community/attachment/xtool-community/a1a5365f-32ec-4770-892f-3f4023f5bc35.png?x-oss-process=image/resize,w_200,h_150,limit_0/interlace,1/format,webp/auto-orient,1)
![[Laser cut and engrave] Laser Cut Coordinates Wall Art Sign with Heart Symbol](https://image-res.atomm.com/resource/xtool/community/attachment/xtool-community/c7b0bca0-6bea-47c6-b768-01b14588f983.png?x-oss-process=image/resize,w_200,h_150,limit_0/interlace,1/format,webp/auto-orient,1)
![[Laser cut and engrave] Laser Cut Coordinates Wall Art Sign with Heart Symbol](https://image-res.atomm.com/resource/xtool/community/attachment/xtool-community/c922c707-ef73-4de2-97b9-fe4a22a076f3.png?x-oss-process=image/resize,w_200,h_150,limit_0/interlace,1/format,webp/auto-orient,1)
3D Custom Coordinates Sign
 Instruction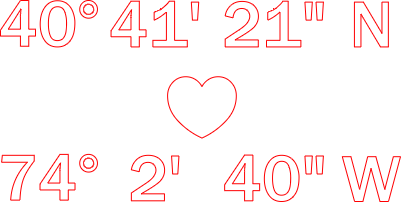
Custom Coordinates Sign
.xcs
Application scenario
Laser processing
Machine & module

xTool P2S
55WCompatible xTool Machine
P3
80WP2
55WMaterial used

1/2"(12mm) Black Acrylic

1/2"(12mm) Black Walnut Plywood

1/2"(12mm) White Acrylic

1/8"(3mm) Red Acrylic

20
682
Information
      Every love story has a setting. Whether it's the place we met, the spot where we got engaged, or the address of our first home, immortalize that special location with this modern, handcrafted sign.

Unlike standard printed signs, this laser-cut acrylic is here to create a stunning 3D raised effect. The sharp black numbers pop against the rustic white wood, creating a premium look that adds depth and texture to any gallery wall.
Instruction
1
Step1
Software Setup Import Design:
- Open xTool Studio (XCS).
- Click Image -> Import and select the design you download from Atomm
- Assign Settings as per xTool recommendation
- Note: Always run a small 1-inch test circle first. If the edges are gummy, increase speed slightly. If it doesn't cut through, decrease speed.
- Masking: Ensure the acrylic is masked. Most cast acrylic comes with paper masking. Leave it on! If you are cutting mirrored gold, the grey back is usually not masked, so apply masking tape to the back to prevent scorch marks.
2
Step2
Machine Setup (xTool P2)
- Slats vs. Honeycomb:
- For acrylic, slats (the triangular bars) are often better than honeycomb because they have less surface area touching the back of the material, reducing "flashback" (grid marks burned onto the material).
- For acrylic, slats (the triangular bars) are often better than honeycomb because they have less surface area touching the back of the material, reducing "flashback" (grid marks burned onto the material).
- Focus:
- Place your material inside.
- In XCS, look for the Distance setting. Click the Auto-measure icon (the ruler) to let the P2 automatically measure the thickness/distance of the material.
- Place your material inside.
- Air Assist:
- Acrylic Trick: Unlike wood, you want LOW air assist for acrylic. High air cools the cut too fast and makes the edges frosty/white. Low air allows the laser to melt the edge slightly, giving you that crystal-clear, polished "flame polished" look.
- Acrylic Trick: Unlike wood, you want LOW air assist for acrylic. High air cools the cut too fast and makes the edges frosty/white. Low air allows the laser to melt the edge slightly, giving you that crystal-clear, polished "flame polished" look.
3
Step3
The Cut
- Framing: Click Process Framing to ensure your design fits on the scrap.
- Start: Close the lid and press the button.
- Watch It: Never leave the laser unattended, especially with acrylic (it is flammable).
4
Step4
Post-Processing
- Cool Down: Let the pieces sit for a minute or two. Acrylic is soft when hot; lifting them too early can warp the long thin stick of the stirrer.
- Unmasking: Peel off the paper masking.
- Cleaning: If there is any sticky residue, wipe it with a microfiber cloth and a little isopropyl alcohol (or plastic cleaner). Warning: Don't use 100% alcohol on extruded acrylic as it can crack it; cast acrylic is usually safer.
Comments
Remixes



You may also like

$1.40
$1.40
$7.00
Credits140
Laser Cut Be Mine Valentine Wall Art Decor with Roses

0

3D Layered “I Love You” Heart Wall Art

46
249

'/%3e%3cdefs%3e%3clinearGradient%20id='paint0_linear_1433_15726'%20x1='12'%20y1='5.25'%20x2='12'%20y2='18.75'%20gradientUnits='userSpaceOnUse'%3e%3cstop%20stop-color='%23FFC654'/%3e%3cstop%20offset='1'%20stop-color='%23FF8D12'/%3e%3c/linearGradient%3e%3c/defs%3e%3c/svg%3e)
Laser Cut Wooden and Plexiglass Heart with Lovebirds Wall Art with Inspirational Quote

20
32

Laser Engraved Wooden Sign LOVE with Floral Patterns Valentine's Day Card
.png?x-oss-process=image/resize,m_fill,w_240,h_240,limit_0/interlace,1/format,webp/auto-orient,1)
40
314

Valentine Rose Heart Wall Art - Laser Cut

40
176

Laser Engraved Acrylic Love Sign with Heart Design

4
8

Custom Dice Sign

7
20

Love sign with arrow decoration for Valentine's Day

14
70

'/%3e%3cdefs%3e%3clinearGradient%20id='paint0_linear_1433_15752'%20x1='12.5'%20y1='5'%20x2='12.5'%20y2='19.2596'%20gradientUnits='userSpaceOnUse'%3e%3cstop%20stop-color='%232F7FFF'/%3e%3cstop%20offset='1'%20stop-color='%232661F1'/%3e%3c/linearGradient%3e%3c/defs%3e%3c/svg%3e)
Laser Cut Wooden Floral Frame with Swinging Girl and Happy 40th Sign
36
132

Customizable Scrabble Valentine/Love Sign with Extra Tiles

42
169

$2.20
$2.20
Credits220
3D Valentine's Day layered wall decors bundle. Valentines wall art laser cut. Hanging sign svg. Wooden love home decor. Heart wall hanger

7

Valentines day - with/without LED

6
9

Laser Cut Wooden Dog Love Sign with Paw Print and Heart

15
48

Laser Cut LOVE Multilayers

29
149

Pulsar Reference Map to SOL

0
1

Laser Cut Floral Heart Wall Art Decor

4
38

Laser Engraved Wooden Postcard Sign with Romantic Message

4
13

Laser Cut Heart-Shaped Bee Wall Art with Honeycomb Pattern

2
16