
![[Laser cut and engrave] Stained Glass Style Labrador Retriever Memorial Light with Personalized Name Plate](https://storage-public.atomm.com/xtool/community/attachment/xtool-community/df3bf977-8a02-4766-b4ab-58ef5458b599.jpg?x-oss-process=image/resize,m_fill,w_1280,h_960,limit_0/interlace,1/format,webp/auto-orient,1)

![[Laser cut and engrave] Stained Glass Style Labrador Retriever Memorial Light with Personalized Name Plate](data:image/png;base64,iVBORw0KGgoAAAANSUhEUgAAAAoAAAAKCAYAAACNMs+9AAAAAXNSR0IArs4c6QAAABdJREFUKFNjZCASMBKpjmFUId6QIjp4AAppAAuXjCs4AAAAAElFTkSuQmCC)
![[Laser cut and engrave] Stained Glass Style Labrador Retriever Memorial Light with Personalized Name Plate](https://storage-public.atomm.com/xtool/community/attachment/xtool-community/df3bf977-8a02-4766-b4ab-58ef5458b599.jpg?x-oss-process=image/resize,w_200,h_150,limit_0/interlace,1/format,webp/auto-orient,1)
![[Laser cut and engrave] Stained Glass Style Labrador Retriever Memorial Light with Personalized Name Plate](https://storage-public.atomm.com/xtool/community/attachment/xtool-community/4327b0f7-6b12-48b6-85cc-a95e6a0fdbf9.png)
![[Laser cut and engrave] Stained Glass Style Labrador Retriever Memorial Light with Personalized Name Plate](https://storage-public.atomm.com/xtool/community/attachment/xtool-community/baaf46b9-adeb-454c-8cc1-22b66b0cfb12.jpg?x-oss-process=image/resize,w_200,h_150,limit_0/interlace,1/format,webp/auto-orient,1)
![[Laser cut and engrave] Stained Glass Style Labrador Retriever Memorial Light with Personalized Name Plate](https://storage-public.atomm.com/xtool/community/attachment/xtool-community/6cacb106-1268-488e-a0a2-b0b74db63407.JPG?x-oss-process=image/resize,w_200,h_150,limit_0/interlace,1/format,webp/auto-orient,1)
![[Laser cut and engrave] Stained Glass Style Labrador Retriever Memorial Light with Personalized Name Plate](https://storage-public.atomm.com/xtool/community/attachment/xtool-community/1ec8954b-b6e8-48f6-a9fa-eac3cc5685ff.JPG?x-oss-process=image/resize,w_200,h_150,limit_0/interlace,1/format,webp/auto-orient,1)
![[Laser cut and engrave] Stained Glass Style Labrador Retriever Memorial Light with Personalized Name Plate](https://storage-public.atomm.com/xtool/community/attachment/xtool-community/d9436ab1-3869-499d-86e0-1ac24f3dc2b3.JPG?x-oss-process=image/resize,w_200,h_150,limit_0/interlace,1/format,webp/auto-orient,1)
![[Laser cut and engrave] Stained Glass Style Labrador Retriever Memorial Light with Personalized Name Plate](https://storage-public.atomm.com/xtool/community/attachment/xtool-community/67d8f442-184e-4c16-a24d-77d2a88f7cb9.JPG?x-oss-process=image/resize,w_200,h_150,limit_0/interlace,1/format,webp/auto-orient,1)
![[Laser cut and engrave] Stained Glass Style Labrador Retriever Memorial Light with Personalized Name Plate](https://storage-public.atomm.com/xtool/community/attachment/xtool-community/9ad69c90-6d72-464d-85a5-2451678b1f64.JPG?x-oss-process=image/resize,w_200,h_150,limit_0/interlace,1/format,webp/auto-orient,1)
![[Laser cut and engrave] Stained Glass Style Labrador Retriever Memorial Light with Personalized Name Plate](https://storage-public.atomm.com/xtool/community/attachment/xtool-community/f0352660-1879-4c3b-a08d-29d6fb0556f4.jpg?x-oss-process=image/resize,w_200,h_150,limit_0/interlace,1/format,webp/auto-orient,1)
![[Laser cut and engrave] Stained Glass Style Labrador Retriever Memorial Light with Personalized Name Plate](https://storage-public.atomm.com/xtool/community/attachment/xtool-community/59b37c84-9f43-4d93-8991-02c6844e88fa.jpg?x-oss-process=image/resize,w_200,h_150,limit_0/interlace,1/format,webp/auto-orient,1)
![[Laser cut and engrave] Stained Glass Style Labrador Retriever Memorial Light with Personalized Name Plate](https://storage-public.atomm.com/xtool/community/attachment/xtool-community/b2c1fa61-96ad-4d24-bd60-608fa3137d25.jpg?x-oss-process=image/resize,w_200,h_150,limit_0/interlace,1/format,webp/auto-orient,1)
![[Laser cut and engrave] Stained Glass Style Labrador Retriever Memorial Light with Personalized Name Plate](https://storage-public.atomm.com/xtool/community/attachment/xtool-community/0ad7c3b6-fcf0-4dfe-87df-b19f78280da1.JPG?x-oss-process=image/resize,w_200,h_150,limit_0/interlace,1/format,webp/auto-orient,1)
![[Laser cut and engrave] Stained Glass Style Labrador Retriever Memorial Light with Personalized Name Plate](https://storage-public.atomm.com/xtool/community/attachment/xtool-community/a10ea4f6-43e3-4052-8b65-1e442cd9e059.JPG?x-oss-process=image/resize,w_200,h_150,limit_0/interlace,1/format,webp/auto-orient,1)
![[Laser cut and engrave] Stained Glass Style Labrador Retriever Memorial Light with Personalized Name Plate](https://storage-public.atomm.com/xtool/community/attachment/xtool-community/a1e0ae70-5a92-4185-bd92-7d6e548b53a4.JPG?x-oss-process=image/resize,w_200,h_150,limit_0/interlace,1/format,webp/auto-orient,1)
![[Laser cut and engrave] Stained Glass Style Labrador Retriever Memorial Light with Personalized Name Plate](https://storage-public.atomm.com/xtool/community/attachment/xtool-community/0eff2d36-bd9e-4d86-9275-6ec67941b3b7.JPG?x-oss-process=image/resize,w_200,h_150,limit_0/interlace,1/format,webp/auto-orient,1)
![[Laser cut and engrave] Stained Glass Style Labrador Retriever Memorial Light with Personalized Name Plate](https://storage-public.atomm.com/xtool/community/attachment/xtool-community/d6c4fe81-14b9-4652-8386-37549701060d.JPG?x-oss-process=image/resize,w_200,h_150,limit_0/interlace,1/format,webp/auto-orient,1)
![[Laser cut and engrave] Stained Glass Style Labrador Retriever Memorial Light with Personalized Name Plate](https://storage-public.atomm.com/xtool/community/attachment/xtool-community/df6c0659-fbe3-461a-b75d-eb0be9c33c69.JPG?x-oss-process=image/resize,w_200,h_150,limit_0/interlace,1/format,webp/auto-orient,1)
![[Laser cut and engrave] Stained Glass Style Labrador Retriever Memorial Light with Personalized Name Plate](https://storage-public.atomm.com/xtool/community/attachment/xtool-community/2c0c6489-b6c2-4dc3-9071-d801eb4212ac.JPG?x-oss-process=image/resize,w_200,h_150,limit_0/interlace,1/format,webp/auto-orient,1)
Personalized Dog or Cat Pet Frame with Interchangeable Designs
 Paws & Portraits: Pet Gifts Contest
 Instruction


Information
      I created this collection of seven personalized stained-glass pet portrait designs to honor the unconditional love and lifelong memories our pets give us. The featured design is based on my own yellow Labrador, whose loyal companionship inspired this entire collection. Every piece combines a laser-cut layered wood frame with a vibrant stained-glass style portrait that can be personalized with a customer's own dog or cat and their pet's name. Whether celebrating a beloved companion still by your side or remembering one who has crossed the Rainbow Bridge, each keepsake is designed to preserve the joy, love, and special bond that never fades. With colorful landscapes and optional LED backlighting, these pieces become lasting tributes that families can proudly display and cherish for years to come.

Instagram: https://www.instagram.com/p/DbfA52ajrLe/?igsh=MWh3dm41cXRlZTI3ZQ==

Facebook: https://www.facebook.com/share/v/18BVpExaSk/?mibextid=wwXIfr
Instruction
Step1: Download and Prepare for Cutting/Printing


Download the file and open it.
The wood frame is made from 3mm basswood. Cut is 60/27/1 and engrave is set to 30/500/1 and 20/300/1.
Begin by centering wood, turning output on and doing an aimed measure. You can confirm with a closeup view.
Press start. I did all this on my P2S since it cuts faster than the M2. I used my friends M2 to print the inkjet files. Since I was borrowing hers I only did one dog and cat test print. I used thick 42 vellum found at Amazon and printed the files at 80 percent saturation and cut them out. I added those in the document and separate for you to download. I did not add the M2 file since it is the new version.
If you want contrast cut the middle piece and paw from walnut. I ran out, but that was my intention when creating this project.
Step2: Gluing front frame

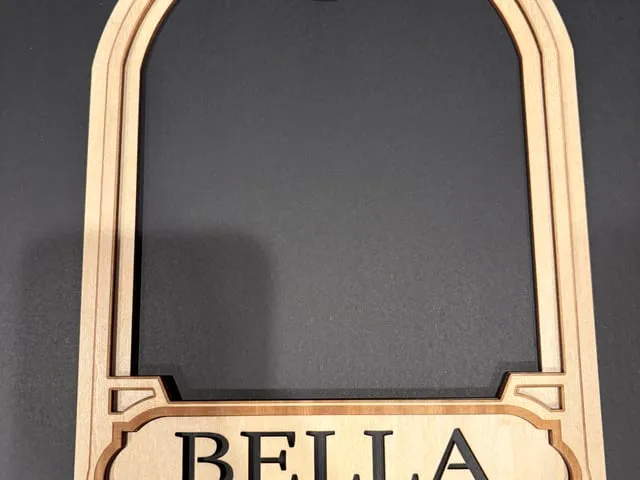

Next I glued the front piece to the middle piece making sure it lined up. Then I glued the vellum piece to the back of the frame. Next I glued the paw offset and paw to the top of the frame. Let dry.
Step3


Add brackets. The spacing between the front and back is 9mm so use the three parts and glue them together.
Step4: Lights Base


Decide if you are adding a strip of led lights. If you are glue around brackets and bottom of base. Glue both front and back into base. Make sure you add glue to brackets to hold together. Clamp to dry.
Remixes



You may also like

'/%3e%3cdefs%3e%3clinearGradient%20id='paint0_linear_1433_15752'%20x1='12.5'%20y1='5'%20x2='12.5'%20y2='19.2596'%20gradientUnits='userSpaceOnUse'%3e%3cstop%20stop-color='%232F7FFF'/%3e%3cstop%20offset='1'%20stop-color='%232661F1'/%3e%3c/linearGradient%3e%3c/defs%3e%3c/svg%3e)
 Template
Pet photo frame


Pets photo frame laser cut bundle. Cats and dogs wooden frames. 3d Family pet frames. Family photo frame template. Personalized pet frame. 10 Designs


Pet Photo Frame


'/%3e%3cdefs%3e%3clinearGradient%20id='paint0_linear_1433_15726'%20x1='12'%20y1='5.25'%20x2='12'%20y2='18.75'%20gradientUnits='userSpaceOnUse'%3e%3cstop%20stop-color='%23FFC654'/%3e%3cstop%20offset='1'%20stop-color='%23FF8D12'/%3e%3c/linearGradient%3e%3c/defs%3e%3c/svg%3e)
Personalised Dog Photo Frame with pet portrait graphic


Heart Shaped Pet Memorial Photo Frame with Paw Print Details


I Love My Dog Paw Print Picture Frame


Best Furry Friend Dog Photo Frame with Paw Print Accents


Customizable Multilayer Pet Photo Frame Laser Cutting File


Laser Cut I Love My Pet Photo Frame with Paws and Bones Decorations


Dog Breed Photo Frame Refrigerator Magnets

 Template
Pet Dog Frame

Pets Photo Frame Laser Cut Design, Animals Photo Frame, Personalized Animals Picture Frame


Dog Lovers Photo Frame


Dog Picture Frame

 Template
Love Always Pet Paw Print Frame


Memorial for dog

 Template
cat frame

A 4x5 Photoframe with a matching Keychain
