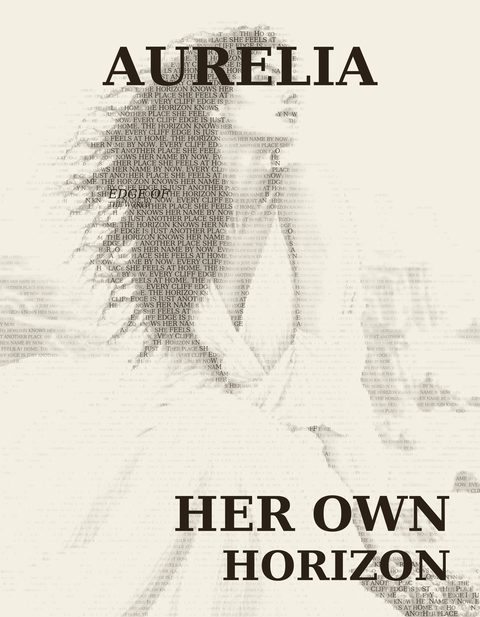
Turn any photo into a portrait made entirely of your own words — no design experience needed.
13
Description
How it works
Upload a photo — TypeWeave reads its light and shadow directly, no tracing or masking required
Type the words you want to become the portrait — a name, a quote, a letter, anything
Adjust density, tone, and color, or start from one of six built-in presets
Export a laser-ready SVG, a high-resolution PNG, or a transparent PNG for DTF and heat-transfer
Feature highlights
Six built-in presets, from delicate line work to bold poster contrast
Text Blocks — add unlimited independent headlines, captions, or a full magazine-style masthead, each with its own position, font, weight, and alignment
Full color control — any ink and paper color, plus a one-click transparent background for DTF
True millimeter sizing carried through to every export
内置3D预览功能可以在将材料投入使用之前检查雕刻件的外观
Supported output
SVG — real vector text, correct engrave fill color, exact physical sizing
PNG — high-resolution raster for print, framing, or DTF, with optional transparency
Craft
Based on what TypeWeave actually produces:
PRINT ✅ Ink Print, ✅ DTF & DTG — both are genuine fits (transparent export was purpose-built for DTF). I'd leave UV Print unchecked unless you specifically want to claim it; it's not a distinct capability of the tool.
LASER: ✅ Engraving only. TypeWeave outputs fill-based text density, not cut paths or true 3D relief geometry, so Cutting, 3D, and Relief would overstate what it does.
Four ways to use TypeWeave
The same tool produces very different results depending on which features you reach for. Each workflow below starts from the same place — a photo and some words — and ends somewhere distinct. Follow one, or all four, to see how the pieces connect.
Understanding the interface
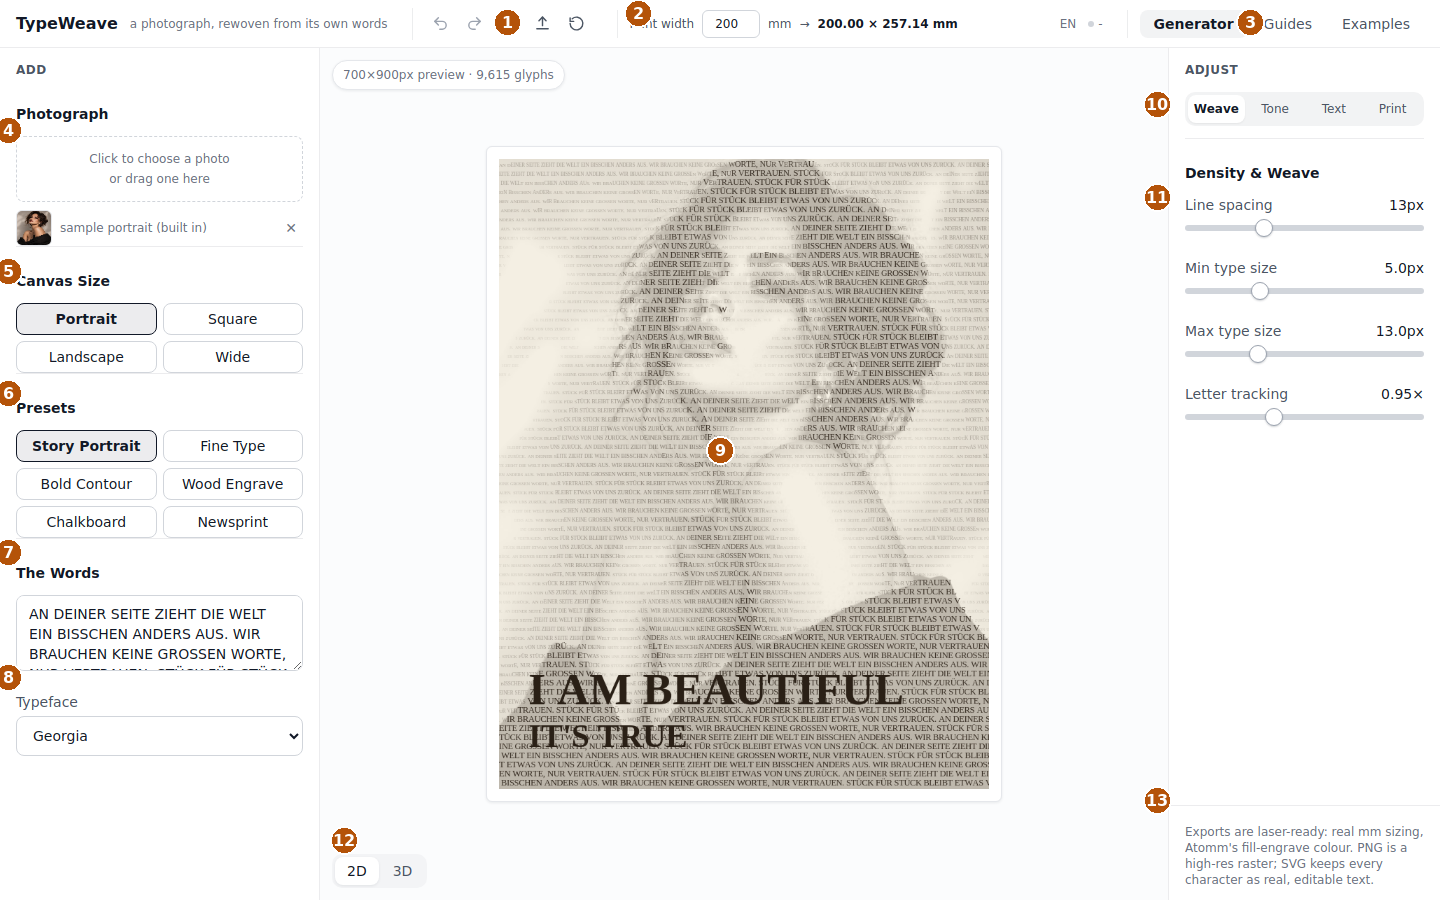
Before the workflows, a quick map of where everything lives. Every number below points to the same spot in the screenshot.
Understanding the interface
Before the workflows, a quick map of where everything lives. Every number below points to the same spot in the screenshot.
Toolbar - Undo, redo, download your settings as a file, upload a settings file, and reset to defaults.
Print width -The real physical size of the piece, in millimeters — updates live as you type, and this is what actually gets exported.
Page tabs - Generator is the main workspace. Guides is this walkthrough, built into the app. Examples has the presets and the Cookbook.
Photograph - Click or drag a photo here. TypeWeave starts you off with a built-in sample so there's always something to try.
Canvas size - Portrait, Square, Landscape, or Wide — this re-crops from your original photo, so switching costs nothing.
Presets - Six built-in starting points — Story Portrait, Fine Type, Bold Contour, Wood Engrave, Chalkboard, Newsprint.
The words - Whatever you type here becomes the portrait — it repeats automatically to fill the frame.
Typeface - The font used for the woven body text. Any Text Block can override this with its own font instead.
Canvas preview - Live and exact — whatever's shown here is precisely what exports, at any zoom level.
Adjust tabs - Weave (density), Tone (contrast & color), Text (Text Blocks), and Print (material thickness & sizing detail).
Controls for the active tab - Only one tab's controls show at a time, so the panel never gets overwhelming.
2D / 3D toggle - Switch to a 3D preview to see how the piece will look engraved on an actual surface.
Export - A short note on what each format contains, with the platform's Export button just below it.
In this tutorial
A simple text portrait — the fundamentals, five minutes
A magazine-style cover — Text Blocks, mastheads, and captions
A DTF-ready transparent design — custom color and transparency
A laser-engraving-ready file — real sizing and vector export
Workflow 1
A simple text portrait
The fastest path through the app — a finished, framable portrait made of your own words, using nothing but a preset.
Upload a photo
Click the photo box in the left panel. A clear, well-lit subject with some separation from the background works best, but TypeWeave calculates its own starting contrast for whatever you bring.
Type your words
In the text box, write whatever you want the portrait made of — a name, a quote, a short story. It repeats automatically to fill the frame, so a sentence or two is enough.
Pick a preset
Try Story Portrait first — it's the balanced, all-purpose default. Fine Type resolves more facial detail; Bold Contour reads better from across a room.
Check the Tone tab
If the result looks too light or too dark, click Reset tone to this photo — this recalculates black and white points from your specific image rather than a fixed preset value.
Export
Use the platform Export button. You'll get a laser-ready SVG and a high-resolution PNG, both sized to whatever print width you set in the header.
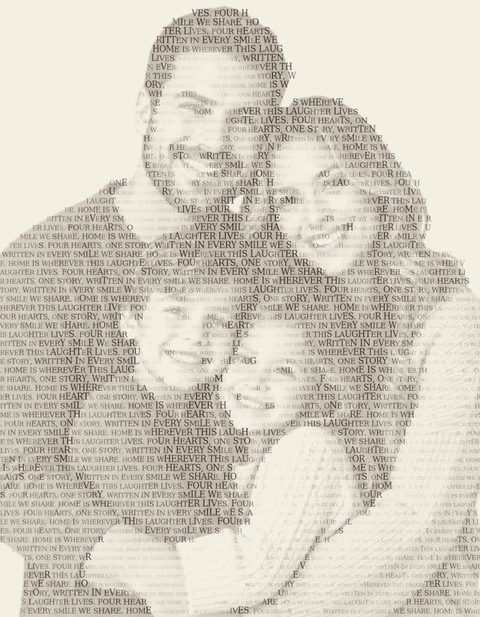
Story Portrait preset, no other adjustments — the whole workflow above, start to finish.
Workflow 2
A magazine-style cover
Layer several independent headlines and a masthead on top of the woven portrait — the same technique real magazine covers use, built with Text Blocks.
Start from a portrait
Upload your photo and get the base weave looking right first — density, tone, and preset — before adding any text on top.
Add your masthead
Open the Text tab, click + Add text block. Type a single strong word, set Position to top-center, and push Headline size up toward 12-16%. Pick a display serif like Playfair Display or Bodoni Moda for the classic cover look.
Add your headline
Add a second block for the emotional core of the cover — a two-line phrase, positioned bottom-left, at roughly 9-11% size with the second line scaled down.
Add a small caption
Add a third block for a short pull-quote. Switch its Position panel to Fine-tune and drag it into an open, uncluttered part of the photo using the Horizontal/Vertical sliders, well clear of the masthead.
Adjust legibility if needed
If any block sits over a busy part of the photo, raise its Clear space behind it slider slightly — it adds a soft halo around just the letters, not a box behind the whole word.
Export
The finished cover exports exactly as previewed — every text block carries through to both the PNG and the vector SVG.
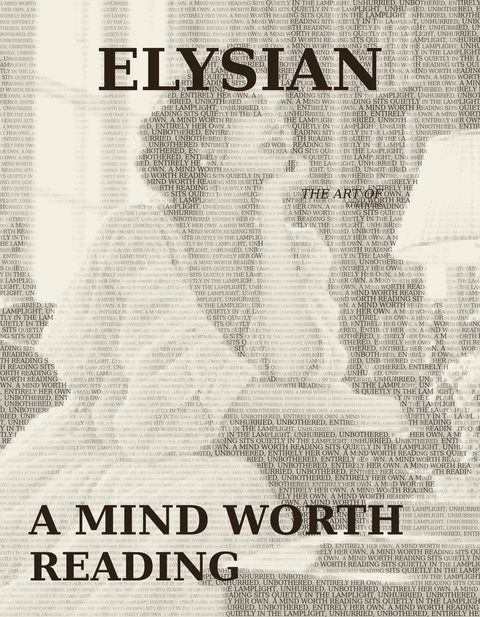
Three Text Blocks: a masthead (top-center), a headline (bottom-left), and a small caption placed with Fine-tune.
Tip: the Examples tab's Cookbook section has ten finished covers built exactly this way — click Open on any of them to load the full look onto your own photo instead of starting from scratch.
Workflow 3
A DTF-ready transparent design
A design that prints only its own ink and lets a garment's real color show through everywhere else — ready for DTF or heat-transfer.
Choose a clean-background photo
A photo with its background already removed (real PNG transparency) gives a pixel-perfect result. A busy background still works, but expect a very faint residual tint instead of a perfectly clean edge.
Confirm background detection
In the Tone tab, make sure Respect removed/transparent background is on — this confines the weave to just the subject.
Pick your ink color
Under Colors & Print Output, choose an ink color — this is the only color that will actually print, so pick something that reads well on the garment color you're printing onto.
Turn on transparency
Switch on Transparent background. The live preview swaps to a checkerboard so you can see exactly what will and won't print before exporting.
Export as PNG
Use the PNG export specifically for this — the SVG (laser) export never had a background fill to begin with, so the transparency toggle doesn't change it.
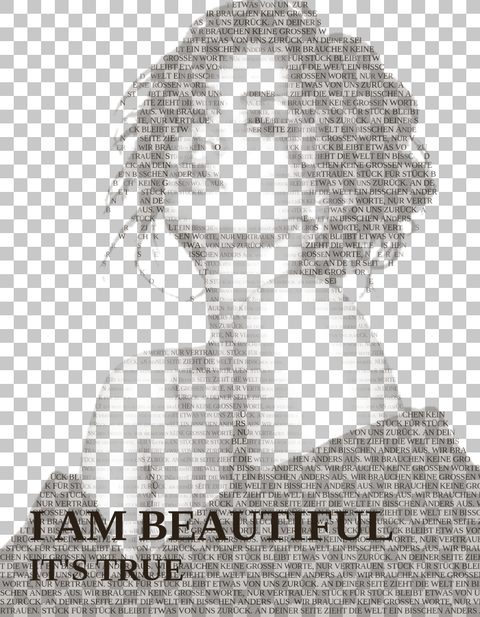
The same portrait with Transparent background on, shown over a checkerboard — only the ink prints.
Workflow 4
A laser-engraving-ready file
A file sized to the exact material you're cutting, with every character as real vector text a laser can read directly.
Set your real print width
In the header, type the actual physical width in millimeters for your material. The height follows automatically, shown live next to it.
Check the Print tab
Set Material thickness if you're using the 3D preview to check how the design will look engraved before committing material to it.
Mind the smallest detail
The Print tab's readout shows the smallest glyph size in millimeters — if it's smaller than your laser can resolve, increase Min type size in the Weave tab.
Export the SVG
The SVG keeps every character as editable vector text in the correct engrave fill color, at the exact millimeter size you set — no rescaling needed on the machine side
Strong silhouette contrast, sized to a real material width — ready for the laser as-is.