


![[Laser cut and engrave] Wall bracket for Father's Day wall sign](https://storage-us.atomm.com/resource/xtool/community/attachment/xtool-community/87cb9e73-0e12-4ee7-884b-800db190dee6.png?x-oss-process=image/resize,w_1200,h_900,limit_0/interlace,1/format,webp/auto-orient,1)
![[Laser cut and engrave] Wall bracket for Father's Day wall sign](data:image/png;base64,iVBORw0KGgoAAAANSUhEUgAAAAoAAAAKCAYAAACNMs+9AAAAAXNSR0IArs4c6QAAABdJREFUKFNjZCASMBKpjmFUId6QIjp4AAppAAuXjCs4AAAAAElFTkSuQmCC)
![[Laser cut and engrave] Wall bracket for Father's Day wall sign](https://storage-us.atomm.com/resource/xtool/community/attachment/xtool-community/87cb9e73-0e12-4ee7-884b-800db190dee6.png?x-oss-process=image/resize,w_200,h_150,limit_0/interlace,1/format,webp/auto-orient,1)
![[Laser cut and engrave] Wall bracket for Father's Day wall sign](https://storage-us.atomm.com/resource/xtool/community/attachment/xtool-community/f1c3070f-4037-4099-ac46-c559a27f28a3.png?x-oss-process=image/resize,w_200,h_150,limit_0/interlace,1/format,webp/auto-orient,1)
![[Laser cut and engrave] Wall bracket for Father's Day wall sign](https://storage-us.atomm.com/resource/xtool/community/attachment/xtool-community/4cc63b4e-4897-4b3c-97e9-0b28fd7a69ef.png?x-oss-process=image/resize,w_200,h_150,limit_0/interlace,1/format,webp/auto-orient,1)
![[Laser cut and engrave] Wall bracket for Father's Day wall sign](https://storage-us.atomm.com/resource/xtool/community/attachment/xtool-community/a195d930-ca56-48a8-a507-643986622d22.png?x-oss-process=image/resize,w_200,h_150,limit_0/interlace,1/format,webp/auto-orient,1)
![[Laser cut and engrave] Wall bracket for Father's Day wall sign](https://storage-us.atomm.com/resource/xtool/community/attachment/xtool-community/b106c5df-2d4f-48ce-afc0-adeca7230ee3.png?x-oss-process=image/resize,w_200,h_150,limit_0/interlace,1/format,webp/auto-orient,1)
![[Laser cut and engrave] Wall bracket for Father's Day wall sign](https://storage-us.atomm.com/resource/xtool/community/attachment/xtool-community/bcad0575-9a16-4807-8dce-0ba1dd02b6e6.png?x-oss-process=image/resize,w_200,h_150,limit_0/interlace,1/format,webp/auto-orient,1)
![[Laser cut and engrave] Wall bracket for Father's Day wall sign](https://storage-us.atomm.com/resource/xtool/community/attachment/xtool-community/5ba40e93-42a4-432f-bf2a-6d15648ae4aa.jpg?x-oss-process=image/resize,w_200,h_150,limit_0/interlace,1/format,webp/auto-orient,1)
![[Laser cut and engrave] Wall bracket for Father's Day wall sign](https://storage-us.atomm.com/resource/xtool/community/attachment/xtool-community/6fb1d3fe-b25d-42f3-a8cc-dfc39d73308b.jpg?x-oss-process=image/resize,w_200,h_150,limit_0/interlace,1/format,webp/auto-orient,1)
![[Laser cut and engrave] Wall bracket for Father's Day wall sign](https://storage-us.atomm.com/resource/xtool/community/attachment/xtool-community/b2e6d68b-0e37-4a5c-b689-ecc15fc09a96.jpg?x-oss-process=image/resize,w_200,h_150,limit_0/interlace,1/format,webp/auto-orient,1)
Wall bracket for Father's Day wall sign
 Instruction
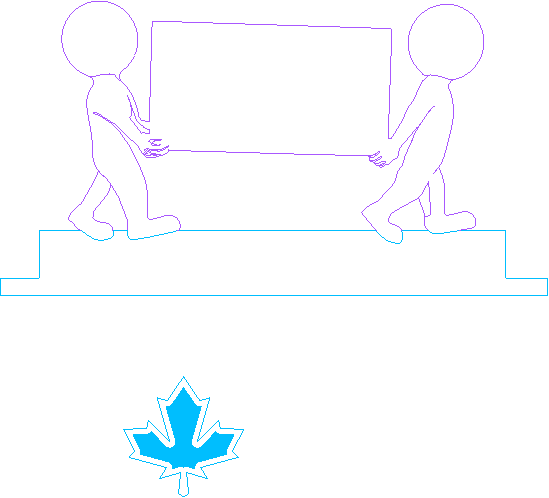

Information
      In an earlier post, we made a wall sign. Following that, we have now also designed a wall mount in the same style as this sign. (https://www.atomm.com/template/55659-signboard-regarding-fathers-day-without-wall-mounting )
This way, you can really use the sign as a signboard, so that it is visible on both sides.
Of course you can also use this mounting for other purposes or with another sign.
Instruction
Step1: Make the parts


A logical first step. Making the parts.
Although this is a standard process, I have highlighted the making of the cloverleaf for you.
The cloverleaf- Now go to settings in XCS and turn only cutting of sheet on "output" on and engraving (and possibly the rest of the "output" on off.
- You must first cut out the cloverleaf (with the plastic protections on it).
- Process done? THEN LEAVE EVERYTHING AS IT IS!
- How do I remove the cloverleaf from the plate without moving it?
- Take a piece of paper tape
- Make a circle around your finger, with the sticky part on the outside
- Now press your finger on the cloverleaf. If everything is cut out correctly, you should now lift the cloverleaf out of the entire plate without it shifting.
If this does not work, the figure is not yet completely loose from the plate and you will have to repeat the cutting process.
(This would not be a problem if you did not shift the plate.)
d. Remove the plastic protection from the cloverleaf and carefully place it back into the plate.
e. Now go to settings in XCS and turn the cutting "output" off and engraving "output" to on (green).
f. Start proces. → Finish.
g. Get off all the protection from the acrylaat
Step2: put together. The first layer


We use the first complete runner as a base. We glue the other runner on top of that, which has a recess.
Note:
Make sure you work securely. Otherwise you run the risk that subsequent parts will not fit.
Always apply the glue to the part you are going to glue and not the construction itself.
This way, surfaces that still need to be used, or where other things need to be used later, remain (still) free of (dried) glue.
Step3: The acrylic is placed.


Apply glue to the wood where the acrylic will be placed.
There is a triangle in the acrylic. This allows you to secure the acrylic extra with glue.
Of course, make sure that all the protective foil is removed from the acrylic.
Step4: The last normal MDF Layer

Now mount the last MDF layer.
If you have done everything correctly the construction is as follows:
- 1 full layer mdf
- 1 layer mdf with acrylate,
- 1 layer mdf
Step5: The wooden Layers


Finally, we will mount the wooden beams on both sides.
Make sure everything is now properly dry. and then any treatment for outdoor use can be realized.
If you want to hang your creation outside, it is important to protect it from moisture and of course use waterproof glue.
The construction that is already light in front of you, will be treated again later. You can also treat this once now. However, you must then ensure that the protective film is still on the acrylic.
note: The protection of the acrylic is already off. so protect this item with wood tape, if you are going to treat it with vernis.
Step6: The cloverleaf on wood

Glue the cloverleaf to the wood. You can use wood glue for this, but other glue will also work.
Step7: The part for on the wall
Look at the photo. Here you can see how the wall plates should be glued together. Start by gluing the 3 MDF plates together and then finally the back (wood plate).
The plate on The front with the top, is not glued yet.
Note:
The wall plates are not identical with front and back. So look carefully that the plates are on top of each other in such a way that you have nice holes.
Step8: Assembling the beams and the wall plate


We are going to assemble the 2 parts.
- First we are going to glue the plate with the top.
- We also put glue on the back of the hole.
- Now we put the legs of the shelves through the first plate with the top and then through the other plates (3xmdf + 1x wood)
- Put some glue on the half leaves on the front of the shelf. (see photo).
- Now press everything together and push down as far as possible.
At the back, the leg of the shelves will fit neatly into the hole. - If everting is in place? Now you can position the front plate with the leaf properly, so that it runs parallel to the edges of the other shelves
- Press everything firmly and remove any glue that comes out from under the parts.
Step9: If you want to use the stuff outside?
If you want to hang your creation outside, it is important to protect it from moisture and of course use waterproof glue.
Some parts are already covered once.
You can also treat this once now again
Acrylic and varnish are not friends of each other. Therefore please protect the acrylic with paper tape before you are going to varnish the entire project again.
Step10: Bundle the 2 projects into 1 project


As written in the subject, you can use this project separately and we have also put it separately on Atomm. https://www.atomm.com/template/55659-signboard-regarding-fathers-day-without-wall-mounting
However, there is also a project of a sign in the same style as this one. If you have already made the other project, you can now combine them using iron rings and chains.
This makes it a nice Father's Day gift for in the garden.
→ Happy Father's Day - everyone ←
Thanks for downloading❤️this project and have more fun with our (other) models.😍
It is always fun to make it, and also nice to 🎁 it away afterwards.
Happy with this project? Give me a 👍up. THKS.


