
![[Laser cut and engrave] Pendentif rectangulaire avec motif de papillon coloré](https://image-res.atomm.com/resource/xtool/community/attachment/xtool-community/63265d34-973c-4d21-b07a-ce20f743f298.jpg?x-oss-process=image/resize,w_1200,h_900,limit_0/interlace,1/format,webp/auto-orient,1)
![[Laser cut and engrave] Pendentif rectangulaire avec motif de papillon coloré](data:image/png;base64,iVBORw0KGgoAAAANSUhEUgAAAAoAAAAKCAYAAACNMs+9AAAAAXNSR0IArs4c6QAAABdJREFUKFNjZCASMBKpjmFUId6QIjp4AAppAAuXjCs4AAAAAElFTkSuQmCC)
![[Laser cut and engrave] Pendentif rectangulaire avec motif de papillon coloré](https://image-res.atomm.com/resource/xtool/community/attachment/xtool-community/63265d34-973c-4d21-b07a-ce20f743f298.jpg?x-oss-process=image/resize,w_200,h_150,limit_0/interlace,1/format,webp/auto-orient,1)
![[Laser cut and engrave] Pendentif rectangulaire avec motif de papillon coloré](https://image-res.atomm.com/resource/xtool/community/attachment/xtool-community/6f399761-64c6-4471-9c18-3421069ae09f.jpg?x-oss-process=image/resize,w_200,h_150,limit_0/interlace,1/format,webp/auto-orient,1)
Butterfly in color on 304 steel
 Instruction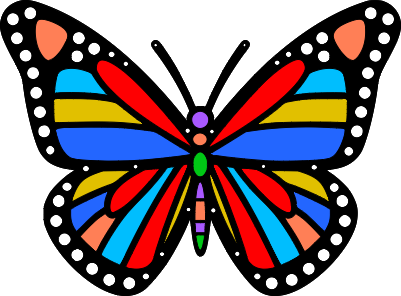


Information
      This creation uses my new fast color palette (200 mm/s) optimized for the infrared laser, at 846 lpcm. Tested on 35 x 20 mm rectangular pendant, and 50 mm round plate.
The duration of the engraving is from 32 minutes to two hours, depending on the size.
Instruction
Step1: Preparation
Clean the pendant on both sides, with isopropyl alcohol and a non-abrasive paper towel, and dry with microfiber.
Paint a thin layer of dark paint or stick a very thin opaque adhesive on the side that will not be engraved. This step is for autofocus.
Open the XCS file, and enable infrared warm-up.
Identify the three groups of vectors to be engraved, named:
- Butterfly Colors
- Butterfly Outlines
- Butterfly Black
By default, the output is disabled for all three groups
Place the autofocus face under the center spot, close the cover, and autofocus
Flip the pendant over and position it horizontally, about 1 cm below the center spotlight.
Select all three groups simultaneously to size and place the model on the pendant.
Step2: Colour engraving
Check that the three groups have their output disabled
Enable the output of the "Butterfly Colors" group, and start the burning
Disable the output of this group, and don't touch anything
Step3: Engraving of the borders
Check that all three groups have their output disabled
Enable the output of the "Butterfly Outlines" group, and start the burn
Disable the output of this group, and leave nothing
Step4: Engraving of black areas
Check that the three groups have their output disabled
Activate the output of the "Papillon Black" group, and start the engraving
This step is the longest, its duration depends on the surface to be engraved.
Disable the output of this group, and leave nothing
Step5: Cleaning
Using a non-abrasive paper towel and isopropyl alcohol, clean well without forcing.
The black areas are the most important, the paper towel should be clean at the end.
Microfiber
Dry
Remixes



You may also like

porte clef / chaine sur plaque acier inoxidable

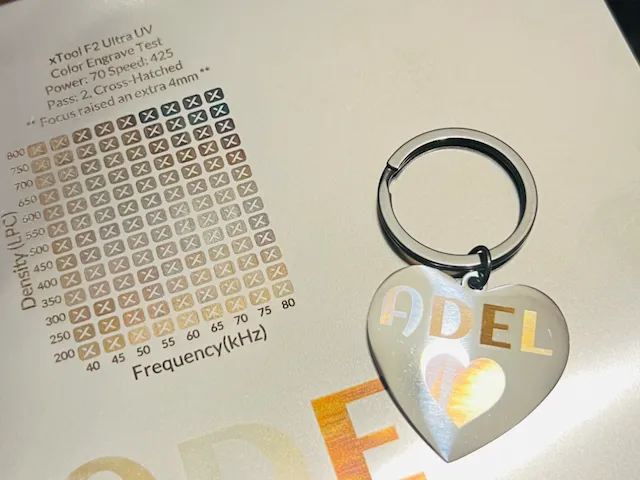
Stainless steel heart engraved in color


Anodized plate engraving


Japanese Inspired Omamori Charms - Laser Cut SVG DXF Files


Stainless steel key ring


Wooden creations for pendants or keyrings in the shape of cute dogs


Crystal keychain with centering support in 3D printing


Oval Wooden Key Chain with Eagle and American Flag


heart-shaped pins


2 Hearts Colors Aluminum Medallion F2 IR


Engraving on 304 stainless steel plaque

Laser Engraved Leather Keychain with Humorous Rooster Design


JIG Jig for Round Wood Keychain 40 mm diameter

Alex G Album Cover Brass Coin


Stainless Steel - 1.016mm Guitar keychain cut on F2 Ultra MOPA


Wooden creations for pendants or keyrings in the shape of cute dogs

Laser engraved nameplate with Tom Brady for the Big Game


Stay Groovy Metal Tag with Smiley Face and Rose Motif