
Making your own puzzle means two decisions, and most guides only cover the second. First, what goes on it — your own artwork, a shape nobody sells, a design cut to fit one person. Second, how it gets produced.
This guide takes the design side first: themes worth making, real examples to work from, then the three production routes and how to pick a print-on-demand service if you go that way.
Generate a jigsaw cut file freePick a size and piece count, preview the pieces, and export a ready-to-cut file.Try the generatorKey Takeaways
- The design decides everything else — a custom shaped outline is the thing a shop-bought puzzle cannot give you.
- Three routes to produce one: print at home, laser cut it, or order print-on-demand.
- Piece count is a difficulty setting: 5–14 for toddlers, 100–300 for adults.
What Makes a DIY Puzzle Worth Making
A puzzle you make competes with a mass-produced one that costs very little. It wins on the things a factory will not do for a single unit.

A shape, not a rectangle
Cutting your own outline is the clearest difference. A leaf, a heart, an animal silhouette — the puzzle reads as an object before anyone starts solving it.
Content nobody else has
Your own illustration, a hand-lettered quote, an inside joke. This is where a DIY puzzle beats anything on a shelf, and it is why they work as gifts.
A material choice
Plywood, acrylic, and thick card all feel different in the hand. Cardboard puzzles are all the same; a 3 mm birch puzzle is not.
The right difficulty
Commercial puzzles come in fixed sizes. You can cut fourteen chunky pieces for a two-year-old or three hundred for someone who wants an evening's work.
Puzzle Design Ideas to Make Your Own
Five community designs, chosen because each solves a different design problem rather than just looking good. All are downloadable.
1. Heart Shaped Jigsaw Puzzle
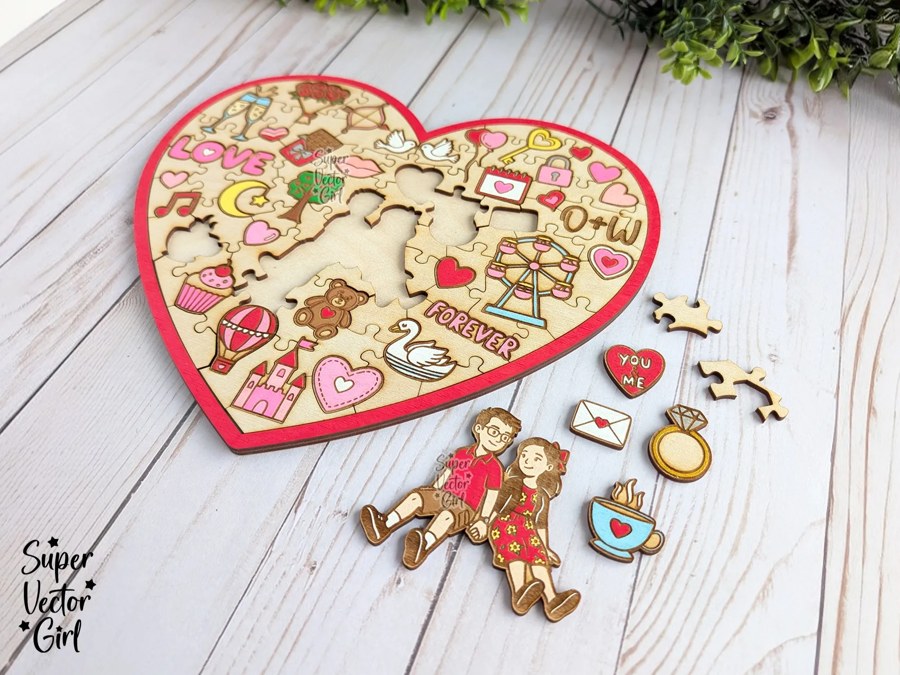
A heart-shaped Valentine puzzle with small themed pieces sitting loose around it. The shaped outline does the gift work before a single piece is placed, and the loose extras turn it into an activity rather than a flat image to reassemble.
Get this design →2. Puzzle Automne - Laser Cut Wooden Autumn Fox Leaf Jigsaw Puzzle

An autumn scene cut inside a maple-leaf outline. Note the trick: the illustration and the outline share a theme, so the shape is not arbitrary decoration. Pick a subject first and let the outline come out of it, rather than the other way round.
Get this design →3. Flower jigsaw Puzzle
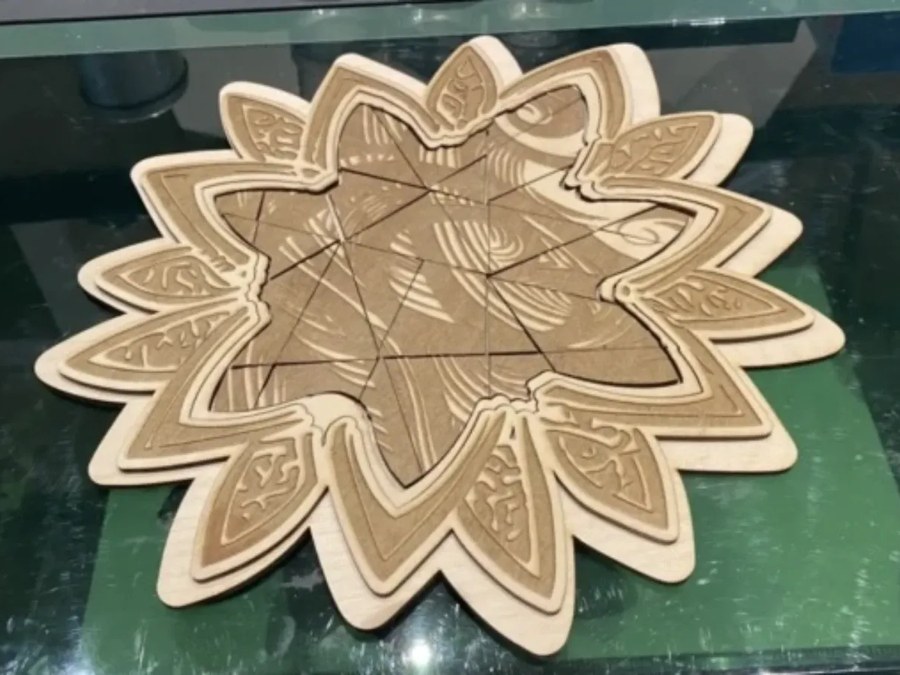
A layered flower puzzle where the petals form the piece boundaries instead of standard jigsaw tabs. Abandoning the interlocking tab shape entirely is an option most people forget: pieces only have to be distinguishable, not tabbed.
Get this design →4. Pig Wooden Jigsaw Puzzle Plan Laser Cutting
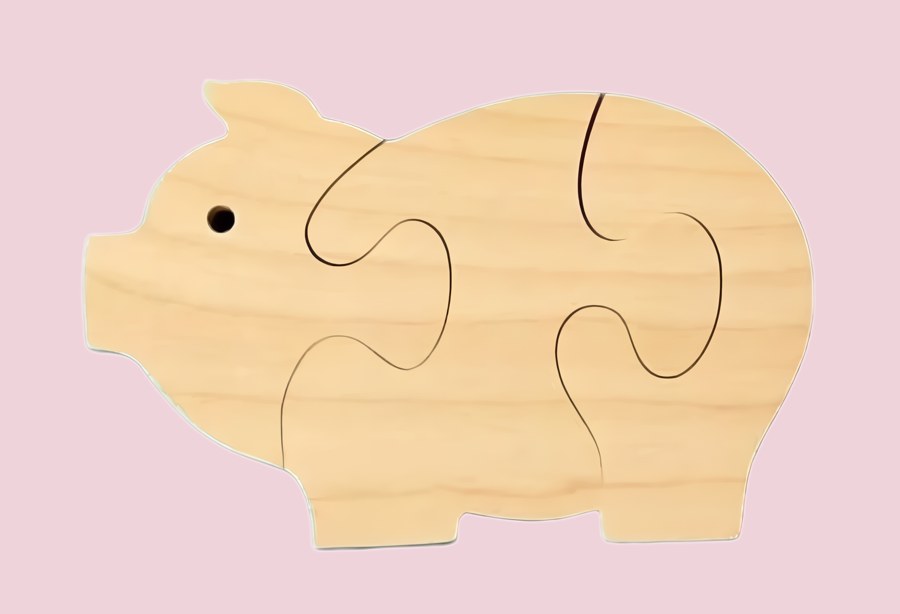
A pig cut into five chunky pieces for toddlers. Fewer, larger pieces is a design constraint rather than a simplification — each piece has to be recognisable on its own, so the cut lines follow the animal's anatomy instead of a grid.
Get this design →5. Wooden Mothman Jigsaw Puzzle with Appalachian Folklore Engraving

An engraved folklore scene on a rectangular wooden puzzle. Engraving instead of printing means the artwork can never peel or fade, and it also means the image has to work in one colour, since tone comes from burn depth alone.
Get this design →What You Need to Make a Puzzle

Artwork
Your own drawing, a design file, or an image you have the right to use. It needs to be at least as large as the finished puzzle at 300 dpi.
A cut file
The jigsaw grid itself, generated to your size and piece count. This is the part the puzzle generator produces.
Material
Three-millimetre plywood is the usual choice: thick enough that pieces hold their shape, thin enough to cut quickly. Acrylic works but chips at the tabs.
A way to cut it
A laser is the practical answer. Scroll saws work but cannot hold the tolerance that makes pieces click together.
Choose Your Piece Count First
Piece count is the difficulty dial, and it interacts with physical size. Two hundred pieces in an A4 puzzle means pieces under two centimetres, which is fiddly rather than difficult.

| Audience | Pieces | Finished size | Notes |
|---|---|---|---|
| Toddlers (2–4) | 5–14 | 20×20 cm | Pieces must be recognisable alone |
| Children (5–8) | 20–50 | A4 | Clear, high-contrast artwork |
| Casual adult | 100–200 | A3 | An hour or two of solving |
| Enthusiast | 300+ | A3 or larger | Needs detailed, varied artwork |
Match the artwork to the piece count
Large flat areas — sky, a plain wall, a studio backdrop — become interchangeable pieces solvable only by shape. Fine at 50 pieces, miserable at 300. Detailed artwork is what makes a high piece count enjoyable rather than tedious.
How to Make the Cut File
Four steps in the generator, and the third is the one worth slowing down for.

Step 1: Set the finished size
Enter the actual dimensions of the piece you will cut, in millimetres. Everything downstream is derived from this, so guessing here means recutting later.
Step 2: Choose the piece count
Use the table above. The generator shows the resulting piece size as you change it, and anything under about 15 mm gets fragile in plywood.
Step 3: Check the preview against your artwork
Look at where the cut lines fall. A line straight through the middle of a face, or through the only text in the design, is worth nudging the grid to avoid.

Step 4: Export and cut
Export the file and load it into your laser software as a cut layer, running the artwork as a separate engrave layer if you are engraving rather than printing.
Three Ways to Produce It
The design is done; now it has to become an object. The three routes differ mostly in what equipment you already own.
Print and mount at home
Print the artwork, glue it to mount board, and cut by hand with a craft knife. Cheapest, works at low piece counts, and the pieces will not interlock precisely — expect a puzzle that slides apart when lifted.
Laser cut it yourself
Full control: any outline, any material, any piece count, made in minutes once the file exists. Engrave the artwork directly, or print and mount it before cutting.
Order print on demand
Upload the artwork, a service prints and die-cuts it, and it ships. You give up the custom outline, since POD puzzles are rectangles in fixed sizes, but you get proper full-colour printing with no equipment.

How to Choose a Print-on-Demand Puzzle Service
Puzzle POD looks like a commodity and is not. Five things vary enough to decide which service you use.
Piece counts offered
Most services stock a handful of fixed counts, commonly 30, 110, 252, 500, and 1000. If you want 60 pieces for a five-year-old, check before designing to that size.
Board thickness and finish
Thin board warps and the pieces feel flimsy. Look for a stated thickness, and for a matte or linen finish — gloss reflects overhead light straight into the solver's eyes.
Print quality and colour accuracy
Order one sample before listing anything for sale. Puzzle board absorbs ink differently to paper, and dark, saturated artwork is where cheap services visibly fail.
Unit cost against your run size
POD wins on one-offs and small numbers. Past a few dozen identical puzzles the per-unit price stops competing with cutting them yourself.
Packaging
A puzzle arrives as a box, and the box is most of the gift. Some services print a custom lid; others send a plain white one, which undoes the effect.
| If you want… | Route | Why |
|---|---|---|
| A custom outline or shape | Laser cut | POD only offers rectangles |
| Full-colour photographic artwork | Print on demand | Proper printing beats engraving for colour |
| One gift, no equipment | Print on demand | No setup cost or machine needed |
| Dozens of the same design | Laser cut | Per-unit cost drops sharply after setup |
| A very low piece count for a toddler | Laser cut | POD rarely goes below about 30 pieces |
Conclusion
Start from the design rather than the machine. A custom outline, artwork nobody else has, and a piece count matched to one specific person are the three things a shop-bought puzzle cannot do.
Then pick the route that fits what you own. Laser cutting buys shape and material freedom; print-on-demand buys full-colour printing and needs no equipment; cutting by hand is cheap and imprecise.
Working from a photograph rather than your own artwork? That has a different set of problems — which images make good puzzles, resolution, and cropping — covered in making a puzzle from a photo.
Not sure the two words mean the same thing? Jigsaw or puzzle explains where the terms diverge.
Frequently Asked Questions about Making Puzzles
How do I make my own jigsaw puzzle?
Choose or draw the artwork, generate a jigsaw cut file at your finished size and piece count, then produce it by laser cutting, hand cutting, or uploading to a print-on-demand service.
What material should I use for a wooden puzzle?
Three-millimetre plywood is the standard. Thinner boards let tabs snap during solving, and acrylic tends to chip at the narrow points where pieces interlock.
How many pieces should a puzzle have?
Match it to the solver: 5 to 14 for toddlers, 20 to 50 for young children, 100 to 200 for a casual adult, and 300 or more for someone who wants a long session.
Can I make a puzzle without a laser cutter?
Yes. Print the artwork, mount it on board, and cut it by hand, or upload the design to a print-on-demand service that prints and die-cuts it for you.
Is print on demand or laser cutting cheaper?
Print on demand is cheaper for one or two. Laser cutting becomes cheaper once you are making a few dozen of the same design, since there is no per-unit printing cost.
Can a print-on-demand puzzle have a custom shape?
Almost never. POD services die-cut to fixed rectangular formats, so a custom outline such as a heart, an animal, or a leaf requires cutting it yourself.
Make your own puzzle cut file
Set the size, pick a piece count, preview the pieces, and export — free.
