
Торт, приготовленный новичком, не обязан выглядеть как торт новичка. Секрет в том, чтобы выбрать способ украшения, который соответствует вашему реальному уровню навыков, а не копировать торт из кондитерской, отделка которого потребовала многих лет практики.
Короткий ответ:
- Начните с чернового слоя крема (crumb coat) — тонкого слоя крема, который «запечатывает» крошки перед нанесением финального слоя.
- Отделка масляным кремом через кондитерский мешок — самый щадящий способ украшения для новичков: простые завитки и бордюры скрывают неровности.
- Шоколадный ганаш и свежие фрукты быстро покрывают торт и почти не требуют навыков работы с кондитерским мешком.
- Топпер для торта — самое простое украшение из всех: не требует никаких навыков работы с кремом и сразу превращает простой торт в готовый.
- Охлаждайте торт между этапами. Холодный торт гораздо лучше держит начинку, подтёки и топперы, чем торт комнатной температуры.
Что вам понадобится
- Изогнутая лопатка (offset spatula) и шпатель-скребок для выравнивания крема
- Кондитерские мешки и хотя бы одна звездчатая и одна круглая насадка
- Вращающаяся подставка для торта или тарелка, которую можно крутить руками
- Масляный крем или ганаш, а также любые свежие фрукты или посыпка, которые вы хотите добавить
- Опционально: топпер для торта, вырезанный лазером или напечатанный на 3D-принтере, для мгновенно завершённого вида
Как украсить торт масляным кремом

- Сначала нанесите черновой слой. Распределите тонкий слой масляного крема по всему торту и охладите его 15–20 минут.
- Нанесите финальный слой обильно, а затем разровняйте его шпателем-скребком, удерживая его под постоянным углом и вращая торт.
- Отсадите простой бордюр по верхнему или нижнему краю звездчатой насадкой — повторяющийся узор из «ракушек» или розеток — самый простой вариант для начала.
- Добавьте объём розетками или шапочками крема по всей поверхности, если хочется большего покрытия без дополнительных навыков отсадки.
Как украсить торт шоколадом

- Приготовьте простой ганаш, нагрев примерно равные части сливок и измельчённого шоколада до однородности.
- Сначала охладите торт, чтобы подтёк застыл, а не стекал прямо вниз.
- Ложкой нанесите ганаш по краям и дайте ему стечь по бокам, прежде чем заполнить верх.
- Добавьте текстуру шоколадной стружкой, завитками или кусочками шоколадной коры сверху.
Как украсить торт клубникой

- Вымойте и полностью высушите клубнику — любая влага заставит крем сползать.
- Часть ягод разрежьте пополам, а часть оставьте целыми для объёма и разнообразия.
- Выложите от центра к краю или кольцом по верхнему краю, начиная с самых крупных ягод.
- Смажьте тёплым джемом или глазурью для блеска и чтобы ягоды держались на месте.
Украшение топпером для торта
Если отсадка крема пока не получается, просто пропустите этот шаг: топпер превращает простой покрытый кремом торт в готовый за считаные секунды, без каких-либо навыков работы с кремом. Топперы из акрила и дерева, вырезанные лазером, можно персонализировать именем, возрастом или сообщением, а многие из них можно использовать повторно и на следующий день рождения.
Больше идей, помимо подборки ниже, вы найдёте в полной коллекции топперов для торта на заказ, в этом наборе лазерных макетов топперов и элементов декора для торта, или в этих готовых наборах декора для дня рождения с подходящими друг к другу топперами и акцентами. Несколько фаворитов для начала:
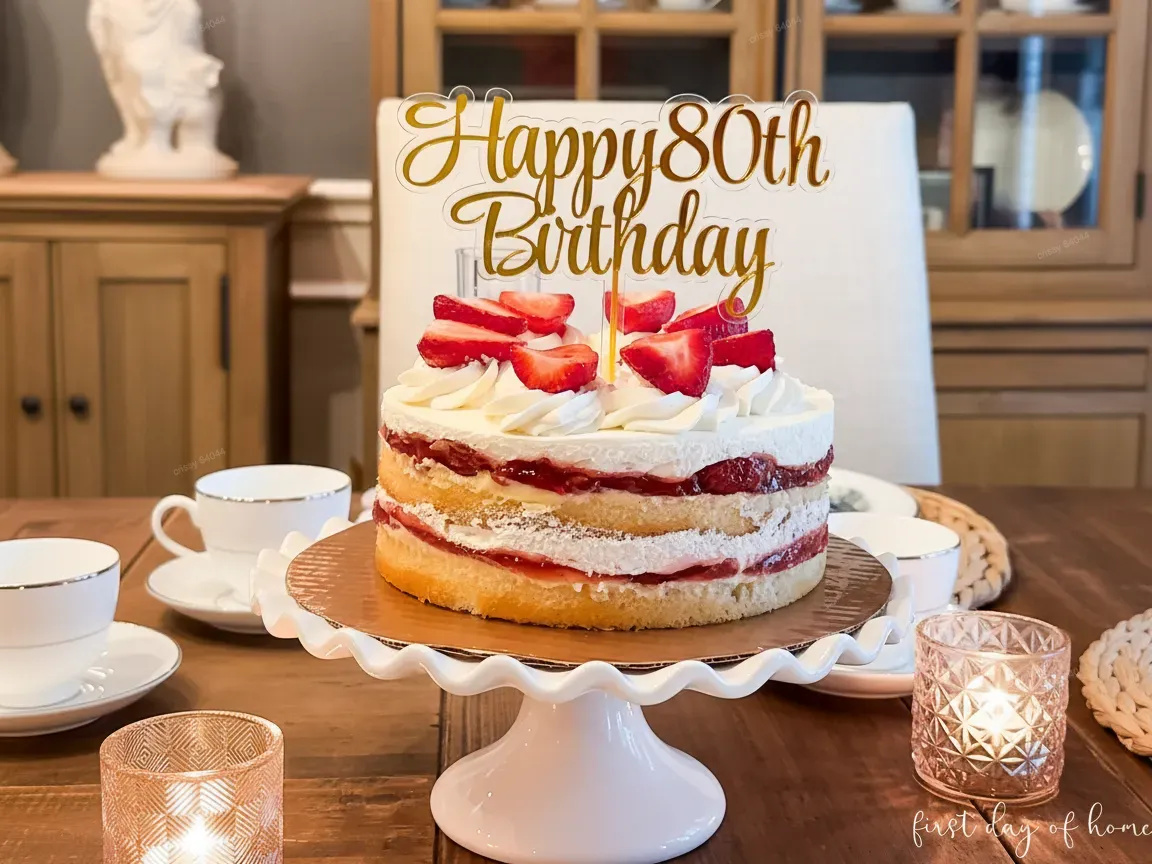
1. Топпер для торта из золотого зеркального акрила
- Материал: акрил (золотое зеркало)
- Процесс: лазерная резка
- Тип: топпер для торта
Золотой зеркальный акрил вырезается в виде соединённой рукописной надписи и вставляется прямо в крем. Поскольку буквы соединены между собой, вся фраза поднимается единым целым без сложной сборки, а зеркальная поверхность отражает свет свечей — вот почему обычный бисквит с ягодами вдруг начинает выглядеть как торт из кондитерской.
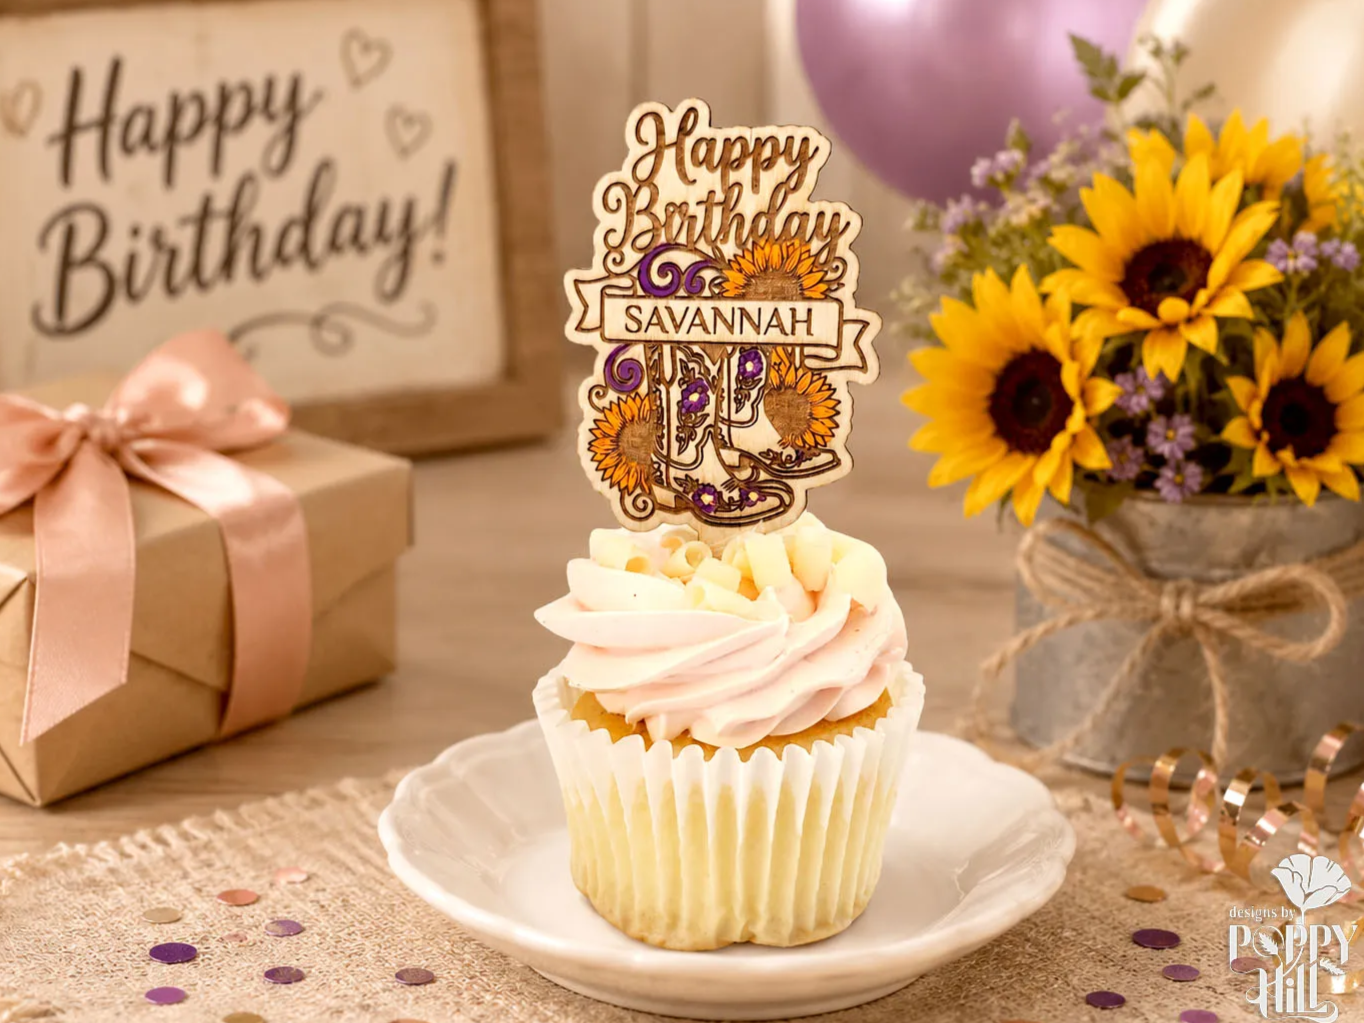
2. Топпер для капкейков «Подсолнухи и ковбойские сапожки»
- Материал: дерево
- Процесс: лазерная резка и гравировка
- Тип: топпер для капкейков
Тот же подход «персонализируй и вырежи» отлично работает и для капкейков — замените имя и тему, и один файл превращается в целый набор одинаковых топперов для всего противня.
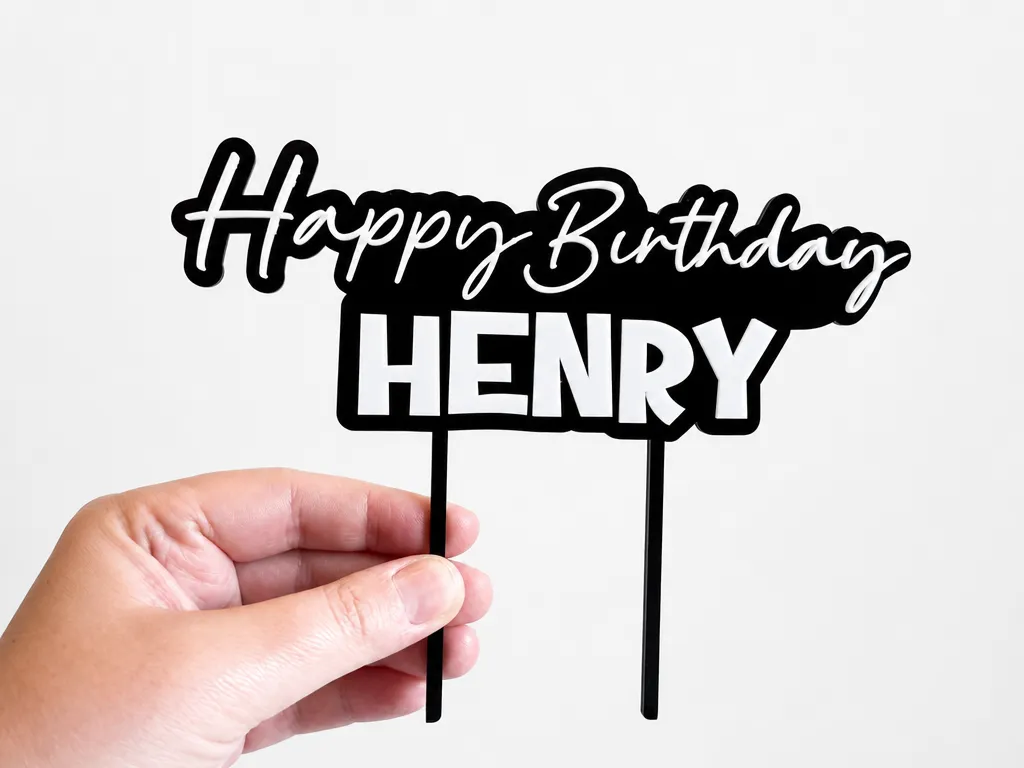
3. Именной топпер из слоёного акрила
- Материал: акрил (слоёный, двухцветный)
- Процесс: лазерная резка
- Тип: топпер для торта
Два слоя контрастного акрила, вырезанных и сложенных вместе, придают именному топперу глубину и лёгкую тень без каких-либо навыков рисования или тонирования.
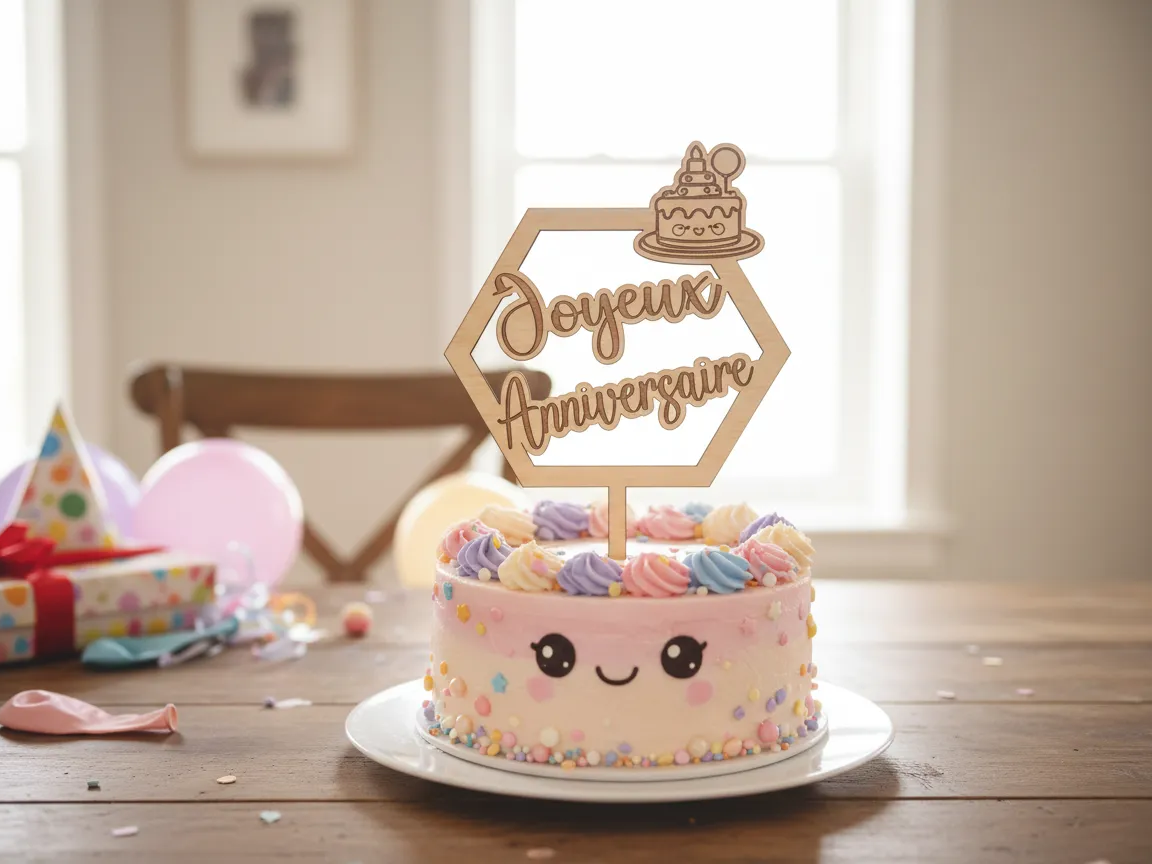
4. Праздничный топпер в стиле kawaii-аниме
- Материал: дерево
- Процесс: лазерная резка и гравировка
- Тип: топпер для торта
Kawaii и аниме-стиль — один из самых востребованных вариантов оформления топперов в сообществе: милая улыбающаяся мордочка и рукописное поздравление, вырезанные и выгравированные за один проход. Смотрите больше макетов топперов для торта на заказ с другими персонажами и стилями рукописного шрифта.
Ошибки новичков, которых стоит избегать
- Украшение тёплого торта. Крем тает и сползает на торте, только что вынутом из духовки — сначала полностью остудите его.
- Пропуск чернового слоя крема. Без него рассыпавшиеся крошки попадают в финальный слой крема и становятся видны.
- Слишком плотное наполнение кондитерского мешка. Мешком, заполненным наполовину, легче управлять, чем полностью полным.
- Слишком раннее добавление свежих фруктов. Со временем ягоды выделяют сок и, если их выложить заранее, за несколько часов он растечётся по крему.
Итог
У всех способов украшения торта, доступных новичкам, есть общий секрет: выбирайте технику, которая скрывает мелкие ошибки, а не требует идеально твёрдой руки. Бордюры из масляного крема, шоколадный подтёк, свежие фрукты или топпер — всё это приводит к аккуратному, готовому на вид торту, а топпер позволяет добиться этого, вообще не прикасаясь к кондитерскому мешку.
Часто задаваемые вопросы об украшении торта для начинающих
Какой самый простой способ украсить торт для начинающего?
Топпер для торта — самый быстрый способ получить готовый на вид торт без каких-либо навыков отсадки крема: просто разровняйте крем и установите топпер сверху. Если хочется что-то сделать своими руками, шоколадный ганаш с подтёком — более щадящий вариант, чем отсадка масляным кремом.
Как украсить торт шоколадом?
Приготовьте простой ганаш из тёплых сливок и измельчённого шоколада, охладите торт, чтобы подтёк застыл, а не стекал, а затем нанесите его ложкой по краям, прежде чем заполнить верх.
Как украсить торт клубникой?
Вымойте и тщательно высушите ягоды, часть разрежьте пополам, а часть оставьте целыми, затем выложите их от центра к краю или по верхнему краю. Смазывание тёплым джемом добавляет блеск и помогает ягодам держаться на месте.
Как сделать топпер для торта?
Лазерный станок делает это простым: спроектируйте или скачайте текст либо фигуру, вырежьте её из тонкого акрила или дерева и приклейте к палочке или шпажке. Файлы сообщества, как в примерах выше, готовы к тому, чтобы их открыть, персонализировать и вырезать без необходимости проектировать с нуля.
Какие инструменты на самом деле нужны новичку в украшении тортов?
Изогнутая лопатка, шпатель-скребок, один кондитерский мешок со звездчатой и круглой насадками, а также вращающаяся подставка (или тарелка, которую можно крутить руками) — этого достаточно почти для любой техники начального уровня. Всё остальное опционально, пока конкретная задумка не потребует иного.
Создайте подходящий топпер для торта
Введите имя, выберите стиль и экспортируйте файл топпера, готовый к резке — бесплатно.
