
Report
![[Laser cut and engrave] Laser Cut Wooden Picture Frames with Intricate Floral Designs](https://image-res.atomm.com/resource/xtool/community/attachment/xtool-community/602e5d70-2836-4d5a-ae6e-2bbed427ddd3.png?x-oss-process=image/resize,w_1200,h_900,limit_0/interlace,1/format,webp/auto-orient,1)

![[Laser cut and engrave] Laser Cut Wooden Picture Frames with Intricate Floral Designs](data:image/png;base64,iVBORw0KGgoAAAANSUhEUgAAAAoAAAAKCAYAAACNMs+9AAAAAXNSR0IArs4c6QAAABdJREFUKFNjZCASMBKpjmFUId6QIjp4AAppAAuXjCs4AAAAAElFTkSuQmCC)
![[Laser cut and engrave] Laser Cut Wooden Picture Frames with Intricate Floral Designs](https://image-res.atomm.com/resource/xtool/community/attachment/xtool-community/602e5d70-2836-4d5a-ae6e-2bbed427ddd3.png?x-oss-process=image/resize,w_200,h_150,limit_0/interlace,1/format,webp/auto-orient,1)
![[Laser cut and engrave] Laser Cut Wooden Picture Frames with Intricate Floral Designs](https://storage-us.atomm.com/resource/xtool/community/attachment/xtool-community/64669249-c3c0-4207-a44c-50a42c68e977.png)
![[Laser cut and engrave] Laser Cut Wooden Picture Frames with Intricate Floral Designs](https://image-res.atomm.com/resource/xtool/community/attachment/xtool-community/3dba406f-4d5a-418b-9fb5-74301c1f8be2.jpg?x-oss-process=image/resize,w_200,h_150,limit_0/interlace,1/format,webp/auto-orient,1)
![[Laser cut and engrave] Laser Cut Wooden Picture Frames with Intricate Floral Designs](https://image-res.atomm.com/resource/xtool/community/attachment/xtool-community/09e81b6c-2024-4e52-a910-0353f5969a0c.jpg?x-oss-process=image/resize,w_200,h_150,limit_0/interlace,1/format,webp/auto-orient,1)
![[Laser cut and engrave] Laser Cut Wooden Picture Frames with Intricate Floral Designs](https://image-res.atomm.com/resource/xtool/community/attachment/xtool-community/21d8e6eb-49ff-421f-930f-084f9a6738a3.jpg?x-oss-process=image/resize,w_200,h_150,limit_0/interlace,1/format,webp/auto-orient,1)
Photo frames wood embossing - mandala designs
 Instruction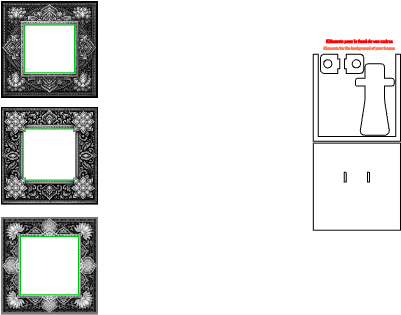
F2 U UV 3 cadres mandala
.xcs
Application scenario
Laser processing
Machine & module

xTool F2 Ultra UV
5WMaterial used

5 mm wood coaster

61
1077
Information
      3 Mandala Frames – Deep Engraving (Embossing)

A series of three wooden frames decorated with deep engraved mandala motifs.

The embossing work brings relief and highlights every detail of the floral and geometric patterns. The engraving depth creates a subtle play of shadows that gives character and a real presence to the frames.

Each piece reveals the finesse of the design and the richness of the textures, transforming these frames into decorative elements in their own right, even before inserting a photo.
A project focused on the precision, relief and elegance of the pattern.
Instruction
1
Step1

Preview

Preview

Preview
7 More images
For this project, I used wood chips of 5 mm thick, initially sold as coasters. Bought here: https://share.temu.com/NPhhWMUqmVB<
p data-start="246" data-end="306">For the back of the frame, I used 2 mm plywood.Don't forget to place a slatboard in the bottom of your machine so as not to damage it.
In the software, position your visual in the center of your workspace.
Run the framing to check the positioning. The visual must be slightly larger than the plate in order to engrave the entire design.
Start the job.
The laser will first perform the embossing, then perform the cutting the center.
Then cut the bottom elements of the frame from 2 mm plywood.
Insert your photo (size 8×8 cm; window size between 5×5 cm and 6×6 cm depending on the model).
Assemble using wood glue.
Ask... and admire ✨
Comments
Remixes
License

This work contains AI-generated content.


You may also like

Laser Engraved Custom Photo Frame on Wood Slice

1
21

Photo Frame with Dragon Design

14
47

Laser Engraved Wooden Family Photo Frame Wall Decor with Clips

0
7

Photo Frame with variable stand and pattern

15
114

'/%3e%3cdefs%3e%3clinearGradient%20id='paint0_linear_1433_15752'%20x1='12.5'%20y1='5'%20x2='12.5'%20y2='19.2596'%20gradientUnits='userSpaceOnUse'%3e%3cstop%20stop-color='%232F7FFF'/%3e%3cstop%20offset='1'%20stop-color='%232661F1'/%3e%3c/linearGradient%3e%3c/defs%3e%3c/svg%3e)
 Template
Mothers Day Photo Frame

5


Laser Cut Wooden Instax Mini Film Frame Ornament

8
41

Multi-Size Photo Frame Legs

74
484

Laser Cut Wooden Heart-Shaped Decorative Picture Frame with Floral Design

3
54

Flower Photo Frame

21
80

3D Decorative photo frame. Boho display frame. Wooden modern photo frame with stand

54
449

$3.98
$3.98
$7.96
Credits398
Gift Picture Frame, 4x6 Photo Holder, Laser Cutting Design, Photo Frame for Handmade

0

hot - air balloon photo frame
21
62

Laser Engraved Wooden Family Photo Frame with Inspirational Quote
0
1

Team Papa Photo Frame

7
32
 Template
Zoo Family Photo Frame
1

photo frame

91
553

Minimalist Simple Wooden Photo Stand for your desk
20
75

Laser Engraved Wooden School Years Photo Frame Personalized

10
105