


Report
![[Laser cut and engrave] Laser Cut Layered Topographic Map Model in Wood](https://storage-us.atomm.com/resource/xtool/community/attachment/xtool-community/c1a9b3de-fa6f-40fa-aa2b-345fa80f9b21.jpg?x-oss-process=image/resize,w_1200,h_900,limit_0/interlace,1/format,webp/auto-orient,1)
![[Laser cut and engrave] Laser Cut Layered Topographic Map Model in Wood](data:image/png;base64,iVBORw0KGgoAAAANSUhEUgAAAAoAAAAKCAYAAACNMs+9AAAAAXNSR0IArs4c6QAAABdJREFUKFNjZCASMBKpjmFUId6QIjp4AAppAAuXjCs4AAAAAElFTkSuQmCC)
![[Laser cut and engrave] Laser Cut Layered Topographic Map Model in Wood](https://storage-us.atomm.com/resource/xtool/community/attachment/xtool-community/c1a9b3de-fa6f-40fa-aa2b-345fa80f9b21.jpg?x-oss-process=image/resize,w_200,h_150,limit_0/interlace,1/format,webp/auto-orient,1)
![[Laser cut and engrave] Laser Cut Layered Topographic Map Model in Wood](https://storage-us.atomm.com/resource/xtool/community/attachment/xtool-community/3680b73a-ba3f-41eb-8402-d3bf380cfb80.jpg?x-oss-process=image/resize,w_200,h_150,limit_0/interlace,1/format,webp/auto-orient,1)
![[Laser cut and engrave] Laser Cut Layered Topographic Map Model in Wood](https://storage-us.atomm.com/resource/xtool/community/attachment/xtool-community/9fa54198-fa6b-45f3-a0bd-2357fab9bf97.jpg?x-oss-process=image/resize,w_200,h_150,limit_0/interlace,1/format,webp/auto-orient,1)
![[Laser cut and engrave] Laser Cut Layered Topographic Map Model in Wood](https://storage-us.atomm.com/resource/xtool/community/attachment/xtool-community/3a6697db-8c97-4784-a2af-89eb9742a534.jpg?x-oss-process=image/resize,w_200,h_150,limit_0/interlace,1/format,webp/auto-orient,1)
![[Laser cut and engrave] Laser Cut Layered Topographic Map Model in Wood](https://storage-us.atomm.com/resource/xtool/community/attachment/xtool-community/8aee2413-908c-4de6-a2d5-2b51cad89937.jpg?x-oss-process=image/resize,w_200,h_150,limit_0/interlace,1/format,webp/auto-orient,1)
![[Laser cut and engrave] Laser Cut Layered Topographic Map Model in Wood](https://storage-us.atomm.com/resource/xtool/community/attachment/xtool-community/611b50d6-e677-42b0-ab8d-eeb3c6ced2a8.jpg?x-oss-process=image/resize,w_200,h_150,limit_0/interlace,1/format,webp/auto-orient,1)
Grand Canyon 3D Coasters - Bright Angel Trail Layered Topographic Map - Set of 4
 Instruction
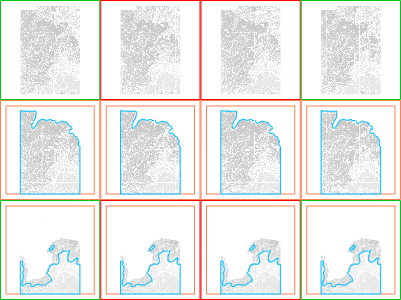
3 Layered Grand Canyon Project
.xcs
Application scenario
Laser processing (540min)
Machine & module
xTool S1
40WCompatibles · 9
Accessories

xTool S1 Honeycomb Panel

[US Only for xTool S1] xTool Fire Safety Set: Auto Fire Detection, Fire Extinguishing

xTool S1 Riser Base

xTool S1 40W Laser Module

xTool 6-inch 410 CFM Inline Duct Fan
Material used

1/4"(6mm) MDF
1
117
Information
      This is a project for 3D Coasters for the Grand Canyon's Bright Angel Trail.

A friend of mine hiked this trail and asked if I could make unique coasters for it. I took the topographic map for the Grand Canyon, found the trail, and zoomed into an area that fit the entire path in one screen. After editing the map externally, I moved to XTool and divided a work area into 12 squares sized to a piece of acrylic I had for the top of the coasters - 4 columns of 3 layers. I then divided the elevation of the map into 1/3rds to set onto the 3 layers to give a 3D effect to the coasters. After that, I placed my 1/4" piece of MDF into the S1, lined it all up, and started the laser.

Once the laser finished, I then moved to the table saw to cut the MDF squares straight. I did this to avoid burning the edges of the coasters and having to clean them, but the laser can easily cut these squares perfectly for you if you want darker edges and are okay with cleaning the sides. Then, I simply placed the layers together with fast setting super glue and topped them off with the acrylic to make them a solid coaster. Finally, I added 4 felt pads to the bottom of each to make them table top friendly.

Notes:
* I would recommend using the laser itself to cut the squares because the pieces become so small that the table saw becomes dangerous to use (which you can see how it kicked back at me in the photos and is why some pieces are chipped or have gouges - my friend liked this though as she thought it made it look rugged like the trail)
* When cleaning the burned edges, be sure to clean them before gluing anything or else the ash will stick to the glue and muddy up the result
Instruction
1
Step1: Gather Materials
Materials:
- ¼" MDF Sheet - 1/4" x 16" x 12"
- 4 Acrylic squares (I used these from Amazon) - 0.04" x 3.938" x 3.938"
- Quick-setting adhesive (I used liquid super glue)
2
Step2: Setup Laser
- Position your ¼" piece of MDF in your machine
- Set your material height
- Set your processing area
- Confirm with framing
3
Step3: Start the Laser
This will take a little over 8 hours. The cuts come out clean after 3 passes and the engravings take a while as well because they are set to 180 Lines per cm for added detail
BE SURE TO STAY NEAR THE MACHINE AS THE HIGH POWER AND LOW SPEED GENERATES A LOT OF HEAT/DANGER
4
Step4: Prepare Material
After the laser has finished, remove the pieces from the machine. Discard the blank cut pieces found between the engraved portions and the borders as these will not be used.
Now would be a good time to clean the edges of the pieces before any adhesive is added to remove any soot/ash from the sides so that they do not stain fingers when grasping the finished product
5
Step5: Assemble Outside Border
- Add a drop of quick-setting adhesive to the back of the border middle layer
- I have found super glue to work very well with both the MDF and the acrylic
- Place the middle layer onto the top of the bottom layer in line with the border
- Let it dry enough to hold the piece in place
- Repeat steps 1-3 for the top border onto the middle border ensuring all layers are even on the inside and outside
6
Step6: Assemble Engraved Pieces
- Add a drop of quick-setting adhesive to the back of the engraved middle layer
- Place the middle layer onto the top of the bottom layer in the correct position
- Match the bottom edge against the inside border and the engravings to the engravings beneath
- Let it dry enough to hold the piece in place
- Repeat steps 1-3 for the top layer onto the middle layer
- There is a very tiny piece at the top layer that represents an “island” that is at the same elevation as the top but is not connected to that cliff in real life. Treat this piece the same as the rest of the top layer
7
Step7: Add Acrylic Top
- Add a sized acrylic piece to the top of the layered coaster
- Place the adhesive at the edge of the acrylic and MDF to avoid discoloration of the MDF from the moisture of the adhesive
8
Step8: Add Felt Feet
Add felt feet to the bottom of the coaster. I used 4 pads with a sticky backing at each corner
9
Step9: Overview
All Steps:
- Position your ¼" piece of MDF in your machine
- Setup your tool
- Let the tool run
- Remove your cut/engraved pieces from the machine
- Remove the blank pieces between the engraved areas and the borders of the coaster as they will not be used
- Add a drop of quick-setting adhesive to the back of the border middle layer
- I have found super glue to work very well with both the MDF and the acrylic
- Place the middle layer onto the top of the bottom layer in line with the border
- Let it dry enough to hold the piece in place
- Repeat steps 6-8 for the top border onto the middle border
- Add a drop of quick-setting adhesive to the back of the engraved middle layer
- Place the middle layer onto the top of the bottom layer in the correct position
- Match the bottom edge against the inside border and the engravings to the engravings beneath
- Let it dry enough to hold the piece in place
- Repeat steps 10-12 for the top layer onto the middle layer
- There is a very tiny piece at the top layer that represents an “island” that is at the same elevation as the top but is not connected to that cliff in real life, treat this piece the same as the rest of the top layer
- Add a sized acrylic piece to the top of the layered coaster
- Place the glue at the edge of the acrylic and MDF to avoid discoloration of the MDF from the moisture
- Add felt feet to the bottom of the coaster
Comments

![[US Only for xTool S1] xTool Fire Safety Set: Auto Fire Detection, Fire Extinguishing](https://image-res.xtool.com/resource/xtool/community/accessories/20231018-183509.webp)


