


Report
![[Laser cut and engrave] Fishing with Dad- Layered wood wall art](https://storage-us.atomm.com/resource/xtool/community/attachment/xtool-community/9c2f535a-c062-4b91-a187-3e569d938c0a.jpeg?x-oss-process=image/resize,w_1200,h_900,limit_0/interlace,1/format,webp/auto-orient,1)
![[Laser cut and engrave] Fishing with Dad- Layered wood wall art](data:image/png;base64,iVBORw0KGgoAAAANSUhEUgAAAAoAAAAKCAYAAACNMs+9AAAAAXNSR0IArs4c6QAAABdJREFUKFNjZCASMBKpjmFUId6QIjp4AAppAAuXjCs4AAAAAElFTkSuQmCC)
![[Laser cut and engrave] Fishing with Dad- Layered wood wall art](https://storage-us.atomm.com/resource/xtool/community/attachment/xtool-community/9c2f535a-c062-4b91-a187-3e569d938c0a.jpeg?x-oss-process=image/resize,w_200,h_150,limit_0/interlace,1/format,webp/auto-orient,1)
![[Laser cut and engrave] Fishing with Dad- Layered wood wall art](https://storage-us.atomm.com/resource/xtool/community/attachment/xtool-community/53a71082-4dfa-4a2d-85a0-4ae3a94360bf.jpeg?x-oss-process=image/resize,w_200,h_150,limit_0/interlace,1/format,webp/auto-orient,1)
![[Laser cut and engrave] Fishing with Dad- Layered wood wall art](https://storage-us.atomm.com/resource/xtool/community/attachment/xtool-community/fd0368f2-d7b8-493a-967f-1712c2139e19.jpeg?x-oss-process=image/resize,w_200,h_150,limit_0/interlace,1/format,webp/auto-orient,1)
![[Laser cut and engrave] Fishing with Dad- Layered wood wall art](https://storage-us.atomm.com/resource/xtool/community/attachment/xtool-community/7fb5dd50-e5e7-43b8-86f2-b89ba2323bf4.jpeg?x-oss-process=image/resize,w_200,h_150,limit_0/interlace,1/format,webp/auto-orient,1)
![[Laser cut and engrave] Fishing with Dad- Layered wood wall art](https://storage-us.atomm.com/resource/xtool/community/attachment/xtool-community/9a318993-2576-4f4b-9c40-e7cdc33e2dc0.jpeg?x-oss-process=image/resize,w_200,h_150,limit_0/interlace,1/format,webp/auto-orient,1)
![[Laser cut and engrave] Fishing with Dad- Layered wood wall art](https://storage-us.atomm.com/resource/xtool/community/attachment/xtool-community/45f05396-9e5f-4f90-abfc-4ce0907d4d20.jpeg?x-oss-process=image/resize,w_200,h_150,limit_0/interlace,1/format,webp/auto-orient,1)
![[Laser cut and engrave] Fishing with Dad- Layered wood wall art](https://storage-us.atomm.com/resource/xtool/community/attachment/xtool-community/cab98019-4685-44f2-b27c-fcc8abbeb160.jpeg?x-oss-process=image/resize,w_200,h_150,limit_0/interlace,1/format,webp/auto-orient,1)
![[Laser cut and engrave] Fishing with Dad- Layered wood wall art](https://storage-us.atomm.com/resource/xtool/community/attachment/xtool-community/f4b04b45-e85a-4ed4-9c9b-0b1902369400.jpeg?x-oss-process=image/resize,w_200,h_150,limit_0/interlace,1/format,webp/auto-orient,1)
Fishing with Dad- Layered wood wall art
 Atomm Featured
 Instruction
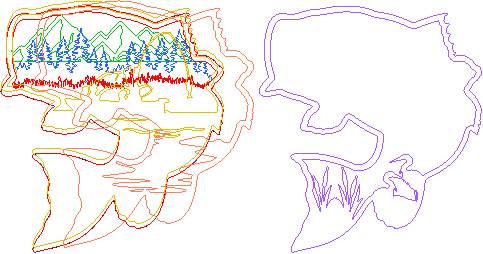
Familyfishing
.xcs
Application scenario
Laser processing
Machine & module
xTool M1 Ultra
20WCompatibles · 13
Material used

1/8"(3mm) Basswood Plywood
149
1354
Information
      I wanted to remind my dad of the good ol' days with our family of four in our fishing boat. We all had our spot in the boat, our superstitions, and our sayings like "reel em in!"
When creating this image, I struggled to find a fish silhouette big enough to add the detail but once I found one, I created all the layers. I tried not to overthink it but we often went fishing in the mountains of Colorado which sets the perfect scenery. I used three types of wood alternating for the seven layers: basswood, walnut, and cherry. I stained or sealed them to create complementary colors.

This was a fun and very personal project for my dad. I've completed several layered templates before but this was the first layered image I designed!
Instruction
1
Step1
For this template, you should be able to resize to your preference and print using step 6 below. If you don't want four family members in a boat, or if you want to create your own layered design, you can use the instructions below. It's easier than it looks/sounds. I promise!
Instructions below are to create your own layered design and/or to switch out a single layer.
- Find a solid background image and duplicate it. This is layer 1
- Use the duplicate image to create an offset. Select both images (duplicate and offset) and “subtract at overlap” leaving just the border. My offset was about ¼ inch.
- Once you subtract at overlap, you've created your edge for all future layers. duplicate for as many layers as you want. In the steps below, you'll weld the images within the layer.
- Find images that can fill your background. Make your edge wide enough to touch the edge and weld the image to the fish edge to create a single layer. Fill in the bottom which is unexposed in the design but a solid service to provide stability in the piece.
- Example: Fill under the mountains where it's not going to be exposed. See image above.
- Add the next layer (third) Example: add grass. Weld to a single layer image. fill in the bottom of the fish that won't be exposed.
- Continue to create all of your layers.
- For a visual effect within the software, put each layer into a different cut color.
- Lay them over one another to make sure they are all the same exact size and will line up perfectly once you cut it.
- Cut one layer at a time if using different woods and/or if the image is too big.
- Ignore the images you don't want to cut by deselecting output
- make sure to move the unwanted layer(s) out of the cut zone and “frame” to make sure you're only cutting the desired layer.
- You'll ignore that layer when done and move to the next.
- Repeat until all layers are complete.
Comments


