
Report
![[Laser cut and engrave] Teaching resources: Geoboard - Geoplano - Géoplan](https://storage-public.atomm.com/xtool/community/attachment/xtool-community/92fd4e8c-39e2-4b2c-bfeb-b7ff60ad495e.JPG?x-oss-process=image/resize,w_1200,h_900,limit_0/interlace,1/format,webp/auto-orient,1)
![[Laser cut and engrave] Teaching resources: Geoboard - Geoplano - Géoplan](data:image/png;base64,iVBORw0KGgoAAAANSUhEUgAAAAoAAAAKCAYAAACNMs+9AAAAAXNSR0IArs4c6QAAABdJREFUKFNjZCASMBKpjmFUId6QIjp4AAppAAuXjCs4AAAAAElFTkSuQmCC)
![[Laser cut and engrave] Teaching resources: Geoboard - Geoplano - Géoplan](https://storage-public.atomm.com/xtool/community/attachment/xtool-community/92fd4e8c-39e2-4b2c-bfeb-b7ff60ad495e.JPG?x-oss-process=image/resize,w_200,h_150,limit_0/interlace,1/format,webp/auto-orient,1)
![[Laser cut and engrave] Teaching resources: Geoboard - Geoplano - Géoplan](https://storage-public.atomm.com/xtool/community/attachment/xtool-community/1bf5cb6b-c9b0-4177-9aee-841acd4d288f.jpg?x-oss-process=image/resize,w_200,h_150,limit_0/interlace,1/format,webp/auto-orient,1)
![[Laser cut and engrave] Teaching resources: Geoboard - Geoplano - Géoplan](https://storage-public.atomm.com/xtool/community/attachment/xtool-community/9d68ebea-b092-4824-89cf-af69f6ea7b51.jpg?x-oss-process=image/resize,w_200,h_150,limit_0/interlace,1/format,webp/auto-orient,1)
Teaching resources: Geoboard - Geoplano - Géoplan


This project is empowered by AImake
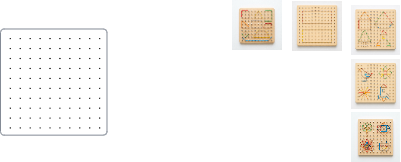
Geoboard - Geoplano - Géoplan
.xs
Show 4 more
Application scenario
Laser processing (60min)
Machine & module

xTool S1
40WCompatible xTool Machine
New
M2
10W, 20WF1 Ultra
20WM1
5W, 10WD1
5W, 10W, 20WD1 Pro
5W, 10W, 20W, 40WP2
55WF1
10WS1
10W, 20WM1 Ultra
10W, 20WP2S
55WMaterial used

1/4"(6mm) White oak plywood

19/32"(15mm) Basswood Plywood

4
384
Source Image Generated with AImake
Tap to View Prompt and Remix It!

view prompt

view prompt

view prompt

view prompt

view prompt
Information
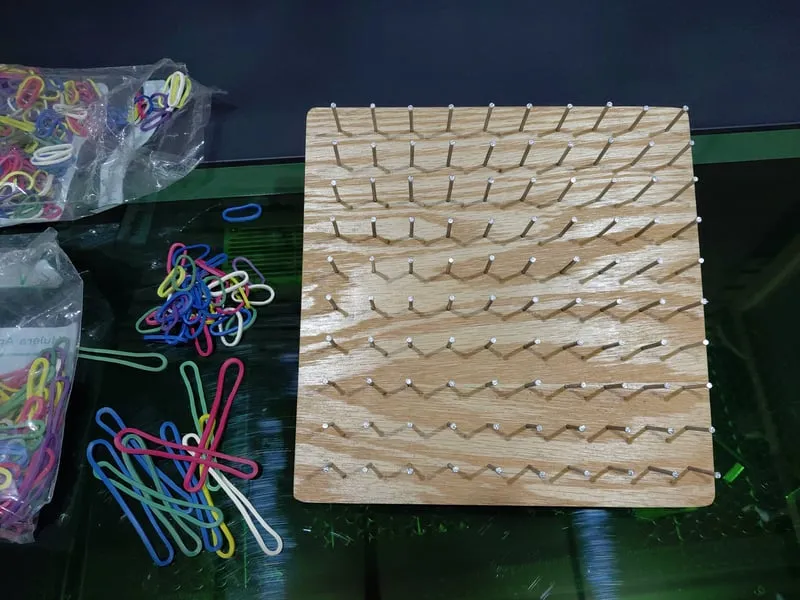
      We all learn in different ways. A geoboard is a teaching resource to help kids to better and faster understand geometry concepts and math as it  enhances other sensorial aspects.

But, there are other concepts that can be taught and other advantages using this device:  colors, geometry shapes, different sizes, perimeter and area calculations, mirror/copy shapes, use of coordinates, basic mathematical operations, etc.
It is capable of teaching while playing games, it teaches using other senses. It helps to develop fine motion control while strengthening fingers.

One thing that was very interesting while developing this project was the use of AImake as it was actually used to generate different playing cards! With this, the users already have a starting point to use the board. AI make is a great tool not just to create real physical designs that will be created later, but it can also be used to complement your projects.

The main idea with this project is to share it in different forums, teacher's didactic materials Facebook pages, AND some boards will be donated to a community center that focus on kids learning and therapies so we can really Make it matter.

https://www.facebook.com/share/1Gka2CsNqV/
https://www.facebook.com/share/p/17kFbrQZga/
Instruction
1
Step1: Prepare the material

Preview
15 mm plywood was used, masking the material will eliminate dark spots on the surface (upper face and back as well)
2
Step2: Engrave the holes, Cut the plywood and sand the edges to remove burn marks

Preview

Preview
Holes are necessary to guide and hammer the nails
3
Step3: Apply a finish

Preview
It is important to protect the plywood as the board is going to have a lot of contact with the hands and fingers
4
Step4: Hammer the nails

Preview

Preview
1.5 inch long head-less (or spherical head) nails were used
5
Step5: Use the board
Preview

Preview

Preview

Preview
6
Step6: Another variant

Preview

Preview

Preview
This second board have 2 pieces of plywood, one is 5 mm thick and the second is 12mm. The nails are 1in long
Comments
Remixes
License

This work contains AI-generated content.


You may also like

'/%3e%3cdefs%3e%3clinearGradient%20id='paint0_linear_1433_15726'%20x1='12'%20y1='5.25'%20x2='12'%20y2='18.75'%20gradientUnits='userSpaceOnUse'%3e%3cstop%20stop-color='%23FFC654'/%3e%3cstop%20offset='1'%20stop-color='%23FF8D12'/%3e%3c/linearGradient%3e%3c/defs%3e%3c/svg%3e)
Weaving Loom Kit

84
238

Wooden recess with geometric shapes for Montessori learning

2
0

Montessori 100 Board and Control

3
10

• Doodle & Play Boards
0
2

Wooden educational tray with numbers, shapes and animals for children

6
23

$2.25
$2.25
Credits225
Personalized Wooden Busy Board Laser Cut Bundle. Educational Activity Center for Toddlers. Montessori Sensory Board

0

Insert le pull - petit bac-le pull- couvercle - table sensorielle - ikea _ Laser Cut Wooden pull over
.png?x-oss-process=image/resize,m_fill,w_240,h_240,limit_0/interlace,1/format,webp/auto-orient,1)
0
7

Multiplication wheel

37
167

Wooden Montessori Lacing Boards with Colorful Shoelaces for Kids

4
36

Laser Cut Wooden Shape Puzzle with Geometric Figures Montessori

9
39

PALETA DE COLORES MONTESSORI

4
9

I make children's toys and educational items
0
1

Transportation Sewing Buttons - Car, Airplane, Boat, and Train
0
2

Fish and Seahorse Shape Educational Print & Toy Set for Kids

1
4

Laser Cut Miniature Dollhouse SVG File – 3-Story Wooden Toy House Vector

15
116

$1.99
$1.99
Credits199
Wooden Spirograph Kit Laser Cut Bundle, Kids Spirograph SVG, Montessori Game, Educational Toy, Anti-Stress Spiral Set, Drawing Toy
6

Laçage Montessori - progression - Montessori lacing toys bundle laser cut. Learn to tie shoe laces svg.
5
12

Play Money Euro Coins

13
99