
![[Laser cut and engrave] Halftone to 3D Printed T-Shirt Transfer Using Atomm AIMake Editor and Bambu P1S](https://storage-public.atomm.com/xtool/community/attachment/xtool-community/95b7ca27-105f-46c2-8de7-ac91f7ae509a.gif)
![[Laser cut and engrave] Halftone to 3D Printed T-Shirt Transfer Using Atomm AIMake Editor and Bambu P1S](data:image/png;base64,iVBORw0KGgoAAAANSUhEUgAAAAoAAAAKCAYAAACNMs+9AAAAAXNSR0IArs4c6QAAABdJREFUKFNjZCASMBKpjmFUId6QIjp4AAppAAuXjCs4AAAAAElFTkSuQmCC)
![[Laser cut and engrave] Halftone to 3D Printed T-Shirt Transfer Using Atomm AIMake Editor and Bambu P1S](https://storage-public.atomm.com/xtool/community/attachment/xtool-community/6e5c41a6-45d9-4045-a558-a5a04c90be0e.png?x-oss-process=image/resize,w_200,h_150,limit_0/interlace,1/format,webp/auto-orient,1)
![[Laser cut and engrave] Halftone to 3D Printed T-Shirt Transfer Using Atomm AIMake Editor and Bambu P1S](https://i.ytimg.com/vi/iTjI6L9Rt-A/hqdefault.jpg)
![[Laser cut and engrave] Halftone to 3D Printed T-Shirt Transfer Using Atomm AIMake Editor and Bambu P1S](/_nuxt/video_icon.B5w3Xr8w.png)
![[Laser cut and engrave] Halftone to 3D Printed T-Shirt Transfer Using Atomm AIMake Editor and Bambu P1S](https://storage-public.atomm.com/xtool/community/attachment/xtool-community/7702f76f-d498-44eb-b0a8-a909369e1ee4.png?x-oss-process=image/resize,w_200,h_150,limit_0/interlace,1/format,webp/auto-orient,1)
![[Laser cut and engrave] Halftone to 3D Printed T-Shirt Transfer Using Atomm AIMake Editor and Bambu P1S](https://storage-public.atomm.com/xtool/community/attachment/xtool-community/f308fa64-4262-4c7b-81a1-f13a802ee0ca.png?x-oss-process=image/resize,w_200,h_150,limit_0/interlace,1/format,webp/auto-orient,1)
![[Laser cut and engrave] Halftone to 3D Printed T-Shirt Transfer Using Atomm AIMake Editor and Bambu P1S](https://storage-public.atomm.com/xtool/community/attachment/xtool-community/beca7df3-533b-45a3-af18-e84511efa52a.jpg?x-oss-process=image/resize,w_200,h_150,limit_0/interlace,1/format,webp/auto-orient,1)
![[Laser cut and engrave] Halftone to 3D Printed T-Shirt Transfer Using Atomm AIMake Editor and Bambu P1S](https://storage-public.atomm.com/xtool/community/attachment/xtool-community/ca8d1cdc-a23d-4d78-9abc-19dbff14ba7c.jpg?x-oss-process=image/resize,w_200,h_150,limit_0/interlace,1/format,webp/auto-orient,1)
![[Laser cut and engrave] Halftone to 3D Printed T-Shirt Transfer Using Atomm AIMake Editor and Bambu P1S](https://storage-public.atomm.com/xtool/community/attachment/xtool-community/aeee943e-bebb-47e6-8029-8faec6f486fa.png?x-oss-process=image/resize,w_200,h_150,limit_0/interlace,1/format,webp/auto-orient,1)
Halftone to 3D Printed T-Shirt Transfer Using Atomm AIMake Editor and Bambu P1S
 First Prize in Halftone Maker Contest
 Instruction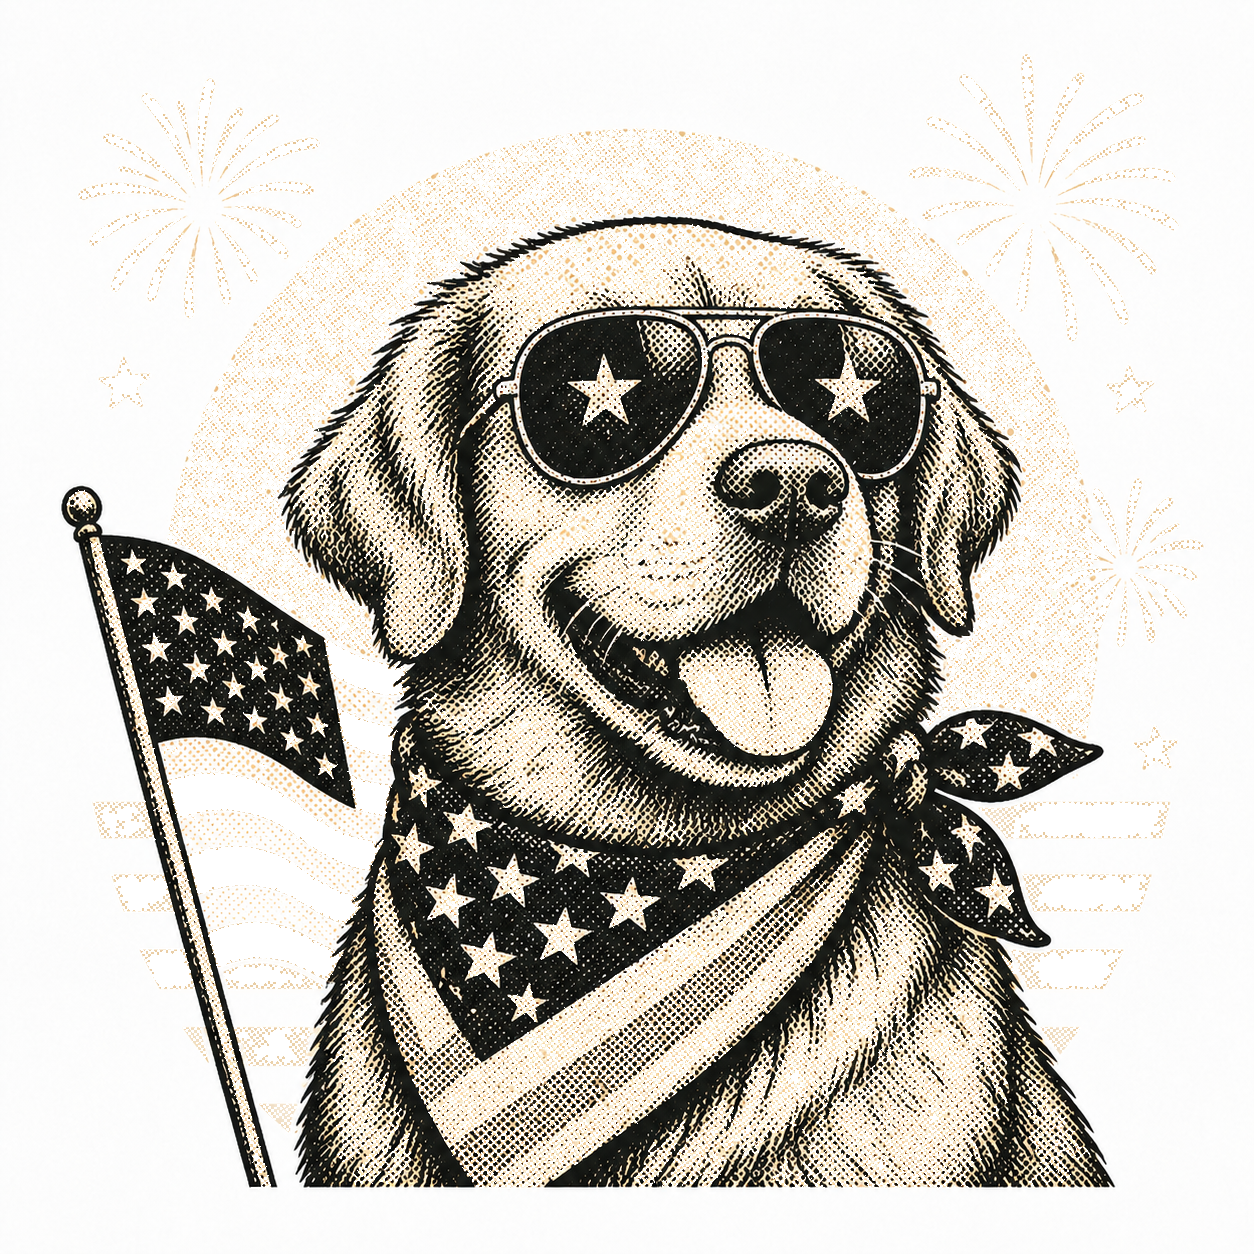

Information
      This project started as a simple experiment with Atomm’s Halftone Maker, but instead of using the halftone design only as a flat image, I wanted to turn it into a physical 3D printed T-shirt transfer.

The main idea was to create an image with one removable color, use Atomm AIMake Editor to generate the halftone effect, convert that halftone artwork into an SVG, then turn it into an STL file for 3D printing.

For this project, I knocked off the beige color in Atomm AIMake Editor and kept the final design black and white so it would work better for halftone conversion and 3D modeling. After exporting the PNG, I used Canva to convert the image into an SVG, then used Bambu Lab MakerLab’s parametric model tool to convert the SVG into an STL.

Once the STL was ready, I added a base layer and printed the design using PLA on my Bambu P1S. After printing, I transferred the 3D printed design onto a T-shirt using a Teflon sheet and heat press.

This project is a fun way to combine AI image creation, halftone design, SVG conversion, 3D printing, and apparel making. It shows that halftone art does not have to stay as a flat digital design — it can become a textured, wearable, physical product.
Instruction
Step1: Create the Original Image
Start by creating an image that has one color you want to knock off later.
For this project, I created an image with a beige color included in the design. The goal was to remove that beige color during the halftone process and keep the remaining image bold and clean.
Try to keep the image simple and high contrast because the final halftone will later be converted into a 3D printable file.
Step2: Open the Image in Atomm AIMake Editor
Upload the image into Atomm AIMake Editor and use the halftone creation tool.
In my case, I selected the beige color as the color to knock off. This helped create a cleaner halftone pattern from the remaining artwork.
This step is important because the knocked-off color controls how the final halftone image looks.
Step3: Export the Halftone Image as PNG
Once the halftone effect looks good, export the final image as a PNG.
I chose to keep the final image in black and white because I wanted to use it for SVG conversion and then convert it into a 3D model.
Black and white works better for this type of workflow because the shapes are easier to trace, convert, and print.
Step4: Convert the PNG to SVG
After exporting the PNG, convert the halftone image into an SVG.
For this project, I used Canva to generate the SVG from the image.
The SVG format is useful because it turns the image into vector shapes, which can then be used for 3D model creation.
Step5: Convert the SVG to STL
Next, use Bambu Lab MakerLab’s parametric model tool to convert the SVG into an STL file.
This step turns the flat halftone design into a 3D printable model.
Before printing, check that the dots and shapes are not too small or too thin. If the halftone pattern is too detailed, some parts may not print cleanly.
Step6: Add a Base Layer
Once the STL is ready, add a base layer to the design.
You can choose any color for the base depending on the T-shirt color and the look you want. For the design layer, choose a different color so the halftone artwork stands out clearly.
The base layer helps hold the design together and makes it easier to transfer the printed piece onto the T-shirt.
Step7: Print the Design
Print the design using PLA.
For this project, I used my Bambu P1S 3D printer. PLA worked well for this experiment because it printed the halftone design cleanly and kept the shape stable.
After printing, carefully remove the piece from the build plate so the thin halftone details do not break.
Step8: Transfer to the T-Shirt
Place the 3D printed design onto the T-shirt.
Use a Teflon sheet on top of the print and apply heat using a heat press.
The Teflon sheet helps protect the print and the fabric during the transfer process.
Once pressed, let it cool before removing or handling the shirt.
Step9: Final Result
The final result is a 3D printed halftone T-shirt design made using Atomm AIMake Editor, Canva, Bambu Lab MakerLab, and a Bambu P1S printer.
This process turns a digital halftone image into a physical textured design that can be worn on a T-shirt.
It is a great way to experiment with custom apparel, 3D printed transfers, halftone art, and digital-to-physical making.
Remixes



You may also like

FIRST RODEO DTF HALFTONE PRINT


Black T-shirt featuring Gorilla Graphic and Alone By Choice Not Lonely Text


Floral Tiger Face Graphic Design for T-Shirt Printing


Black T-Shirt with Colorful Skeleton Graphic


Black T-Shirt Featuring Lord Krishna Graphic Print with I Am Starboy Text


Chevelle Kings Classic Car Graphic Printed Black T-Shirt


Royal Hearts Kiss printed on T-Shirt


Military Style Printed T-Shirt With American Flag and Text


'/%3e%3cdefs%3e%3clinearGradient%20id='paint0_linear_1433_15752'%20x1='12.5'%20y1='5'%20x2='12.5'%20y2='19.2596'%20gradientUnits='userSpaceOnUse'%3e%3cstop%20stop-color='%232F7FFF'/%3e%3cstop%20offset='1'%20stop-color='%232661F1'/%3e%3c/linearGradient%3e%3c/defs%3e%3c/svg%3e)
Cruise Better Life Preserver Graphic T-Shirt

Cartoon Goat Face Printed White T-Shirt


This custom T-shirt was designed and printed using the xTool apparel printer, ensuring high print clarity, durability, and a smooth finish.

Stylish T-shirts with Trendy Patterns


Horse Head Vector Design for T-Shirt Printing and Laser Cutting

White T-shirt with Graphic Illustration of a Dinosaur Holding an Illuminati Eye

Love My Fluffy Cute Pet Heart T-Shirt


Black T-Shirt with Military Soldier and American Flag Print You Are Not Alone

Green Christmas Snowman T-Shirt with Veselé Vánoce Print


Old Hippies Don't Die Funny Graphic T-Shirt with Retro Design