
![[Laser cut and engrave] Stackable Drawer System](https://storage-public.atomm.com/xtool/community/attachment/xtool-community/99aaf290-6126-4f47-8024-1bd5c2ce8622.jpeg?x-oss-process=image/resize,m_fill,w_1280,h_960,limit_0/interlace,1/format,webp/auto-orient,1)
![[Laser cut and engrave] Stackable Drawer System](data:image/png;base64,iVBORw0KGgoAAAANSUhEUgAAAAoAAAAKCAYAAACNMs+9AAAAAXNSR0IArs4c6QAAABdJREFUKFNjZCASMBKpjmFUId6QIjp4AAppAAuXjCs4AAAAAElFTkSuQmCC)
![[Laser cut and engrave] Stackable Drawer System](https://storage-public.atomm.com/xtool/community/attachment/xtool-community/99aaf290-6126-4f47-8024-1bd5c2ce8622.jpeg?x-oss-process=image/resize,m_fill,w_160,h_120,limit_0/interlace,1/format,webp/auto-orient,1)
![[Laser cut and engrave] Stackable Drawer System](https://storage-public.atomm.com/xtool/community/attachment/xtool-community/f01c51db-df6c-4dc6-a20f-ea4ca9320b8b.jpeg?x-oss-process=image/resize,m_fill,w_160,h_120,limit_0/interlace,1/format,webp/auto-orient,1)
![[Laser cut and engrave] Stackable Drawer System](https://storage-public.atomm.com/xtool/community/attachment/xtool-community/2ecbc9b0-bb53-4284-9236-ddac249590fb.jpeg?x-oss-process=image/resize,m_fill,w_160,h_120,limit_0/interlace,1/format,webp/auto-orient,1)
Stackable Drawer System
'/%3e%3cpath%20d='M7.99985%2010.6665L4.6665%206.6665H6.6665L7.99985%209.33317L9.33317%206.6665H11.3332L7.99985%2010.6665Z'%20fill='white'/%3e%3cdefs%3e%3clinearGradient%20id='paint0_linear_2869_78399'%20x1='8'%20y1='1.3335'%20x2='8'%20y2='14.6668'%20gradientUnits='userSpaceOnUse'%3e%3cstop%20stop-color='%23FFA15F'/%3e%3cstop%20offset='1'%20stop-color='%23E37C32'/%3e%3c/linearGradient%3e%3c/defs%3e%3c/svg%3e) Atomm Exclusive
Atomm Exclusive Instruction


Information
      I have a lot of small parts that I use often and so I wanted a stackable drawer system that I can add more drawers to if needed down the line. I started this project a couple of months ago but before that, I had tried other versions of it that others had made, but they were just too convoluted and/or you could not add more later. I decided to make my own and so this came about.
The good thing about this is that you can make as many drawers as you want and add to either side as well as the top to keep adding more drawers.
Instruction
Step1: Before you begin
Per instructions for the 1% contest, I am including my social link here: https://www.facebook.com/woodlord.crafts/posts/pfbid0Z4mMUonF1MaW6kA3fTGrHkhKfTSDE4wfGyZQUmBk1mgySSoKgnHVXYLSeaz4hpJil
I started this a couple of months ago after not being able to find the plans I wanted anywhere online that would be simple to make AND provide the ability to add more drawers to as I needed them.
Each drawer (casing around it included) measures approximately 6 7/8" deep, 5 7/8" wide and 1 5/8" tall. The drawer measures approximately 5 3/8" deep, 5 1/8" wide and 1 3/16" deep. This provides plenty of space for small parts and pieces that you may need to use. For me, I needed places for trophy plaques, adhesive squares, paper clips, tweezers and picks, toothpicks, etc… things that I would use a lot and took up a good bit of space without having someway to organize them. These drawers end up the perfect size for what I needed.
This is made of 1/8" (3mm) birch plywood from xTool. I used 2 sheets of 12"x12" birch per drawer and casing. If you decide to add the blank cap and sides (more on step 7 about this) then you will need a 3rd sheet per drawer.
I do recommend thick superglue such as Starbond to assist in the assembly of this. In addition, I also recommend having an activator on hand to set the glue faster so the drawer does not get glued into the casing. (Ask me how I know that can happen….)
Step2: Cut your pieces
I made this project using the P2S and so if you decide to make this on the same machine and using the same wood, the settings above should work fine. If using a different machine and/or material, you will need to use settings that you have tested for. Using the settings above (or your own) cut out all the parts.
You should have a drawer front, drawer bottom (no cross holes), 2 drawer sides, drawer back (has nibs that poke from either side), case back, 2 case sides (has a slide area cut out along approximately 4/5ths the length), case top and bottom (has 2 cross holes in them). If you have decided to add a cap to the sides and top, you will also have two solid sides and top with not tab cutouts.
In addition, you will also have multiple little U shaped pieces. You need atleast 4 of these if you are going to stack drawers.
The above materials makes you one drawer with case. If you plan on more drawers, you will need to cut out and assemble them and each will have the same number of pieces with the exception of the U pieces. You will only need 4 of those IF you are stacking a drawer ontop or to the side of the drawers.
Step3: Assemble the connectors


Simple and to the point. If you plan on stacking or connecting the drawers, you will need to assemble these little U shaped pieces. Just take two and where the groove is, connect them to create a little cross piece. Put these to the side for now.
Step4: Assemble the Drawer

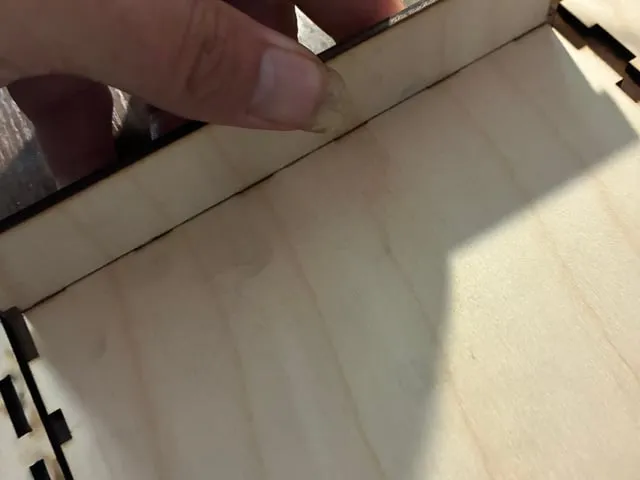


Photo 1 on this step shows the 5 pieces you will use. Start by assembling the sides. Put a strip of glue along the tabs and connect them to the bottom. Do the same with the back piece.
IMPORTANT: The nib on either side of the back piece needs to be aligned where it is close to the bottom of the drawer.
When you are done, you should have a partial drawer like shown in photo 3.
To add the front, put a strip of glue on the tabs of the drawer and pop the drawer front on. It will be tight but it does go on.
For additional stability and strength, run a strip of glue along every joint INSIDE the drawer. Spray activator spray over it to harden it quicker.
Step5: Assemble the Case


The case has 5 pieces as well. However, start with the 4 pieces shown in Photo 1. Run a strip of glue along the tabs and connect the pieces as explained below:
IMPORTANT: Make sure the cutout groove of the sides is closest to the bottom piece.
IMPORTANT: Only attach the sides at this step. When the sides are attached, run a strip of glue along the joint where the two pieces meet to provide strength to the connection. Use activator spray to harden the glue before proceeding to the next part.
BEFORE adding the back of the casing, take your drawer and lever the nibs along the back into the cut out groove of the sides. (Photo 3) Pull the drawer all the way forward. (Photo 4)
IMPORTANT: When attaching the back of the casing, be sure the smallest tab is at the bottom as shown in photo 5. Run glue along the tabs and connect it to the sides of the casing. Add a strip of glue where the back joins the sides and bottom and then use activator spray to harden it.
Finally, add the top piece by running a strip of glue along each tab and snapping it into the tab connections of the bottom part of the casing. Keep your drawer pulled all the way out as you assemble it. It will be tough to snap in but they do go together. Once assembled, wait approximately 5 minutes for the glue on the top to set and harden since you can't reliably get activator spray to the interior at this point.
After the glue has hardened, test the drawer by pulling and pushing it in and out several times.
Step6: Stacking or Attaching


For the purposes of this instructional, stacking is placing a drawer on top while attaching is placing them side by side.
If you want to stack/attach more drawers, you will need to follow the above steps to create each one you want.
In the top and sides of each drawer casing are two cross shaped holes. To stack or attach, you will take one of the crosses we made in step 2 above and snap them into the hole.
IMPORTANT: Do not glue these in unless they are very loose. They shouldn't be and fit in tightly. Glue comes later.
ALSO IMPORTANT: Pressing these crosses into the holes, it is very easy to push them all the way through. To prevent that, when attaching, the sides of the interior drawer should keep that from happening if you close the drawer all the way before pushing them in place. For the top, you will be able to keep them from coming all the way through on the front hole by placing your hand inside and keeping your finger over the hole. The back hole, you just need to be very careful and press lighter than the others.
Once you have the crosses in the holes, put a bit of glue at each intersection of the cross pieces (see photo 3). Then take your next drawer and line it up and press down to snap them together. Do this before the glue sets so that the glue will attach the crosses to both drawers.
The sides are the exact same but easier as the crosses can be seen easier and lined up easier.
Step7: Adding Blanks to the top and Sides (Optional)


You may not want to see the tabs or the groove the drawer rides in or the cross holes once you have everything assembled. In that case, use the blanks provided to cover those areas up.
IMPORTANT: Keep in mind that once you add a blank, you are essentially saying you will not be stacking/attaching anymor drawers. That is the reason I do not have a photo of the top blank being added as I plan to add more drawers to the top of this later.
I recommend cutting the blank sides and cap only after you are fully assembled and ready to add them and not before. This way you will know exactly how many you need.
Step8: Final thoughts
These drawers are the perfect size for what I needed. I did try to make them bigger both depth and width wise but they just did not slide as easily. It may be that a guide piece would be needed for larger sized underneath the drawer but inside the casing. That would be an almost total redesign for that though and I decided not to pursue that course.
For what I set out to do though, this worked perfect. What do you think?
Let me know in the comments and if you like this project, give me a thumbs up on Atomm. Also, when you do make it, give me photo so I can see how it turned out.
I have lots of other plans available. There are a few premium ones but for the most part, my plans are free to download and use. Check them out here: https://www.atomm.com/@Woodlord_Crafts?utm_source=copylink&utm_medium=referral&utm_campaign=sharetoearn2&utm_id=15190
And while your at it, give me a follow so you will be alerted to when I drop other plans in the future.
As always,
Happy Crafting!
Remixes
License



You may also like

Laser Cut Wooden Multi-Drawer Desk Organizer StorageeG Tea


Storage Box


Open Top Jewellery Box With Drawer


Wooden Desktop Storage Box with Pull-Out Drawer


Organizador de pared con cajones de madera 3mm


Gift jewelry box 2 floors, laser cutting design, table decor. Cut model, laser cut pattern, sliding boxes. Gift for her or him, birthday gift.


box


Stackable Bins


Dual Hinged Lid Storage Box Press-Fit Assembly Instructions (Material assumed: 1/4 inch/5.2mm plywood)

mirror shadow box

3mm wood plate holder

Box with divider


Slider gift box with secret compartment, laser cutting pattern, military design. Laser cut, laser craft, table decor. Jewelry box, birthday gift.

Stackable Shelf

Unique gift jewelry box, square flower design, laser cutting pattern. Laser cut, laser craft, table decor. Gift for her, birthday gift.

Wooden Treasure Box SVG | Laser Cut Box SVG | Heart Storage Box SVG


Simple Cord Winder


Stackable Storage Base