
Report
![[Laser cut and engrave] Iris box](https://image-res.atomm.com/resource/xart/result/6749/34603aa4-5511-412e-9acf-965b169f71c9.png?x-oss-process=image/resize,m_fill,w_1280,h_960,limit_0/interlace,1/format,webp/auto-orient,1)
![[Laser cut and engrave] Iris box](data:image/png;base64,iVBORw0KGgoAAAANSUhEUgAAAAoAAAAKCAYAAACNMs+9AAAAAXNSR0IArs4c6QAAABdJREFUKFNjZCASMBKpjmFUId6QIjp4AAppAAuXjCs4AAAAAElFTkSuQmCC)
![[Laser cut and engrave] Iris box](https://image-res.atomm.com/resource/xart/result/6749/34603aa4-5511-412e-9acf-965b169f71c9.png?x-oss-process=image/resize,m_fill,w_160,h_120,limit_0/interlace,1/format,webp/auto-orient,1)
![[Laser cut and engrave] Iris box](https://image-res.atomm.com/resource/xtool/community/attachment/xtool-community/81edd340-bf88-4cab-af38-c1ee7eb38601.webp?x-oss-process=image/resize,m_fill,w_160,h_120,limit_0/interlace,1/format,webp/auto-orient,1)
![[Laser cut and engrave] Iris box](https://storage-us.atomm.com/resource/xtool/community/attachment/xtool-community/248c15db-f104-4fe5-ad8d-c3881ed72561.gif)
Iris box
 Instruction
Circular Laser-cut Iris box
.xcs
Show 1 more
Application scenario
Laser processing
Machine & module

xTool D1 Pro
20WCompatible xTool Machine
M2
P3
F2
F2 Ultra UV
F2 Ultra(Single)
F2 Ultra
F1 Ultra
F1
F1 Lite
S1
P2S
P2
M1 Ultra
M1
D1 Pro 2.0
D1
Laserbox
Material used

1/8"(3mm) Basswood Plywood

1206
9475
Information
      Laser-Cut Iris Box – Precision-Engineered Kinetic Design

This mesmerizing laser-cut Iris box combines functional elegance with mechanical artistry. Featuring a smoothly rotating iris mechanism, the lid opens and closes like a camera shutter — perfect for storing small treasures, jewelry, or simply showcasing the beauty of precision laser-cut design.

Crafted from [material used, e.g., 3mm Basswood plywood or acrylic], the parts are designed to fit together seamlessly without glue (or with minimal adhesive, depending on your assembly preference). The design emphasizes precision, symmetry, and satisfying motion, making it both a fun build and a captivating conversation piece.

🔧 No hardware required
🪵 Material: [3mm plywood]
🧩 Assembly time: ~[5-10 minutes]
🎁 Great as a gift, desk piece, or personal project!
Instruction
1
Step1: Assembling the main container

Preview
Insert the wall pieces into the bottom piece (the one without a guide hole), no need for glue.
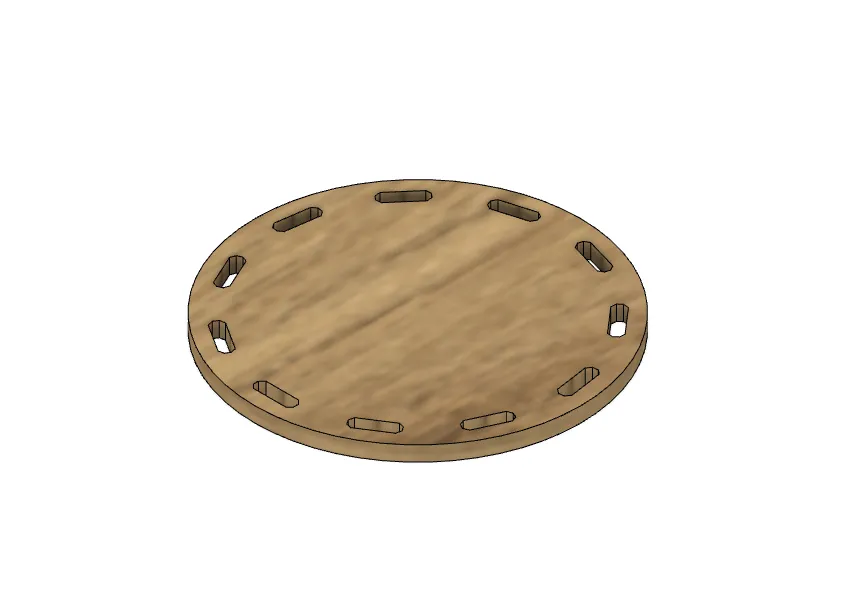
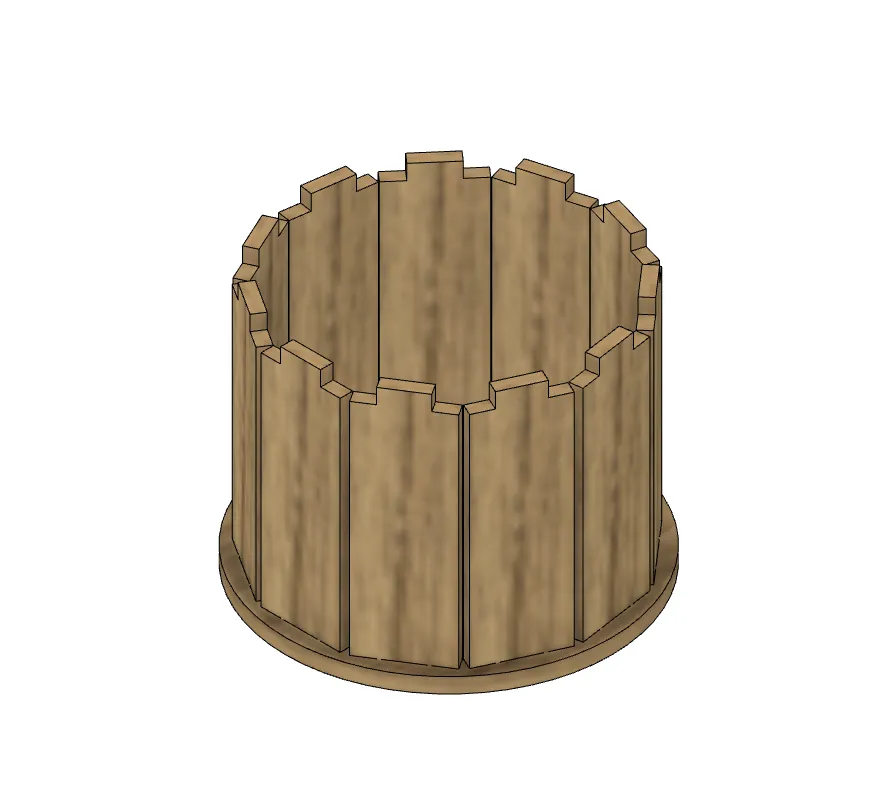
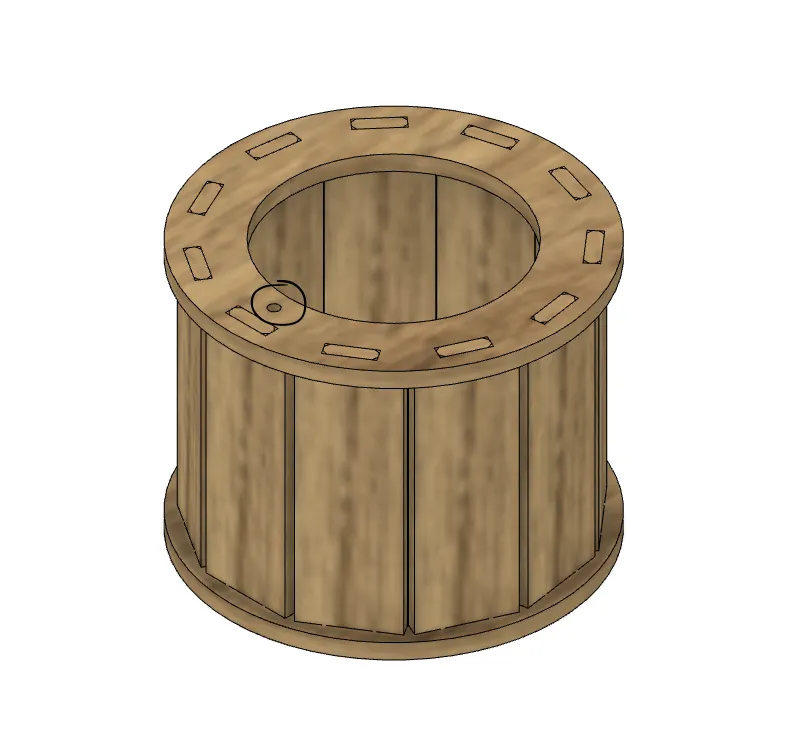
Now insert the top piece, make sure the top one is the one with the guide hole. You may want clamps to make sure the tabs are fully inserted into the top pieces holes.
2
Step2: dding and gluing the tab attachment and the tabs

Preview
Set the tab attachment piece onto the top of the container and line up the guide holes. Then glue those two pieces together like that.
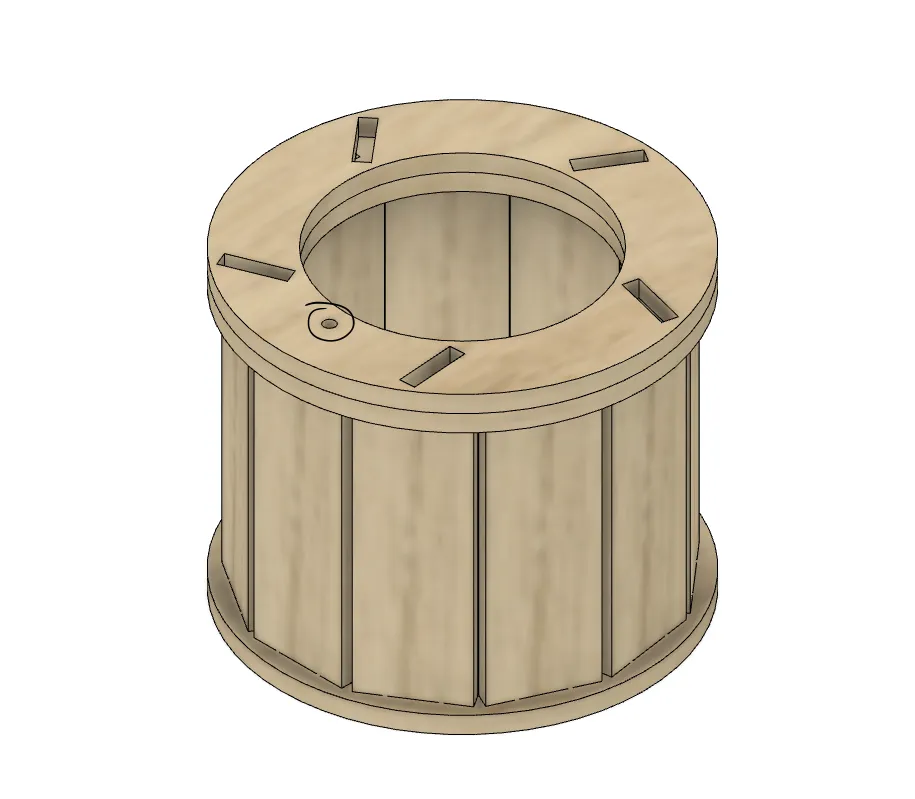
Now insert and glue in the tabs.
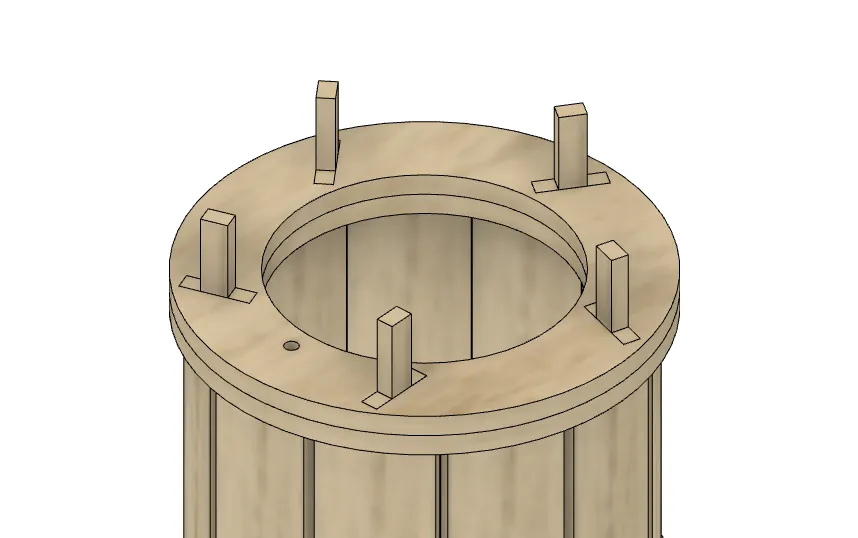
3
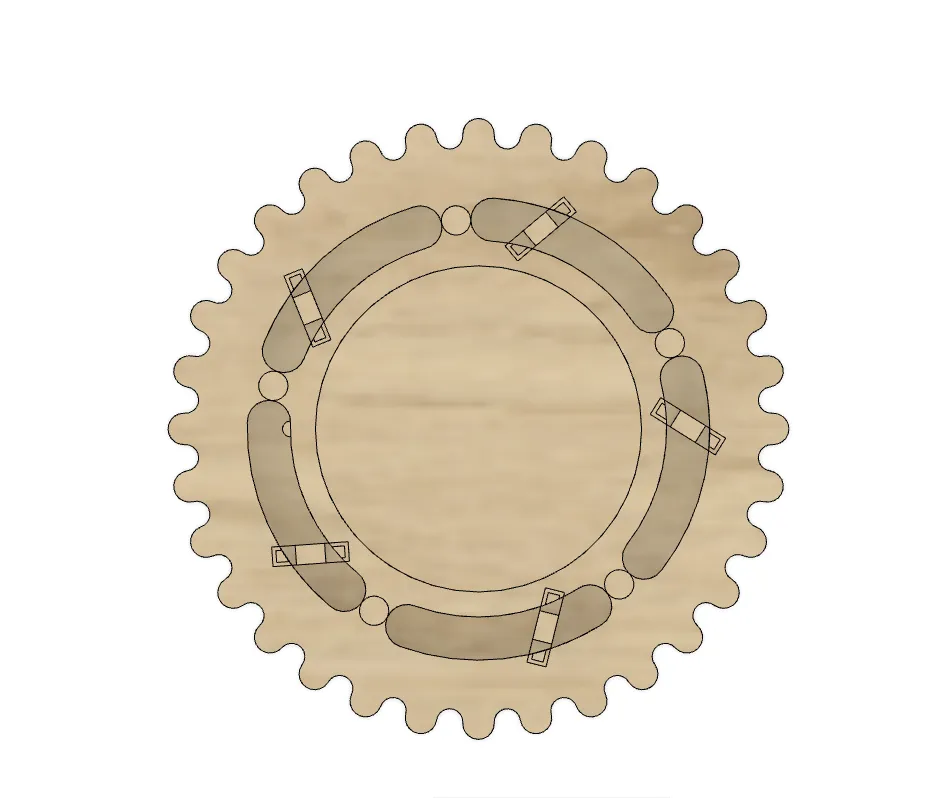
Step3: Adding the operating ring/gear

Preview
Now take the piece that looks like this:
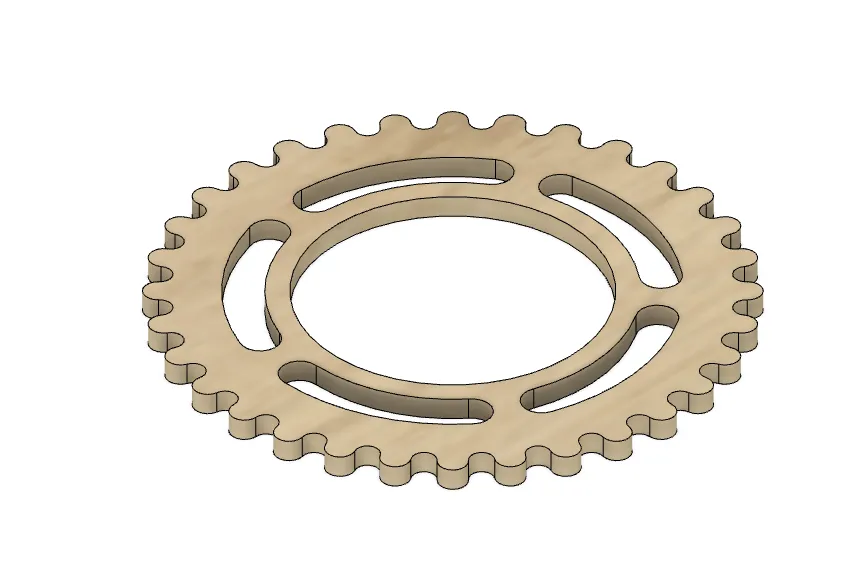
And glue it to the other piece that was engraved a ton to look like this:
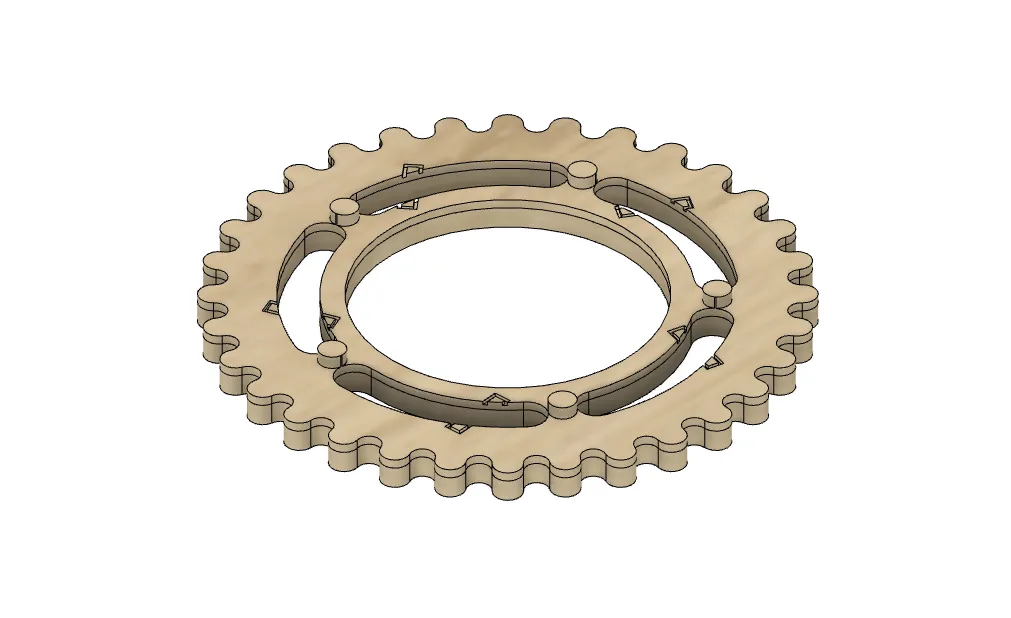
Then place that on top of the previously assembled pieces to look like this:
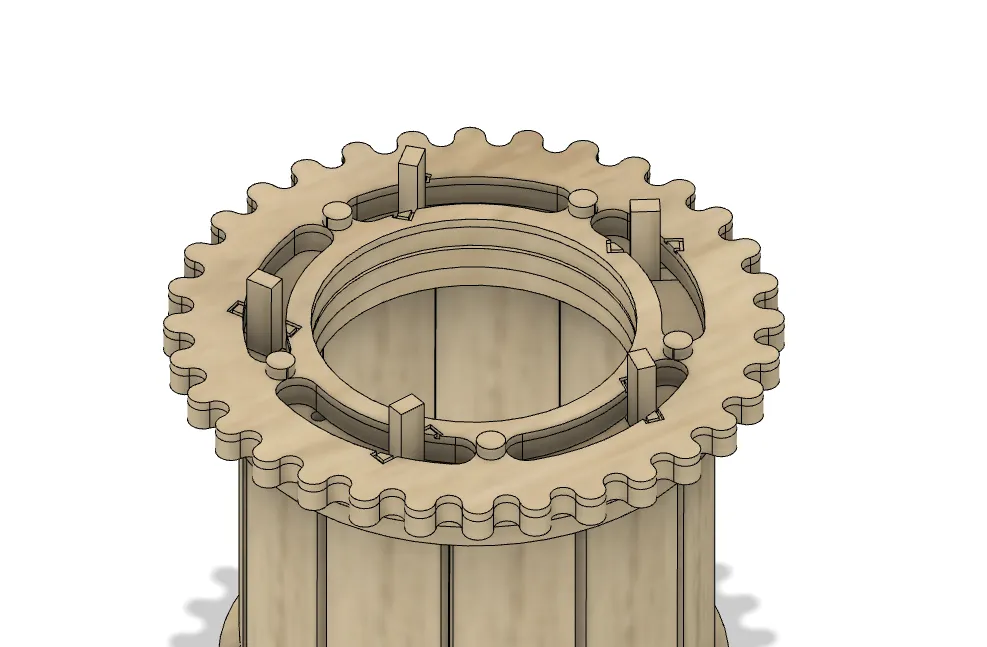
4
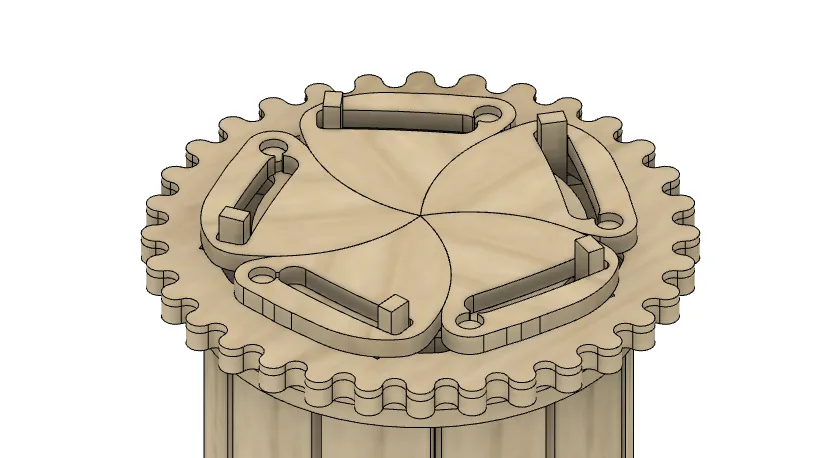
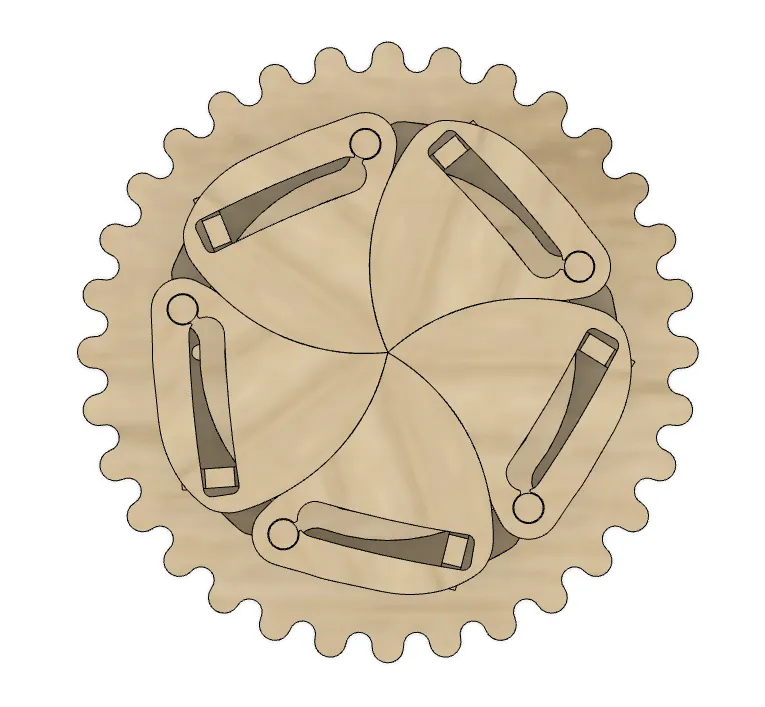
Step4: Adding opening and closing blades, then the top.

Preview
Now add the blades on the top as showed in the pictures:
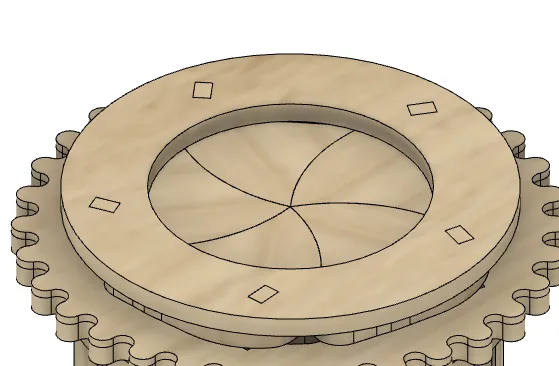
Then just put the top cover on, it should fit snugly without glue.
Comments
Remixes



You may also like

Steampunk Lightbox

6
29

Gear Box - 3mm

45
350

$3.99
$3.99
Credits399
Box with gears - Glasses box

1

GIF
Gears strongbox

663
2.8k

Lasercut Iris Box
1.7k
9.3k

GIF
Gear Box Creative Toys
113
457

'/%3e%3cpath%20d='M15.9997%2019.3335L11.833%2014.3335H14.333L15.9997%2017.6668L17.6663%2014.3335H20.1663L15.9997%2019.3335Z'%20fill='white'/%3e%3c/g%3e%3cdefs%3e%3clinearGradient%20id='paint0_linear_1412_57140'%20x1='16'%20y1='7.6665'%20x2='16'%20y2='24.3332'%20gradientUnits='userSpaceOnUse'%3e%3cstop%20stop-color='%23FFA15F'/%3e%3cstop%20offset='1'%20stop-color='%23E37C32'/%3e%3c/linearGradient%3e%3c/defs%3e%3c/svg%3e)
Heart Shaped Mechanical Gear Toy with Crank

4
28

Display Gears Box
143
629

Adjustable laser height fixture with star knobs
3
8

$3.99
$3.99
$7.98
Credits399
Gift Box Book, design laser cutting, laser craft pattern. Jewelry box, laser cut, gift for him. Table decor, birthday gift, holiday design. Storage.

3

Coaster

33
155

Sunflower Iris Box
.jpeg?x-oss-process=image/resize,m_fill,w_80,h_80,limit_0/interlace,1/format,webp/auto-orient,1)
8
51

$4.79
$4.79
$9.58
Credits479
Gift jewelry box, design laser cutting, circle sliding box. Gift box, laser cut, holiday gift or decor. Table decor, birthday gift, greeting boxes.
5

Hexagonal Drawer Box SVG, Laser Cut Wooden Storage Box, Geometric Organizer Template, Digital Download

0
6

Laser Cut Wooden Puzzle Box with Interlocking Design

4
16

Star handle

3
30

Storage Box

1.1k
5.9k

Rock Collection Box

36
161