Report
![[Laser cut and engrave] 2 Layer Acrylic Lady bugs](https://image-res.atomm.com/ali-res/community/making/62b6d357-25bb-4d9e-82ed-888efe0fda43/PXL_20230808_134713240~2.jpg?x-oss-process=image/resize,m_fill,w_1280,h_960,limit_0/interlace,1/format,webp/auto-orient,1)
![[Laser cut and engrave] 2 Layer Acrylic Lady bugs](data:image/png;base64,iVBORw0KGgoAAAANSUhEUgAAAAoAAAAKCAYAAACNMs+9AAAAAXNSR0IArs4c6QAAABdJREFUKFNjZCASMBKpjmFUId6QIjp4AAppAAuXjCs4AAAAAElFTkSuQmCC)
![[Laser cut and engrave] 2 Layer Acrylic Lady bugs](https://image-res.atomm.com/ali-res/community/making/62b6d357-25bb-4d9e-82ed-888efe0fda43/PXL_20230808_134713240~2.jpg?x-oss-process=image/resize,m_fill,w_160,h_120,limit_0/interlace,1/format,webp/auto-orient,1)
![[Laser cut and engrave] 2 Layer Acrylic Lady bugs](https://image-res.atomm.com/ali-res/community/making/580bec15-c9bf-49ca-a7f6-4e98eda226b1/PXL_20230808_134713240~2.jpg?x-oss-process=image/resize,m_fill,w_160,h_120,limit_0/interlace,1/format,webp/auto-orient,1)
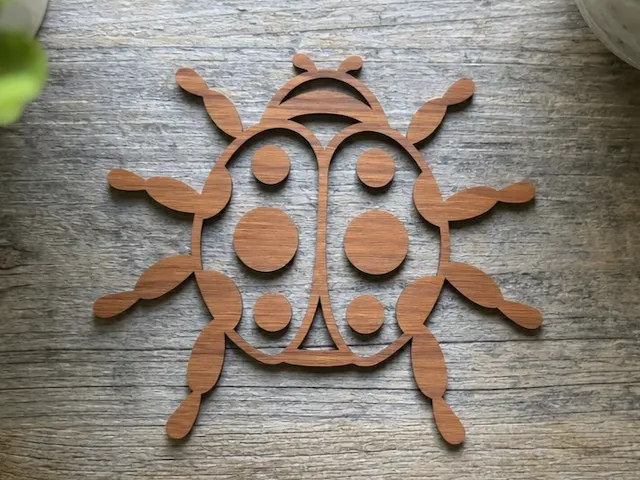
2 Layer Acrylic Lady bugs
 Instruction
ladybug3
.xcs
Application scenario
Laser (20min)
Machine & module

xTool D1 Pro
20WCompatible xTool Machine
P3
F2
F2 Ultra UV
F2 Ultra(Single)
F2 Ultra
F1 Ultra
F1
F1 Lite
S1
P2S
P2
M1 Ultra
M1
D1 Pro 2.0
D1
Laserbox
M2
Material used

Acrylic 2 sided tape
Transparent Acrylic

211
3027
Instruction
1
Step1: Set Up Design

Preview

Preview
Place design within XCS software and set the item to cut with the following settings 100% power, 7mm/s speed and 1 pass. It is best to remove film from acrylic on both sides if the acrylic has a plastic film, You can leave the top film on if is a paper film but remove bottom for best cutting results.
2
Step2: Laser Cutting

Preview
Once focus is set the cutting is straight forward, the acrylic cuts clean and air assist is a must.
3
Step3: Assembling parts.

Preview

Preview
These Lady bugs are 2 pieces, they are assembled together with 2 sided tape as shown in the picture, there are many other methods to adjoin them but this is the fastest and cleanest.
4
Step4

Preview

Preview

Preview
Once the 2 parts are affixed together they can be placed in the desired area's to add to the summer fun.
Comments
Remixes

You may also like

Red felt ladybug coaster

4
71

$2.49
$2.49
$8.30
Credits249
Laser Cut Wooden Ladybug Welcome Wall Art Decor

0

Car parking disc, ladybug car parking clock

2
6

$3.59
$3.59
$5.98
Credits359
Welcome Ladybug Door Hanger

28

$2.49
$2.49
$8.30
Credits249
Lady Bug Garden Welcome Round Sign
16

Butterfly Wall Art with Floral Rose Motif
1
15

Acrylic Sunflower

13
20

Acrylic skull earrings / keyring

97
297

Laser Cut Wooden Butterfly Wall Art Decor Pinwheel

19
123

$1.92
$1.92
$9.60
Credits192
Leaping Dolphin - Laser Cutting Design

0

Laser Cut Bee Flower Holder | Kids Nature Craft SVG | Wooden Flower Picking Activity

25
126

Red Ladybug Stud Earrings

4
12

Wildflower Keeper "Little Girl Giving Bouquet"

21
42

Laser Cut Dinosaur Piggy Bank 4mm Free Vector

0
21

Caterpillar, Moth, and Spider Wooden Cutout Figures
2
8

3 layer cutout Paw print wooden ornaments for pets
4
43

Sunflower wall decoration with bees and ladybugs for garden

2
6

Easter Egg Lasercut Keychain

0
17