
Coasters are the perfect first "real" craft project: small enough to finish in an afternoon, useful enough that people actually keep them, and endlessly customizable. A good set makes a housewarming gift that beats anything store-bought — and if you sell your work, coaster sets are a market-table staple.
The short answer: you can make your own coasters five ways —
- Laser-cut wood or acrylic — detailed and repeatable.
- Engraved slate — dramatic contrast.
- Cork — quick and naturally absorbent.
- Poured resin — glossy and colorful.
- Tile with vinyl or decoupage — no machines at all.
Here's each method with steps, then a comparison so you can pick.

What makes a good coaster?
Three things, whatever the material:
- Water resistance. It has to survive sweating glasses and coffee rings — sealing matters more than looks.
- Grip. Cork or felt pads underneath protect the table and stop sliding.
- Size. Aim for a 3.5–4 inch (9–10 cm) circle or square — big enough for a mug, small enough to stack.
Method 1: How to Make Laser-Cut Wood or Acrylic Coasters
The maker's method: engrave any design — mandalas, monograms, maps — and cut perfectly uniform sets. One file, endless identical coasters.
What You Need
- A laser cutter (any diode or CO2 machine)
- 3–4 mm plywood, hardwood, or acrylic (unsure which sheet? wood choice matters)
- A design — start from a customizable coaster template or design your own
- Food-safe finishing oil or spray sealant, plus cork backing pads
Steps to Make Laser-Cut Coasters

Following xTool's own plywood and acrylic processing guides:
- Design a 4-inch round or square with your pattern inside — leave a clean border so the engraving doesn't run to the edge.
- Engrave first, then cut the outline, using your machine's preset for the material.
- Sand lightly and clean off any soot with a barely damp cloth.
- Seal well — coasters live a wet life. Oil, polyurethane, or spray lacquer all work; recoat the top face.
- Add cork or felt pads underneath, and cut a matching holder if you're making a set.
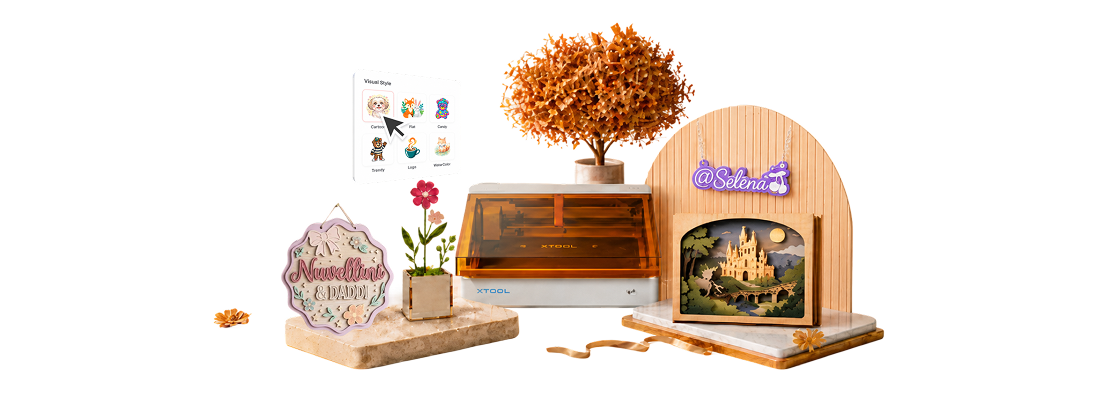
If you're shopping for a machine for exactly this kind of project, the xTool M2 is the current do-it-all starter: an enclosed Class 1 diode laser (10W or 20W) that also swaps in a CMYK inkjet head, so it prints a full-color design and cuts it out in one session — dual cameras handle placement and air assist is built in. A coaster set comes off the bed printed and cut in one job — holder included.
Tip: Cut a simple slotted holder from the same sheet as the coasters — a set of four in a matching caddy instantly looks like a boutique product instead of a craft project, and it gifts far better.
Method 2: How to Make Engraved Slate Coasters

Slate coasters are the dramatic ones: the laser marks light gray against near-black stone, and the natural rough edges do the styling for you.
What You Need
- Slate coaster blanks (cheap, sold in packs with padded feet)
- A laser engraver (diode and CO2 both mark slate well)
- A little cooking oil and a cloth for finishing
Steps to Engrave Slate Coasters
- Wipe the slate clean and place it on the laser bed — a simple positioning jig helps when batching.
- Engrave your design — slate needs no coating; the beam turns the surface a pale gray.
- Test on the back first — slate varies piece to piece, so dial in power and speed on the underside.
- Wipe with a light coat of oil to deepen the black and make the engraving pop.
- Check the feet — most blanks come padded; add cork dots if not.
Method 3: How to Make Cork Coasters
Cork is the friendliest material here: naturally absorbent, already non-slip, and it engraves or cuts in seconds.
What You Need
- Cork coaster blanks (or a cork sheet to cut)
- A laser engraver — or stamps and fabric ink for a no-laser version
- Optional: a sealant spray for spill-heavy use
Steps to Make Cork Coasters
- Start from blanks — 4-inch cork rounds cost pennies apiece.
- Engrave your art at low power; cork burns easily, so a light touch keeps lines crisp — the same low-power principle wood engraving relies on.
- No laser? Stamp it with fabric or permanent ink and let it cure.
- Leave it natural — cork's absorbency is the feature. Seal only if you expect heavy spills.
Method 4: How to Make Resin Coasters
Resin is the glossy, colorful method — swirled pigments, embedded flowers, glitter, gold flakes. Every pour is one of a kind.
What You Need
- Epoxy resin (a coaster-grade kit with measuring cups)
- Silicone coaster molds
- Pigments, dried flowers, or glitter
- Gloves, a level surface, and patience for curing
Steps to Make Resin Coasters
- Mix the resin exactly per the kit's ratio — bad math means sticky coasters forever.
- Add pigments or inclusions and pour into the silicone molds.
- Pop the bubbles with a heat gun or lighter pass.
- Cure 24–72 hours on a level, dust-free surface, then demold.
- Add felt pads — resin is slick on wood tables.
Method 5: How to Make Tile Coasters (No Machines)
The classic no-equipment method: a plain ceramic tile plus vinyl, napkin decoupage, or paint pens.
What You Need
- 4-inch ceramic tiles (hardware-store cheap)
- Adhesive vinyl, patterned napkins + Mod Podge, or paint pens
- Clear spray sealant and cork backing
Steps to Make Tile Coasters
- Clean the tile with alcohol.
- Decorate: apply a vinyl design, decoupage a napkin layer with Mod Podge, or draw straight on with paint pens.
- Seal with several thin coats of clear spray — this is what makes it drink-proof.
- Glue cork to the back so the rough tile base can't scratch furniture.
How do the coaster methods compare?
| Method | Time | Cost per set | Look | Durability | Difficulty |
|---|---|---|---|---|---|
| Laser wood/acrylic | 30–60 min | $2–5 | Detailed, matching sets | High (sealed) | Easy–medium |
| Slate (engraved) | 20–40 min | $8–12 | Dramatic, natural | Very high | Easy |
| Cork | 10–20 min | $2–4 | Casual, warm | Medium | Very easy |
| Resin | 30 min + curing | $8–15 | Glossy, artistic | High | Medium |
| Tile + vinyl | 30–60 min | $3–6 | Clean, graphic | Medium | Very easy |
10 DIY Coaster Ideas to Try
Coasters reward creativity out of proportion to their size — holders, themes, portraits, and puns all fit on a four-inch circle. Here are ten community favorites, each a real design you can open and make for free.
1. Leaf Coaster Sets with Tree Holder
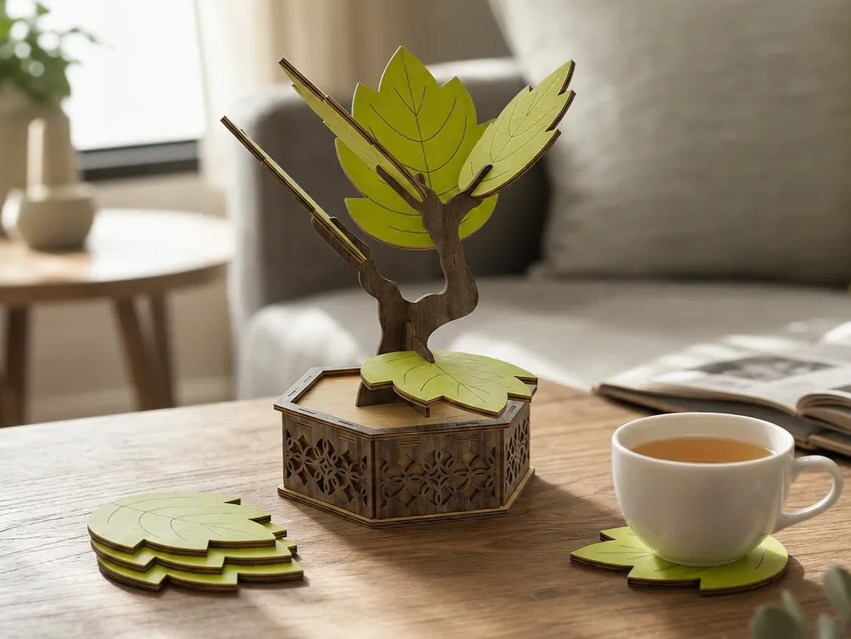
Leaf coasters that hang on a little wooden tree — the holder is the showpiece and the coasters are the leaves. It's the kind of set that guests ask about. Cut the whole thing from one sheet and finish with contrasting green stain for the leaves.
2. Filigree Mandala Sets
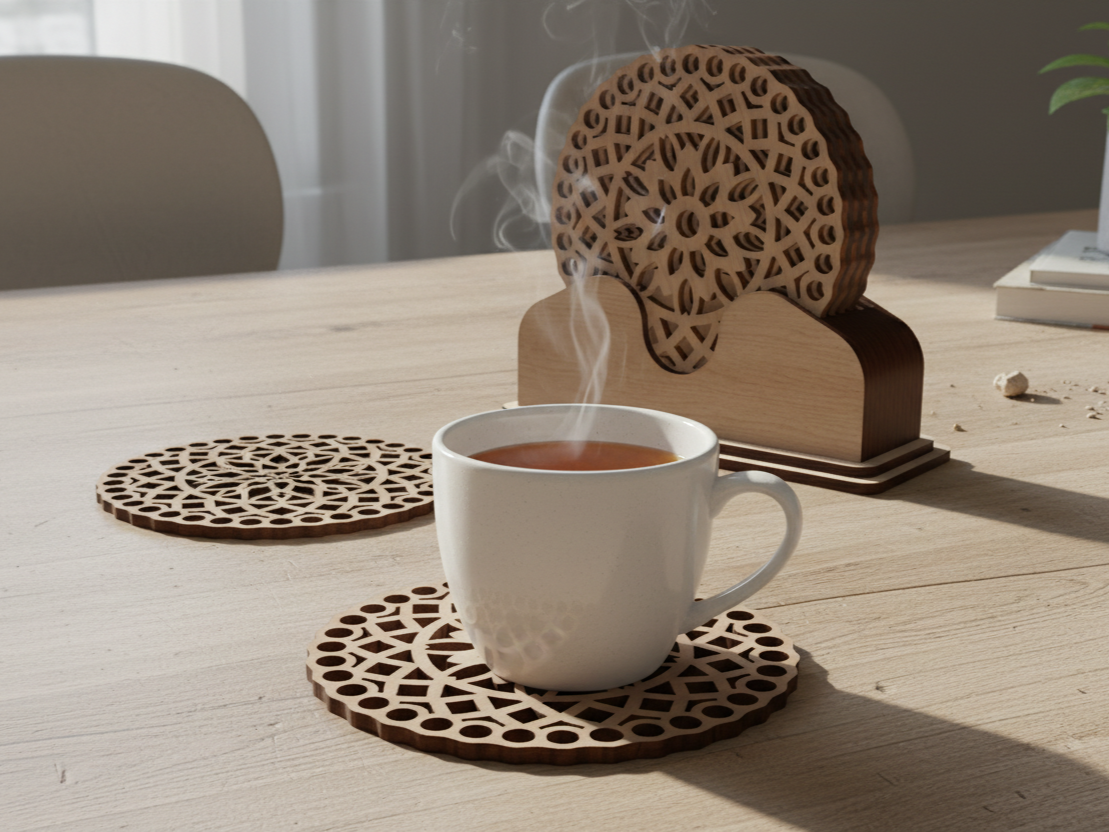
Intricate mandala cutouts show off what a laser does best — lace-fine geometry in plain plywood. This set of six with a matching holder makes a striking housewarming gift. Because the pattern is cut rather than engraved, it reads beautifully from across the room.
3. Mandala Trivets
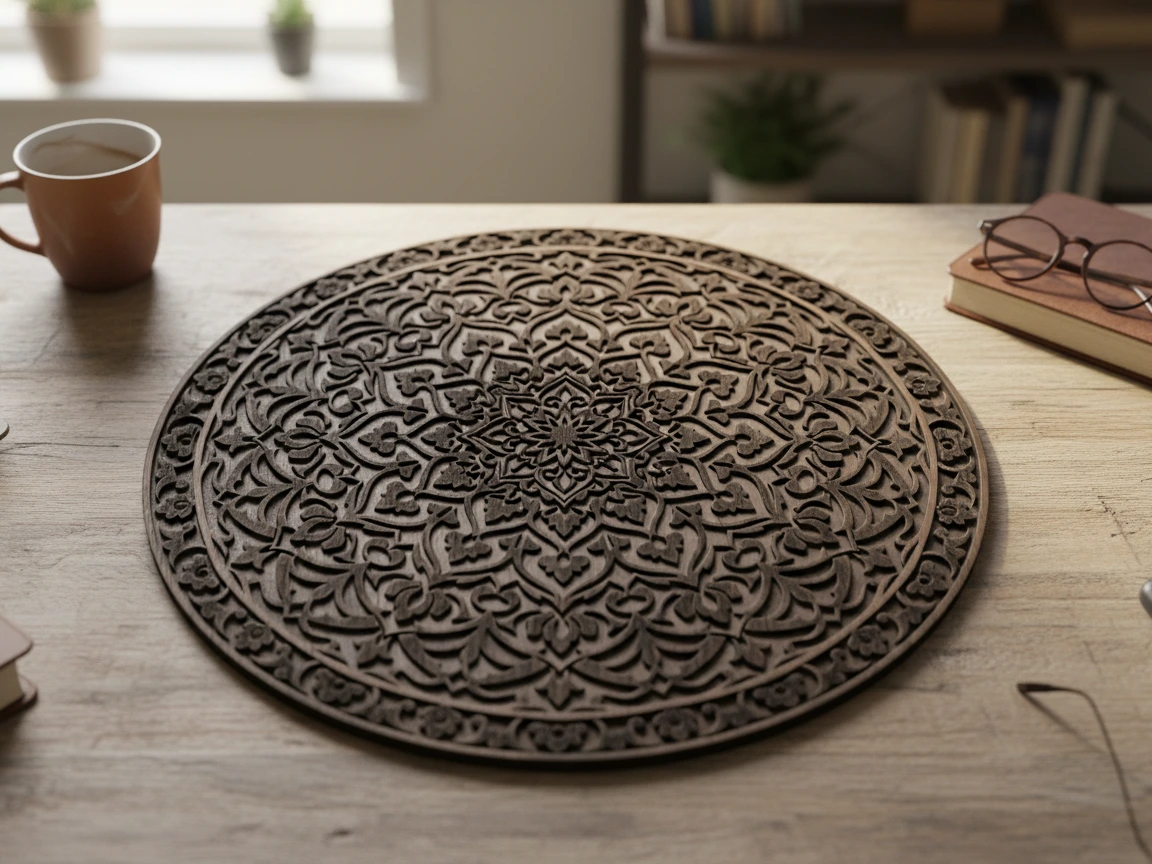
Scale the coaster up and you've got a trivet — same technique, bigger canvas. This engraved mandala centerpiece protects the table from hot pots and looks like decor when it's not working. Make the trivet plus four matching coasters for a full kitchen set.
4. Honeycomb Bee Coasters
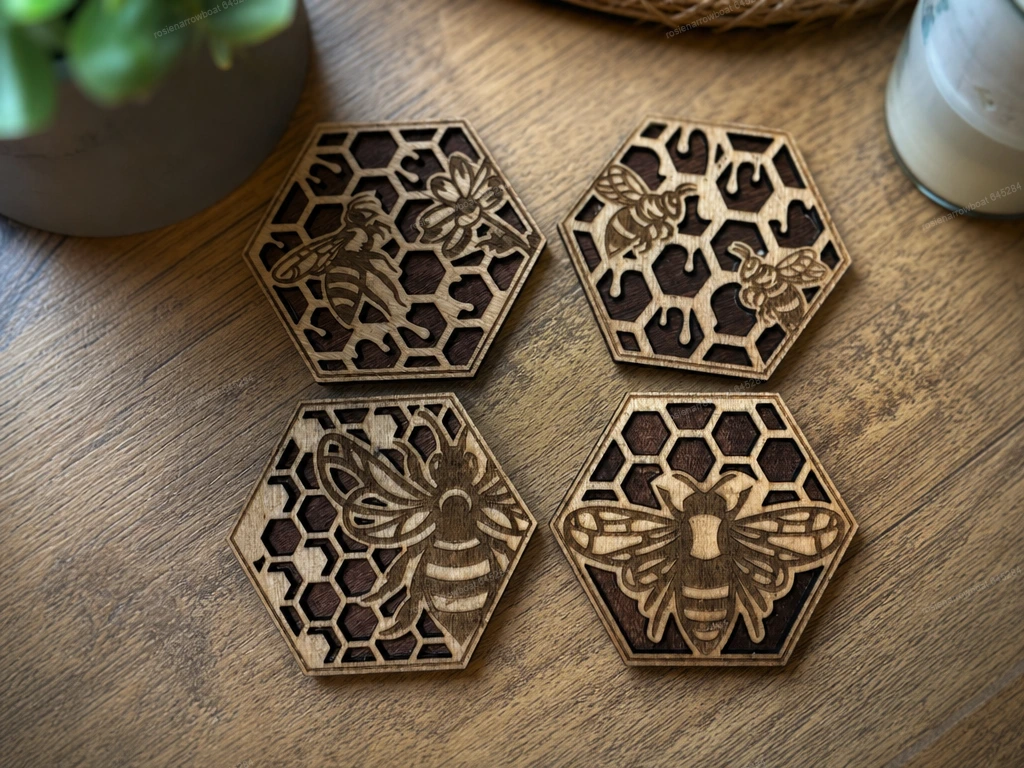
Hexagons tile perfectly — so honeycomb coasters look intentional as a scattered set on the table. The two-layer build (honeycomb pattern over a solid base) adds depth, and the little bees sell the theme. A favorite for kitchens and gift baskets.
5. Record Player Coaster Sets
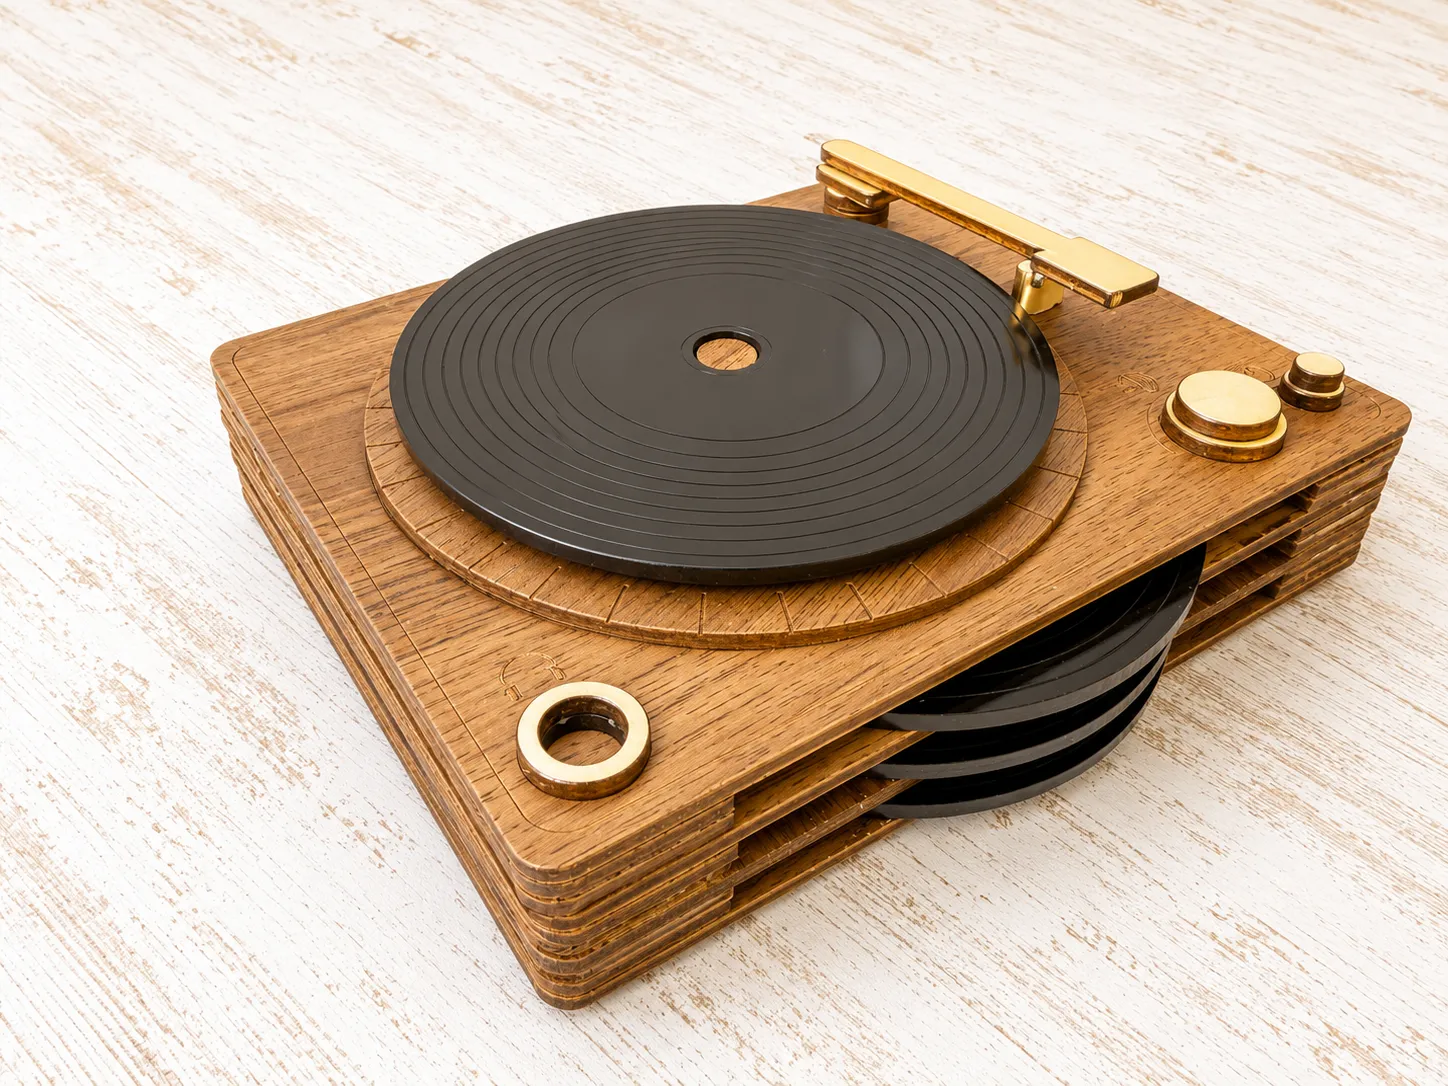
The cleverest coaster concept in the community: black 'vinyl record' coasters stored in a wooden record-player caddy, tone arm and all. It's a conversation piece for any music lover's shelf — and every part cuts flat from one or two sheets.
6. Engraved Cork Portraits
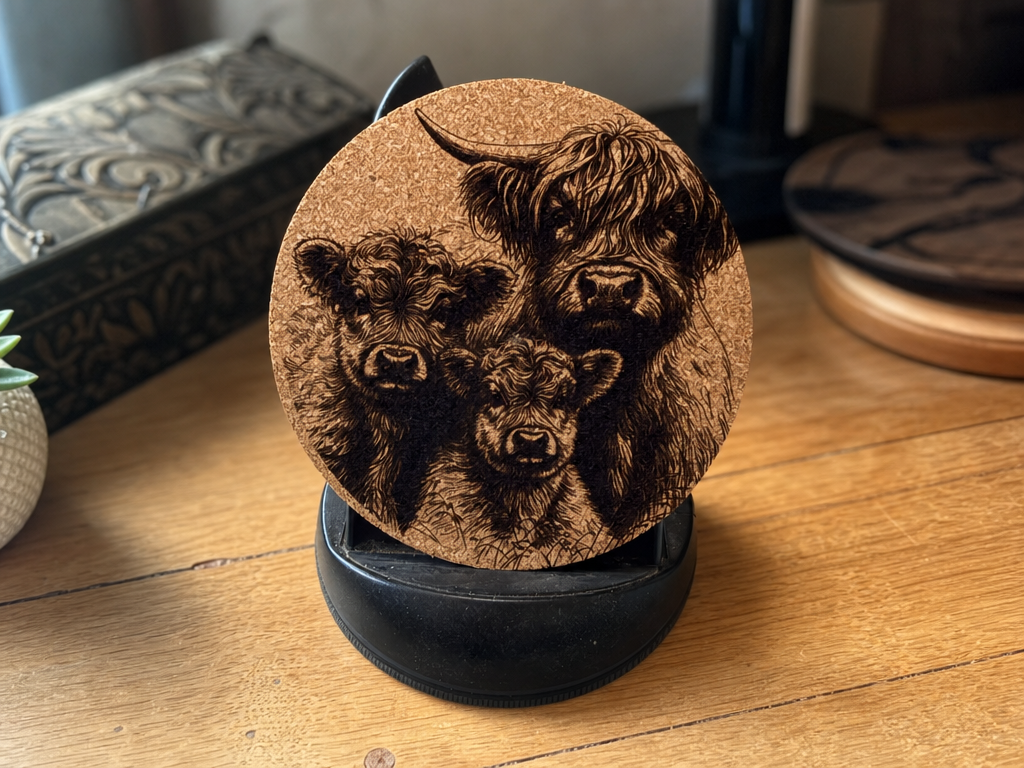
Cork takes photo-style engraving surprisingly well — this highland cow family proves it. The warm cork tone reads like sepia, and blanks cost pennies. Engrave a pet portrait set for the most personal coffee-table gift there is.
7. Personalized Cork Coasters
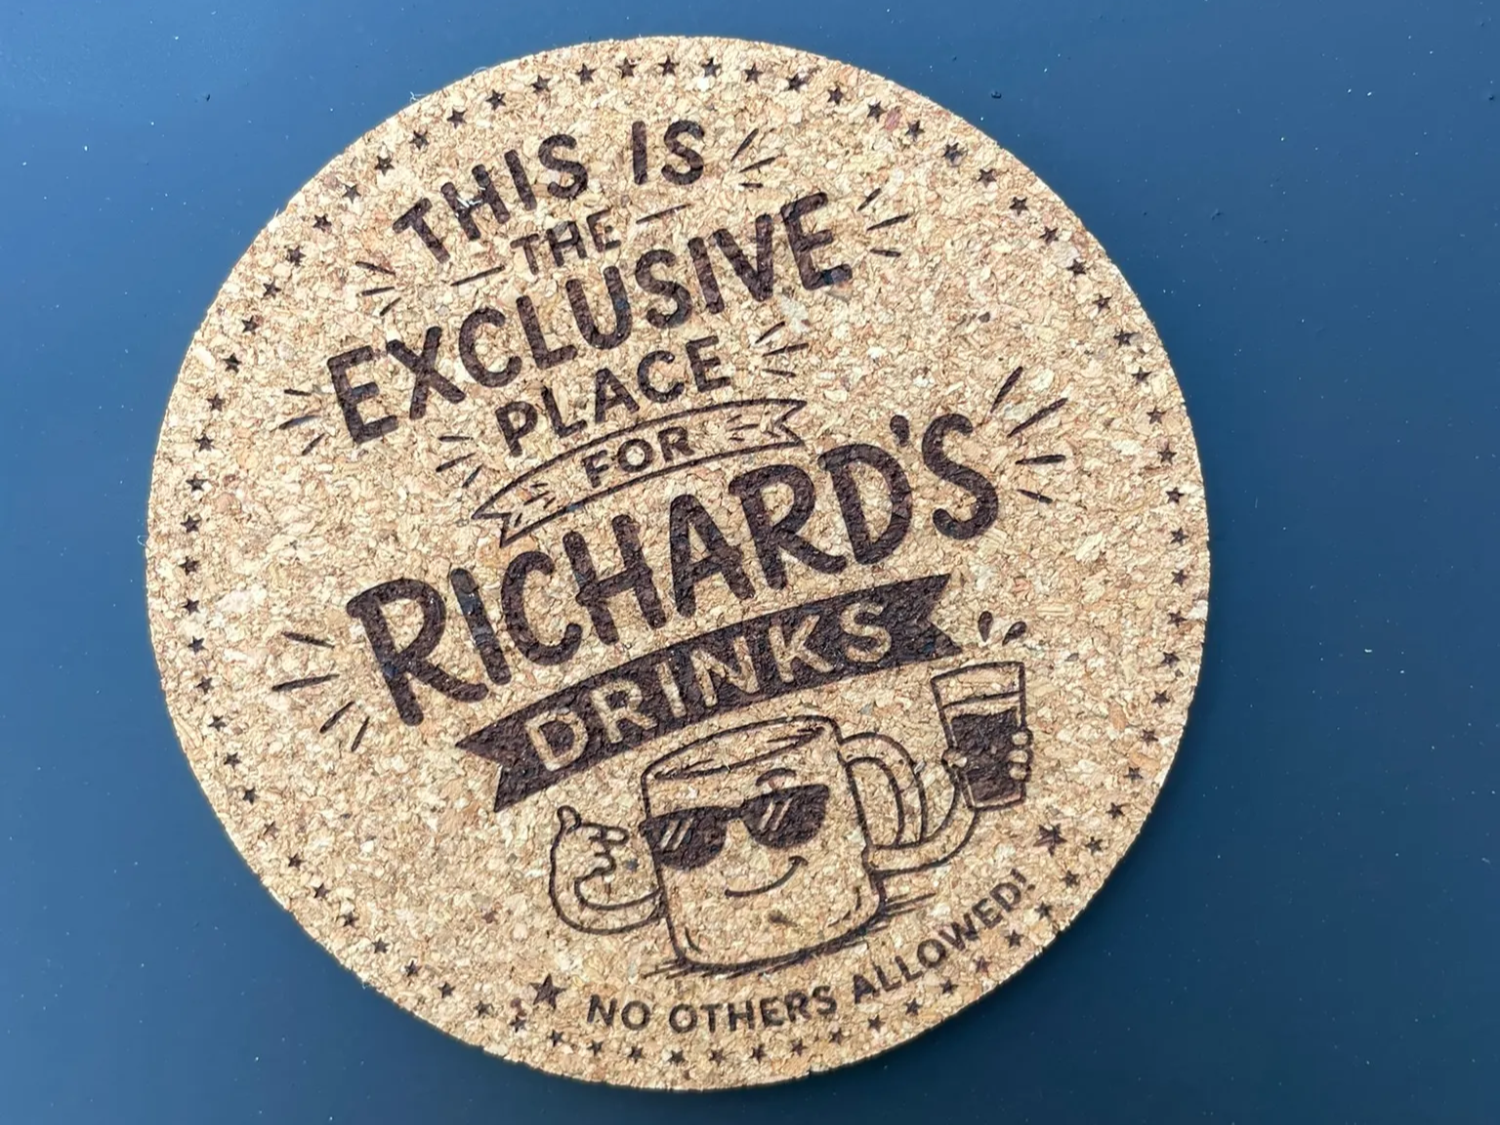
"This is the exclusive place for Richard's drinks" — a joke, a name, and a cork blank is all it takes. Personalized text coasters engrave in a couple of minutes each, which makes them perfect party favors, stocking stuffers, and office gifts.
8. Wood-Slice Logo Coasters
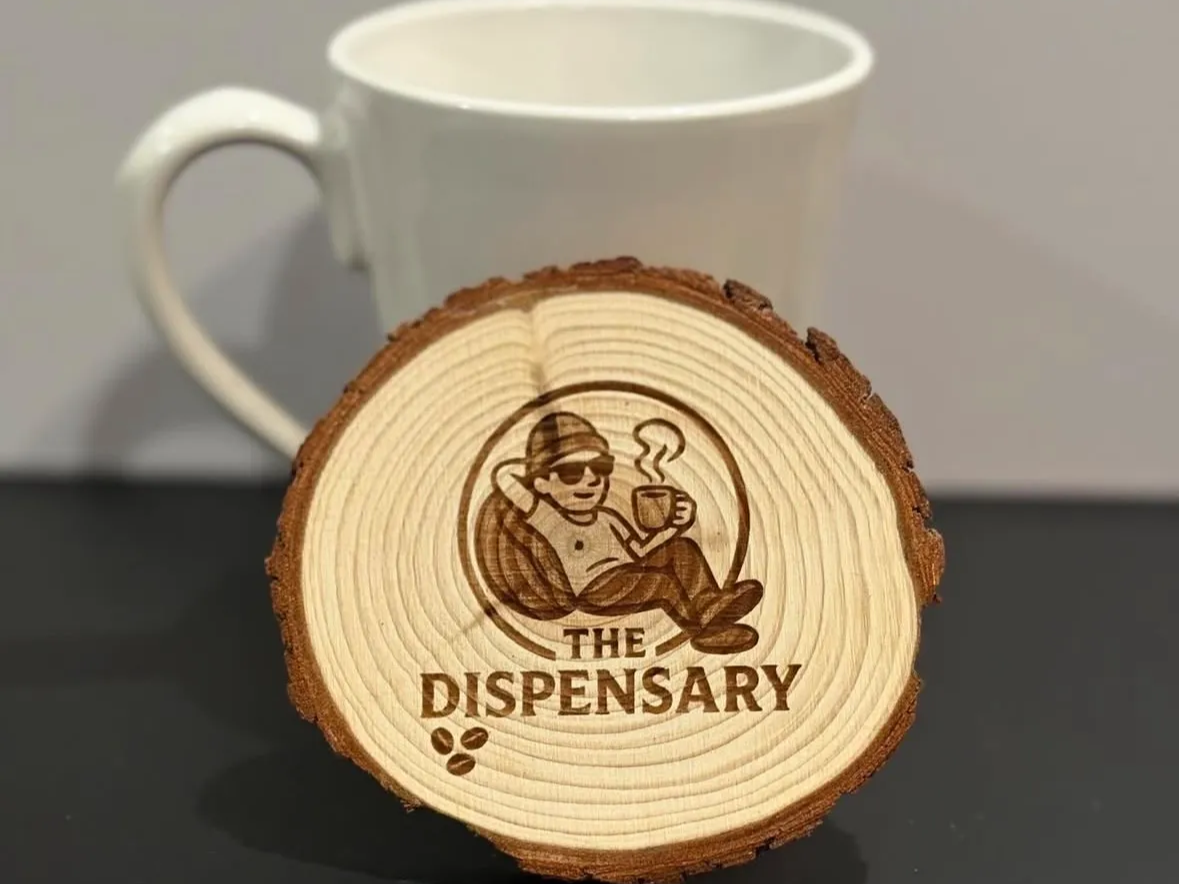
A live-edge wood slice with an engraved logo is rustic branding at its cheapest — cafés and breweries pay well for exactly this. The bark ring frames the mark naturally. Seal the face well; raw wood slices drink up spills otherwise.
9. Anniversary Gift Sets
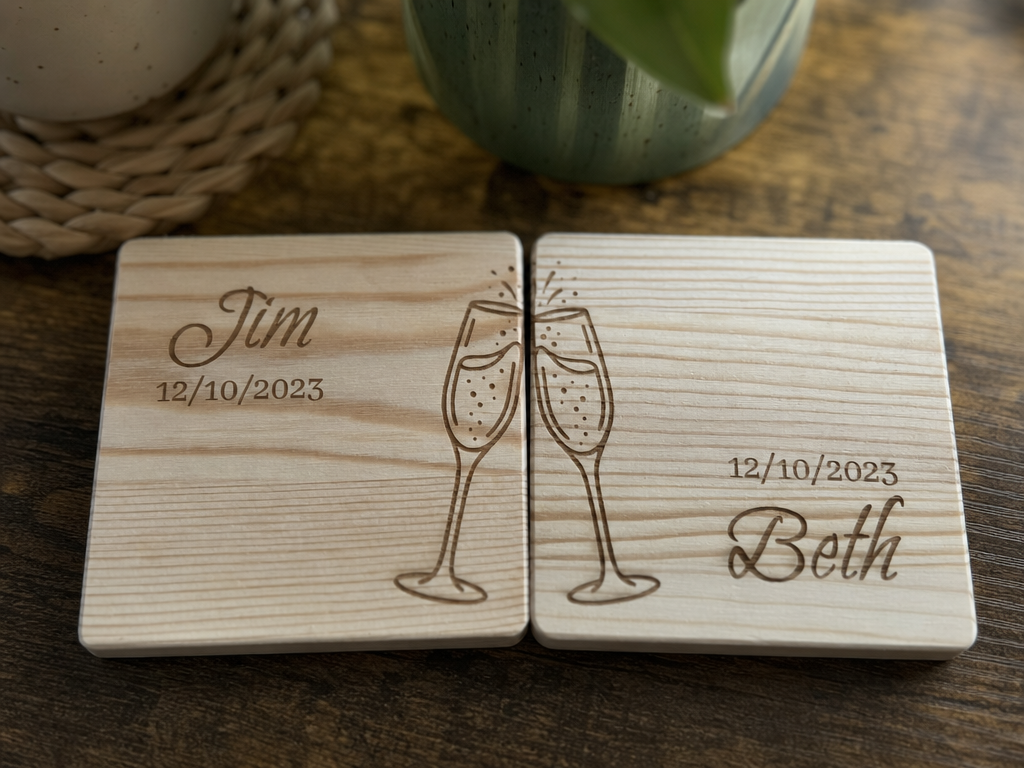
A his-and-hers pair — names, the date, and clinking glasses that meet when the coasters sit together. Paired designs like this turn two small squares of wood into a fifth-anniversary gift (the traditional 'wood' year, no less).
10. Slate Batch Jigs
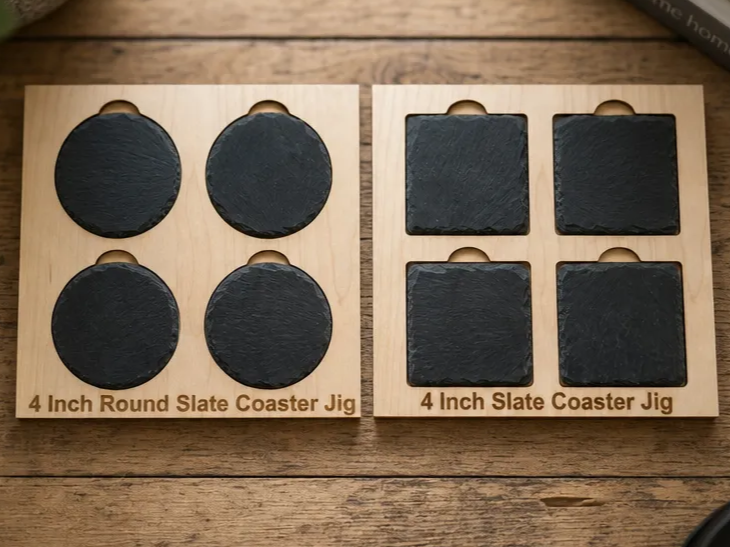
Making coasters to sell? A jig is the upgrade: a cut board that holds four slate blanks in exact position, so every coaster in every batch engraves identically. Cut the jig once, and batching becomes load-engrave-repeat.
The bottom line
Pick by the vibe you want: laser wood for detailed matching sets, slate for drama, cork for speed, resin for gloss and color, and tile if you own no machines at all. Whatever you make: seal it well, back it with cork, and make it a set of four with a holder — that's what turns a craft into a gift.
For designs with a bit of attitude, see funny coaster ideas.
Frequently Asked Questions
What is the best material to make coasters out of?
For durability and looks per dollar, engraved slate is hard to beat — it's naturally waterproof and dramatic. For custom detail and matching sets, laser-cut wood wins. Cork is the fastest and cheapest, and resin gives the glossiest, most artistic results.
How do you make coasters waterproof?
Seal them. Wood needs oil, polyurethane, or spray lacquer on all faces; tile needs several thin coats of clear sealant over the design; resin and slate are naturally water-resistant. Re-seal wooden coasters once a year if they see daily use.
What size should a homemade coaster be?
3.5 to 4 inches (9–10 cm) across is the sweet spot — it fits mugs and pint glasses, stacks neatly, and matches store-bought holders. Keep the thickness around 3–10 mm depending on material.
Can you laser engrave slate coasters?
Yes — slate is one of the easiest materials to engrave. No coating needed: the laser marks a pale gray against the dark stone. Test settings on the coaster's underside first, and wipe with a little oil afterward to boost the contrast.
Can I sell homemade coasters?
Absolutely — coaster sets are craft-market staples. Personalized sets (monograms, names, city maps) and themed sets with a matching holder command the best prices. Laser methods scale best since every piece comes out identical.
Browse coaster designs
A full collection of coaster engraving ideas and files you can make today.
