
Report
![[Laser cut and engrave] Peeking Cat Door Topper](https://image-res.atomm.com/resource/xtool/community/attachment/xtool-community/ebe58c99-e968-48ce-88ed-3afa28342c3a.png?x-oss-process=image/resize,w_1200,h_900,limit_0/interlace,1/format,webp/auto-orient,1)
![[Laser cut and engrave] Peeking Cat Door Topper](data:image/png;base64,iVBORw0KGgoAAAANSUhEUgAAAAoAAAAKCAYAAACNMs+9AAAAAXNSR0IArs4c6QAAABdJREFUKFNjZCASMBKpjmFUId6QIjp4AAppAAuXjCs4AAAAAElFTkSuQmCC)
![[Laser cut and engrave] Peeking Cat Door Topper](https://image-res.atomm.com/resource/xtool/community/attachment/xtool-community/ebe58c99-e968-48ce-88ed-3afa28342c3a.png?x-oss-process=image/resize,w_200,h_150,limit_0/interlace,1/format,webp/auto-orient,1)
![[Laser cut and engrave] Peeking Cat Door Topper](https://image-res.atomm.com/resource/xtool/community/attachment/xtool-community/a97a4192-2ebd-4841-ad27-db4584c9c441.png?x-oss-process=image/resize,w_200,h_150,limit_0/interlace,1/format,webp/auto-orient,1)
![[Laser cut and engrave] Peeking Cat Door Topper](https://image-res.atomm.com/resource/xtool/community/attachment/xtool-community/2c2efa07-4e22-4d74-bfb5-6711af20f2bf.png?x-oss-process=image/resize,w_200,h_150,limit_0/interlace,1/format,webp/auto-orient,1)
![[Laser cut and engrave] Peeking Cat Door Topper](https://image-res.atomm.com/resource/xtool/community/attachment/xtool-community/f455b1f3-4593-4a5f-961f-cf5ba18e239c.png?x-oss-process=image/resize,w_200,h_150,limit_0/interlace,1/format,webp/auto-orient,1)
Peeking Cat Door Topper
 Instruction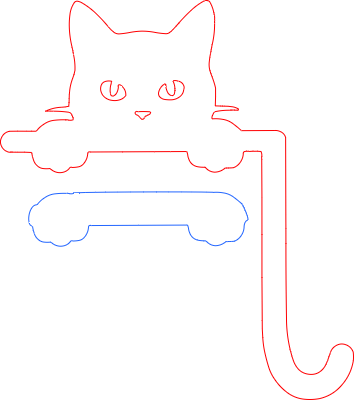
Peeking Cat Door Topper
.xcs
Application scenario
Laser processing
Machine & module

xTool D1 Pro
20WCompatible xTool Machine
New
M2
10W, 20WF2 Ultra UV
5WF1 Ultra
20WM1
5W, 10WD1
5W, 10W, 20WD1 Pro
5W, 10W, 40WP2
55WF1
10WS1
10W, 20W, 40WM1 Ultra
10W, 20WP2S
55WMaterial used

1/8"(3mm) Basswood Plywood

1/2"(12mm) Pine Ponderosa Plywood

75
991
Information
      Add a playful touch of whimsy to your home with our Peeking Cat Door Topper! 🐾

Whether you’re a crazy cat person or just looking for a unique conversation piece, this adorable silhouette is designed to rest perfectly on the corner of any standard door frame, window casing, or picture frame. It creates the charming illusion of a little black kitty peeking over the edge to keep an eye on the room!
Instruction
1
Step1
Preparation and Safety
- Ventilation: Ensure your smoke purifier is on or your exhaust fan is venting outside. Cutting wood produces significant smoke and char.
- Air Assist: Always use Air Assist when cutting wood. It blows away debris and prevents the wood from catching fire, resulting in cleaner cuts.
- Fire Safety: Never leave your laser unattended while cutting.
2
Step2
Physical Setup in the Machine
- Place the Material: Lay your wood flat on the honeycomb panel or slats.
- Secure the Wood: Use "honeycomb pins" or magnets to ensure the wood is perfectly flat. If the wood is warped, the laser will lose focus, and it won't cut through.
- Position the Laser Head: Manually move the laser head (or use the software arrows) to the top-left corner of your material.
3
Step3
Configuring xTool Studio
- Connect Your Device: Open XCS and connect to your S1 or P2 via USB, Wi-Fi, or IP.
- Select Mode:
- Capture the Canvas: * On the P2, click Refresh to take a wide-angle photo of your wood.
- Import Your Design: Open the xcs file you downloaded from Atomm.
4
Step4
Setting the Focus
Proper focus is the difference between a clean cut and a scorched mess.
- Auto-Measure: In the right-hand panel, click the Auto-measure icon (it looks like a small ruler/target).
- S1: The probe will drop down to touch the wood.
- P2: The laser head will move over the material to measure the height via the built-in sensor.
5
Step5
Adjusting "Cut" Parameters
Select your design on the canvas to open the settings panel on the right.
- Processing Type: Change from "Score" or "Engrave" to Cut.
- Setting the Power/Speed:
- Passes: Set to 1 unless the wood is exceptionally thick (over 10mm).
6
Step6
Framing and Starting
- Framing: Click Framing on the bottom right. The laser head will move in a rectangle to show you exactly where the cut will happen. Ensure it doesn't hit any pins or magnets.
- Process: Click Process, then Start.
- Physical Button: Finally, press the Start button on the machine itself to begin the cut.
Comments
Remixes



You may also like

Laser Cut Black Cat Door Topper with Glowing Eyes

19
60

Cool Cat Hot Laser Engraved Wooden Door Hanger

0
8

Black Cat Door Corner Decor, Cat Heart Door Topper, Cute Cat Door Frame Decoration, Cat Lover Gift, Laser Cut Cat Wall Art

1
18

$1.50
$1.50
$3.00
Credits150
Halloween Laser Cut Door Hanger with Cat, Ghosts, and Spider Web. Halloween Welcome Sign.

1

Christmas Family Door Sign

14
19

Cat with Hat Halloween Door Hanger

193
871

St. Patrick's Day Get Lucky Towel Hook for Shower Bathroom Decor

0
4

Leprechaun St. Patrick's Day acrylic door corner hanger.

14
102

Laser Cut Do Not Disturb Door Hangers

9
51

Cat Themed Do Not Disturb Door Hanger Sign

1
14

Cloud-shaped kitten room wooden sign

2
2

3D Christmas door corner. Xmas trim corner laser cut. Door corner sign. Christmas characters. Penguins

30
184

Thanksgiving Turkey Door Sign with Fat Pants Quote

3
12

$1.99
$1.99
Credits199
Wooden Bag Hanger Hooks with Decorative Animal and Floral Design Laser Cut Bundle. Functional Decor. Bag Hanger

1

Laser cut Halloween Door Hangers

3
13

"Hello Summer" Watermelon Door hanger
4
33

Patriotic Welcome Sign, Round Door Hanger Lasercut

3
72

N.A.P. Protocol Door Hanger
3
57