![[Laser cut and engrave] Counter Pot Trivet](https://image-res.atomm.com/ali-res/community/making/b4615ca9-875c-49d4-bbb2-de7770cc21a0/PXL_20230913_151337680.jpg?x-oss-process=image/resize,m_fill,w_1280,h_960,limit_0/interlace,1/format,webp/auto-orient,1)
![[Laser cut and engrave] Counter Pot Trivet](data:image/png;base64,iVBORw0KGgoAAAANSUhEUgAAAAoAAAAKCAYAAACNMs+9AAAAAXNSR0IArs4c6QAAABdJREFUKFNjZCASMBKpjmFUId6QIjp4AAppAAuXjCs4AAAAAElFTkSuQmCC)
![[Laser cut and engrave] Counter Pot Trivet](https://image-res.atomm.com/ali-res/community/making/b4615ca9-875c-49d4-bbb2-de7770cc21a0/PXL_20230913_151337680.jpg?x-oss-process=image/resize,m_fill,w_160,h_120,limit_0/interlace,1/format,webp/auto-orient,1)
![[Laser cut and engrave] Counter Pot Trivet](https://image-res.atomm.com/ali-res/community/making/33b57199-4b09-4d7d-8777-46d14e7126b5/PXL_20230913_151337680.jpg?x-oss-process=image/resize,m_fill,w_160,h_120,limit_0/interlace,1/format,webp/auto-orient,1)
![[Laser cut and engrave] Counter Pot Trivet](https://image-res.atomm.com/ali-res/community/making/0850f755-aea2-42ae-b7f3-5748b2919584/PXL_20230913_151343944.jpg?x-oss-process=image/resize,m_fill,w_160,h_120,limit_0/interlace,1/format,webp/auto-orient,1)
Counter Pot Trivet
 Instruction


Instruction
Step1: Design Stage 1


Step 1) For this Project a sheet of walnut will be used, it all starts with an image of a pear brought in from the computer this pear is broke into several pieces. In order to do this a narrow rectangle is created, it is then multiplied with the use of the array feature, by selecting the amount wanted and the desired spaces it is activated to produce several rectangles. These new array of rectangles are placed over the pear shape and with the combine feature it is subtracted. and you are left with the pieced pear.
Step2: Design Stage 2


Step 2) Once the pear is set a backing is needed to keep it all in the shape when finished, this is done simply with 2 rectangles to run along the bottom side of the trivet, a third piece for the bottom is also needed in the shape of an oval. all of this is then cut out from the sheet of walnut and glued together. So seeings all the pieces will be apart.one more narrow rectangle is cut out to use as a spacer. this piece is not glued or needed after the trivet is glued.
Step3: Finished


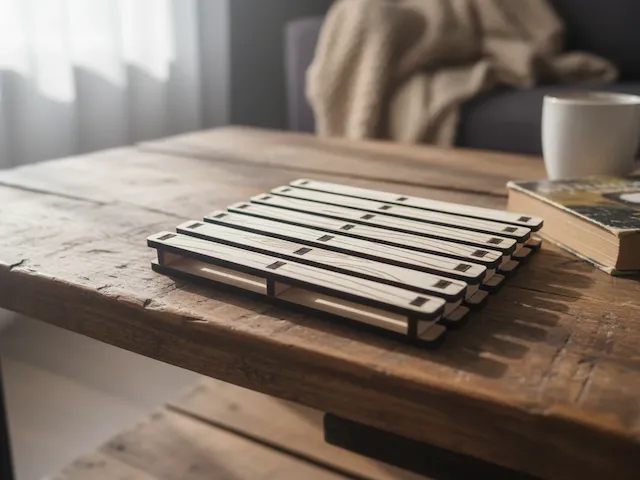
Step 3) Once everything is glued up with the aid of the spacer, it is covered in a sealer to bring the true beauty of the walnut out. it then can safely save your counter from hot pots that may damage it. here is what the bottom looks like with the glued pieces.
Remixes


You may also like

M1 Triangle Prism Spacer


Lamellenregal für P2S


Weinfass und Ständer

Desk Organiser to Hold USB, USB-C & SD Cards


Palet


Wooden grid puzzle pieces for DIY - Hot Plate Place


Miniature Wooden Shipping Pallet Coaster remix


Pallet Coaster Set with Storage Crate


Mini Euro Pallet - Mug Coaster from Planks


The wife a happy birthday love heart

Miniature Wooden sled on snow


support pc


Laser Cut Wooden Marble Run Toy for Desk or Tabletop

moose Coasters

Epée Minecraft multicouches


Square Slate Coaster Featuring American Flag Design


Days Until Christmas Display

Wooden bench
