
Most rooms don't need a renovation — they need a plan. The difference between a room that feels "done" and one that feels like a furniture waiting area usually comes down to a handful of decisions: where the eye lands first, what colors repeat, and whether anything in the room says something about the person living in it.
The short answer: decorate in this order —
- Function and layout first.
- A color palette.
- One focal point.
- Layered lighting.
- Plants and shelves.
- Textiles.
- The personal pieces.
Do the steps in sequence and every purchase has a job. Here's the walkthrough, plus ten DIY decor pieces you can make instead of buy.

Step 1: Decide the Room's Job Before Decorating
Decor follows function. Before buying anything, answer: what happens in this room? Sleep and wind-down? Work calls? Movie nights? Kids everywhere?
- List the top three activities and make sure the layout serves them first.
- Clear what doesn't serve them. Decluttering is the cheapest decorating step there is.
- Walk the traffic paths. Furniture that blocks natural walking lines will annoy you forever, no matter how good it looks.
Step 2: Choose a Room Color Palette
Pick two main colors plus one accent and let them make every later decision for you. The classic 60-30-10 split keeps it balanced: 60% dominant (walls, large furniture), 30% secondary (curtains, rug, bedding), 10% accent (pillows, art, objects).
- Pull the palette from something you already love — a rug, an artwork, a favorite jacket. If naming your overall look helps first, each of the twelve decor styles comes with a ready-made palette.
- Warm palettes (creams, terracotta, wood tones) cozy a room up; cool ones (grays, blues, greens) calm it down.
- When in doubt: neutral walls, colorful accents. Repainting pillows is easier than repainting walls.
Step 3: Create One Focal Point

Every good room has a spot where the eye lands first — a gallery wall, a statement mirror, a bold headboard, a large plant. One, not three.
- Stand in the doorway and note where you look first. That's your focal wall.
- Give it something worth looking at: a large piece of wall art, a mirror that bounces light, or a styled shelf arrangement.
- Scale up. The most common mistake is art that's too small — aim for a piece (or grouping) about two-thirds the width of the furniture below it.
- Hang at eye level: center the artwork around 57–60 inches (145–152 cm) from the floor.
Tip: Wall art is the easiest decor to make yourself. A laser-cut wood silhouette, a layered mandala, or a family-name sign costs a few dollars in plywood and instantly outdoes mass-market prints — browse the wall art gallery for designs you can make free.
Step 4: Layer the Lighting
One ceiling bulb flattens everything. Rooms feel expensive when light comes from three heights:

- Ambient: the ceiling fixture — put it on a dimmer if you can.
- Task: a desk lamp, a reading lamp by the chair, under-cabinet strips.
- Accent: the mood layer — table lamps, string lights, candles, or a DIY lamp (a laser-cut lamp shade turns a bare bulb into a feature).
- Warmth matters: 2700–3000K bulbs everywhere in living spaces; save cool white for workrooms.
Step 5: Add Plants and Shelving
Plants are the only decor that's alive, and shelves are where personality goes on display.

- One big plant beats five tiny ones — a floor plant fills a dead corner like furniture.
- Wall-mounted planters and plant shelves get greenery up at eye level where it decorates.
- Style shelves in triangles: books, a plant, one object; vary heights; leave breathing room. More arrangements live in these shelf-styling ideas.
- A key-holder shelf by the door is decor that earns its keep — the most-downloaded organizer in the maker community for a reason.
Step 6: Warm It Up with Textiles
Textiles are the difference between a room you look at and a room you sink into.
- Rug first, and bigger than you think — front legs of all furniture on it, minimum.
- Layer pillows in your palette: mix one pattern, one texture, one solid.
- A throw over the sofa arm reads as effortless; a blanket ladder does it at scale.
- Curtains hung high and wide — mount the rod near the ceiling and let panels kiss the floor; the room instantly grows.
Step 7: Finish with Personal, Handmade Pieces
This is the step mass-produced decor can't do: things with your name, your people, your jokes on them.
- A family-name sign on the focal wall — design one free with the name gift generator.
- Photo frames you made, holding photos you took (the photo frame generator outputs ready-to-cut frames).
- A custom wall clock, engraved coasters on the table, a nursery name light for the kid's room.
- One handmade piece per room is the minimum effective dose; it's what visitors comment on.
And they're easier to make than they look — every piece above can come off one desktop laser cutter.
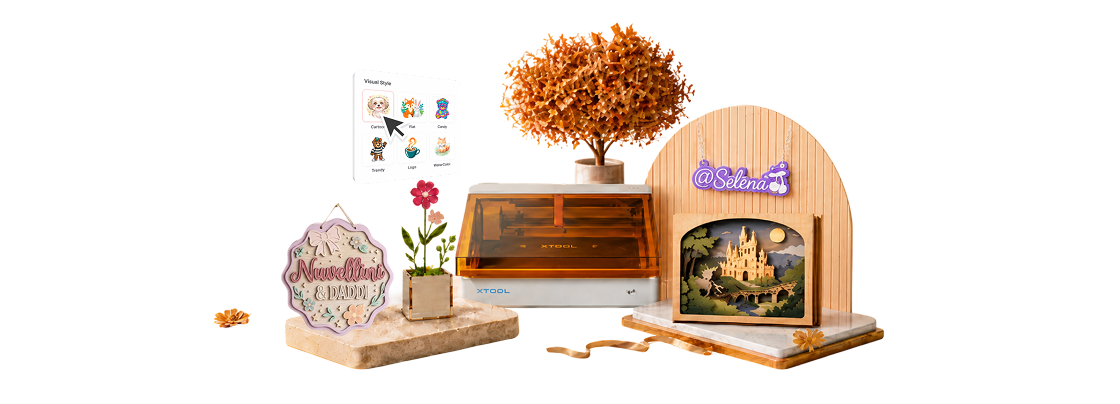
If you're shopping for a machine for exactly this kind of project, the xTool M2 is the current do-it-all starter: an enclosed Class 1 diode laser (10W or 20W) that also swaps in a CMYK inkjet head, so it prints a full-color design and cuts it out in one session — dual cameras handle placement and air assist is built in. For room decor that means the name sign, the shelf, and the clock face all come off one machine.
What You Need
- A desktop laser cutter (a 10W diode cuts 3 mm plywood; 20W handles thicker shelf stock)
- 3 mm basswood or walnut plywood (opaque acrylic works for signs too)
- xTool Creative Space (free) and a design — the 10 free projects below are ready to cut
Steps to Laser Cut Your Own Room Decor

Following xTool's own plywood processing guide:
- Pick a project below — each opens as a ready-to-cut file — or design a name sign from scratch.
- Load 3 mm plywood, flat and film-free, and let the dual cameras position the design on the sheet.
- Set Cut with material-library settings, frame to check placement, and cut with air assist on.
- Assemble and finish: glue layered pieces, add a coat of clear matte, and hang.
Tip: Decorate slowly. A room assembled over months from things you chose — and made — always beats a room ordered in one weekend. When it feels 90% done, stop; the last 10% fills itself with living.
How much does it cost to decorate a room?
| Layer | Budget DIY | Mid-range | The trick |
|---|---|---|---|
| Focal wall art | $5 (DIY laser-cut) | $50–150 | Make it — size beats price |
| Lighting | $20 (lamp + warm bulbs) | $80–200 | Dimmer + 2700K bulbs |
| Plants & shelves | $25 | $75–150 | One large floor plant |
| Textiles | $40 | $150–400 | Oversize the rug |
| Personal decor | $10 (handmade) | $50+ | Names and photos win |
A focused ~$100 pass through all five layers changes a room more than $500 spent on any single one. (Tight budget? These cheap decor ideas stretch it further.)
10 DIY Room Decor Ideas to Make
The personal pieces are the ones you make. These ten community designs cover shelves, planters, signs, and clocks — every one a real file you can open and make for free.
1. Mandala Key Holder Shelves
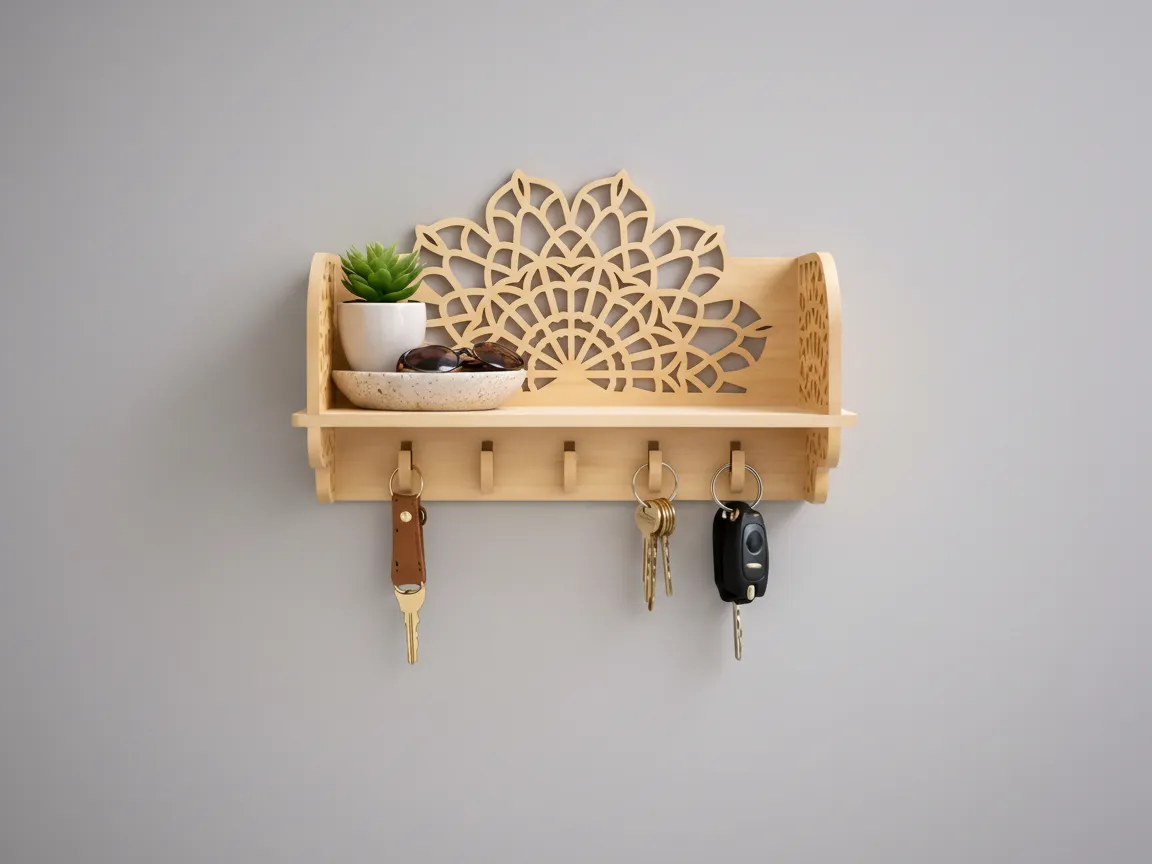
The most-loved organizer in the community: a small entryway shelf with a lace-fine mandala back and hooks for keys below. It solves the where-are-my-keys problem and decorates the hallway in one piece — function-first decor at its best.
2. Geometric Plant Shelves

A single geometric frame with a tiny shelf turns one plant into wall art. The sunburst diamond shape does the styling; the plant does the living. Hang two or three at staggered heights for an instant plant corner.
3. Honeycomb Wall Planters

Modular hexagons that combine engraved scenes, shelf cells, and trailing-plant pockets — build the cluster wall by wall, adding a new cell whenever the mood strikes. It's a living focal wall that grows with your collection.
4. Flower Cart Planters

A miniature flower cart with cutout details makes a windowsill or shelf centerpiece with real charm. Fill it with succulents, herbs, or cut flowers. It's the cottage-core accent piece that photographs like a boutique buy.
5. Shelf Sitter Signs
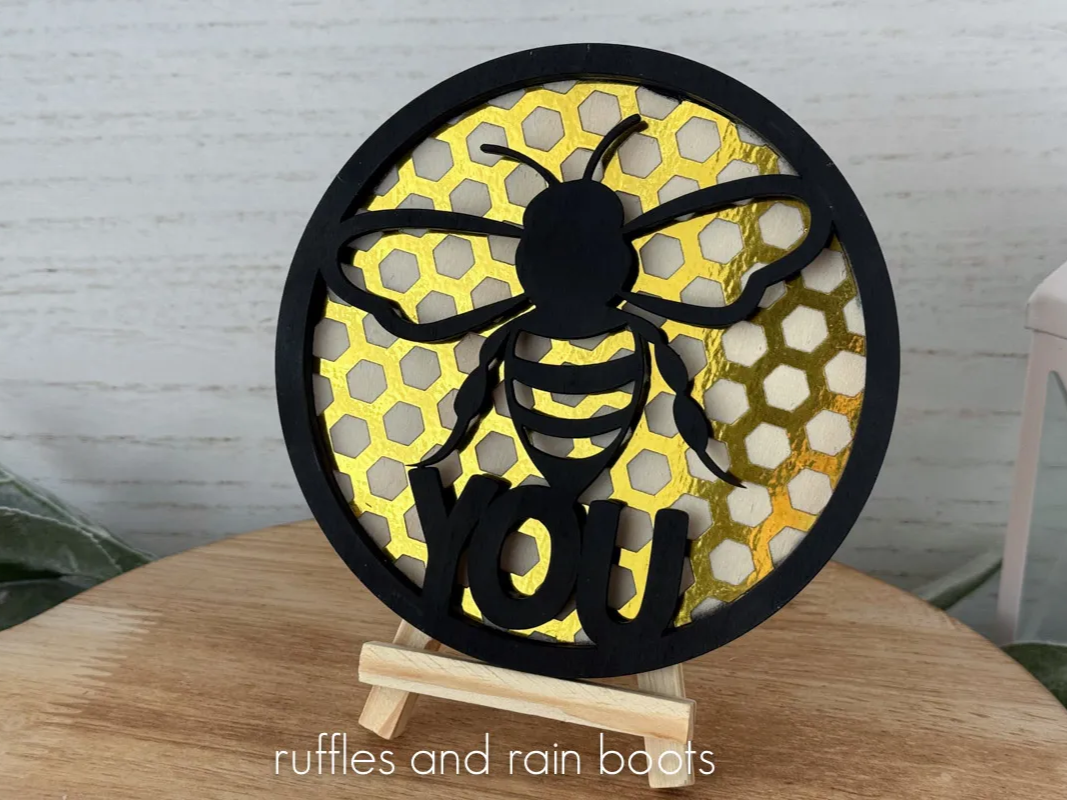
Shelf sitters — small standing signs that lean into a shelf arrangement — are the finishing objects in the book-plant-object triangle. This layered bee with foiled honeycomb adds color and a wink of personality to any shelf.
6. Boho Macrame Wall Hangings

Wood plus fiber is the boho formula: a laser-cut arch scene up top, hand-knotted macrame below. The mixed materials add the texture that all-hard-surface rooms lack. A weekend project that anchors a bedroom wall.
7. HOME Word Signs

A stacked word sign — HOME, calm, gather — is minimalist decor that works on a shelf or the wall. Cut it in matte black for the modern look or warm ply for rustic. The kind of piece stores charge $40 for and a laser cuts for $2.
8. Woodland Wall Clocks

A working clock wrapped in an engraved woodland scene — deer, foxes, and forest edging the dial. Clock mechanisms cost a few dollars; the artwork is where a laser shines. Make the timepiece the room's focal point instead of an afterthought.
9. Grid Display Shelves
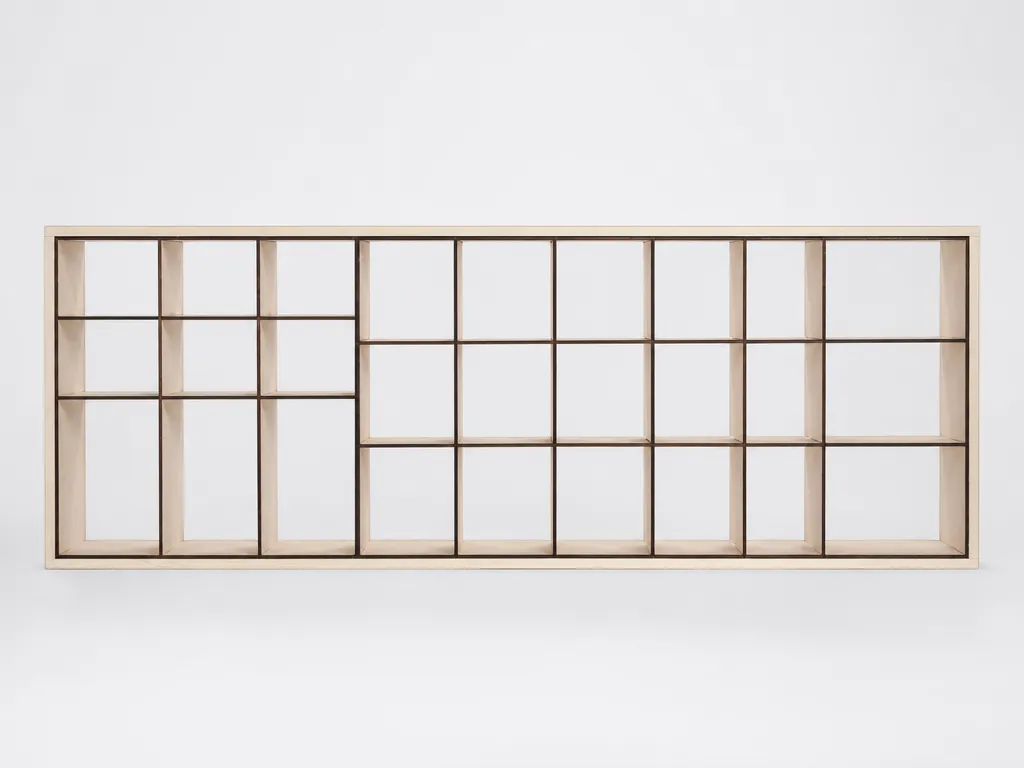
A compartment grid turns collections — minis, plants, trinkets, spice jars — into a curated display instead of clutter. Slot-together construction means no hardware, and you can size the grid to the exact wall. Organization that reads as decor.
10. Novelty Bookends

A hero silhouette 'holding up' the row of books is the kind of visual joke that makes a shelf memorable. Bookends are quick cuts with high personality-per-dollar — match the silhouette to the shelf's owner: dinosaurs, dancers, dachshunds.
The bottom line
Function → palette → focal point → light → plants → textiles → personal pieces. Seven steps, in order, and any room comes together — on almost any budget. The rooms people remember aren't the most expensive ones; they're the ones with a point of view and a few things nobody else owns.
Frequently Asked Questions
What should I decorate first in a room?
Layout first, then the focal point. Get the furniture serving the room's actual use, then give the eye one place to land — a statement wall, art piece, or mirror. Everything after (lighting, textiles, objects) supports those two decisions.
How do I decorate my room without buying everything new?
Rearrange for the traffic paths, declutter, repaint or re-cover what you own, and make your own wall decor — plywood wall art, shelf organizers, and photo frames cost a few dollars in material. One handmade statement piece often replaces hundreds in store decor.
What is the 60-30-10 rule in decorating?
Split your colors: 60% a dominant color (walls, big furniture), 30% a secondary (rug, curtains, bedding), 10% an accent (pillows, art, accessories). It keeps a palette balanced without feeling flat.
How high should I hang wall art?
Center it at about 57–60 inches (145–152 cm) from the floor — average eye level. Over furniture, keep 6–10 inches of gap, and size the art to roughly two-thirds of the furniture's width.
What makes a room look expensive on a budget?
Warm dimmable lighting, an oversized rug, curtains hung high and wide, one large-scale focal piece, and no clutter. None of those require expensive objects — they're proportion and light decisions.
Make a light that fits
Generate a cut-ready lamp shade pattern sized to the look you are going for.
