


The holiday season brings out something beautiful in all of us, that desire to create something meaningful with our own hands. In a world where we can send a text in seconds or order cards by the hundred, there's real magic in sitting down to craft something personal. A handmade card isn't just paper and ink; it's time, thought, and care folded into an envelope.
If you've been curious about how to make a Christmas card that feels truly special, you've come to the right place. Maybe you're brand new to cardmaking, or perhaps you've been creating holiday greetings for years. Either way, combining classic techniques with today's creative tools can take your cards to places you might not have imagined.
In this guide, we'll walk through the heart of Christmas cardmaking, honoring traditional methods while exploring fresh approaches with Atomm, a thriving community where makers from around the world share inspiration, files, and ideas for handcrafted projects. Ready to create cards that people will actually keep? Let's get started.
How to Make a Christmas Card in General
Before we dive into lasers and digital designs, let’s ground ourselves in the heart of card making. Learning how to make a Christmas card usually starts with three core elements: the material, the message, and the motif.
If you are looking to learn how to make a christmas card using traditional methods, here is a concise, step-by-step guide to the foundational process:
Step 1: Define Your Theme and Tone
Begin by deciding the "vibe" of your card. Are you aiming for rustic and cozy (think kraft paper and twine), elegant and minimal (white-on-white with gold accents), or playful and bright?
Tip: Sketch a rough layout on a scrap piece of paper. decide where the focal point will be—is it a tree, a star, or typography?

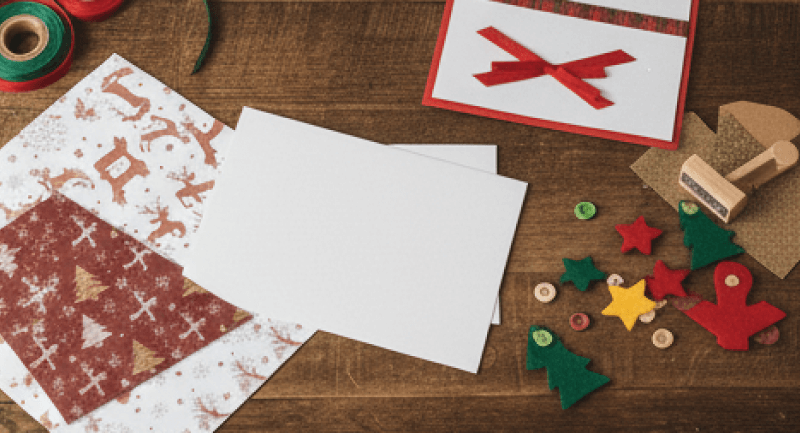
Step 2: Gather Your Core Materials
- Quality matters. Select a heavy cardstock (at least 80lb or 216gsm) for the base so the card stands up straight when displayed.
- Gather your decorative elements: patterned paper, stamps, ink pads, glue runners, and precision scissors.
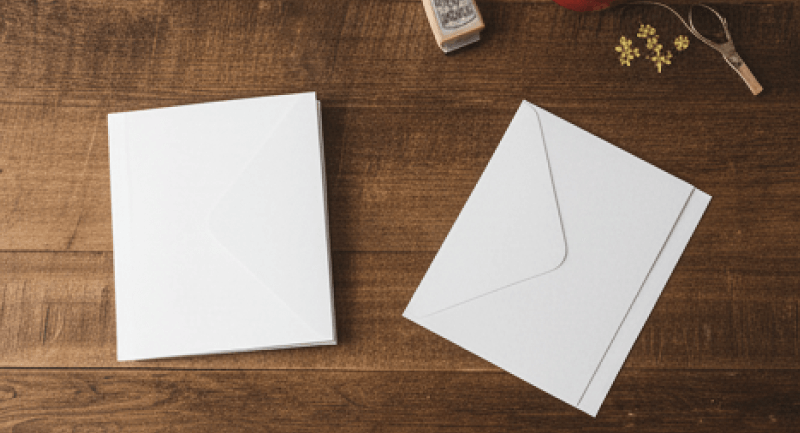
Step 3: Create the Card Base
- Cut your cardstock to size. The standard size is usually 8.5" x 5.5", folded in half to create an A2 size card (4.25" x 5.5").
- Crucial Step: Use a bone folder or a scoring board to create a crisp, clean fold. A messy fold can make even the most beautiful design look amateur.
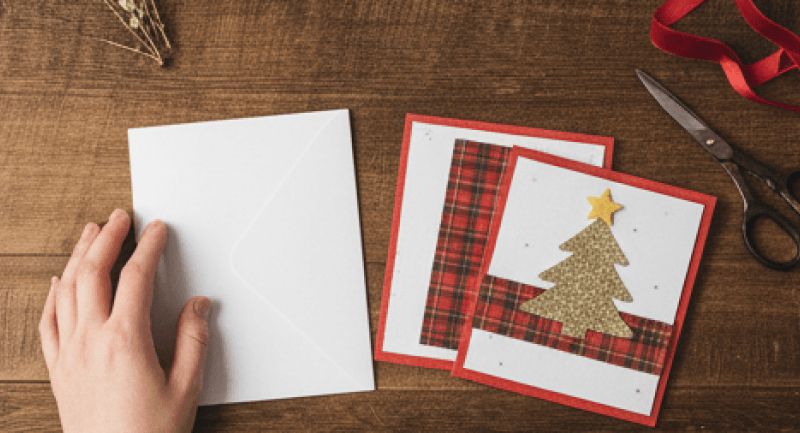
Step 4: Design the Front (The "Face")
- This is where your creativity shines. Layer different papers to create depth. Apply your main image or sentiment. If you are hand-lettering "Merry Christmas," practice on a separate sheet first.
- Add texture using ribbons, buttons, or embossing powder.
Step 5: The Message Inside
- Never underestimate the power of the interior. If your card base is dark (like navy blue or black), cut a slightly smaller piece of white or cream paper and glue it inside to provide a writing surface.
- Write a personalized message. In an age of text messages, your handwriting is a unique gift in itself.

However, every artist eventually hits a wall. You might envision a snowflake with impossibly delicate arms or a pop-up village with intricate windows that scissors simply cannot cut. This is where the world of "maker tech" steps in. By introducing precision tools, you move from simple flat cards to intricate wooden engravings or delicate lace-like paper cuts that look professional yet deeply personal.
Why Make Christmas Cards with a Laser Engraver & Atomm
When it comes to how to make a Christmas card, traditional scissors and glue are wonderful, but combining Atomm creative design platform with the precision of a laser machine opens up a whole new world of creative possibilities. Here’s why:
- Precision and Detail: Laser cutting achieves intricate snowflake patterns, delicate lettering, and fine borders that are nearly impossible by hand.
- Material Versatility: From cardstock to wood veneer, acrylic, or specialty papers, a laser machine can cut or engrave across diverse surfaces.
- Creative Hub: Atomm offers a library of templates, motifs, and design inspiration tailored for laser cutting and engraving.
- Customization Made Easy: You can adjust fonts, layouts, and motifs to personalize each card for family, friends, or clients.
- AI‑Powered Tools: Features like AImake help you instantly generate design ideas from text or images, bridging inspiration and execution.
How to Make a Christmas Card with Atomm and a Laser Machine
Here is your step-by-step guide on how to make a christmas card with Atomm.
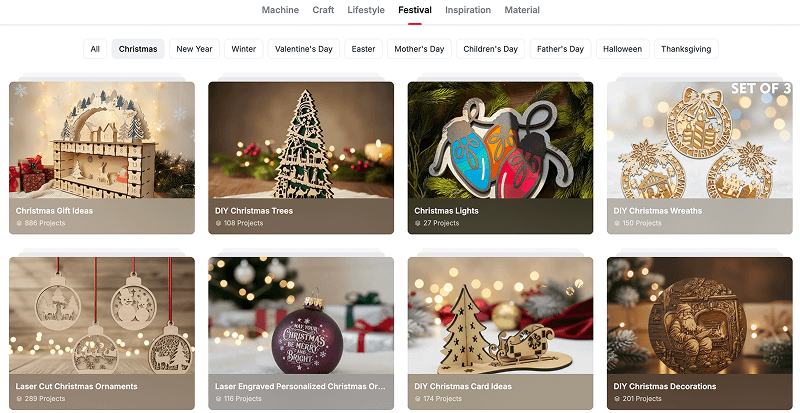
Step 1: Find Your Muse on Atomm
Atomm is a creative hub and design platform offering free DXF, SVG, and vector files for laser cutting, engraving, printing, and DIY projects. It’s built as both a resource library and a community space for makers, especially those using xTool machines.
- Explore the Library: Start by browsing the Atomm community for more diy Christmas Card Ideas. You will find projects like "Pop-up 3D Christmas Cards" or "Layered Winter Scenes."
- Download and Adapt: Look for SVG, DXF, or XCS files. These are vector formats that your laser machine reads to know exactly where to cut and where to engrave. You don't have to start from scratch, standing on the shoulders of other creatives is a wonderful way to begin.
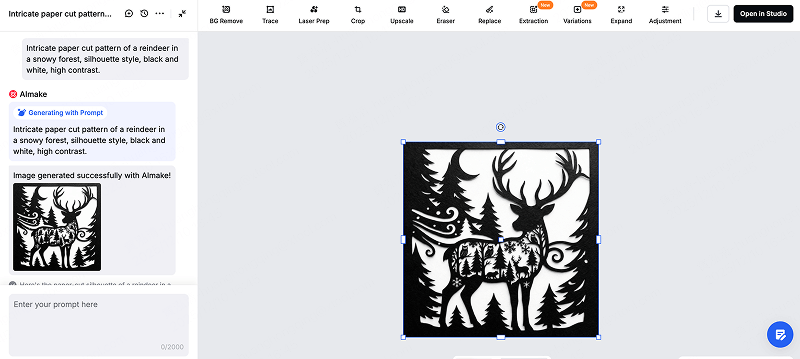
Step 2: Design with AI (The Secret Weapon)
If you want something truly one-of-a-kind, use Atomm’s AImake features. This tool bridges the gap for those who may not be professional graphic designers.
- Generative Art: Simply type a prompt into AImake. For a paper-cut style card, try a prompt like: "Intricate paper cut pattern of a reindeer in a snowy forest, silhouette style, black and white, high contrast."
- Style Transfer: If you have a family photo, use the "Photo to Line Art" or "Sketch" features. This converts a raster image (pixels) into a vector path (lines) that the laser can actually follow, turning a family portrait into an engravable sketch on wood or cardstock.
- Customization: Once generated, you can import these designs into your machine’s software (like xTool Studio). Add your family name, the year, or a personal message to transform the template into a story.
Step 3: Choose Your Material
Laser machines aren't just for wood! The material you choose sets the tone for your card.
- Cardstock (300gsm+): This is ideal for classic cards. Use the laser to cut intricate lace patterns or pop-up elements that would be impossible by hand. Pro tip: Use a "score" setting (low power, high speed) to create perfect fold lines.
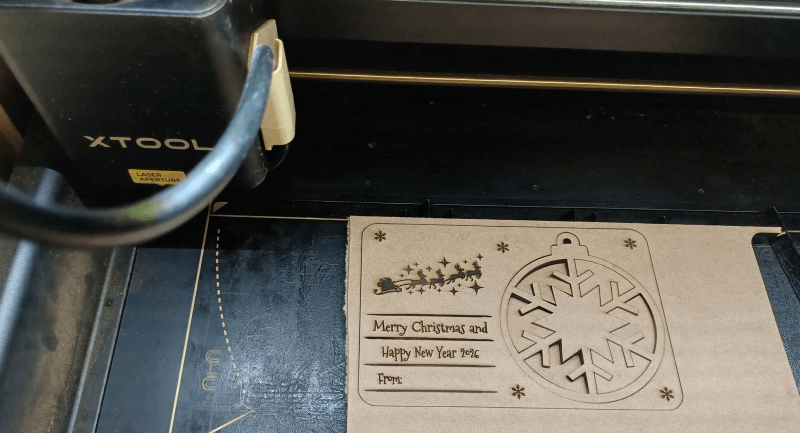
- Wood Veneer or Plywood: Thin sheets of 3mm basswood make for rustic, durable cards. These often double as ornaments—your recipient can pop out a part of the card and hang it on their tree!
- Kraft Paper & Anodized Aluminum: For an industrial-chic look, some makers engrave on metal business cards or mix kraft paper with metallic accents.

Step 4: The Laser Process
This is the moment of truth.
- Test Your Settings: Every paper behaves differently. Run a small test cut on a scrap piece. For example, on an xTool S1 cutting colored cardstock, you might find that Power: 75% / Speed: 80mm/s works for cutting, while Power: 8% / Speed: 20mm/s creates a gentle score line for folding. Always verify before committing your good material!
- The Dance of Light: Send your design from the software to your machine. Watch as the laser dances across the material. It is mesmerizing to see your digital idea become a physical object in seconds.
- Safety First: Always watch your machine when cutting paper, as it is flammable. Air assist is your friend here that it blows air onto the cut site, keeping edges crisp and preventing charring.
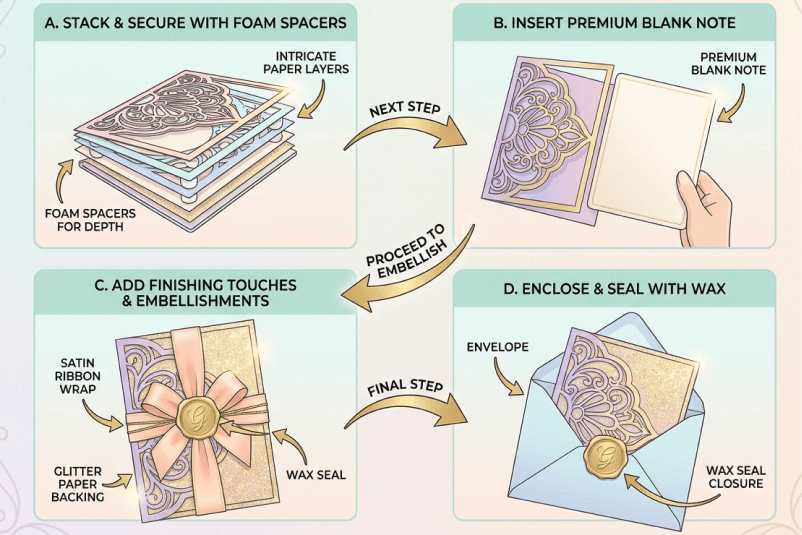
Step 5: Assembly and Finishing Touches
Once the laser stops, the human touch returns.
- Layering: If you designed a shadowbox card, use foam spacers or double-sided tape to stack your layers. This creates a physical depth that printed cards simply can't match.
- Insert a Note: Laser-cut cards often look like art. Glue a blank sheet of high-quality writing paper inside so you can still write a personal handwritten message.
- Embellish: A touch of ribbon, a backing of glitter paper, or a seal of wax on the envelope can add that final festive sparkle.
Make Your Christmas Card Now!
Learning how to make a Christmas card is more than craft, it’s an act of connection. A handmade card carries your creativity, care, and story. Whether you use scissors and glue or embrace Atomm with laser cutting and engraving, the process transforms imagination into something tangible.
Atomm empowers makers to explore, iterate, and personalize with templates and machine‑ready designs. Add DTF printing for vibrant keepsakes that blend artistry with technology.
This holiday season, let your creativity flow. Gather materials, open Atomm, and let your laser machine bring precision to your vision. Because when you know how to make a Christmas card, you’re not just crafting paper and you’re crafting memories, one heartfelt design at a time.