


In the world of custom fabrication and personalized gifts, the ability to take a flat photograph and give it physical depth is nothing short of magic. Whether you are a professional operating a laser business or an enthusiast exploring digital art, the workflow to convert an image to 3D model files is a critical skill to master.
While many associate 3D modeling strictly with 3D printing, one of the most elegant applications is 3D glass inner engraving (Sub-Surface Laser Engraving or SSLE). This technology creates a "floating" image inside a solid crystal block. However, the laser doesn't see colors; it sees depth. To make this work, you must bridge the gap between 2D pixels and 3D geometry.
In this guide, we will walk you through how to make a 3d model from a picture, the software workflows involved, and how to troubleshoot common issues in crystal engraving.
What is Image to 3D Conversion?
A standard 2D image (JPEG or PNG) is composed of pixels arranged on a flat X and Y grid. It has color information, but it has no concept of "Z-depth." If you were to send a standard photo to a 3D engraving machine without processing, the result would look like a flat sheet of paper suspended in the glass—it would lack the lifelike volume of a real face or object.
Image to 3D conversion is the process of extracting geometric data from a 2D source. Traditionally, this was a labor-intensive process requiring an artist to manually sculpt a model while looking at a reference photo. Now, AI image to 3D model generator apply machine learning to predict depth from just one photo. Because the image is suspended in clear crystal, any distortion in the 3D model becomes immediately visible from all sides. Learning how to convert image to 3d model data correctly ensures that your final engraving looks realistic, distinct, and captures the light beautifully.
How to Turn an Image to 3D Model for Engraving?
If you’ve never tried AI 3D Model Generator before, don’t worry, It’s designed to be beginnerfriendly. We’ll walk you through the process step by step so you can create your first 3D model with ease.
Step 1: Prepare your input images
The quality of your input dictates the quality of your output. When you set out to convert image to 3d model data, look for high contrast and even lighting.
- Lighting: Avoid harsh shadows. Shadows can confuse software into thinking a dark area is a "hole" or deep recession.
- Resolution: Higher pixel density allows for more precise texture mapping.
- Subject: If using photogrammetry, ensure the object is static. If using a single photo for AI conversion, ensure the subject is facing the camera directly to avoid "hidden geometry" issues.

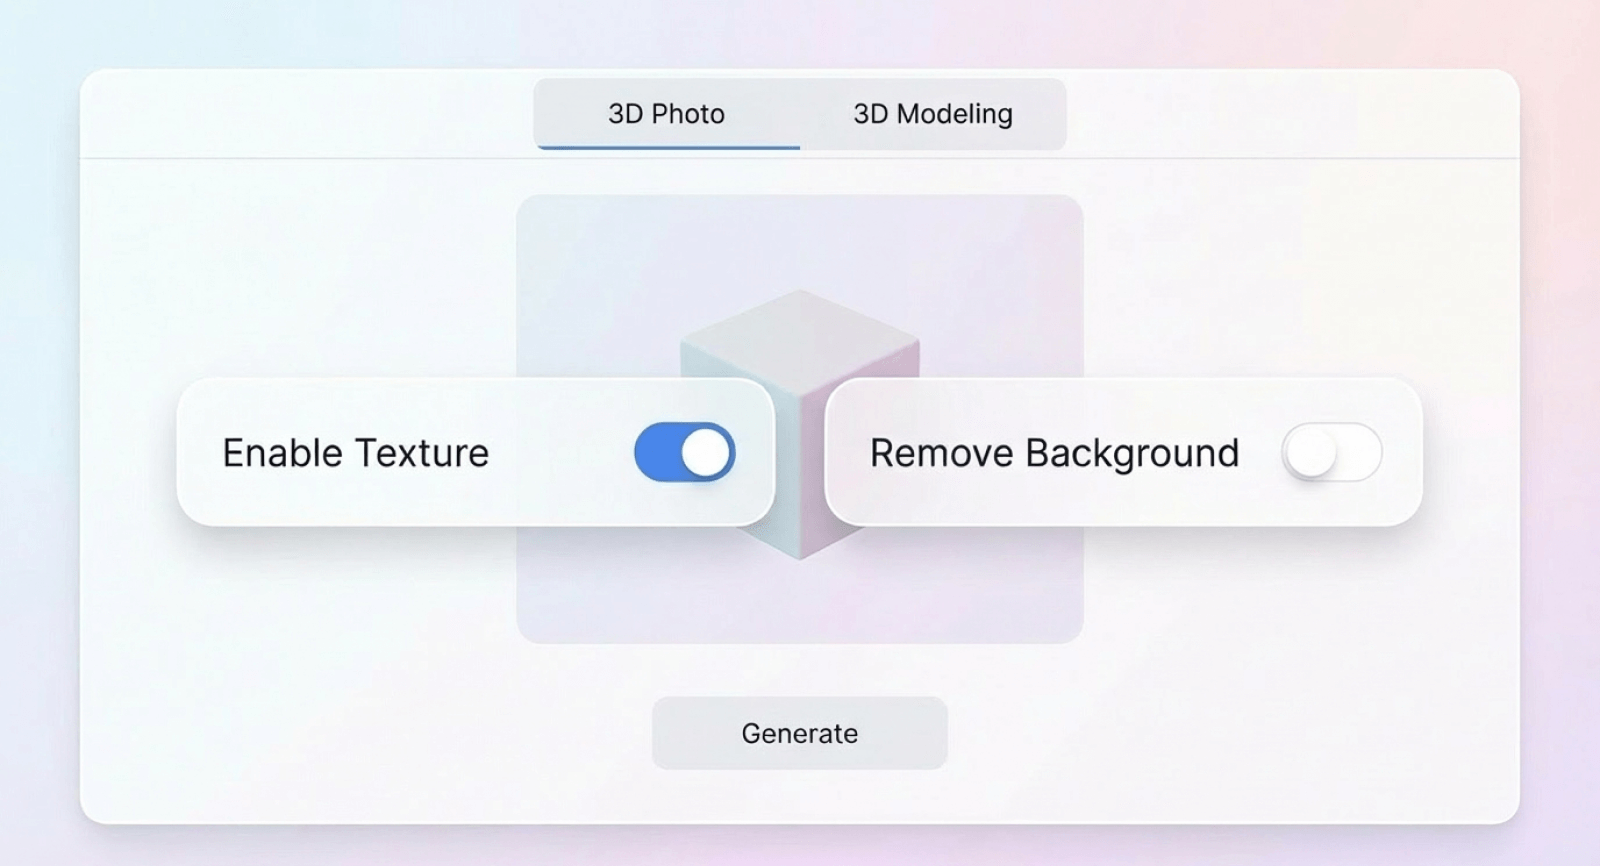
Step 2: Personalize 3D Model, Texture, and Background
Upload your images easily. To successfully convert an image to a 3D model, keep Texture enabled to add realistic surface definition, which is essential for 3D glass inner engraving. Also, ensure Background Removal is active to isolate your subject. This creates a clean, professional effect where the image appears to float inside the crystal without conflicting background noise.
Next, select the processing mode to turn your image into a 3D model. Use 3D Photo for portraits to preserve facial accuracy. For objects, choose 3D Modeling, which lets you select an AI 3D model from image engine ranging from fast generation to high-fidelity modes for exceptional realism.
Step 3: Turn Your Images to 3D Models
Once your settings are confirmed, you can launch the conversion. The AI handles all processing remotely, so there’s no need to keep the browser window active. You can move on to other tasks or begin a new project right away, while the system continues generating your 3D model in the background.
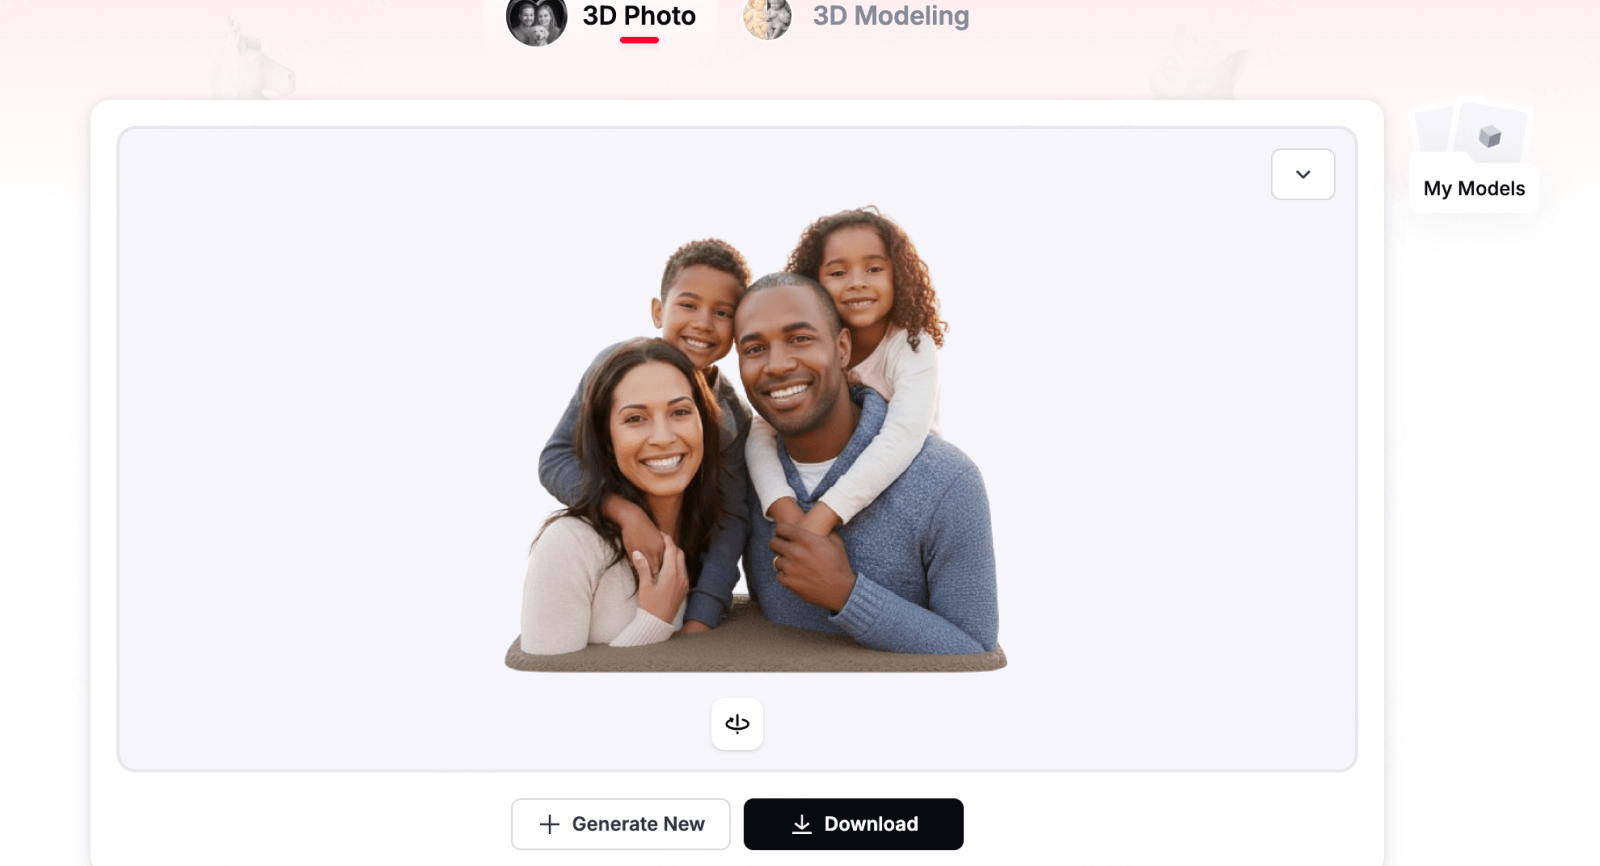
Step 4: Preview Before Exporting 3D Files
Upon completing the process to convert your image to a 3D model, use the preview window for critical quality control. Rotate and zoom in to inspect the depth accuracy and contour clarity. Scrutinize key areas like facial features and fine edges, as these details directly determine the sharpness and realism of the final 3D glass inner engraving.
Once you are satisfied with the model's geometry and details, proceed to the final stage. Export the data and save the file locally to your computer, ensuring it is fully prepared for import into your laser production software.
Step 5: Import 3D Model to Laser Software
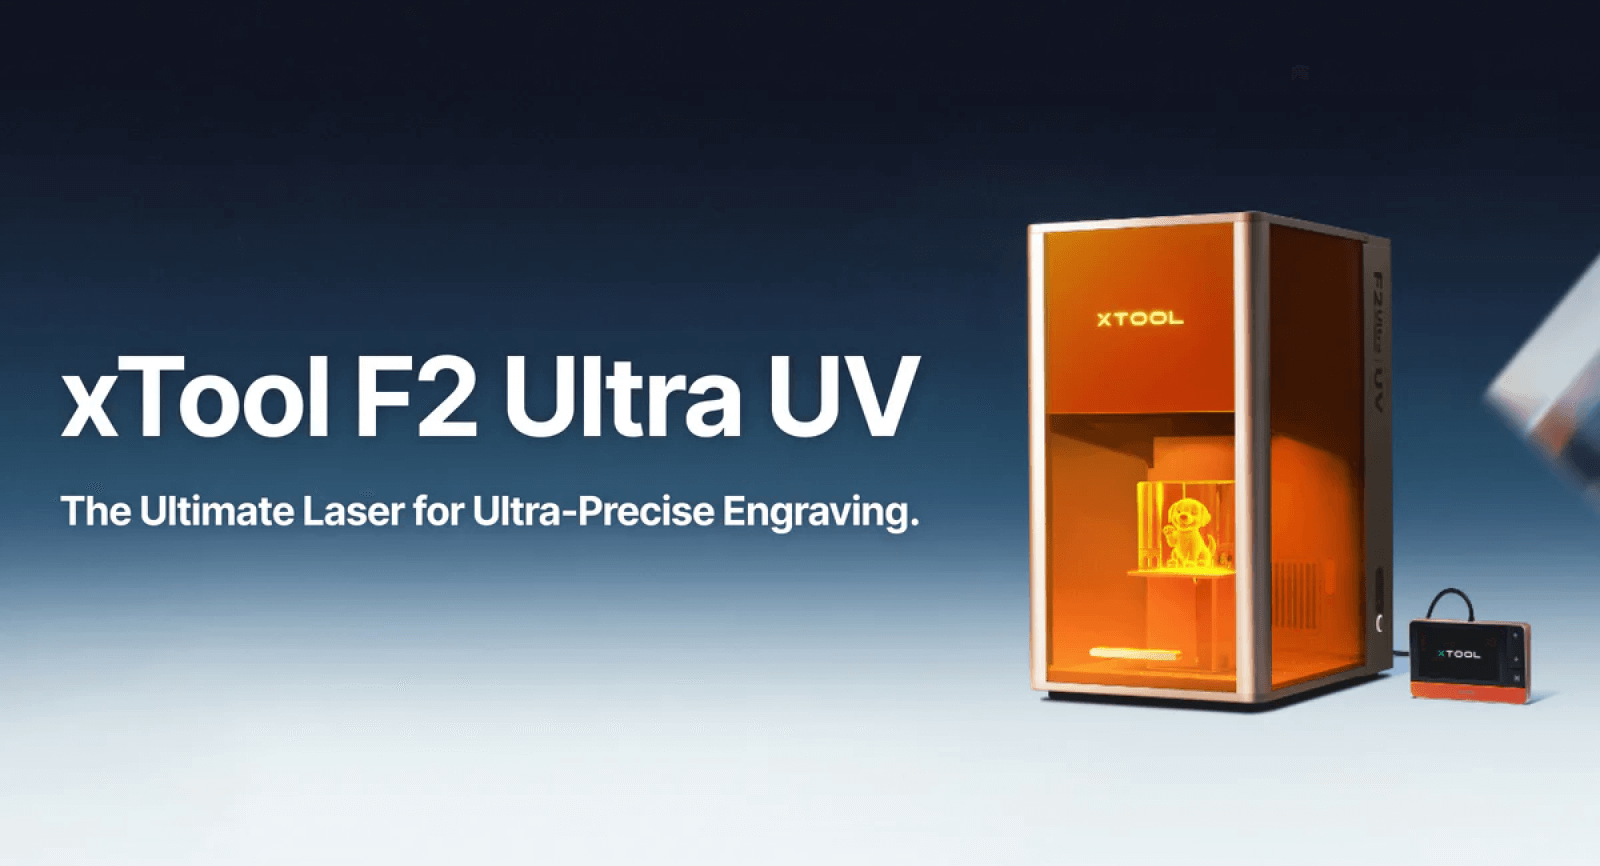
Transitioning from digital design to production requires opening xTool Studio. Import your file and scale the 3D model to align perfectly with the dimensions of your crystal workpiece for the xTool F2 Ultra UV.
The most critical adjustment involves configuring the depth layers, which establishes the "floating" look characteristic of inner engraving. Conclude by optimizing your focus, power, and speed parameters; precise calibration is necessary to produce a crisp, bright image inside the glass while preventing thermal stress cracks.
Troubleshooting Common 3D Inner Engraving Defects
Even with a perfect 3D model, physical factors can impact the quality of 3D glass inner engraving. Use this guide to diagnose and resolve the most frequent production issues.
1. Internal Cracking
The Cause: This is typically the result of "thermal stress"—either the laser pulse energy is too aggressive, the dots are spaced too closely together, or the engraving is positioned too near the edge of the glass.
The Solution: Reduce the laser pulse energy or duration and slightly increase the spacing between dots to dissipate heat. Always leave a safe margin from the crystal's edge. Additionally, ensure the glass block has acclimatized to room temperature; engraving cold glass creates thermal shock.
2. Fuzzy or Uneven Dots
The Cause: Usually stems from a focal error (the laser is not converging at the correct depth) or dirty optics (dust on the lens or protective window).
The Solution: Run a Z-axis sweep to recalibrate the focus height. Inspect and clean the lens and any protective windows with optical-grade wipes. If the focus is sharp but dots remain inconsistent, consider slowing the engraving speed to ensure consistent dwell time.
3. Faint or Incomplete Images
The Cause: Indicates insufficient energy transfer, often due to low power settings, dust accumulation blocking the beam, or a degrading laser diode.
The Solution: Incrementally increase the laser power and test again. Thoroughly check and clean the laser window and all mirrors. If the image remains faint despite max power and clean optics, the laser diode may need replacement.
4. Uneven or Patchy Results
The Cause: Physical misalignment. If the material is not lying flat, the bed is unlevel, or the mirrors are misaligned, the focal point will drift as the laser moves.
The Solution: Verify that the crystal is completely flat and securely clamped. Re-level the machine's bed and perform a pulse test to check mirror alignment, ensuring the beam path remains consistent across the entire work area.
FAQs about Converting Images into 3D Models
Can AI tools accurately turn an image into a 3D model for professional use?
A: Yes, AI 3D model from image technology has evolved significantly. Modern AI tools can predict depth and geometry from a single photograph with impressive speed. However, for professional applications like engraving or manufacturing, these models often serve as a base. You will typically need to perform manual refinement—such as smoothing rough textures or closing geometry holes—to ensure the final output meets high-quality standards.
What is the best file format when I convert an image to a 3D model?
A: The most common formats are OBJ and STL. An OBJ file is generally preferred for design because it can retain texture and color information (UV maps), which is helpful during the editing stage. STL files are the standard for physical production, such as 3D printing or CNC machining, as they describe the surface geometry of the object purely as a mesh of triangles.
Do I need extensive design experience to learn how to make a 3D model from a picture?
A: Not anymore. While traditional 3D modeling requires years of practice, new automated workflows have lowered the barrier to entry. Most "image to 3D" software now utilizes a simple wizard interface where you upload a photo and the software handles the complex geometry calculation. The user’s role has shifted from "sculpting from scratch" to "refining and optimizing" the AI-generated results.
How does a 3D model for glass inner engraving differ from a standard 3D printing model?
A: This is a critical distinction. A model for 3D printing is a "surface shell" (hollow or filled with a grid). A model for 3D glass inner engraving (SSLE) must be converted into a Point Cloud—a solid volume of millions of specific dots. Unlike printing, where you build layers, inner engraving requires the software to calculate the density of micro-fractures inside the object to create a bright, solid-white appearance within the clear glass.
Brings Your Images to Life with Substance 3D
Mastering the workflow to convert image to 3D model is the bridge between digital photography and physical artistry. Whether you are preserving a family memory in a block of K9 crystal or creating architectural awards, the process requires patience, the right software, and an understanding of geometry. By following the steps of capturing, masking, and refining your point clouds, you can avoid common defects and produce stunningly clear engravings.
To make this process even more accessible, Atomm offers a web‑based editor and creative hub with AI‑powered tools and ready‑to‑use project templates. Its AI 3D Model Generator in Creative Lab simplifies image‑to‑3D conversion, helping you produce engraving‑ready models with precision and ease.