
举报
![[Laser cut and engrave] Layered Wood Butterfly and Floral Mandala Wall Art Panel - 5 Layers Wall Art](https://storage-us.atomm.com/resource/xtool/community/attachment/xtool-community/d14f4230-f111-4d6e-8539-bbaf618568b9.jpg?x-oss-process=image/resize,w_1200,h_900,limit_0/interlace,1/format,webp/auto-orient,1)
![[Laser cut and engrave] Layered Wood Butterfly and Floral Mandala Wall Art Panel - 5 Layers Wall Art](data:image/png;base64,iVBORw0KGgoAAAANSUhEUgAAAAoAAAAKCAYAAACNMs+9AAAAAXNSR0IArs4c6QAAABdJREFUKFNjZCASMBKpjmFUId6QIjp4AAppAAuXjCs4AAAAAElFTkSuQmCC)
![[Laser cut and engrave] Layered Wood Butterfly and Floral Mandala Wall Art Panel - 5 Layers Wall Art](https://storage-us.atomm.com/resource/xtool/community/attachment/xtool-community/d14f4230-f111-4d6e-8539-bbaf618568b9.jpg?x-oss-process=image/resize,w_200,h_150,limit_0/interlace,1/format,webp/auto-orient,1)
![[Laser cut and engrave] Layered Wood Butterfly and Floral Mandala Wall Art Panel - 5 Layers Wall Art](https://storage-us.atomm.com/resource/xtool/community/attachment/xtool-community/c12cf30d-0e59-46dd-a356-05fc56d9e685.jpg?x-oss-process=image/resize,w_200,h_150,limit_0/interlace,1/format,webp/auto-orient,1)
![[Laser cut and engrave] Layered Wood Butterfly and Floral Mandala Wall Art Panel - 5 Layers Wall Art](https://storage-us.atomm.com/resource/xtool/community/attachment/xtool-community/1707c13d-6014-4c1d-8a07-fde2d1d3f132.jpg?x-oss-process=image/resize,w_200,h_150,limit_0/interlace,1/format,webp/auto-orient,1)
![[Laser cut and engrave] Layered Wood Butterfly and Floral Mandala Wall Art Panel - 5 Layers Wall Art](https://storage-us.atomm.com/resource/xtool/community/attachment/xtool-community/ff722f58-5f4b-4340-a222-c8e3c328cbfc.jpg?x-oss-process=image/resize,w_200,h_150,limit_0/interlace,1/format,webp/auto-orient,1)
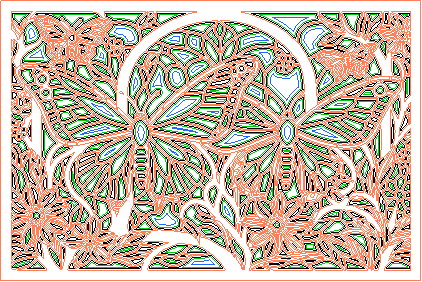
层叠木制蝴蝶与花卉曼陀罗壁画面板——5层墙面艺术


Pixelza 175
.xcs
显示剩余(5项)
应用场景
激光加工
机器与模块
xTool S1
20W兼容的 xTool 机器
M2
10W, 20WF2 Ultra UV
5WF2
15WP3
80WF2 Ultra
40WF1 Ultra
20WM1
5W, 10WD1
5W, 10W, 20WD1 Pro
5W, 10W, 20W, 40WP2
55WF1
10WS1
10W, 40WM1 Ultra
10W, 20WP2S
55W使用的材料

3mm桦木胶合板

278
2729
教程
1
步骤1: 材料
- 5×胶合板或MDF板(推荐:每片3–4毫米厚度)
- 木工胶或CA胶
- 油漆、染色剂或喷漆(可选)
砂 - 纸(细粒度,可选)
2
步骤2: 切割层次

预览

预览
- 把设计导入你的激光软件(LightBurn、xTool Creative Space等)。
- 每层单独提供或按颜色分组。
- 根据你的材料调整功率和速度设置。
- 每一层都单独切割。
💡 提示:先做一个小切口,确保边缘干净且切得合适。
3
步骤3: 涂装选项
你可以在切割前或切割后刷漆,取决于你的工作流程:
选项A – 切割前刷漆(更干净的表面)
- 在整张板上涂上油漆或底漆。
- 让它完全干透。
- 然后继续切割。
选项B——切割后再上色(更精确):
- 先切割所有图层。
- 如果需要,轻轻打磨边缘。
- 每一层单独上色。
💡 提示:薄涂一层,避免材料膨胀或变形。
4
步骤4: 组装(叠加层)
- 把所有5层按顺序排列(背面→前面)。
- 在每层背面涂上少量胶水。
- 仔细对齐并叠放。
- 轻轻按压,晾干。
💡 提示:从后层向前调整,更容易对齐。
5
步骤5: 收尾
- 涂一层透明涂层以保护(可选)。
- 可以加装挂架、框架或双面胶带以便安装。
6
步骤6: 专业技巧(最佳效果)
- 想要高层次效果,使用对比:后面用深色,前面用浅色调。
- 如果你想要更多深度,可以在层之间加一些薄垫(1–3毫米),营造阴影盒的效果。
- 为了达到超干净效果,建议在刷漆前先封闭或底漆木材。
- 切割后轻轻打磨或快速擦拭有助于去除煤灰,提高油漆附着力。
评论
