Report
![[Laser cut and engrave] When Kings Collide](https://image-res.atomm.com/resource/xtool/community/attachment/xtool-community/bce34823-6016-4532-a126-e9c50b7e86bd.png?x-oss-process=image/resize,m_fill,w_1280,h_960,limit_0/interlace,1/format,webp/auto-orient,1)
![[Laser cut and engrave] When Kings Collide](data:image/png;base64,iVBORw0KGgoAAAANSUhEUgAAAAoAAAAKCAYAAACNMs+9AAAAAXNSR0IArs4c6QAAABdJREFUKFNjZCASMBKpjmFUId6QIjp4AAppAAuXjCs4AAAAAElFTkSuQmCC)
![[Laser cut and engrave] When Kings Collide](https://image-res.atomm.com/resource/xtool/community/attachment/xtool-community/bce34823-6016-4532-a126-e9c50b7e86bd.png?x-oss-process=image/resize,m_fill,w_160,h_120,limit_0/interlace,1/format,webp/auto-orient,1)
![[Laser cut and engrave] When Kings Collide](https://image-res.atomm.com/resource/xtool/community/attachment/xtool-community/463fc19e-37dd-41b7-b3f9-dabaf41f9ae4.png?x-oss-process=image/resize,m_fill,w_160,h_120,limit_0/interlace,1/format,webp/auto-orient,1)
![[Laser cut and engrave] When Kings Collide](https://image-res.atomm.com/resource/xtool/community/attachment/xtool-community/14943834-3ce6-40fc-ba83-e2eeeb27558f.png?x-oss-process=image/resize,m_fill,w_160,h_120,limit_0/interlace,1/format,webp/auto-orient,1)
![[Laser cut and engrave] When Kings Collide](https://image-res.atomm.com/resource/xtool/community/attachment/xtool-community/eb232cbe-b52e-4100-8390-46273157c75e.png?x-oss-process=image/resize,m_fill,w_160,h_120,limit_0/interlace,1/format,webp/auto-orient,1)
![[Laser cut and engrave] When Kings Collide](https://image-res.atomm.com/resource/xtool/community/attachment/xtool-community/5740a244-1355-4822-ab7a-04bcc57d6604.png?x-oss-process=image/resize,m_fill,w_160,h_120,limit_0/interlace,1/format,webp/auto-orient,1)
![[Laser cut and engrave] When Kings Collide](https://image-res.atomm.com/resource/xtool/community/attachment/xtool-community/48d85341-e43a-4e77-8666-a7cb74671163.png?x-oss-process=image/resize,m_fill,w_160,h_120,limit_0/interlace,1/format,webp/auto-orient,1)
![[Laser cut and engrave] When Kings Collide](https://image-res.atomm.com/resource/xtool/community/attachment/xtool-community/0961de92-0bf9-4a6e-a354-3d38e1ca1dfa.jpeg?x-oss-process=image/resize,m_fill,w_160,h_120,limit_0/interlace,1/format,webp/auto-orient,1)
![[Laser cut and engrave] When Kings Collide](https://image-res.atomm.com/resource/xtool/community/attachment/xtool-community/55667d42-2b60-47cd-9327-47755adbe1fc.jpeg?x-oss-process=image/resize,m_fill,w_160,h_120,limit_0/interlace,1/format,webp/auto-orient,1)
When Kings Collide
 Instruction
WHEN KINGS COLLIDE
.xcs
Application scenario
Laser processing (96min)
Machine & module

xTool F2 Ultra UV
5WMaterial used

K9 Inner Carved Glass

6
1291
Information
      SHARED - https://www.facebook.com/share/p/14czp2GWU2K/
SHARED - https://www.facebook.com/share/p/1A6hGF7RSu/
SHARED - https://www.instagram.com/p/DX4dTMykRBF/utm_source=ig_web_copy_link&igsh=MzRlODBiNWFlZA==

WHY DINOSAURS FASCINATE ME

It started in the dirt.

As a kid, I wasn't the one chasing after the latest toy or game-/ was the one digging for bones.
I'd spend hours in the backyard, imagining myself uncovering the skeletons of creatures that once ruled the Earth. While others built castles, 1 built worlds-where dinosaurs weren't just giants... they were legends.

They amazed me. Not just because of their size, but because of their story.
Dinosaurs didn't just survive-they adapted, fought, and thrived in a world far more unforgiving than ours.
Even now, I'm captivated by that same wonder.

Dinosaurs remind me that greatness isn't about never falling-it's about leaving a mark big enough to be remembered forever.

That's why I created When Kings Collide.

It's more than a design— it's a tribute to the legends that shaped my imagination, inspired my curiosity, and continue to fuel my passion.
Instruction
1
Step1: Easy to follow directions
- Select a meaningful photo or memory
Choose an image that tells a story or captures a special moment worth preserving. - Optimize the image for 3D processing
Enhance contrast, simplify the background, and ensure the subject is clearly defined. - Use Atomm’s AI tool or other tool to generate a 3D model
Convert the 2D image into a 3D-ready format using AI-assisted depth processing. - Import the file into xTool Studio
Bring the processed image into the workspace for engraving setup. - Configure the inner glass engraving settings
Follow xTool Studio’s guided setup to position and scale the design within the crystal. - Verify measurements and alignment
Double-check dimensions, placement, and laser settings to ensure precision. - Choose your processing style
For this project, I selected outline processing to enhance clarity and detail within the glass. - Run the engraving process
Execute the job and allow the laser to complete the internal crystal engraving. - Finish and polish
Clean and polish the crystal to maximize clarity and visual impact. - Display the final piece
Showcase the finished work—transforming a memory into a permanent, dimensional keepsake.
Comments
Remixes
License

This work contains AI-generated content.


You may also like

I Need Coffee Skull Graphic Lighted Crystal Block

1
3

3D Laser Engraved Godzilla

8
21

'/%3e%3c/g%3e%3cdefs%3e%3clinearGradient%20id='paint0_linear_1737_57170'%20x1='16.5097'%20y1='8.87061'%20x2='16.5097'%20y2='23.3945'%20gradientUnits='userSpaceOnUse'%3e%3cstop%20stop-color='%232E9AFF'/%3e%3cstop%20offset='1'%20stop-color='%233378FF'/%3e%3c/linearGradient%3e%3c/defs%3e%3c/svg%3e)
3D Interior Engraving K9 Crystal - Dragon Rider

1
21

My 101 year old Aunty
1
14

Moon crystal ball ornament with base

0
8

Gosforth cross K9 crystal block
0
1

little children in 3D
0
2

Personalised glass block with photo and hearts

3
7

Camping is my life

2
7

Laser Engraved Samurai Helmet Crystal Cube Light Oni Mask

4
18

LED Acrylic / Glass Night Lamp with Wooden Base Home Decor

1
13
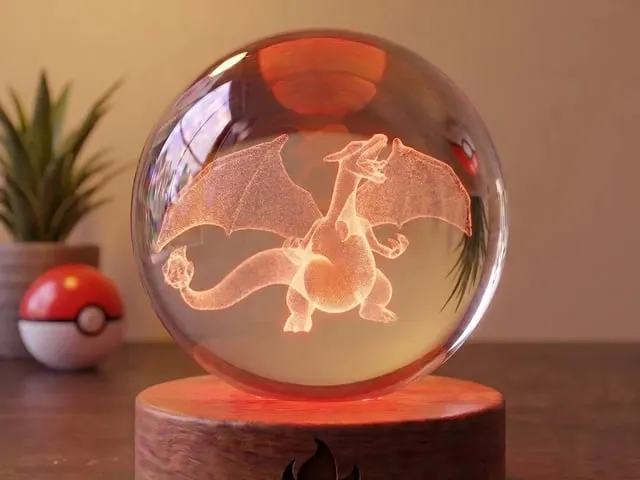
Charizard Crystal Ball

4
10

Dragons in an eternal battle: Frozen in time in a crystal ball
0
6

Crystal Sphere Featuring a Sleeping Baby Dragon

0
0

Pikachu Crystal Cube Paperweight
4
51

🏆 “Cute Does Win” – The Story of Corkie

5
7

Personalized Crystal Photo Block with Lighted Wooden Base

0
0

A crystal ball ornament engraved with a moon motif and a commemorative date

1
6