
舉報
![[Laser cut and engrave] Arch Earring Holder Stand](https://image-res.atomm.com/resource/xtool/community/attachment/xtool-community/c6188f31-3bf9-4eec-b328-0ae9f624cab6.png?x-oss-process=image/resize,w_1200,h_900,limit_0/interlace,1/format,webp/auto-orient,1)
![[Laser cut and engrave] Arch Earring Holder Stand](data:image/png;base64,iVBORw0KGgoAAAANSUhEUgAAAAoAAAAKCAYAAACNMs+9AAAAAXNSR0IArs4c6QAAABdJREFUKFNjZCASMBKpjmFUId6QIjp4AAppAAuXjCs4AAAAAElFTkSuQmCC)
![[Laser cut and engrave] Arch Earring Holder Stand](https://image-res.atomm.com/resource/xtool/community/attachment/xtool-community/c6188f31-3bf9-4eec-b328-0ae9f624cab6.png?x-oss-process=image/resize,w_200,h_150,limit_0/interlace,1/format,webp/auto-orient,1)
![[Laser cut and engrave] Arch Earring Holder Stand](https://image-res.atomm.com/resource/xtool/community/attachment/xtool-community/ece7a410-3c21-4edc-8b8b-0d5dabb0b6c5.png?x-oss-process=image/resize,w_200,h_150,limit_0/interlace,1/format,webp/auto-orient,1)
![[Laser cut and engrave] Arch Earring Holder Stand](https://image-res.atomm.com/resource/xtool/community/attachment/xtool-community/d56fc4e5-c88d-4619-871a-1d2f7b9ecc74.png?x-oss-process=image/resize,w_200,h_150,limit_0/interlace,1/format,webp/auto-orient,1)
![[Laser cut and engrave] Arch Earring Holder Stand](https://image-res.atomm.com/resource/xtool/community/attachment/xtool-community/09598ee0-6e63-4008-a5c6-e1e263e86142.png?x-oss-process=image/resize,w_200,h_150,limit_0/interlace,1/format,webp/auto-orient,1)
![[Laser cut and engrave] Arch Earring Holder Stand](https://image-res.atomm.com/resource/xtool/community/attachment/xtool-community/bc474fdb-5f54-4072-8935-811822032c2a.png?x-oss-process=image/resize,w_200,h_150,limit_0/interlace,1/format,webp/auto-orient,1)
拱形耳環架
 教程
教程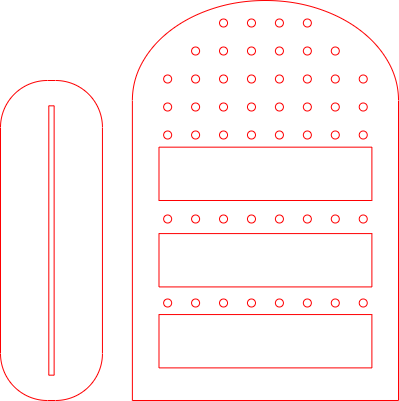
Arch Earring Holder Stand
.xcs
應用場景
激光加工
機器與模組

xTool D1 Pro
20W兼容的 xTool 機器
上新
M2
10W, 20WF2 Ultra UV
5WP3
80WF2 Ultra
40WF1 Ultra
20WM1
5W, 10WD1
5W, 10W, 20WD1 Pro
5W, 10W, 40WP2
55WF1
10WS1
10W, 20W, 40WM1 Ultra
10W, 20WP2S
55W使用的材料

3mm椴木膠合板

6mm枫木胶合板

175
1612
教程
1
步驟1
機器
中的實體設置
- 放置材料:將木材平放在蜂巢面板或木條上。
- 定位雷射頭:手動將雷射頭(或使用軟體箭頭)移到材質的左上角。
2
步驟2
設定 xTool Studio
- 連接您的裝置:開啟 XCS,並透過 USB、Wi-Fi 或 IP 連接到您的 S1 或 P2。
- Select Mode:
- Capture the Canvas: * 在 P2 上,點擊重新整理即可拍攝你的木材廣角照片。
- 匯入你的設計:打開你從 Atomm 下載的 xcs 檔案。
3
步驟3
設定對焦
正確的對焦是乾淨切割與焦黑的差別。
- Auto-Measure:在右側面板點擊自動測量圖示(看起來像一個小尺子/目標)。
- S1:探針會往下碰到木頭。
- P2:雷射頭會透過內建感測器在材料上移動,測量高度。
4
步驟4
調整「切割」參數
在畫布上選擇你的設計,打開右側的設定面板。
- 處理類型:從「Score」或「雕刻」改為切割。
- 設定功率/速度:
- 通過:除非木材特別厚(超過10mm)否則設為1。
5
步驟5
構圖與起始
- 構圖:點擊右下角的構圖。雷射頭會沿著長方形移動,精確顯示切割的位置。確保它不會碰到任何針腳或磁鐵。
- Process: 點擊 Process,然後 Start.
評論
二創



您可能還喜歡

樹飾收納架 3mm |雷射切割耳環夾(SVG)

2
15

3D 分層珠寶架。耳環收納盒雷射切割。波希米亞式配件展示 svg。掉耳環收納。蝴蝶

46
330

耳環架雷射切割檔案、SVG、Glowforge、Sieraden 支架、Sieraden 展示

18
111

獨立耳環展示架

7
100

虹彩拱形耳環架

0
1

耳環架

2
14

雷射雕刻壓克力耳環與展示架

11
33

花卉圖案耳環架代表珠寶組織

1
18

'/%3e%3cdefs%3e%3clinearGradient%20id='paint0_linear_1433_15675'%20x1='12'%20y1='3.25'%20x2='16.6891'%20y2='20.75'%20gradientUnits='userSpaceOnUse'%3e%3cstop%20stop-color='%23FF5D80'/%3e%3cstop%20offset='1'%20stop-color='%23FF0035'/%3e%3c/linearGradient%3e%3c/defs%3e%3c/svg%3e)
珠寶攤

99
555

珠寶展示雷射切割 |珠寶攤 |耳環架 |珠寶架 |CNC 檔案

11
57

雷射切割展示架 - 3mm 木頭

141
901

$2.10
$2.10
积分210
3D 珠寶架。耳環收納盒雷射裁剪。波希米亞風格的配件展示。配件收納。掉落耳環架。飾品盤
4

蝴蝶耳環架

19
98

支撐 bijoux arbre / 雷射切割木製飾品耳環架

57
291

木製耳環展示架 |雷射切割飾品架 |前台女性剪影組織者 |耳環展示

41
141

木製手機蓋雷射切割
4
25

耳環展示板
8
37

Xtools 遙控支架 - 不到一塊板子,且是用 F1 Ultra 製作

4
26