


举报
![[Laser cut and engrave] Laser Cut Wooden Monitor Stand Riser with Cable Management](https://storage-us.atomm.com/resource/xtool/community/attachment/xtool-community/6f2bbb36-6944-461a-b935-21ef3336d1a9.jpeg?x-oss-process=image/resize,w_1200,h_900,limit_0/interlace,1/format,webp/auto-orient,1)
![[Laser cut and engrave] Laser Cut Wooden Monitor Stand Riser with Cable Management](data:image/png;base64,iVBORw0KGgoAAAANSUhEUgAAAAoAAAAKCAYAAACNMs+9AAAAAXNSR0IArs4c6QAAABdJREFUKFNjZCASMBKpjmFUId6QIjp4AAppAAuXjCs4AAAAAElFTkSuQmCC)
![[Laser cut and engrave] Laser Cut Wooden Monitor Stand Riser with Cable Management](https://storage-us.atomm.com/resource/xtool/community/attachment/xtool-community/6f2bbb36-6944-461a-b935-21ef3336d1a9.jpeg?x-oss-process=image/resize,w_200,h_150,limit_0/interlace,1/format,webp/auto-orient,1)
![[Laser cut and engrave] Laser Cut Wooden Monitor Stand Riser with Cable Management](https://storage-us.atomm.com/resource/xtool/community/attachment/xtool-community/3aa3347c-4a1e-4ae9-b7c2-cdfbaf75e938.jpeg?x-oss-process=image/resize,w_200,h_150,limit_0/interlace,1/format,webp/auto-orient,1)
S1 的材料销钉架
 教程
教程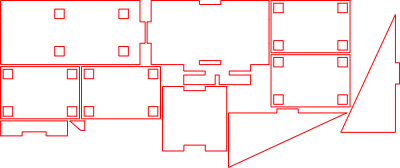
Pinholder S1
.xcs
应用场景
激光加工
机器与模块
xTool S1
40W兼容的 · 9
使用的材料

3mm中密度纤维板
11
245
教程
1
步骤1: 激光切割所有部件

预览
激光切割你选定材料上的所有必需部件。
2
步骤2: 安装第一侧墙

预览
像图片所示,把第一侧墙粘到底板上。
3
步骤3: 安装第二侧墙

预览
将第二侧墙粘牢,仔细对齐。
4
步骤4: 安装后墙

预览
将后墙粘贴到组件上,如图所示。
5
步骤5: 粘上小侧边元件

预览
把小侧面元件粘到底板上。
< data-start="1185" data-end="1236">注:图像中位置清晰显示。
6
步骤6: 加入小的加固件

预览
将较小的加固部分粘合到位,如图所示。
7
步骤7: 组装销钉座块

预览
将四块相同的板子粘合在一起,确保它们完全对齐且齐平。
8
步骤8: 安装销钉座块

预览
将组装好的块子粘到大板上,精确对齐
9
步骤9: 最终组装

预览
按照图片所示,将完成的单元粘到底板上。
10
步骤10: 即用

预览
将材料销插入指定孔中——卡座现在已准备好使用。
11
步骤11: 把销钉座安装到xTool S1上

预览
稍微抬起xTool S1,从侧面滑入材料销钉夹。小心地将机器放下,使夹具牢牢夹在下面。
确保支架位于机器双脚之间,而不是直接在脚下。
评论


