Report
![[Laser cut and engrave] Fall Welcome Hanger](https://image-res.atomm.com/resource/xtool/community/attachment/xtool-community/b2a6214b-5ff4-4ada-88d1-a6aefd72d98a?x-oss-process=image/resize,m_fill,w_1280,h_960,limit_0/interlace,1/format,webp/auto-orient,1)
![[Laser cut and engrave] Fall Welcome Hanger](data:image/png;base64,iVBORw0KGgoAAAANSUhEUgAAAAoAAAAKCAYAAACNMs+9AAAAAXNSR0IArs4c6QAAABdJREFUKFNjZCASMBKpjmFUId6QIjp4AAppAAuXjCs4AAAAAElFTkSuQmCC)
![[Laser cut and engrave] Fall Welcome Hanger](https://image-res.atomm.com/resource/xtool/community/attachment/xtool-community/b2a6214b-5ff4-4ada-88d1-a6aefd72d98a?x-oss-process=image/resize,m_fill,w_160,h_120,limit_0/interlace,1/format,webp/auto-orient,1)
![[Laser cut and engrave] Fall Welcome Hanger](https://image-res.atomm.com/resource/xtool/community/attachment/xtool-community/afa336b9-f0da-4013-8ffa-76e5d4e357de/_DesignFind%20Template%20(28).png?x-oss-process=image/resize,m_fill,w_160,h_120,limit_0/interlace,1/format,webp/auto-orient,1)
![[Laser cut and engrave] Fall Welcome Hanger](https://image-res.atomm.com/resource/xtool/community/attachment/xtool-community/f035221a-e13c-4258-a681-d4a8b5948c9f/5F02B7CB-FAFC-44E9-9B87-1930603DCE81_1_102_a.jpeg?x-oss-process=image/resize,m_fill,w_160,h_120,limit_0/interlace,1/format,webp/auto-orient,1)
Fall Welcome Hanger
 Instruction
Fall Welcome
.xcs
Application scenario
Laser processing (45min)
Machine & module

xTool M1
10WCompatible xTool Machine
P3
F2
F2 Ultra UV
F2 Ultra(Single)
F2 Ultra
F1 Ultra
F1
F1 Lite
S1
P2S
P2
M1 Ultra
D1 Pro 2.0
D1 Pro
D1
Laserbox
M2
Material used

1/8"(3mm) Basswood Plywood

79
1975
Instruction
1
Step1: Open the File and Pick an Option

Preview
- Open the file XCS
- When I was designing this I thought hey this would look good either way so I kept the option open for it to go either way.
- This design was really simple to make
- I brought in a lot of fall graphics and united them to a frame held together by the outline of “welcome”
2
Step2: Option 1: Backing Board

Preview
I made two options for this file.
The first option has a backing board that you can glue the the layers on.
3
Step3: Option 2: Just the Cut out

Preview
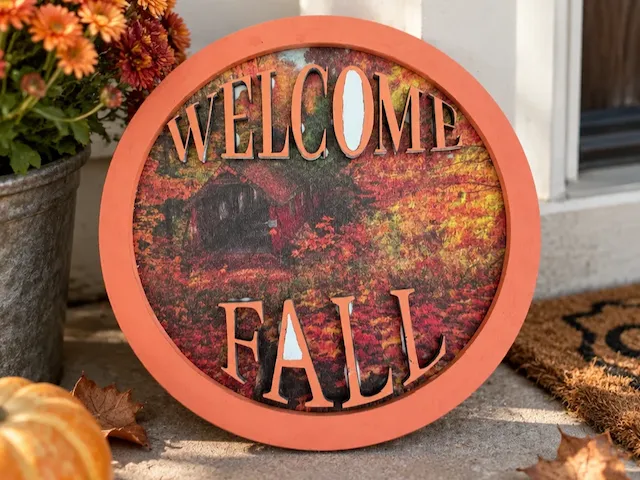
The second option is like how shown in the photos.
I shouldn't have stained this so dark, I didn't take into consideration my dark door or could have gone back and cut the backer board and done the 1st option.
4
Step4: Laser

Preview
- Auto measure you material
- make sure all objects are set to cut
5
Step5: Paint & Assembly

Preview

Preview
I wanted to keep this really simple
I would do this differently I would have just left the frame bare and just stained the welcome rather than the final way shown in photos.
But I love there are so many things you can do with this design! Have at it!
Comments
Remixes
License



You may also like

Hello Autumn Door Hanger

22
49

Fall Door Hanger
20
42

Welcome hanger with decorative leaves
6
21

'tis the season ... hello Fall Door Hanger
11
33

$1.90
$1.90
$3.80
Credits190
Laser Cut Wooden Fall Door Hanger Welcome Sign with Gnome

2

$2.49
$2.49
$8.30
Credits249
Hello Fall Round Wooden Door Sign with Pumpkin and Leaf Accents

6

Hello Pumpkin Door Hanger
29
77

$2.49
$2.49
$8.30
Credits249
Hello Fall Round Wooden Door Sign with Maple Leaf Accents
5

$2.49
$2.49
$8.30
Credits249
Round Welcome Door Sign with Autumn Maple Leaf Motif
4

$0.99
$0.99
Credits99
Squirrel Welcome Sign SVG - Round Door Hanger Laser Cut File - Fall Welcome Sign SVG, Laser Cut Door Sign

1

Laser Cut Wooden Hello Fall Round Door Sign with Bow and Flowers

3
14

Autumn wreath with leaves - Welcome

1
15

Welcome Round Door Sign with Pumpkin and Sunflower Fall Motif

37
486

$1.50
$1.50
Credits150
Round Welcome Pumpkin Wall Hanging Signs for Autumn

2
Welcome Fall print and cut

1
1

$2.61
$2.61
$8.70
Credits261
Hello Fall Round Door Sign with Autumn Pumpkin Motif
10

$1.80
$1.80
$9.00
Credits180
Fall Welcome Door Sign SVG – Perfect for Autumn Home Décor

0

Hello Fall Round Hanging Sign with Pumpkin and Autumn Leaves
36
683