![[Laser cut and engrave] How I Make Badges - Easter Egg Hunt Souvenir](https://image-res.xtool.com/resource/xtool/community/attachment/xtool-community/2a1750df-c623-42f6-9d3b-6b84e568e76d?x-oss-process=image/resize,w_1200,h_900,limit_0/interlace,1/format,webp/auto-orient,1)
How I Make Badges - Easter Egg Hunt Souvenir

Information
This is how I make enamel pin style badges. This year I am making them to give to my family as they finish their orienteering easter egg hunt.
Instruction
Step1: Come Up with a Design for your Badge
First I need to come up with a design for my badge.
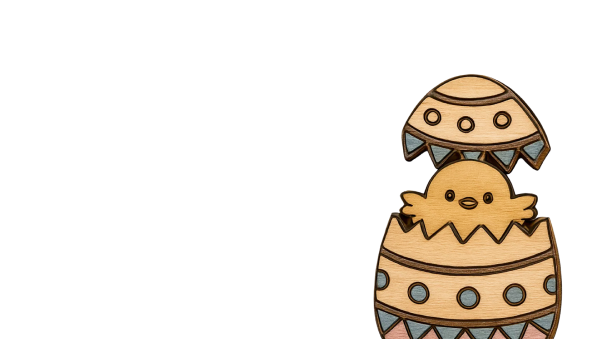
This year I am setting up an orienteering easter egg hunt where they have to follow a map around my grandparents farm, and I thought it would be nice for everyone to get a badge at the end to remember it by. I thought an egg with contour lines and a date would look good.
Step2: Draw Design (or find an image on the internet)
So I screenshotted a picture of an egg and took it into procreate, traced the outside and then drew my contour design on the inside with a brush that has lots of smoothing.
I also drew the date at the bottom.
I made sure to draw everything in black and white, but I varied the thickness of the lines to get some variation.
Alternatively, you can find a drawing on the internet. I would typically go to google images, type what I'm looking for followed by ‘vector’. Black and white images without watermarks tend to look best.
Step3: Bring into XTool Creative Space and Adjust the size
I exported or screenshotted my drawing, and brought it into XCS using the image button.
I like my badges to be about 3cm tall, so I clicked on my image, went to object properties and set the height ‘H’ to 30mm. I made sure to lock the aspect ratio (the button to the right of the dimensions) to make sure that my egg didn't get squished.
Step4: Remove Background
To help the software draw a line around our badge, we need to remove the white background around the edge.
To do this, click on the image, click on edit image, then select the magic wand tool, and finally click on the white boarder around the edge of your image, and it should disappear.
Don't worry about removing the background anywhere else, the software just needs to know where the edge of the drawing is.
Then click save.
Step5: Outline
We want the laser to engrave our image, but we also want it to cut around the outside.
To do this, we need to click ‘outline’.
It will then bring up an option to say how far the outline is from the drawing ('offset distance'). You can pick what you think looks nice, sometimes a big border looks good, sometimes you don't want any.
Type in your outline offset (I chose 0.2mm as I didn't want much of a border), and deselect add inner outline (we don't want any holes in our badge).
Click okay
Step6: Optional: Trace image
Depending on the quality of your image, you might want to trace it. This converts the pixels into vectors, which makes the edges of the lines much clearer. This might also be a good choice if you picked your image from the internet.
To do this, select your image and click ‘trace image’.
I usually keep all three settings quite high, to get some nice smooth lines.
Then click save.
You don't have to trace the image, you can just use Bitmap Laser Engrave.
Step7: Engrave Settings
For my wood I am using jumbo paddle-pop sticks as these are a bit thinner than the 3mm plywood, but I also often use 3mm plywood.
Select your image and choose engrave.
The way the engraving looks will change a lot depending on where you get your material from.
I tend to use quick speeds (so I can get lots done) and high enough power to get nice lines without charring. You want the lines to be deep enough that the paint can go over the top.
>200 lines per cm means that you can't really notice the layers.
Step8: Cut Settings
Click on your outline, and select cut. You might have to test cutting settings for your wood, mine works fastest and cleanest with these settings.
Step9: Load Material
I place my wood in the laser machine, on top of the triangular prisms so that they get good airflow, making sure that the red measuring dot is on top of the wood.
I then click ‘auto-measure’ to measure the height (make sure this looks reasonable), and make sure to select the height raised to triangular prisms.
Step10: Placement and Cutting
I like to group the drawing and outline together, so they stay together when moving around.
Drag the design to where you want to cut it out on the wood. Always then do a ‘framing’ test to check that where it says on the camera lines up with where it is actually going to be, and finally click process.
Press start, and then press the play button on the front of the machine.
Step11: Colouring
I usually go around the edges of my cut with an alcohol wipe to remove any soot.
I like my badges to be nice and colourful so I paint them with paint markers (poska pens). I use pens with a reasonably small tip so that I can paint detail. The best thing about them is that they just go over the top of the engraving lines, so the drawing you engraved comes out very bold.
Step12: Badge Backing
Finally, glue the badge backing onto the back of the badge. Higher placement is better so that the centre of gravity is below the pin, keeping the badge in the right orientation.
I make lots of these badges for all sorts of things. They are super easy and look great :)
