


![[Laser cut and engrave] Be Mine Heart Shape Box with Chocolate Covered Strawberries](https://image-res.xtool.com/ali-res/community/making/5556c0e0-6810-445f-8033-ba0cc53c0090.png?x-oss-process=image/resize,w_1200,h_900,limit_0/interlace,1/format,webp/auto-orient,1)
![[Laser cut and engrave] Be Mine Heart Shape Box with Chocolate Covered Strawberries](data:image/gif;base64,R0lGODlhAQABAAAAACH5BAEKAAEALAAAAAABAAEAAAICTAEAOw==)
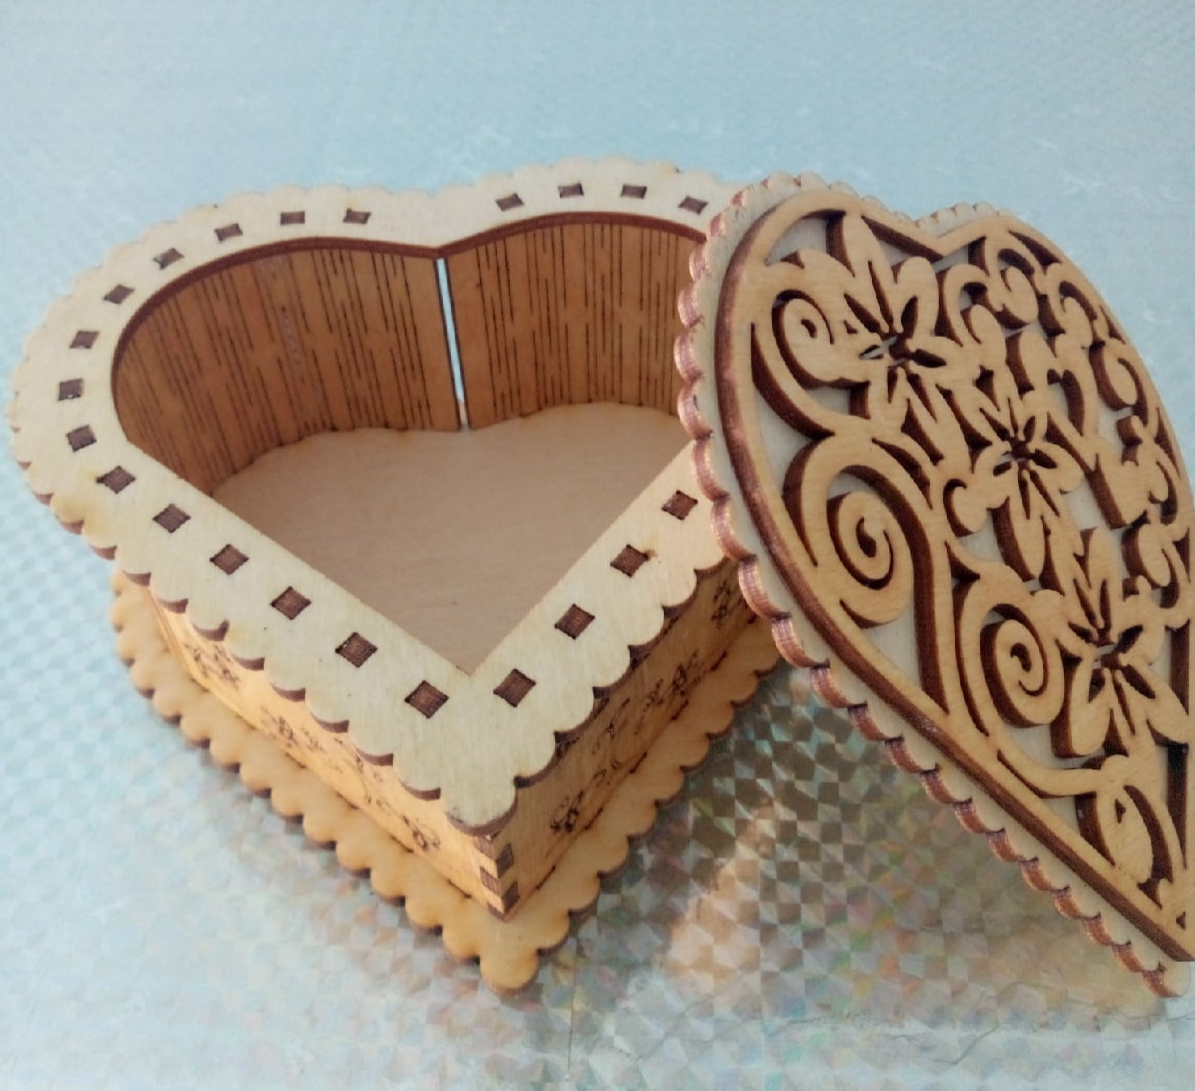
Be Mine Heart Shape Box with Chocolate Covered Strawberries
 Instruction
Information
I used to work at a chocolate store, Chocolate Covered Strawberries are the most popular Valentine's gift ever, not only it tastes great, and are pretty to look at. I made tons of chocolate-covered strawberries back then, and now here I am sharing my laser version of the chocolate-covered strawberry.
Instruction
Step1
Strawberry
Step 1: Design
Strawberry designs are drawn with Procreate App, saved as PNG, then uploaded to Silhouette Studio, then with the "Trace" function, to do the tracing and convert them to vector images.
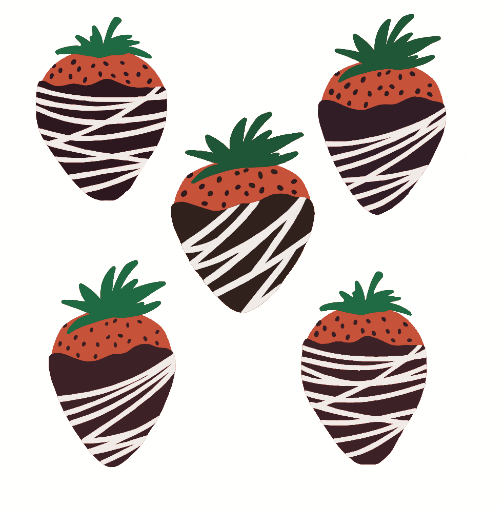
For each strawberry, 5 images are created:
leaves,
a whole strawberry outline, and
a whole strawberry outline with the seeds cut out,
chocolate, and
chocolate drizzle.
Then save them in SVG format.
Step2
Strawberry
Step 2: Laser cut the design
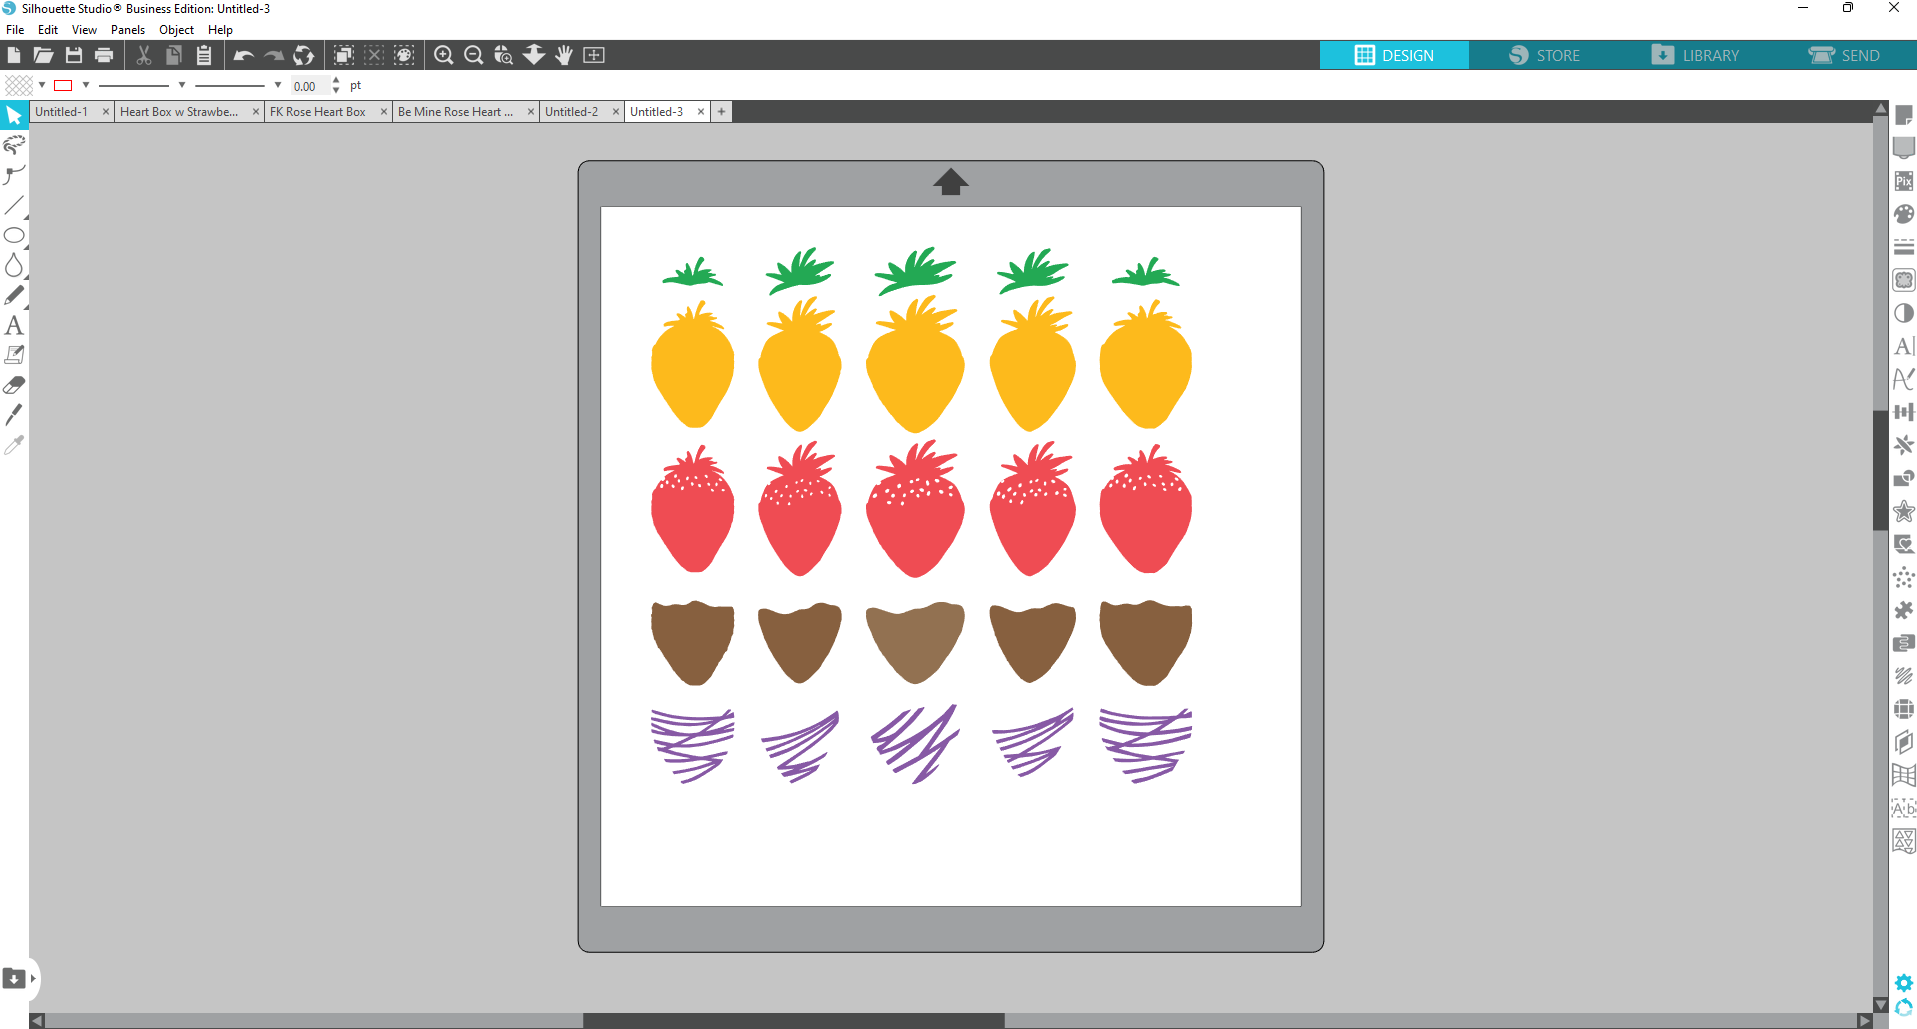
- Load SVG file onto xTool Creative Space
- Turn on M1, air purifier, and air assist, and load the material into the machine
- Auto-measure the material, then enter the setting, and for cardboard, I always use "70/10/1" with the "Score" function. For 1.5mm basswood, I use "100/4/1" with the "Cut" function, and for 3mm basswood, I use "100/5/2" with the"Cut" function.
- Proceed to cut.
- To give a 3D look for the strawberry, one set of 5 images is cut, then flip them horizontally, cutting another set of 5 images.
- For the drizzle, the chipboard or cardstock is recommended
- And if you decided to use wood, I use 1.5mm basswood for the leaf, the seed cutout strawberry outline, the chocolate, and the drizzles, then I cut some whole strawberry outline with 3mm Basswood to build the thickness of the strawberry.
.png)
Step3
Strawberry
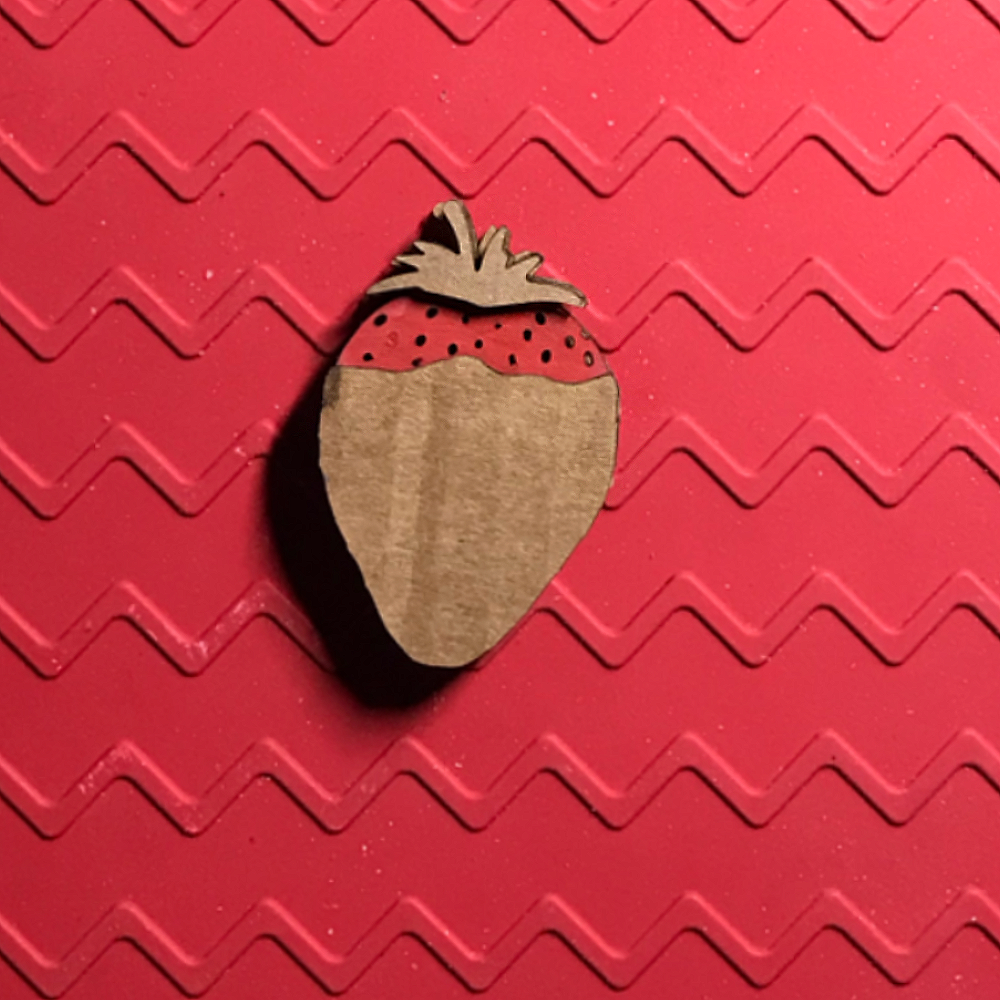
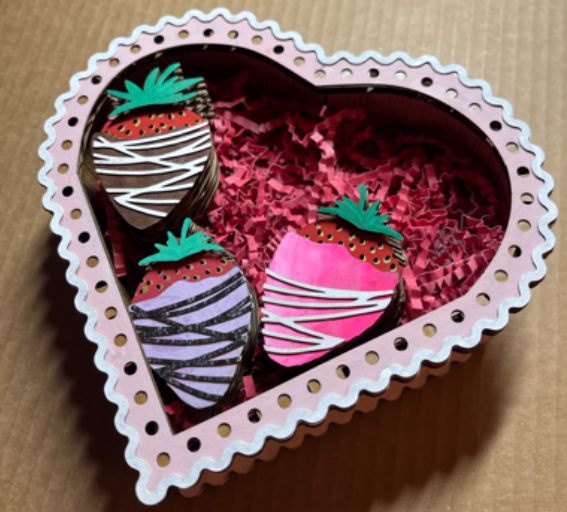
Step 3: Colored and Assembly
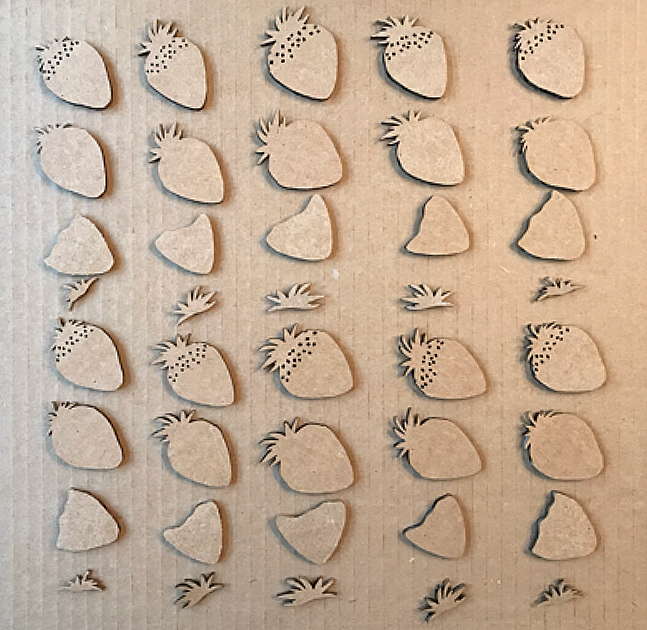
- Glue the 2 pieces of the whole strawberry outline back to back, and then glue the whole strawberry outline with seeds cut out on either side of the outline pieces
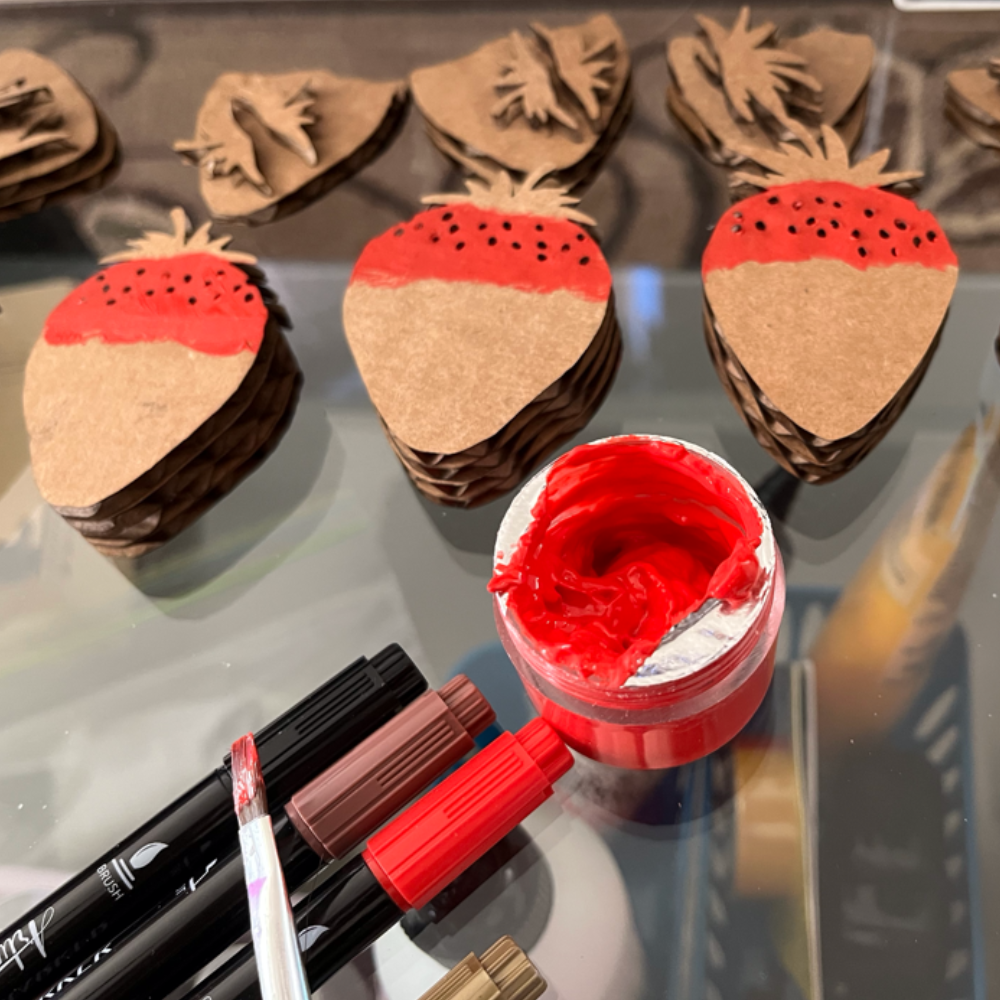
- Color the top part of the strawberry red, after dried, I add some gold color around one side of the seed cutout, to create more depth
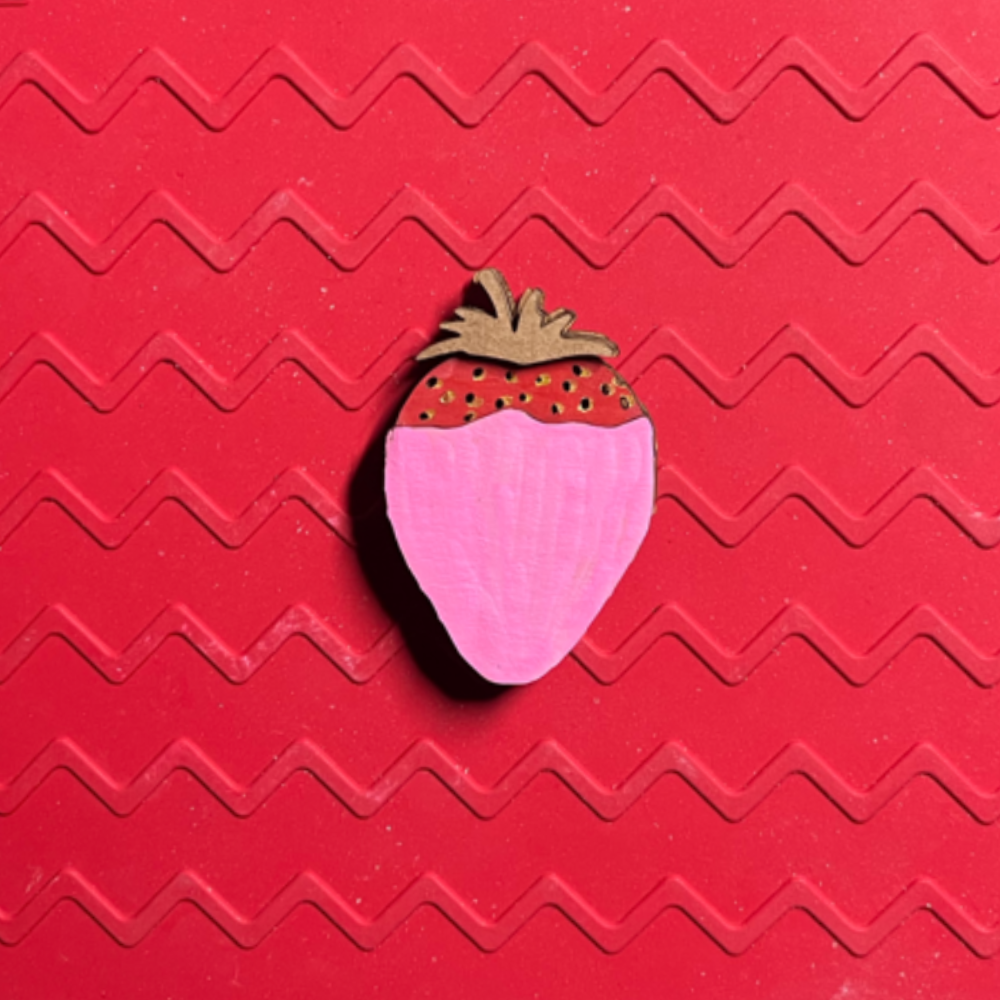
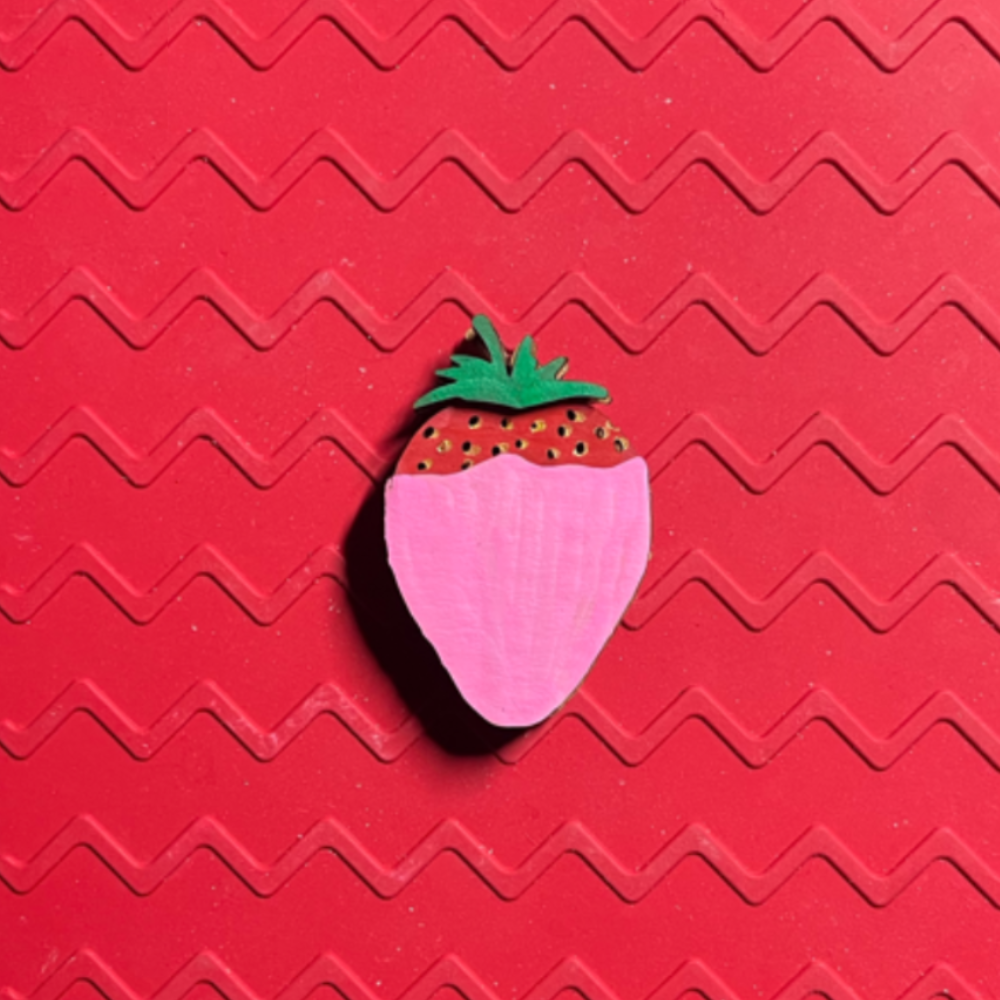
- Glue the chocolate and leaves on both sides of the strawberry
- Go ahead and color the chocolate and the leaves
- Add the drizzled decorations
- For the wood version, I paint the side as well.
.png)
.png)
Step4
Build the Box
Step 1: Basic Structure
There are a few box maker apps online, it helps to build boxes fairly easily, but I haven't found one to build a heart shape box, but I found quite a fell heart shape boxes on 3axis.co, so I decided to pick one to give me the base and modify it to make it my own, here is the one I decided to use (https://3axis.co/laser-cut-wooden-heart-shaped-box-cdr-file/lopqgq67/).
Step5
Build the Box
Step 2:
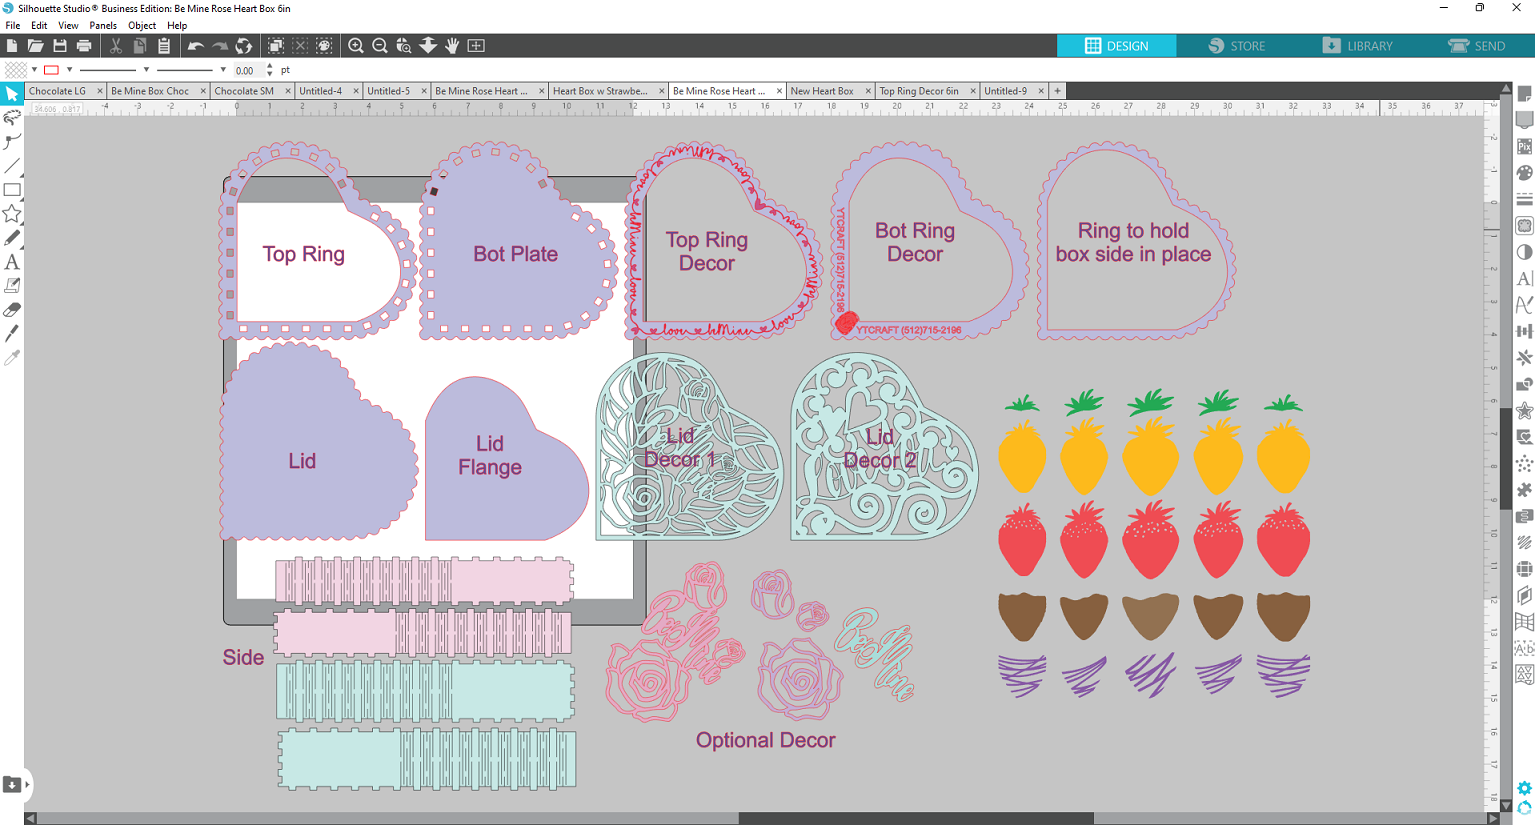
- Load the basic box file onto Silhouette Studio
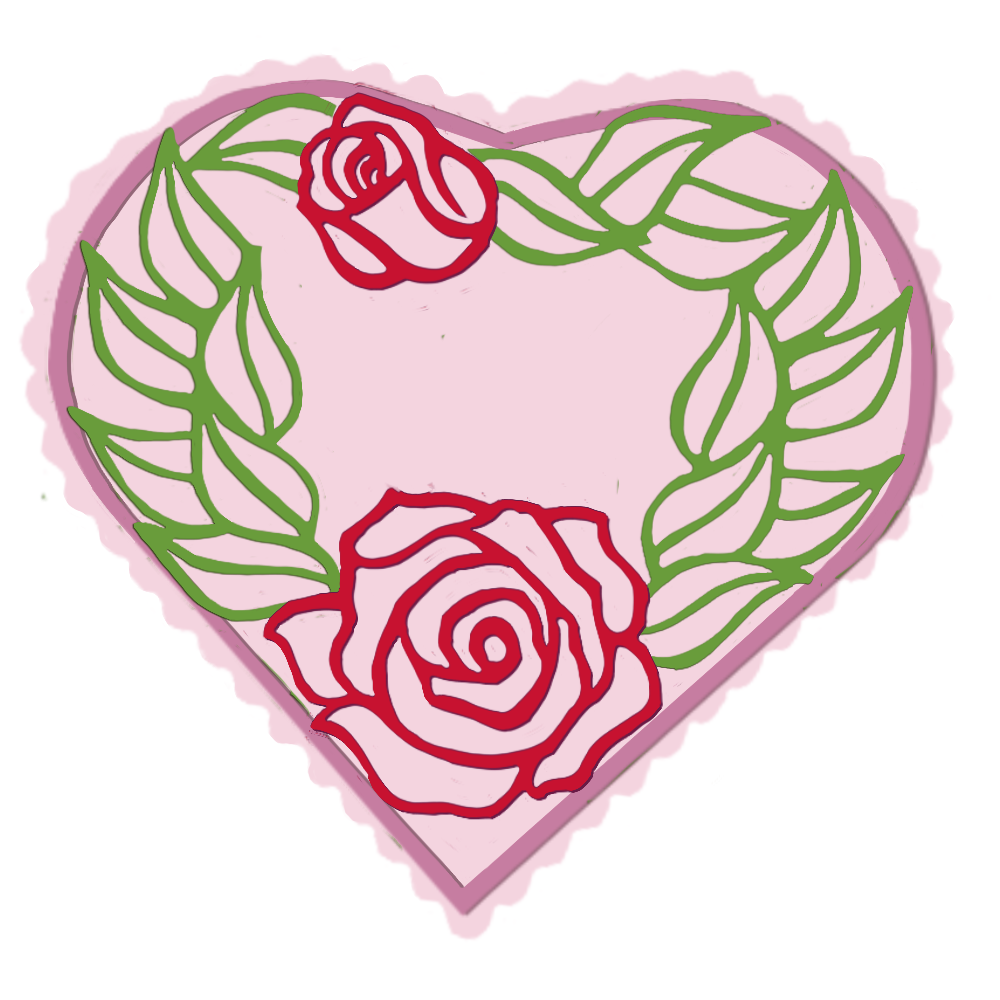
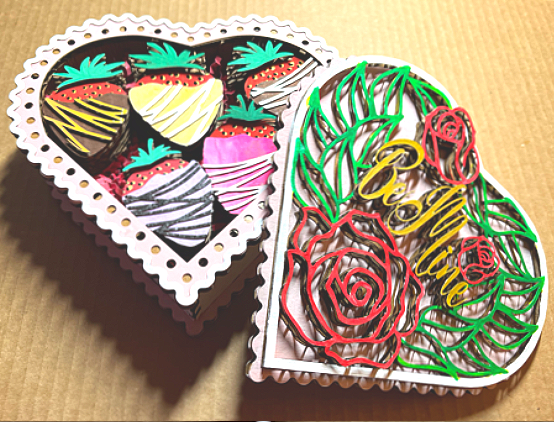
- Using Procreate App to create a design for the lid, I drew a rose design, save it to PNG
- Load the png to Silhouette Studio, using the "Trace" function, and convert the design to vector format
- I did leave a space in the rose design for a customized option, for variations, I made two options here, of course, one is with "Be Mine" and the other is with "Love You". You can always change this to a monogram, initials...
- For the top, I also created "Top Ring Decor"s, which acts as extra layers to cover the holes of the finger joins
- For the bottom, I also created "Bot Ring Decor", to cover the holes of the finger joins, if you are selling your creation, you can add your logo, phone number, and website address...
- For the lid, I add a smaller heart shape and glue it to the inner side of the lid to act as a flange to help the lid to stay in place
- Some extra decorative elements to enhance the design, are totally optional. For instance, I added an extra layer for the "Be Mine" and "roses", then on top of that, I add another layer of the roses, to build thickness and create extra depth.
Of course, save the design to SVG format
- In the original box design, the size of the holes for the sides is a little too large for the material I am using, instead of changing the size of those holes, I created a ring that you glue to the right side of the Bot Plate and glued another one to the wrong side of the Top Ring, this will cover part of those holes, so push the side to the right place.
- I use 3mm basswood for the stability of the basic box structure, which are the side, the bot plate, the top ring, the lid, and the flange. For the rest of the pieces, I use 1.5mm basswood.
Step6
Build the Box
Step 3: Laser Cutting
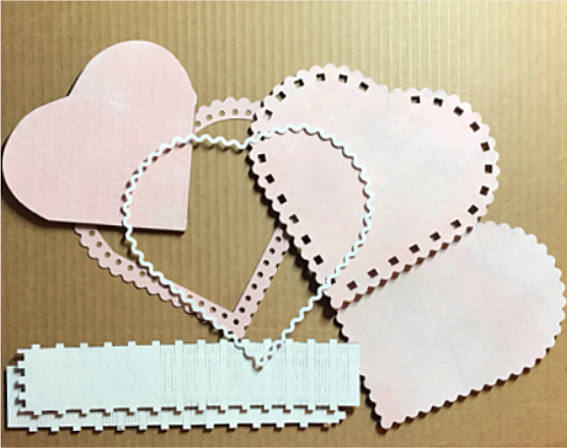
Again load the design to xTool Create Space, with the same setting 70/10/1, "Scor" function, to cut out all the pieces in cardboard. Or if you choose to make it in wood, I use the "Cut" function, with the setting of 100/4/1 for 1.5mm basswood and 100/5/2 for 3mm basswood.
.png)
.png)
.png)
Step7
Build the Box
Step 3: Color and Assembly
- Color all the pieces whatever your heart desires
- Glue the side holding ring to the right side of the Bot Plate, and the wrong side of the Top Ring
- Glue the two side pieces onto the bottom plate
- Glue the top ring onto the other side of the sidepieces. So the base of the box is done
- Glue the top ring decor onto the top ring, the bot ring decor onto the bottom
- Glue the Lid Flange onto the bottom side of the lid
- Glue the Lid decore onto the topside of the lid
.png)
.png)
.png)
.png)
.png)
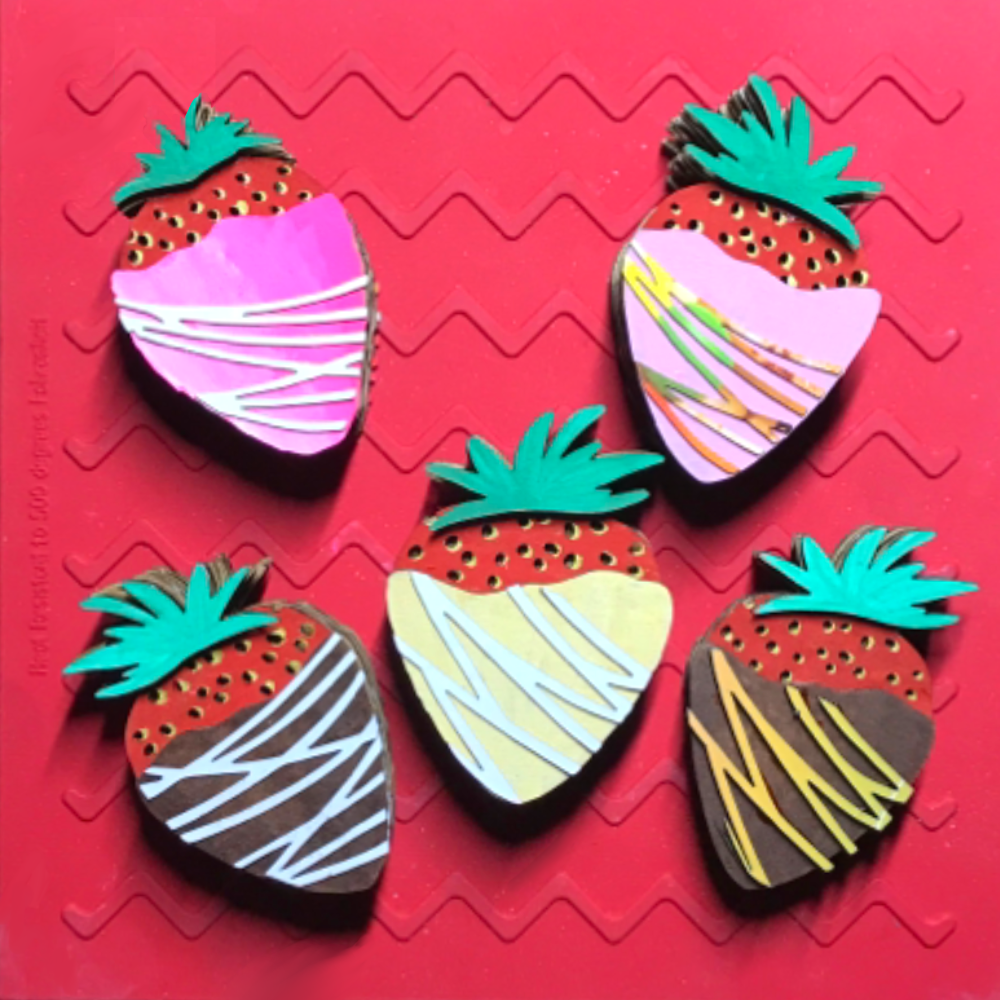
Step8
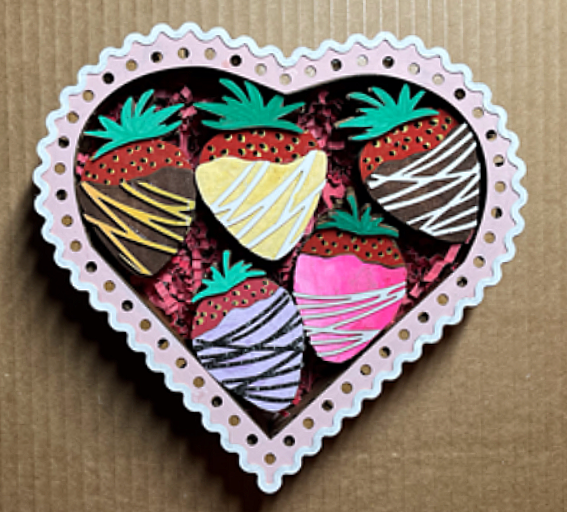
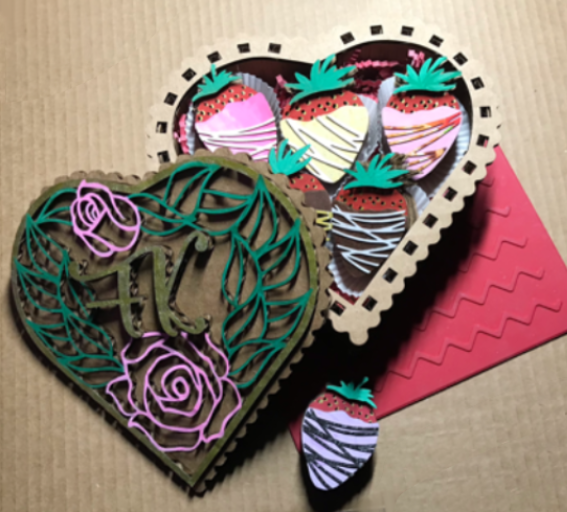
Arrange and box the strawberries and get this unique Valentine's gift ready
.png)
.png)