
Report
![[Laser cut and engrave] Laser Cut Wooden Geometric Circle Earrings](data:image/gif;base64,R0lGODlhAQABAAAAACH5BAEKAAEALAAAAAABAAEAAAICTAEAOw==)
Horizon Soleil – Cercles & lignes ajourés || Horizon Sunrise – Openwork Circles & Lines
 Instruction
Untitled
.xcs
Application scenario
Laser processing
Machine & module
xTool S1
10W, 20W, 40WxTool M1 Ultra
20WxTool D1
10W, 20WxTool D1 Pro
10W, 20W, 40WCompatibles · 11
Material used

1/8"(3mm) Maple Plywood
23
182
Information
      🇫🇷 Description

Jeu d’arcs et de lignes horizontales qui évoquent l’horizon et un soleil levant. Les ajours fins allègent la pièce et créent un rythme graphique très art déco / minimal. Découpées au laser dans du contreplaqué de peuplier 3 mm, avec œillet intégré ; ultra légères et faciles à personnaliser (teinte, vernis, dorure).


🇬🇧 Description

A play of arcs and horizontal lines that suggests a rising sun on the horizon. Fine cutouts keep it ultra-light with a clean art-deco / minimal rhythm. Laser-cut from 3 mm poplar plywood with an integrated eyelet; easy to customize with stain, clear coat, or gold accents.
Instruction
1
Step1
FR
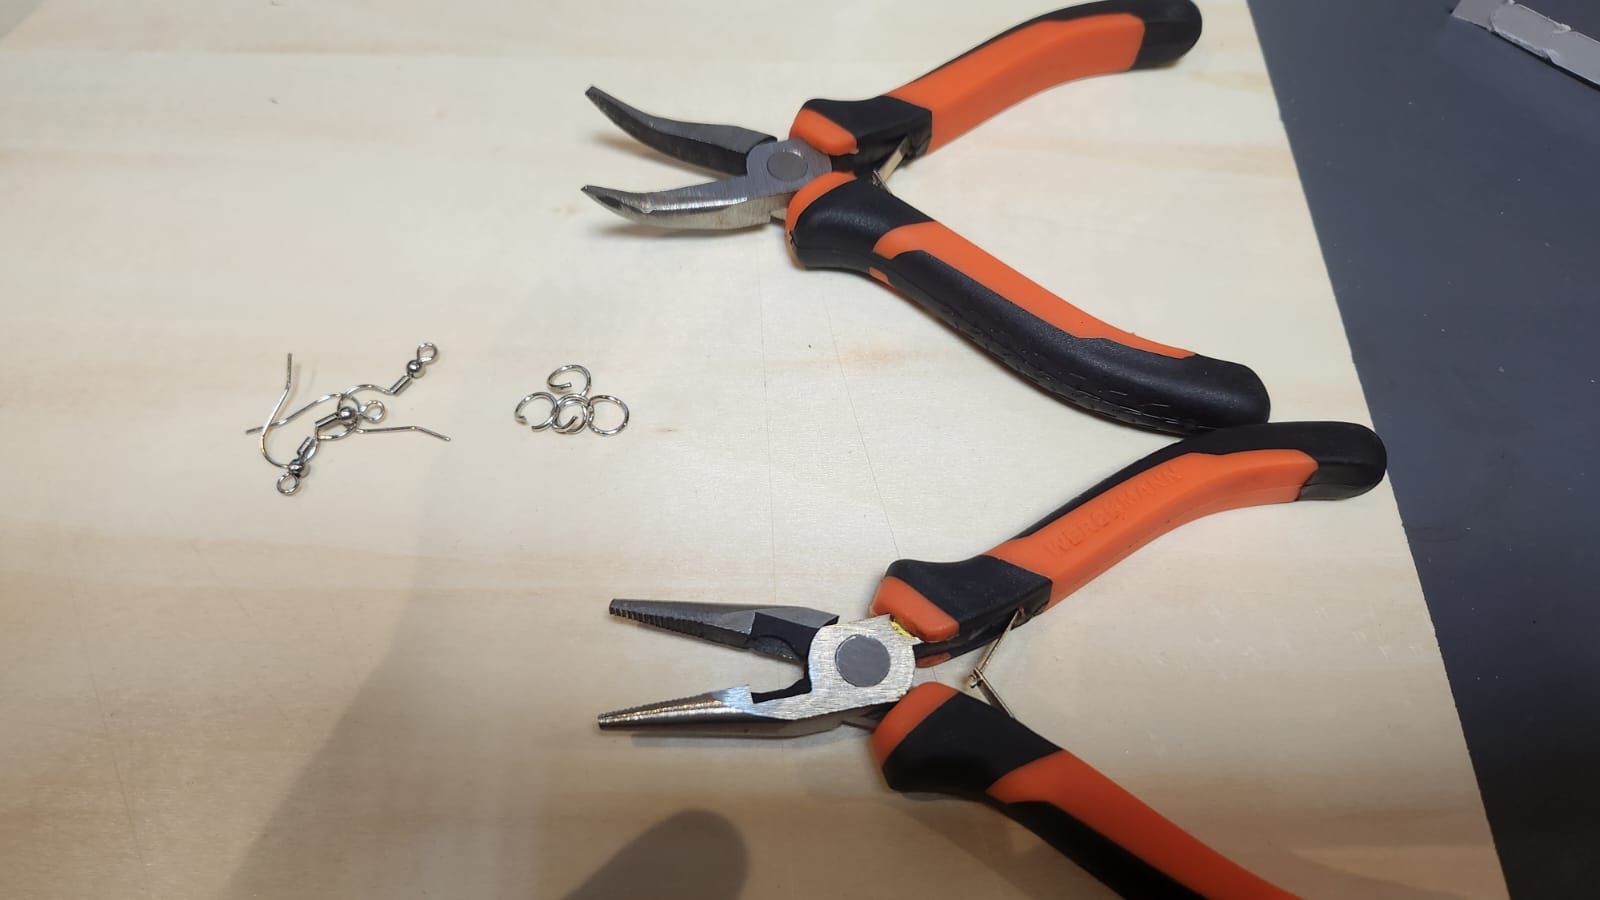
1) Matériel nécessaire
- 2 pinces (plate + ronde)
- Contreplaqué de peuplier 3 mm bien plat
- Anneaux de jonction 6–8 mm
- Crochets d’oreilles en acier inox ou argent 925
EN
1) Materials needed
- 2 pliers (flat + round nose)
- 3 mm poplar plywood, flat and clean
- Jump rings 6–8 mm
- Ear hooks in stainless steel or 925 silver
2
Step2
FR
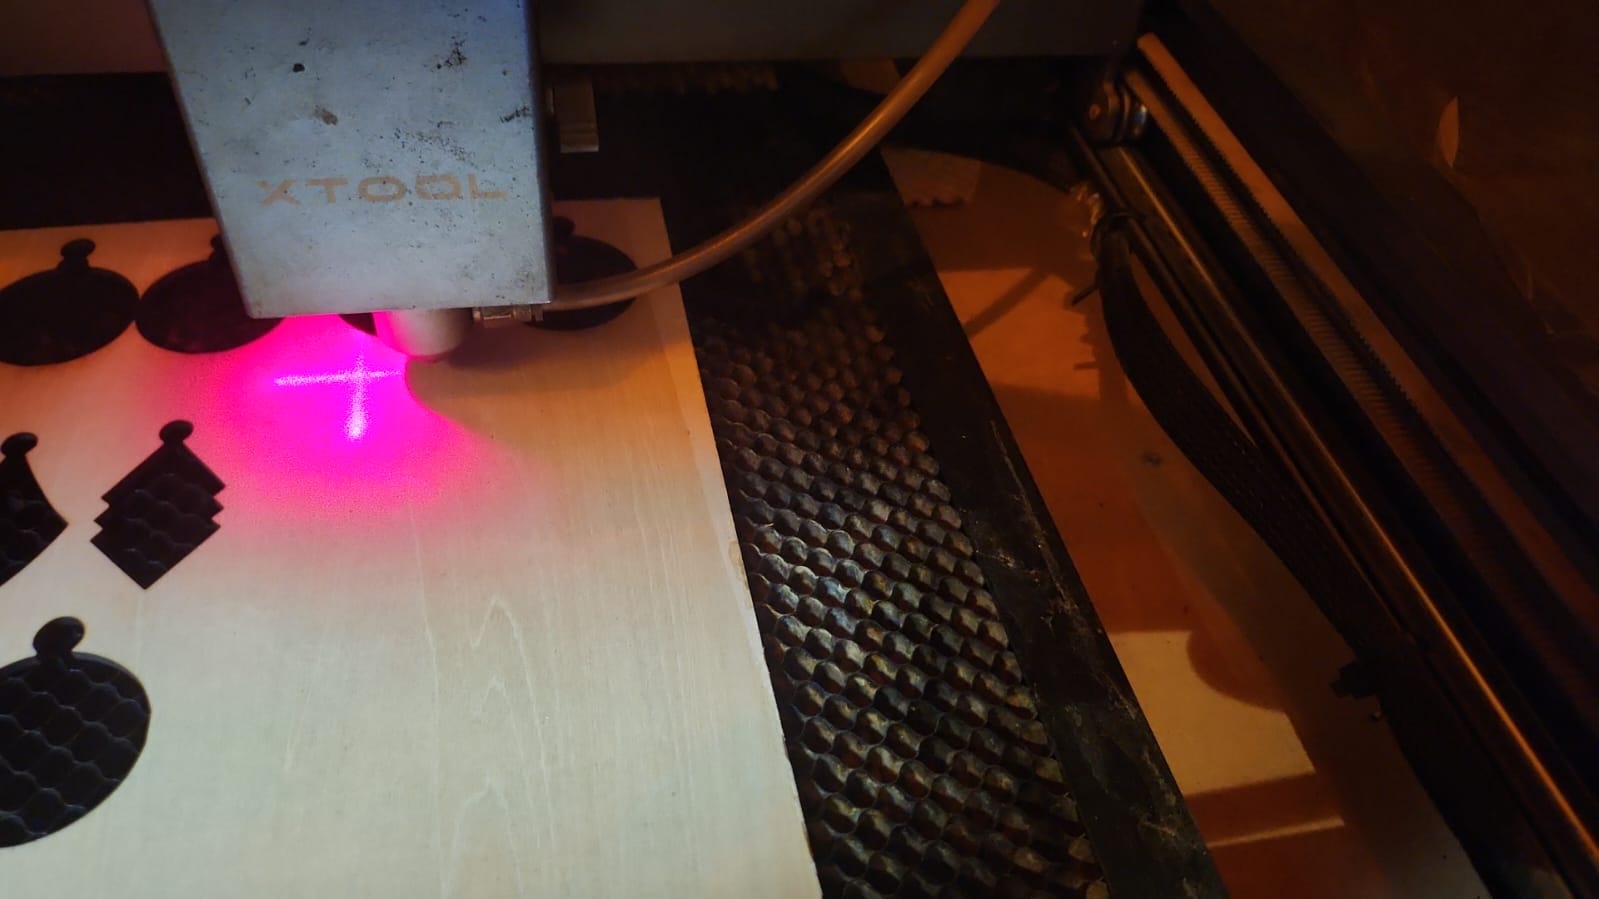
2) Installation dans le laser, réglage et découpe
- Importer le fichier dans xTool Creative Space (ATOMM) et vérifier l’échelle : hauteur 55–60 mm, trou 1,8 mm.
- Mode Laser Flat, matériau Plywood 3 mm.
- Poser sur nid d’abeille et caler la plaque (aimants/pinces). Option : ruban de masquage sur la face visible.
- Focus à 3 mm ; Air Assist ON.
- Couche découpe : vecteurs 0,01 mm, sans remplissage.
- Paramètres 20 W : 100 %, 6 mm/s, 1 pass. Surveiller en permanence.
- Vérifier que les pièces se détachent proprement ; si besoin, refaire une seconde passe identique (uniquement si la coupe n’est pas traversante).
EN
2) Laser setup, settings & cut
- Import the file into xTool Creative Space (ATOMM); verify scale: height 55–60 mm, hole 1.8 mm.
- Use Laser Flat, material Plywood 3 mm.
- Place the sheet on the honeycomb, secure it (magnets/clamps). Optional: painter’s tape on the visible face.
- Set focus to 3 mm; Air Assist ON.
- Cut layer: vectors 0.01 mm, no fill.
- 20 W settings: 100 % power, 6 mm/s, 1 pass. Monitor at all times
- Parts should drop out cleanly; if not, run one identical second pass only if needed.
3
Step3
FR
3) Montage des boucles & personnalisation
- Dégager les pièces, retirer le ruban, nettoyer les chants (alcool iso), ponçage très léger si besoin.
- Protection : vernis mat/incolore ou huile fine.
- Avec les 2 pinces, ouvrir un anneau 6–8 mm latéralement, l’insérer dans l’œillet, ajouter le crochet, refermer dans l’axe.
- Personnalisation : teinte/peinture acrylique, cire colorée, dégradés légers, ajout d’une perle sur l’anneau, ou lasure qui laisse le veinage.
EN
3) Assembly & customization
Remove tape, wipe edges (isopropyl alcohol); very light sanding if needed.
Seal with clear matte varnish or a light oil if desired.
With two pliers, open a 6–8 mm jump ring sideways, thread the eyelet, add the ear hook, and close in line.
Customize with stain/acrylic paint, subtle gradients, a bead on the ring, or a thin wood finish that keeps the grain visible.
Comments

