![[Laser cut and engrave] Flying Seagull Mobile](https://storage-us.atomm.com/resource/xtool/community/attachment/xtool-community/d443f2a6-77fd-4551-85ed-66f7b9d2d8b1.png)
![[Laser cut and engrave] Flying Seagull Mobile](https://storage-us.atomm.com/resource/xtool/community/attachment/xtool-community/89f2f6dd-fb5b-484c-9ac4-86723e1a10f0.jpg?x-oss-process=image/resize,w_200,h_150,limit_0/interlace,1/format,webp/auto-orient,1)
![[Laser cut and engrave] Flying Seagull Mobile](https://storage-us.atomm.com/resource/xtool/community/attachment/xtool-community/10458685-c4c1-478a-a50a-e24178c83ab7.jpg?x-oss-process=image/resize,w_200,h_150,limit_0/interlace,1/format,webp/auto-orient,1)
![[Laser cut and engrave] Flying Seagull Mobile](https://storage-us.atomm.com/resource/xtool/community/attachment/xtool-community/1fe4c938-8d90-4854-8368-b836e8e8cfa8.jpg?x-oss-process=image/resize,w_200,h_150,limit_0/interlace,1/format,webp/auto-orient,1)
![[Laser cut and engrave] Flying Seagull Mobile](https://storage-us.atomm.com/resource/xtool/community/attachment/xtool-community/2c1f9e34-abe0-4d54-9a7d-bbdefadedba9.jpg?x-oss-process=image/resize,w_200,h_150,limit_0/interlace,1/format,webp/auto-orient,1)
![[Laser cut and engrave] Flying Seagull Mobile](https://storage-us.atomm.com/resource/xtool/community/attachment/xtool-community/bad6675b-ca7f-4e8f-83ae-18dedd4c80a3.jpg?x-oss-process=image/resize,w_200,h_150,limit_0/interlace,1/format,webp/auto-orient,1)
![[Laser cut and engrave] Flying Seagull Mobile](https://storage-us.atomm.com/resource/xtool/community/attachment/xtool-community/dc3951ec-4b29-4960-a92e-ee12fd19c5a3.jpg?x-oss-process=image/resize,w_200,h_150,limit_0/interlace,1/format,webp/auto-orient,1)
![[Laser cut and engrave] Flying Seagull Mobile](https://storage-us.atomm.com/resource/xtool/community/attachment/xtool-community/923ddda4-5772-4331-8a8b-26a51ba1667e.jpg?x-oss-process=image/resize,w_200,h_150,limit_0/interlace,1/format,webp/auto-orient,1)
![[Laser cut and engrave] Flying Seagull Mobile](https://storage-us.atomm.com/resource/xtool/community/attachment/xtool-community/743d6bed-324f-4316-8a4a-5323bfac222b.jpg?x-oss-process=image/resize,w_200,h_150,limit_0/interlace,1/format,webp/auto-orient,1)
![[Laser cut and engrave] Flying Seagull Mobile](https://storage-us.atomm.com/resource/xtool/community/attachment/xtool-community/4a918990-a3b5-49f0-8fe8-f29bbcce4a99.jpg?x-oss-process=image/resize,w_200,h_150,limit_0/interlace,1/format,webp/auto-orient,1)
![[Laser cut and engrave] Flying Seagull Mobile](https://storage-us.atomm.com/resource/xtool/community/attachment/xtool-community/371b5dcb-2790-4326-a85f-7720e21116a5.jpg?x-oss-process=image/resize,w_200,h_150,limit_0/interlace,1/format,webp/auto-orient,1)
![[Laser cut and engrave] Flying Seagull Mobile](https://storage-us.atomm.com/resource/xtool/community/attachment/xtool-community/d9c8a9ff-2412-4caa-ab9b-21a39c9e8727.webp?x-oss-process=image/resize,w_200,h_150,limit_0/interlace,1/format,webp/auto-orient,1)
Flying Seagull Mobile

Information
      When I was a teacher in the 90s, these birds were all the rage. So I turned it into a school project. Back then, we used a jigsaw, or more precisely, a fretsaw. Now lets make one of these birds again. Without a saw, of course, it’s 2025! A lazy afternoon with the laser and everything is done.

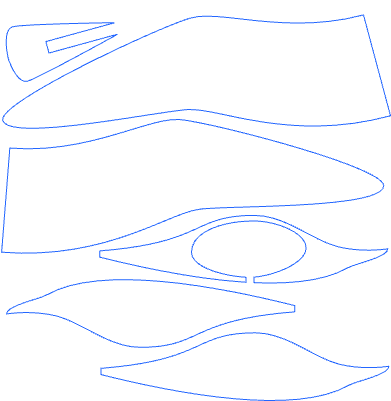
The body consists of three layers. The purpose is the look and something else: This way, I can fill the bird with 100g lead. This allows me to attach the wings closer to the body, which results in a much more realistic, beautiful, and elegant movement. The wings move the most, and the body does not go up and down extremely.

Of course, you can scale the bird however you want. The larger the wingspan, the slower and longer it moves.
Instruction
Step1


My bird has a wingspan of 72 cm, so the wings measure about 36 cm. The board I used was a leftover piece measuring approximately 40 x 40 cm.
The tail has a notch. It must be three times the thickness of the wood. In my case, it was about 11.5 mm.
The three layers of the body are glued together. I filled the bird with 100 grams of lead.
Step2


The wings are attached to the fuselage with ring wood screws. (Four ring wood screws)
Now you have to find the point where you attach the nylon cord. I improvised a kind of gauge. For me, it was 48 mm from the wing root. If you use no or less lead, the distance will be completely different.
Note: The correct distance is very important if you want the bird to hang balanced with approximately horizontal wings when at rest.
You can wrap the nylon cord around the wing and secure it with tape, then try it out to see if you are in the right distance from the body. Once you have done that, drill 1 mm holes in the wings for the thread. I pass the thread through both holes once in a circle so that nothing slips.
At last you need a small piece of wood to attach the nylon to. I make the attachment points slightly wider than the points on the bird.
Step3

The paint job is still pending. Maybe tomorrow. At least I already know how I want it: all white except for the wing tips and the head.


