


![[Laser cut and engrave] Mother’s Day Mini Frame – DIY Laser Gift with MOM, MUM & MAMA Options](https://storage-us.atomm.com/resource/xtool/community/attachment/xtool-community/edc6f9f8-2d44-438e-90fe-46447b2a603d.png?x-oss-process=image/resize,w_1200,h_900,limit_0/interlace,1/format,webp/auto-orient,1)
![[Laser cut and engrave] Mother’s Day Mini Frame – DIY Laser Gift with MOM, MUM & MAMA Options](data:image/png;base64,iVBORw0KGgoAAAANSUhEUgAAAAoAAAAKCAYAAACNMs+9AAAAAXNSR0IArs4c6QAAABdJREFUKFNjZCASMBKpjmFUId6QIjp4AAppAAuXjCs4AAAAAElFTkSuQmCC)
![[Laser cut and engrave] Mother’s Day Mini Frame – DIY Laser Gift with MOM, MUM & MAMA Options](https://storage-us.atomm.com/resource/xtool/community/attachment/xtool-community/edc6f9f8-2d44-438e-90fe-46447b2a603d.png?x-oss-process=image/resize,w_200,h_150,limit_0/interlace,1/format,webp/auto-orient,1)
![[Laser cut and engrave] Mother’s Day Mini Frame – DIY Laser Gift with MOM, MUM & MAMA Options](https://storage-us.atomm.com/resource/xtool/community/attachment/xtool-community/f17d1c64-65b5-4902-91bf-04b609f01c57.png?x-oss-process=image/resize,w_200,h_150,limit_0/interlace,1/format,webp/auto-orient,1)
![[Laser cut and engrave] Mother’s Day Mini Frame – DIY Laser Gift with MOM, MUM & MAMA Options](https://storage-us.atomm.com/resource/xtool/community/attachment/xtool-community/403f8be1-e510-4103-9e29-abb0c66b9717.png?x-oss-process=image/resize,w_200,h_150,limit_0/interlace,1/format,webp/auto-orient,1)
![[Laser cut and engrave] Mother’s Day Mini Frame – DIY Laser Gift with MOM, MUM & MAMA Options](https://storage-us.atomm.com/resource/xtool/community/attachment/xtool-community/7ef5913f-cf7d-49ab-81a4-7ed51aeb20d2.png?x-oss-process=image/resize,w_200,h_150,limit_0/interlace,1/format,webp/auto-orient,1)
![[Laser cut and engrave] Mother’s Day Mini Frame – DIY Laser Gift with MOM, MUM & MAMA Options](https://storage-us.atomm.com/resource/xtool/community/attachment/xtool-community/0fef93c4-0033-4bc7-a49f-38b4f111c124.png?x-oss-process=image/resize,w_200,h_150,limit_0/interlace,1/format,webp/auto-orient,1)
Mother’s Day Mini Frame – DIY Laser Gift with MOM, MUM & MAMA Options
 Instruction
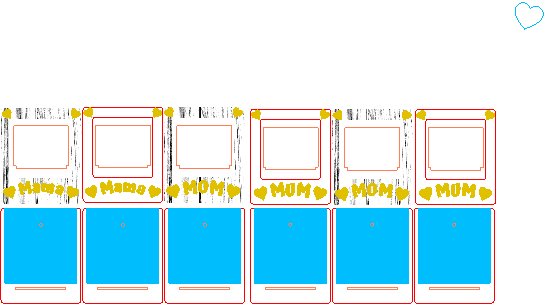

Information
      Celebrate Mother's Day with this beautiful DIY mini frame – available in three versions: MOM, MUM, and MAMA.
You can choose between a clean modern look or a rustic version with engraved wood grain texture. A slot at the top allows you to easily swap out the paper insert, making it perfect for personalized notes or printed artwork.

The frame includes a back hole for wall mounting (e.g. with a nail) and a stand piece for table display – just the way you like it.

Ein liebevolles DIY-Projekt zum Muttertag:
Dieser kleine Holzrahmen ist in drei Varianten verfügbar: MOM, MUM und MAMA – also ideal für unterschiedliche Sprachen oder Kulturen.
Du kannst zwischen einer schlichten Version und einer Variante mit gravierter Holzmaserung wählen.

Dank des Schlitzes oben lässt sich das Papiermotiv ganz einfach austauschen – perfekt für persönliche Botschaften oder Blumendrucke.
Auf der Rückseite befindet sich ein Loch zum Aufhängen (z. B. mit einem Nagel), alternativ kannst du den Rahmen mit dem mitgelieferten Aufsteller schräg auf den Tisch stellen.
Instruction
Step1: Let´s go

Download the file and open it in XCS.
The included settings are for the P2S.
Lade die Datei runter und öffne sie in XCS.
Die mitgelieferten Einstellungen sind für den P2S.
Step2: Place material and adjust

Place the desired material into the laser and adjust the settings for your laser and material if necessary.
Start the cutting and engraving process.
Lege das gewünschte Material in den Laser und passe wenn nötig die Einstellungen für deinen Laser und dein Material an.
Starte den Schneid- und Graviervorgang.
Step3: Cleaning & Flattening


After cutting and engraving, gently clean the engraved inner surface (the part where the paper/photo will be inserted) with a soft brush and a bit of water to remove soot and residue.
If the material has warped slightly due to engraving or cutting, you can flatten it by placing it while still damp between two heavy books or other flat weights until dry.
Nach dem Schneiden und Gravieren die gravierte Innenseite (also den Bereich, wo später das Bild eingeschoben wird) mit einer weichen Bürste und etwas Wasser vorsichtig reinigen, um Ruß und Rückstände zu entfernen.
Hat sich das Material durch Gravur oder Schnitt leicht verzogen, kannst du es feucht zwischen zwei dicken Büchern oder anderen flachen Gewichten trocknen lassen, um es wieder zu glätten.
Step4: Gluing and Final Assembly


After drying, apply wood glue to the contact areas and carefully glue the two frame halves together.
To keep the insert slot open, you can slide in a plastic card (e.g. an old gift card) during gluing.
Then place a few scrap wood pieces on top and underneath, and secure the frame with clamps or rubber bands until the glue has fully dried.
If the frame was still slightly warped, this step will usually straighten it completely.
Nach dem Trocknen etwas Holzleim auf die Kontaktflächen auftragen und die beiden Rahmenteile sorgfältig zusammenkleben.
Damit der Schlitz für das Einlegebild offen bleibt, kannst du eine Plastikkarte (z. B. eine alte Kundenkarte) während des Klebens einschieben.
Anschließend einige Holzreste oben und unten auflegen und das Ganze mit Klammern oder Gummibändern fixieren, bis der Leim vollständig getrocknet ist.
Falls der Rahmen noch leicht gebogen war, wird er durch diesen Schritt in der Regel schön gerade.
Step5: Insert the Picture and Display

After the glue has fully dried, print a custom picture (size: 7 × 7 cm) and slide it into the slot from the top.
Now you can either use the stand to place it on a table or hang it on the wall using the hole at the back – whichever suits your style best.
Nachdem der Leim vollständig getrocknet ist, ein individuelles Bild (Format: 7 × 7 cm) drucken und von oben in den Schlitz einschieben.
Jetzt kannst du den Rahmen entweder mit dem Aufsteller auf den Tisch stellen oder über das Loch auf der Rückseite an der Wand aufhängen – ganz nach deinem Geschmack.
Step6: Last of all
Place it, gift it, and smile. Mom will too. 💐❤️
Aufstellen, verschenken, lächeln. Mama wird sich freuen. 💐❤️


