![[Laser cut and engrave,Inkjet printing] Christmas Advent Calendar using 3 layer family photo and collage as wooden frame](https://image-res.xtool.com/resource/xtool/community/attachment/xtool-community/dc829246-4a7c-49b4-a79f-1b743f8c7d6b?x-oss-process=image/resize,w_1200,h_900,limit_0/interlace,1/format,webp/auto-orient,1)
![[Laser cut and engrave,Inkjet printing] Christmas Advent Calendar using 3 layer family photo and collage as wooden frame](https://image-res.xtool.com/resource/xtool/community/attachment/xtool-community/dc829246-4a7c-49b4-a79f-1b743f8c7d6b?x-oss-process=image/resize,w_200,h_150,limit_0/interlace,1/format,webp/auto-orient,1)
![[Laser cut and engrave,Inkjet printing] Christmas Advent Calendar using 3 layer family photo and collage as wooden frame](https://image-res.xtool.com/resource/xtool/community/attachment/xtool-community/0b308c4e-4c12-459f-94b5-e3e031eecea1.jpg?x-oss-process=image/resize,w_200,h_150,limit_0/interlace,1/format,webp/auto-orient,1)
![[Laser cut and engrave,Inkjet printing] Christmas Advent Calendar using 3 layer family photo and collage as wooden frame](https://image-res.xtool.com/resource/xtool/community/attachment/xtool-community/4cdbf6e0-ed55-4f5a-b642-32d97f534d21.jpg?x-oss-process=image/resize,w_200,h_150,limit_0/interlace,1/format,webp/auto-orient,1)
![[Laser cut and engrave,Inkjet printing] Christmas Advent Calendar using 3 layer family photo and collage as wooden frame](https://image-res.xtool.com/resource/xtool/community/attachment/xtool-community/dbd1852a-deaa-472a-94e8-945c7ead2fb1.jpg?x-oss-process=image/resize,w_200,h_150,limit_0/interlace,1/format,webp/auto-orient,1)
![[Laser cut and engrave,Inkjet printing] Christmas Advent Calendar using 3 layer family photo and collage as wooden frame](https://image-res.xtool.com/resource/xtool/community/attachment/xtool-community/afa4c9f9-dd9d-4424-89e8-4c2ef0802606.jpg?x-oss-process=image/resize,w_200,h_150,limit_0/interlace,1/format,webp/auto-orient,1)
![[Laser cut and engrave,Inkjet printing] Christmas Advent Calendar using 3 layer family photo and collage as wooden frame](https://image-res.xtool.com/resource/xtool/community/attachment/xtool-community/f0818e21-b85d-4945-844a-4f1ca42145c3.jpg?x-oss-process=image/resize,w_200,h_150,limit_0/interlace,1/format,webp/auto-orient,1)
![[Laser cut and engrave,Inkjet printing] Christmas Advent Calendar using 3 layer family photo and collage as wooden frame](https://image-res.xtool.com/resource/xtool/community/attachment/xtool-community/b7a24c19-3166-4a63-b97b-790465636b42.jpg?x-oss-process=image/resize,w_200,h_150,limit_0/interlace,1/format,webp/auto-orient,1)
Christmas Advent Calendar using 3 layer family photo and collage as wooden frame


Information
      I created these advent calendars to capture special memories this winter. This is my first project and contribution so please share advice in the comments. I hope this helps you create your own!

Brandenburg Gate (200x200mm):
The center photo is of my two aunts, wife, son and I in front of the Brandenburg Gate on the 35th Anniversary of the fall of the Berlin Wall.

Falkensteiner Blick (295x225mm):
A family favorite lookout to the ruin of Fortress Falkenstein outside out little town.

I used the XTool M1 Ultra to print in color on the brilliant sunset which we had the evening in Berlin. In one version I used it to add a pop of color from my wife's coat. Surrounding the three layer image are tiles which slide in and out with a latch to keep them in place when the art is hung on a wall. All tiles are engraved with numbers for each day leading up to Christmas Eve and on the back side of each is a special photo memory from the trip. Each day leading up to Christmas you pull a tile and flip to see the next picture. Once all of the tiles have been flipped the completed Christmas gift is a 3 layer laser printed photo surrounded by a collage of images that make up the frame. I don't like working with glue so I used round tooth picks as dowels to bind all the layers together.

You can take the files and insert your own images of memorable events or people in your life. As an example, I created a second advent calendar to share with my family the year's highlights. Surrounding a great family photo with a view from one of our hikes I layered the colorful background of the image using my XTool M1 Ultra to give the piece a pop of color. A final feature that I added in the second larger version was a heart key hole hanging system to make it easy for my family to mount this memory on their wall.

Thanks XTool for creating such a great product for helping me produce these one of a kind gifts!
Instruction
Step1: Select a size
Step2: Prep for inkjet printing (optional)
If you plan to use the inkjet, I recommend using Clear Gesso as described by @ashleefalco [4m20s] to give you more vibrant color. Trade-off, it needs time to dry (overnight).https://www.youtube.com/watch?v=QLj6Vk3UQs4&t=4m20s
Step3: Engrave numbers (saves time later)

Step4: Import your custom photos


Step5: Engrave the 24 custom photos layer

www.youtube.com/watch?v=x7iLEeOFWXo
Step6: Photoshop your Featured Photo
Step7: Integrate the Feature Photo into the Frame
I like to work layer by layer integrating the photo into the frame, but it helps if you stack all of the pieces first so that everything is aligned.
Top Layer:
-Add a Rectangle to the center of the Red top layer to frame the photo.
-Place your photo's front magic selection by copying and pasting directly between Paint 3D and XCS, and then right click to add it to the red layer.
-Create an “Outline” of just that selection
-Select both the rectangle and outline and “Make compound vector”
-Edit the new compound vector so you cut a window to see the layers behind while making sure that the featured front layer is mechanically strong enough, and won't be cut from the rest of the frame.
-Set this new compound vector to cut (recommend 90%, 5mm/s, 2 passes, lower focus = 2 for 3mm Birch and my 10W laser)
-Set the image either to engrave or inkjet or both depending on the effect you want.
Middle Layer:
-This section of you photo also needs a window to see the last layer. I used the sky for this window in both examples. The magic wand can help you remove that segment. I also made the point to add the other elements (enhanced horses and tower) prior to editing the compound vector.
-Again you will need to edit the compound vector points to get exactly the effect you want and make sure to keep structural considerations in mind or you could cut out half your image.
-To save ink, I erased the part of the image which is hidden by the top layer
-[Optional] I selected two hidden places behind the Top Layer to put ovals for my keyhole wall hanging features on Falkensteiner Blick. These are centered.
Bottom Layer
-This is the simplest, just make it count with a fun pop of color or something interesting like the skies in these examples.
-Again, I erased a lot of the images to save ink.
-[Optional] Because this is a family gift I used hearts to finish the key hole wall mount on the back layer. I sized this to fit many screw/nail sizes.
The layers are in the correct order to get a good preview of the final product. Just make sure to add the different parts of your image to the correct layers Red(Top)/Green(Middle)/Cyan(Bottom)
I used other layers to organize the backside layers: Purple(Bottom, Backside)/Blue(Middle, Backside)
Step8: Print the remaining layers
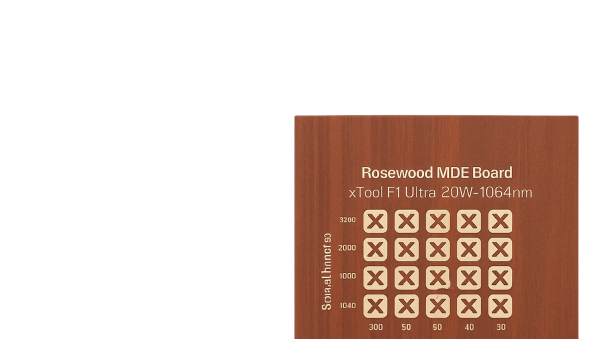
Work layer by layer through the job (front and back for middle and bottom). I provided all the settings which worked well for me, but you can also use the test arrays from Falkensteiner Blick for optimization in your machine.
Recommendations:
Use the inkjet prior to cutting so it doesn't get stuck on a corner.
Build a jig to help with alignment
Use the flattest material you can, but clips, and thin magnets are your friend IF you don't over lap with your pattern.
Cut last after both sides are complete, else you will definitely need to be good at alignment, or have a jig.
Buy enough material so you can screw up. This has many layers and stuff happens ;)
Step9: Seal
For the inkjet parts in particular, I used a clear sealer as soon as the part was done. I ruined a perfect part with a drop of rain right after printing it. Don't make that mistake.
I ended up spraying both sides of all parts with a light coating just to give them staying power. Just do this in a well ventilated space or best outside. and treat each part individually, don't assemble first.
This takes a little time, but this is a lifetime investment.
Step10: Assemble and Share
Ok, so I think glue is messy and causes problems with alignment and rework. Therefore I included lots of holes for wooden toothpicks which I use as dowels. You may think it is overkill, but I designed the outer row to protect the fragile latch I designed so that the bottom tiles don't fall once the calendar is mounted.
I break the toothpicks in half, guide them through all 3 layers, then hammer them in while the assembly is on a sturdy cardboard box which can get lots of holes in it. Once the picks are mostly through, I used a pen knife to shave both sides flush for a rustic, handmade look. It doesn't matter if you do the dowels first or insert your beautiful tiles first. But put the numbers up so that people can work their way through each picture individually.
And you are finished! Wasn't that worth it! What a one of a kind gift :)
