


![[Laser cut and engrave] Mask - Cat (and Bonus: How to Design Your Own)](https://image-res.xtool.com/ali-res/community/making/cb9baa0f-ce07-4c2e-8354-eff3c9976756/IMG_5964.HEIC?x-oss-process=image/resize,w_1200,h_900,limit_0/interlace,1/format,webp/auto-orient,1)
Mask - Cat (and Bonus: How to Design Your Own)
 Instruction
Instruction
Step1
How to Cut and Sew this Project
If you are interested in making a version of this project, I have included the XCS file with settings to cut on a 10.5" x 13.5" sheet of Veg Tan leather. Each piece of the project is movable so you can also print from smaller pieces of leather to match your supplies.
Leather Size Chart and Leather cut settings from testing (using xTool Air Assist)
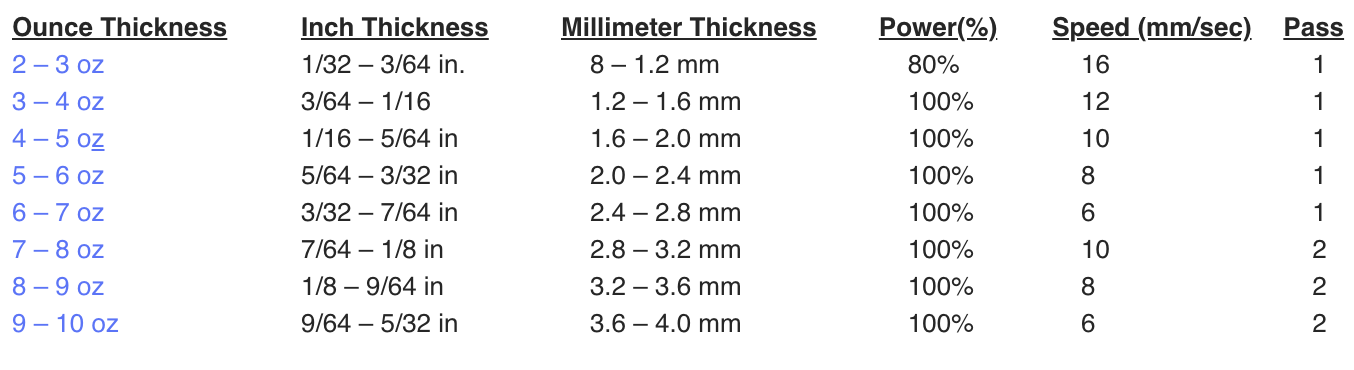
Note: Leather is a natural product and cut settings will vary on moisture content, age, source and cow. Please use these as a guideline in tuning your own settings making a test cut.
Parts of the Mask
Below are the labeled parts of the mask, you only need to cut one of each of the parts labeled.
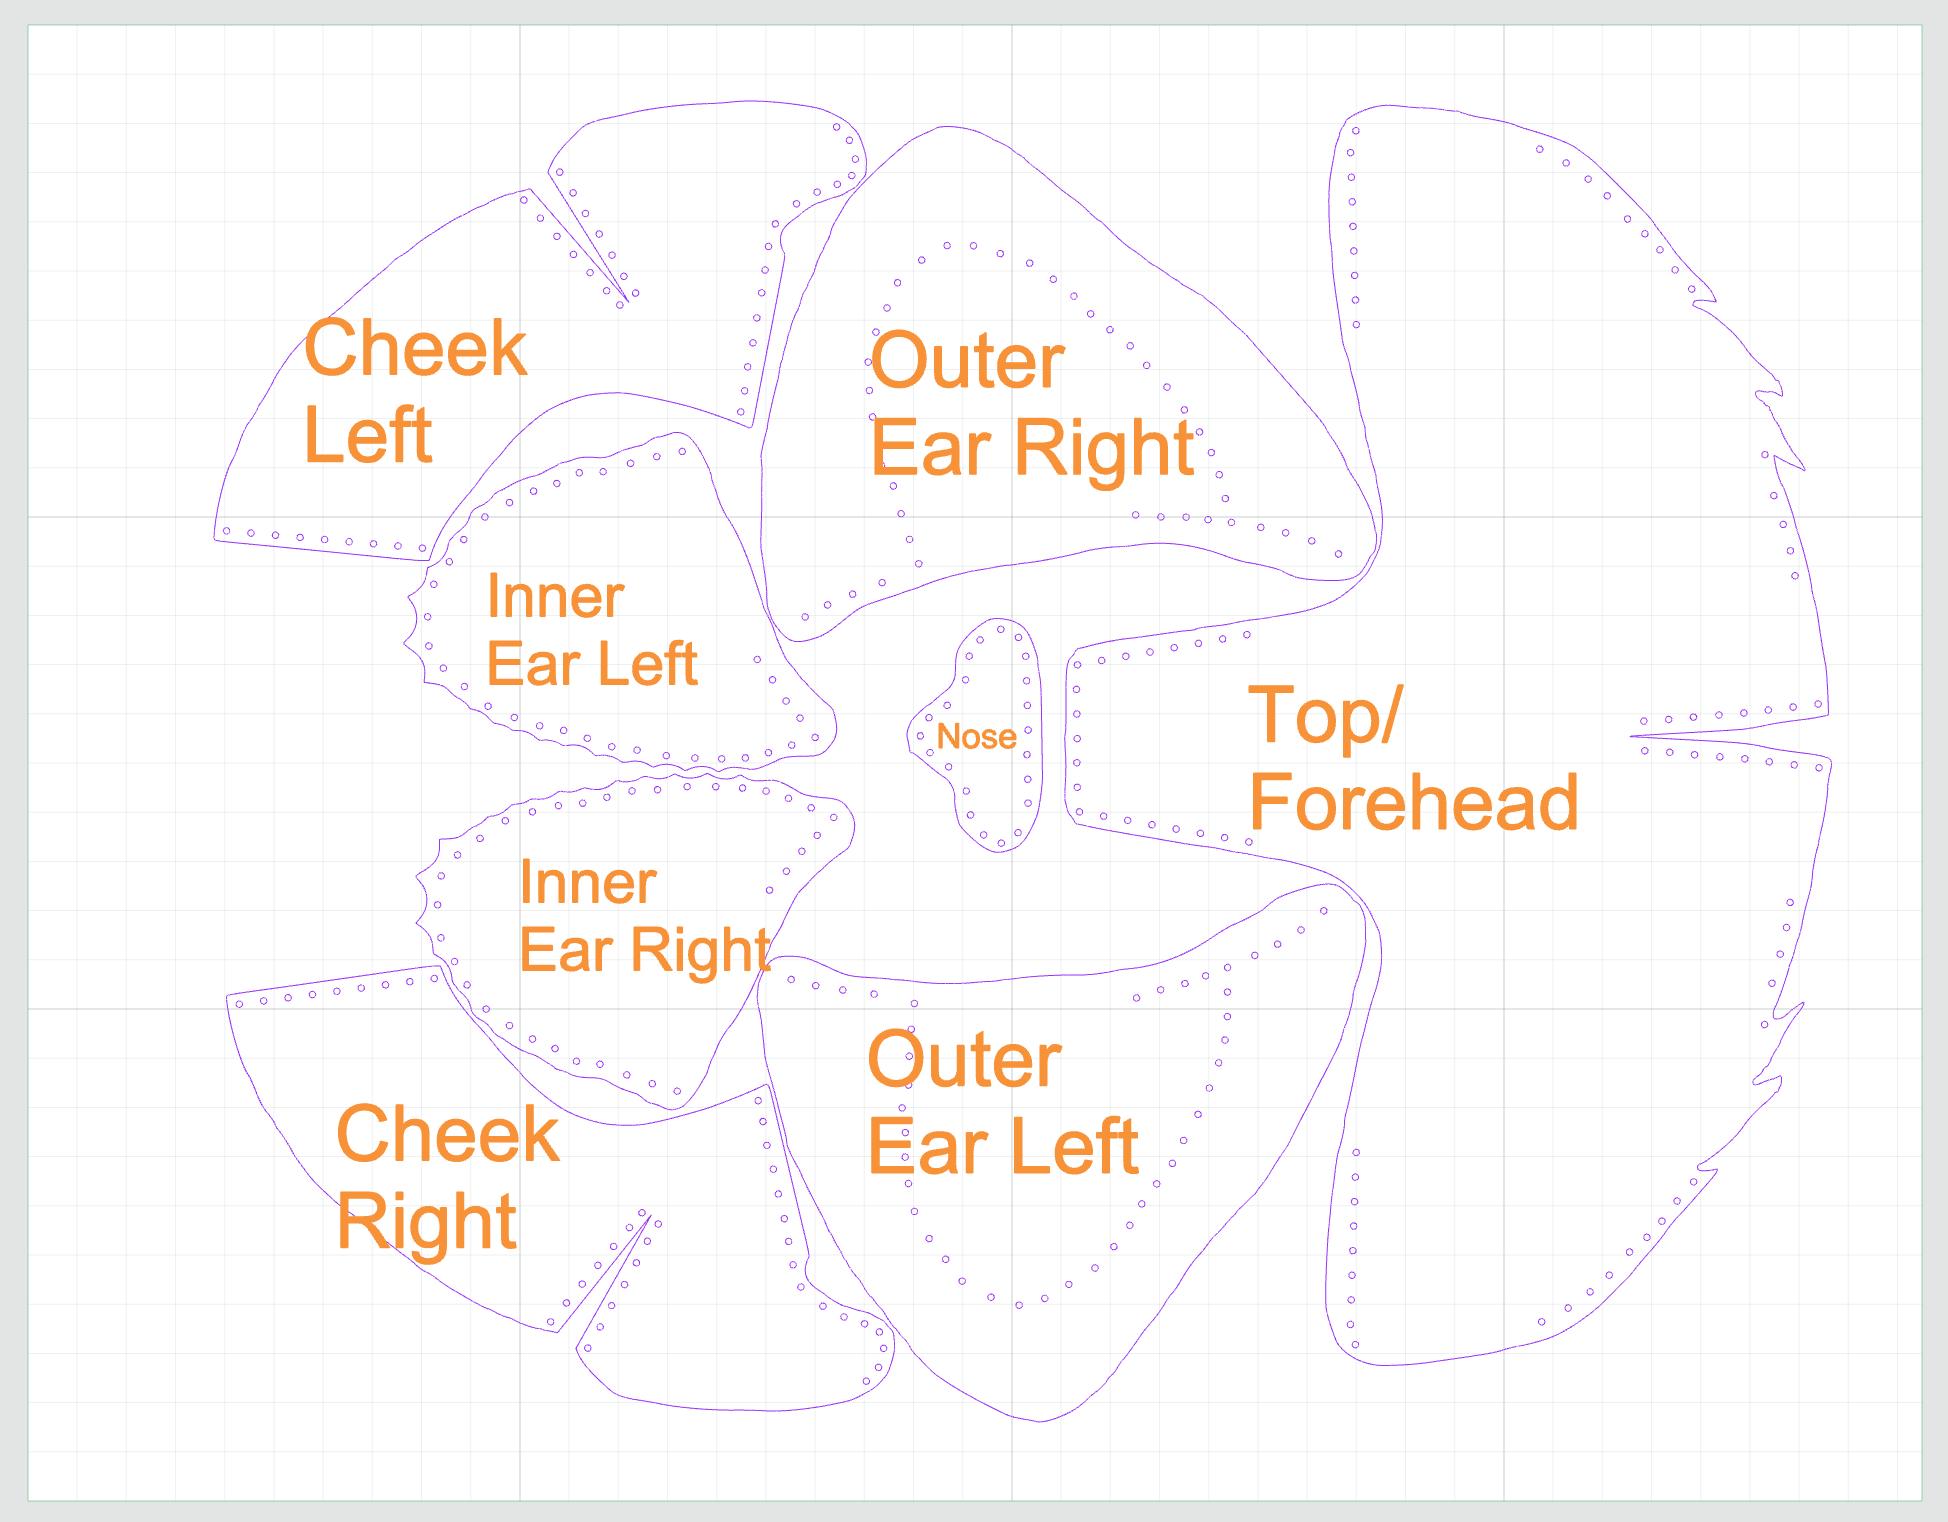
Note: Your cut file does not show the part names
Cutting Tips:
- I recommend you cut a small test circle on a scrap of the leather you will be using for your project due to the natural variation on the material
- I have and use the xTool Air Assist when cutting leather, it reduces char/burn of the material
- Prior to having Air Assist, I tried some techniques such as lightly spraying the leather surface with water to reduce burning. Be careful not to over wet the leather as it can cause the leather to warp or distort as it dries. A light mist from a spray bottle or wipe with damp sponge is all that is needed.
- Leather cutting smells, please make sure you are vented and fans are running
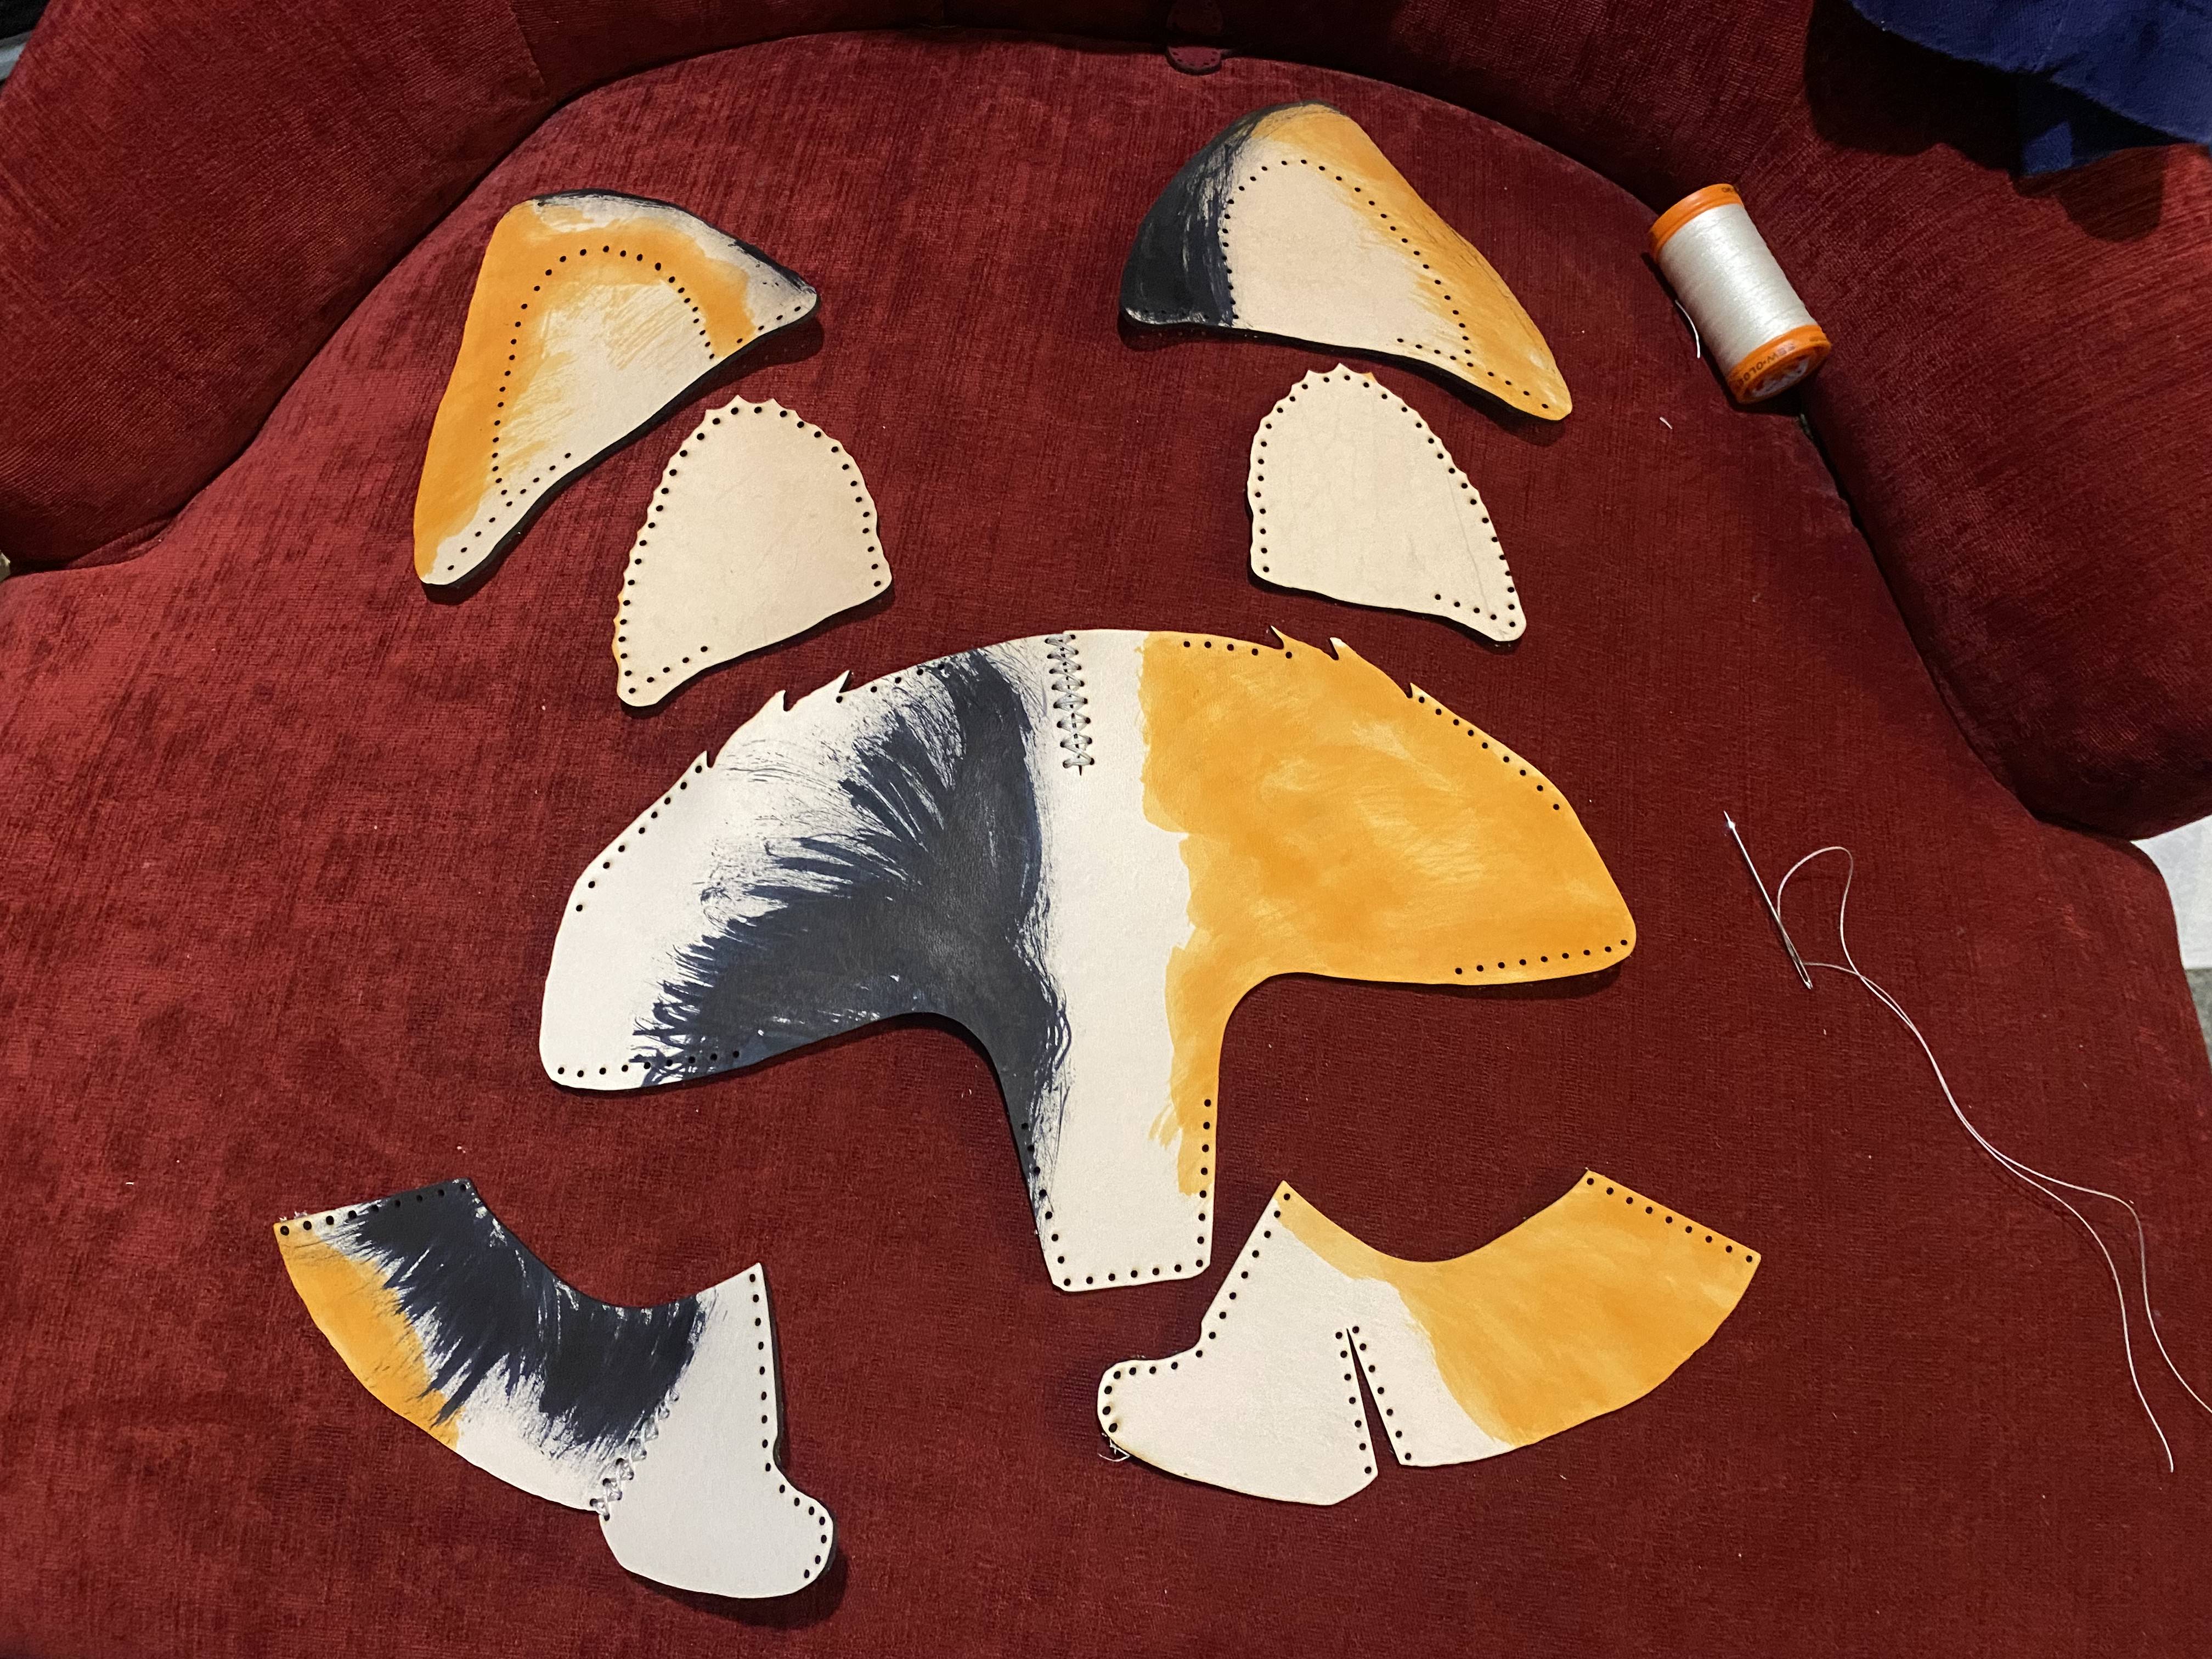
Stain/Dye your Project (Optional)
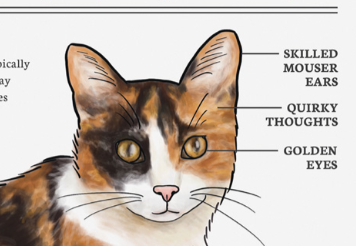
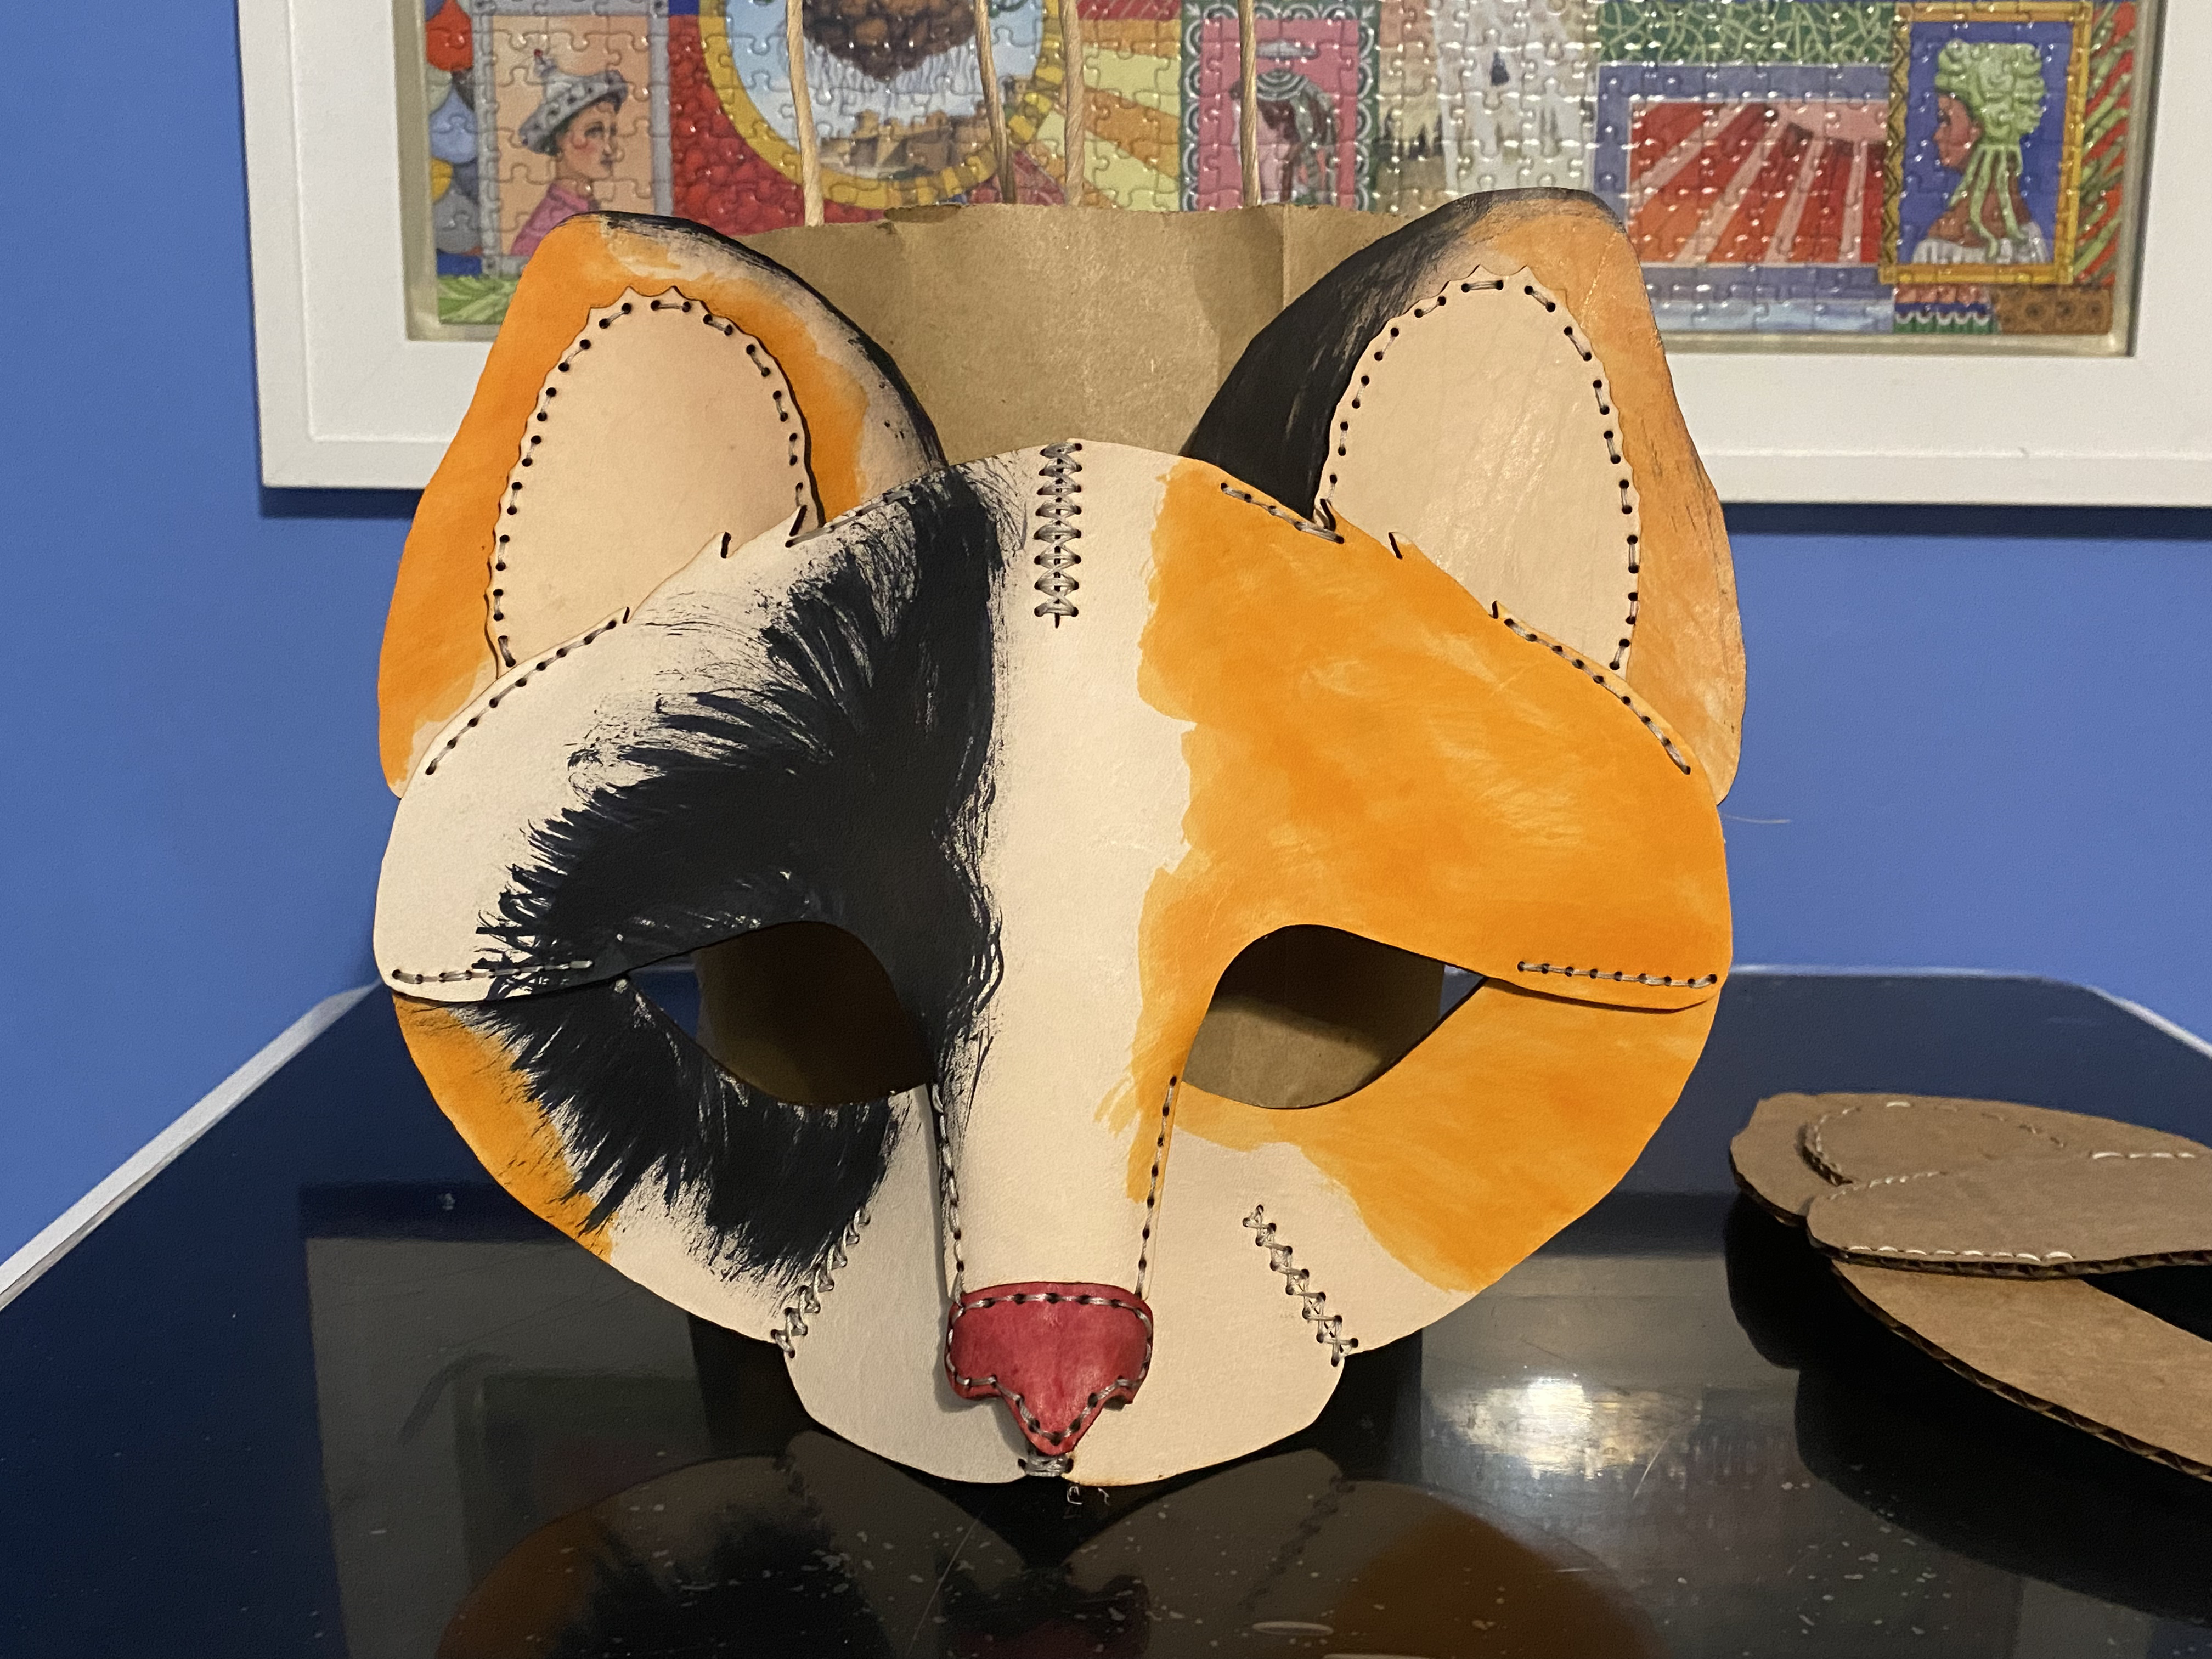
I choose to decorate my leather to match a Calico cat's coloring.
I found it is best to dye/stain your leather prior to assembly but you can also apply dyes after assembly.
Here is my example but you can customize to any colors or markings you like.
Assembly
Once all your pieces are stained and dried (optional), they are pre-cut with the correct number of stitch holes in the correct position to align and assemble the mask.
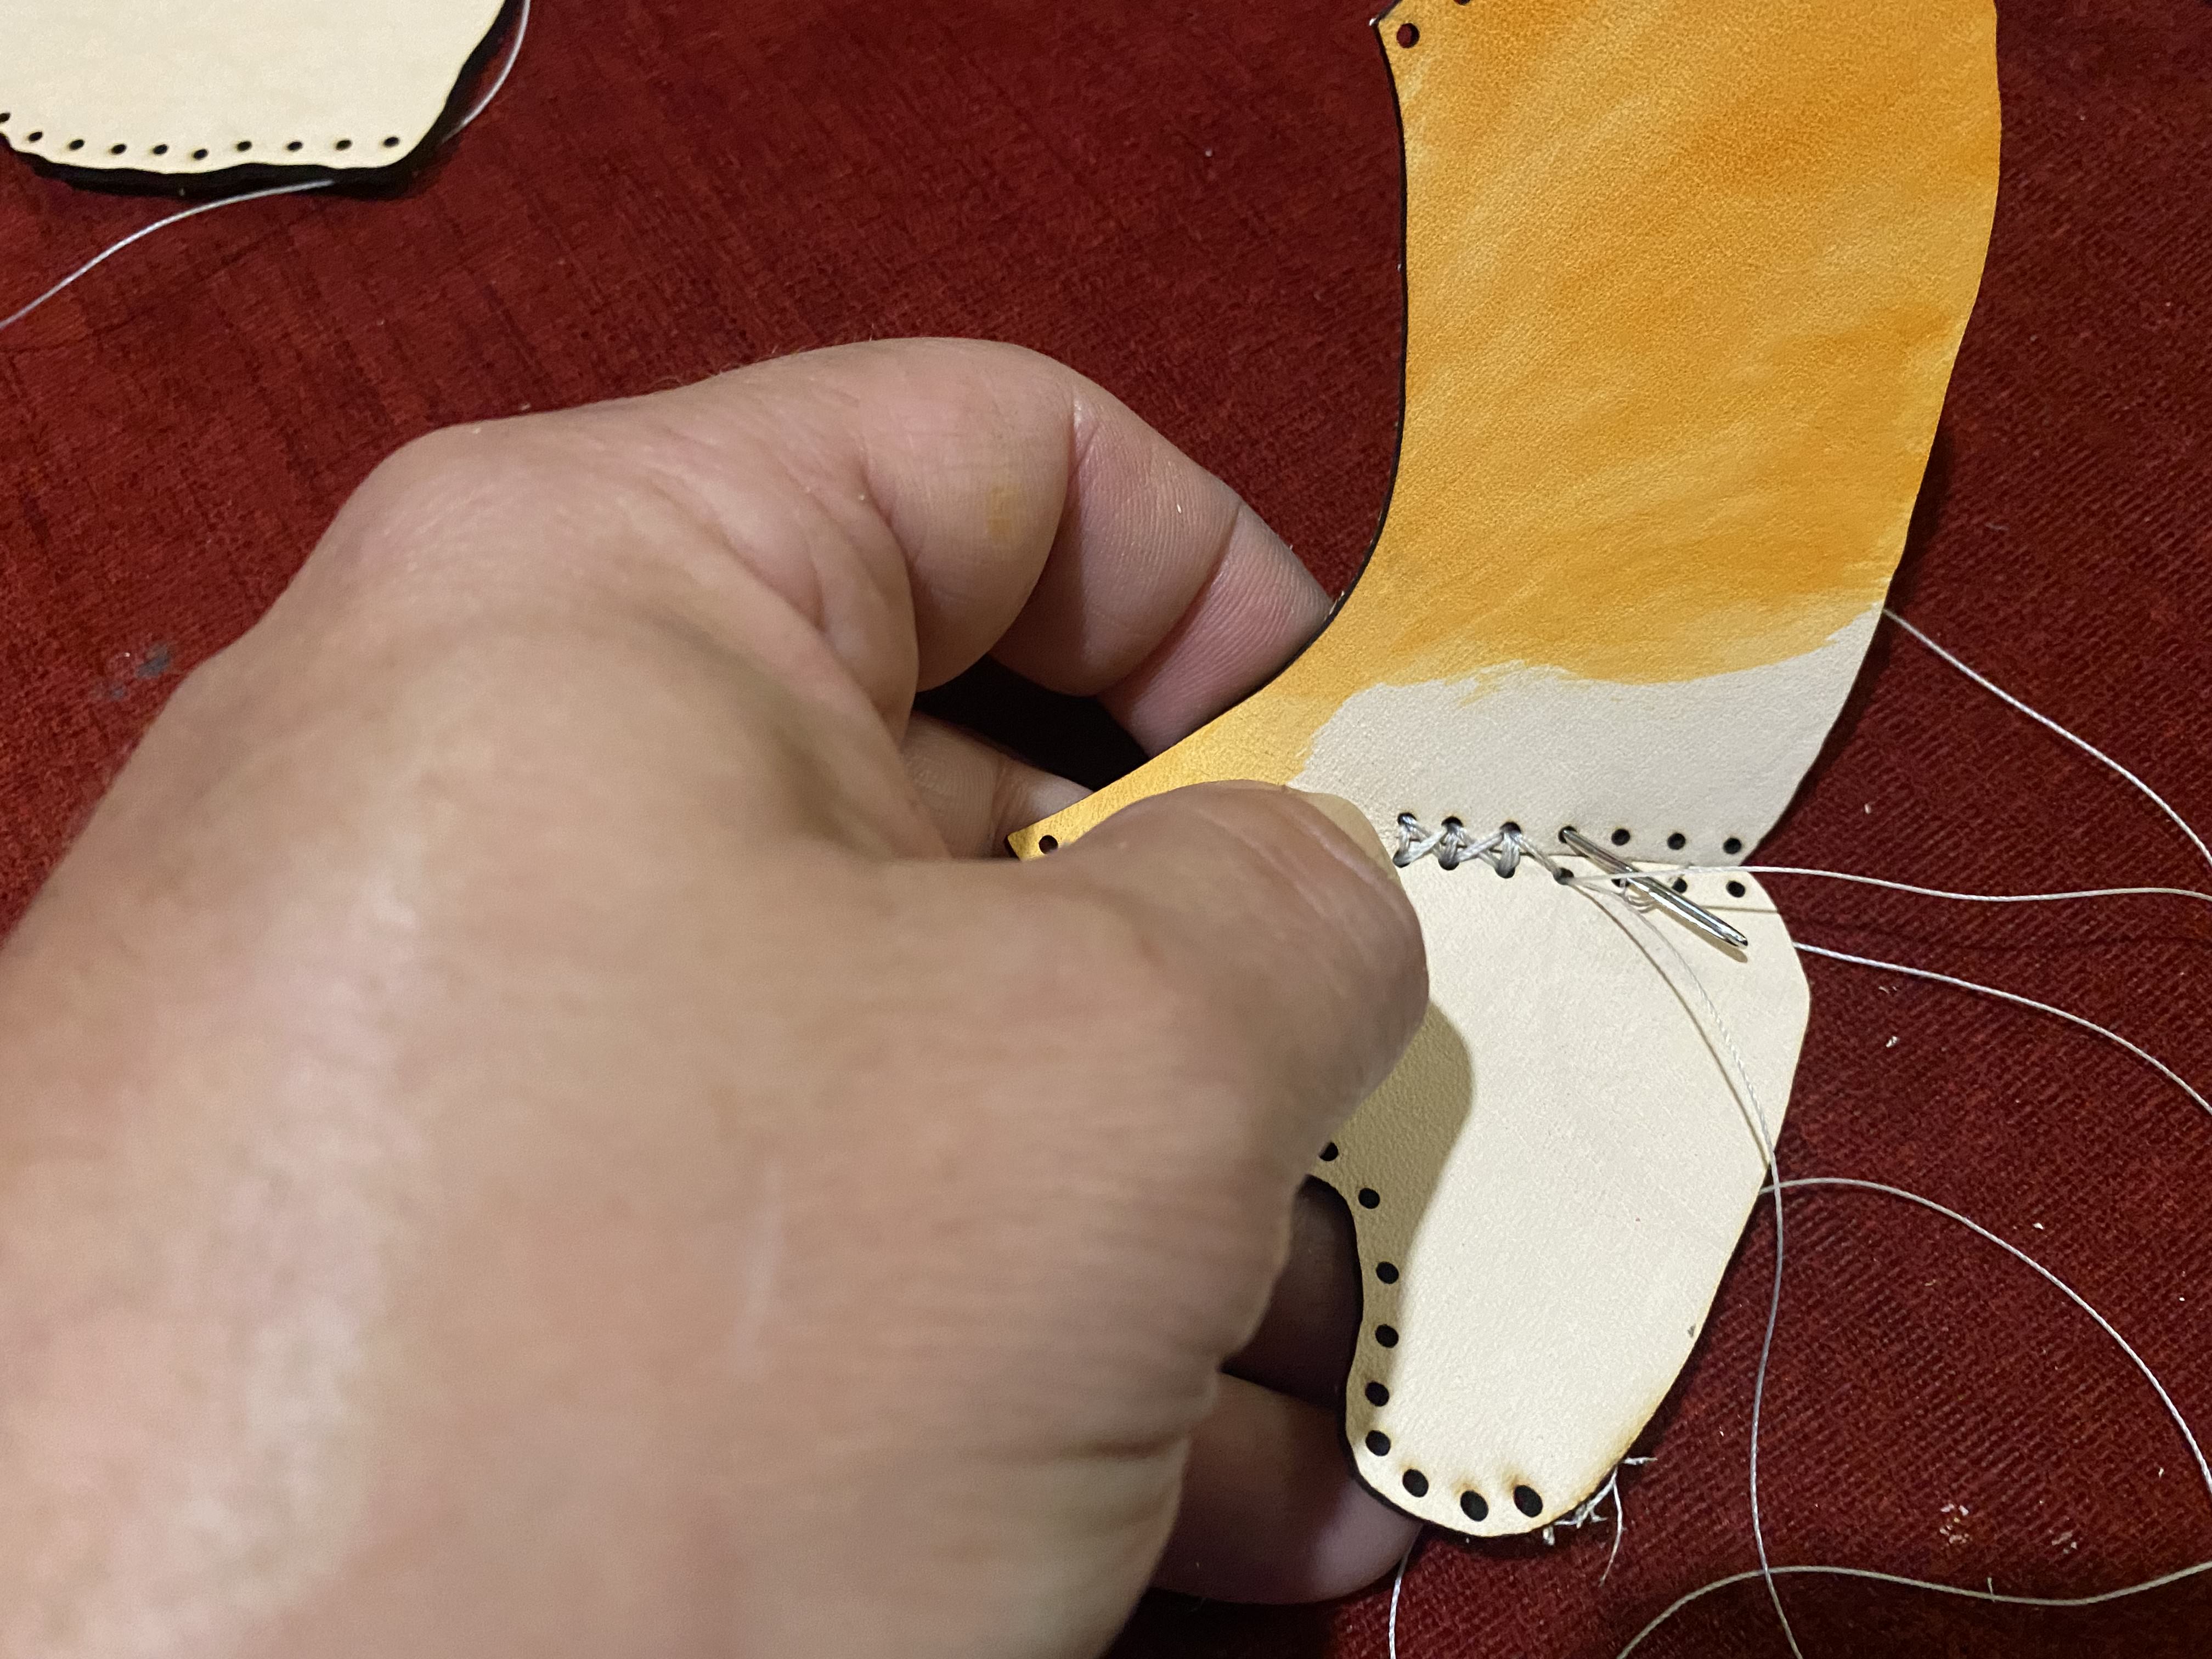
General Stitching Info:
- Used a heavy duty upholstery thread, I choose white, but you can use what ever color best matches your design.
- I recommend using a leather needle with a large "eye" to make it easy to thread with thicker thread
- Measured out about 18in/45cm of thread, put the needle on and measure out another 18in/45cm so the needle was in the middle of a 2 strand length approx. 18in/45cm. I tied 2-3 knots at the end of the thread to lock it behind the pre-made leather hole.
- Start the needle from the back side of the leather mask to hide the knots
- For the start of the part I am sewing, I usually will go through the first 2 holed 2 times to make a stronger stitch at the edge
- For ending the stitch, I also double the stitch and knot the thread on the backside and cut close to the knot
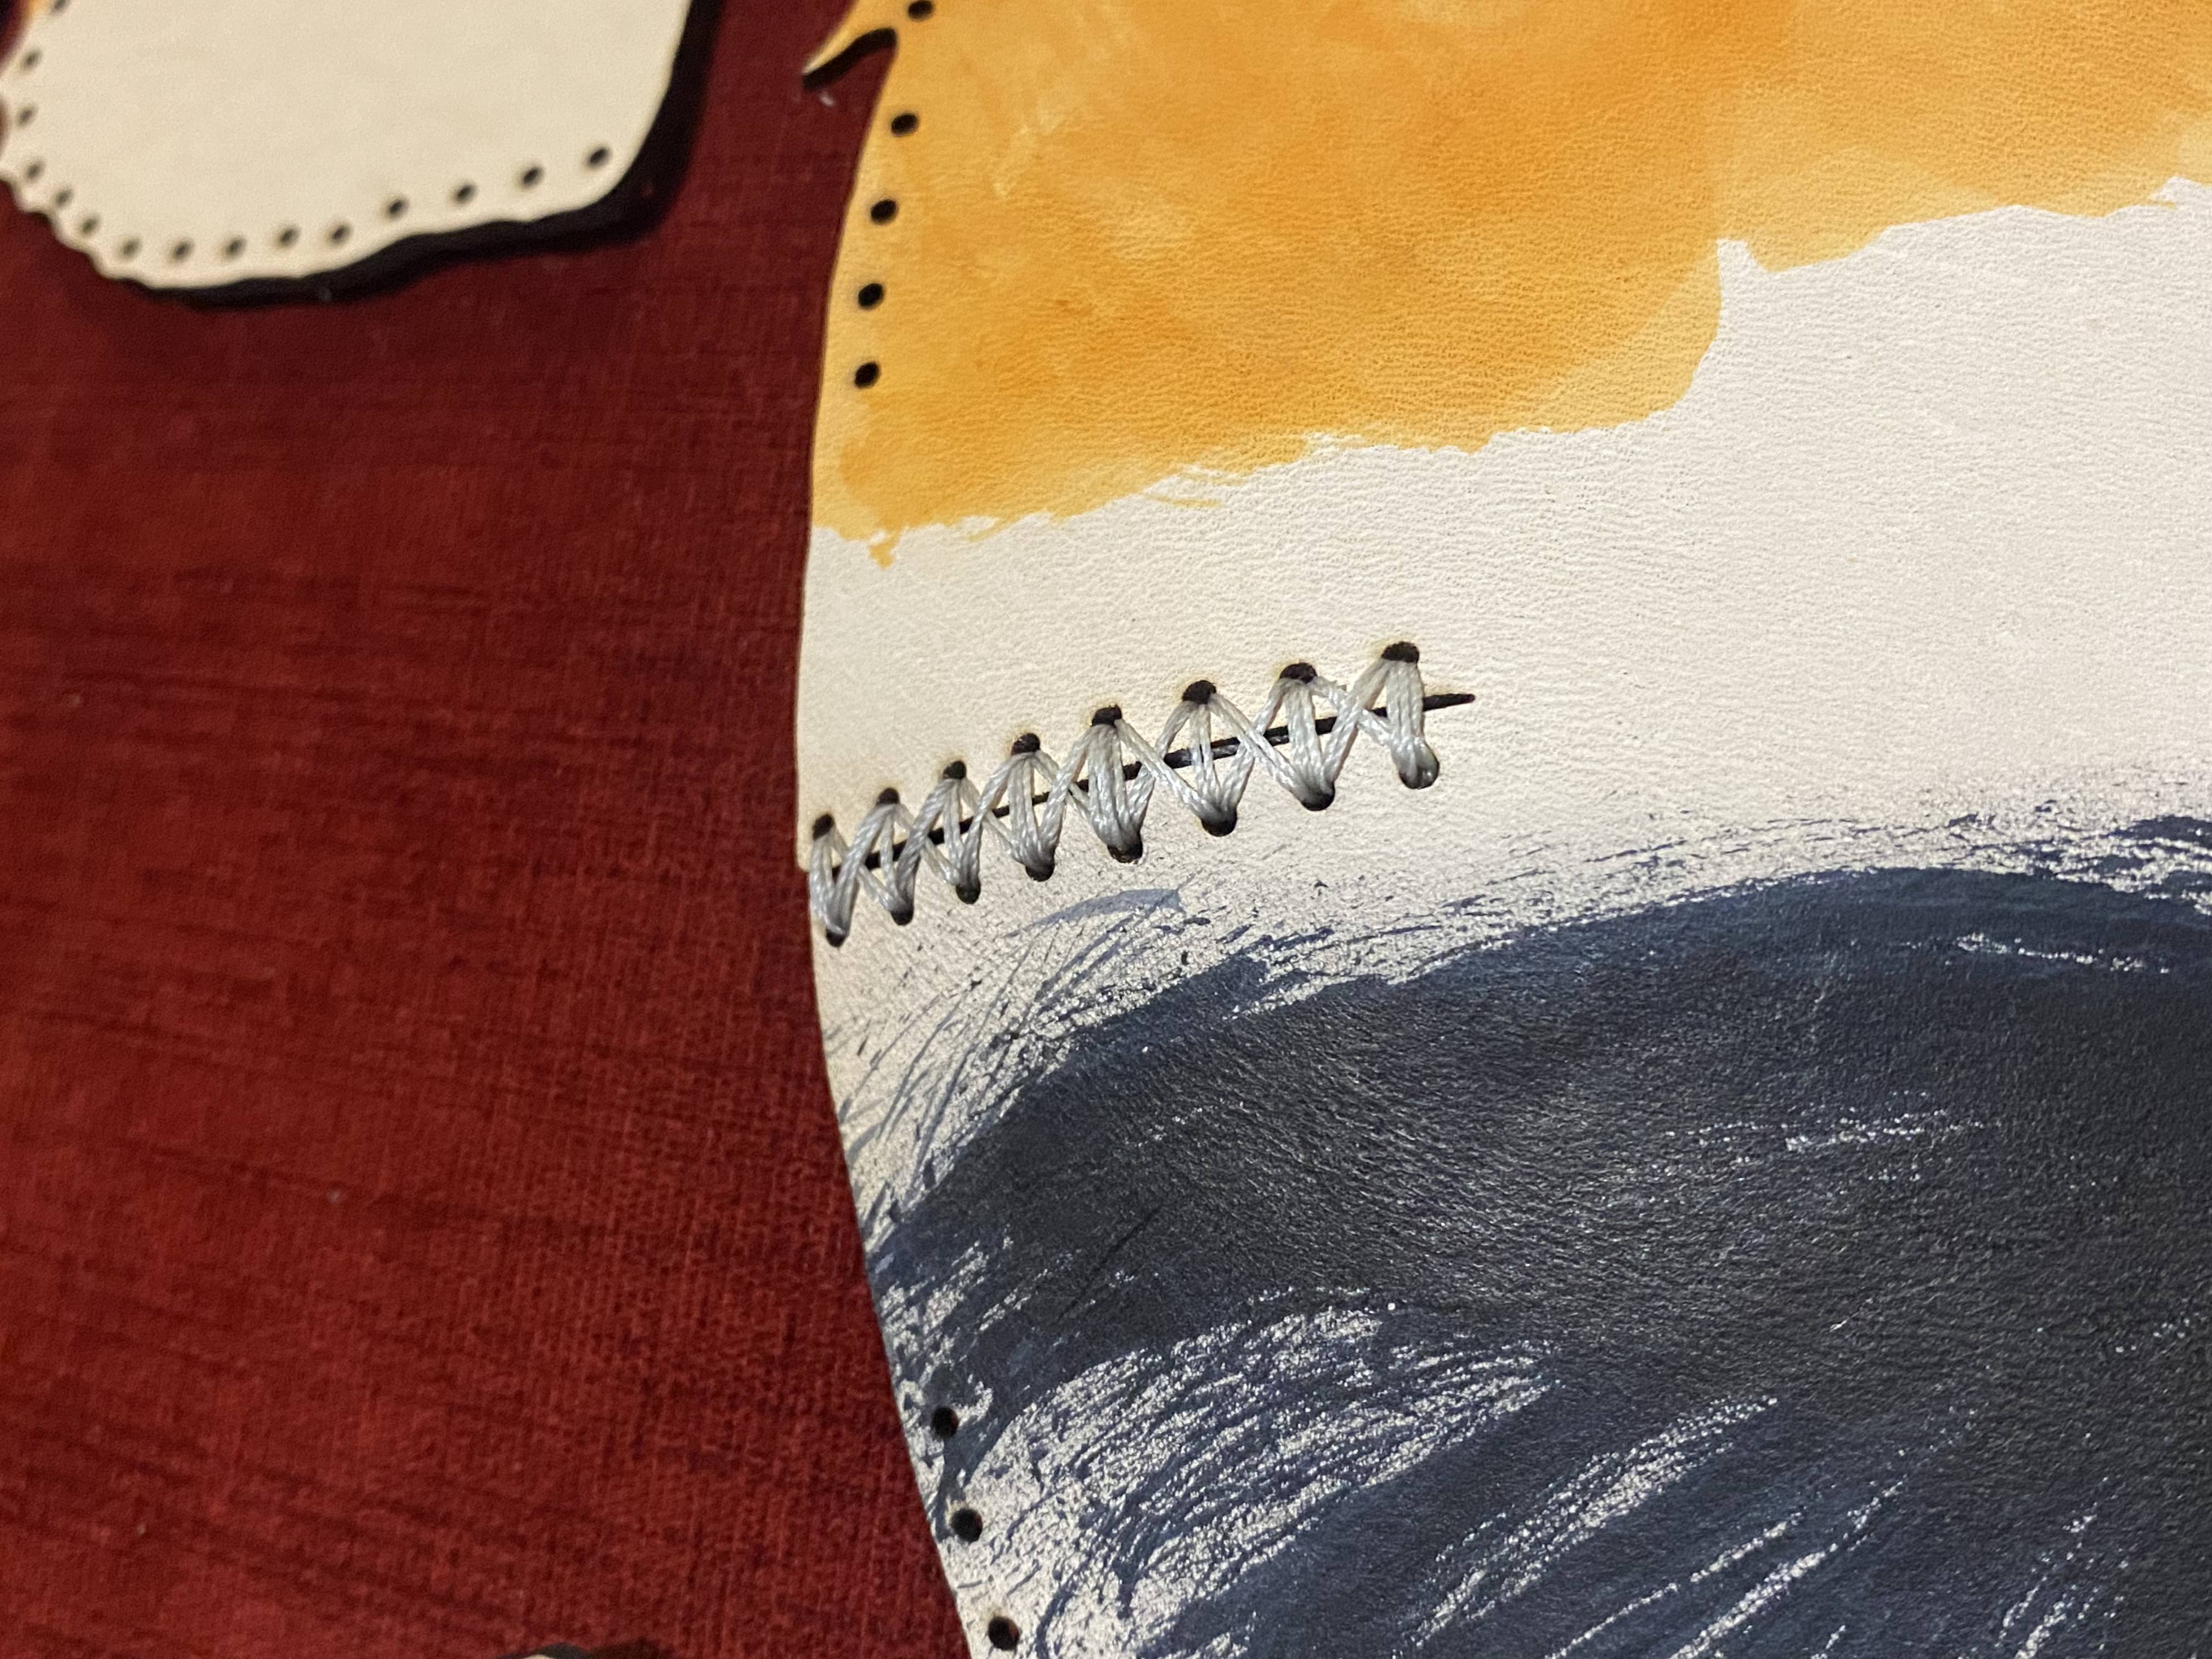
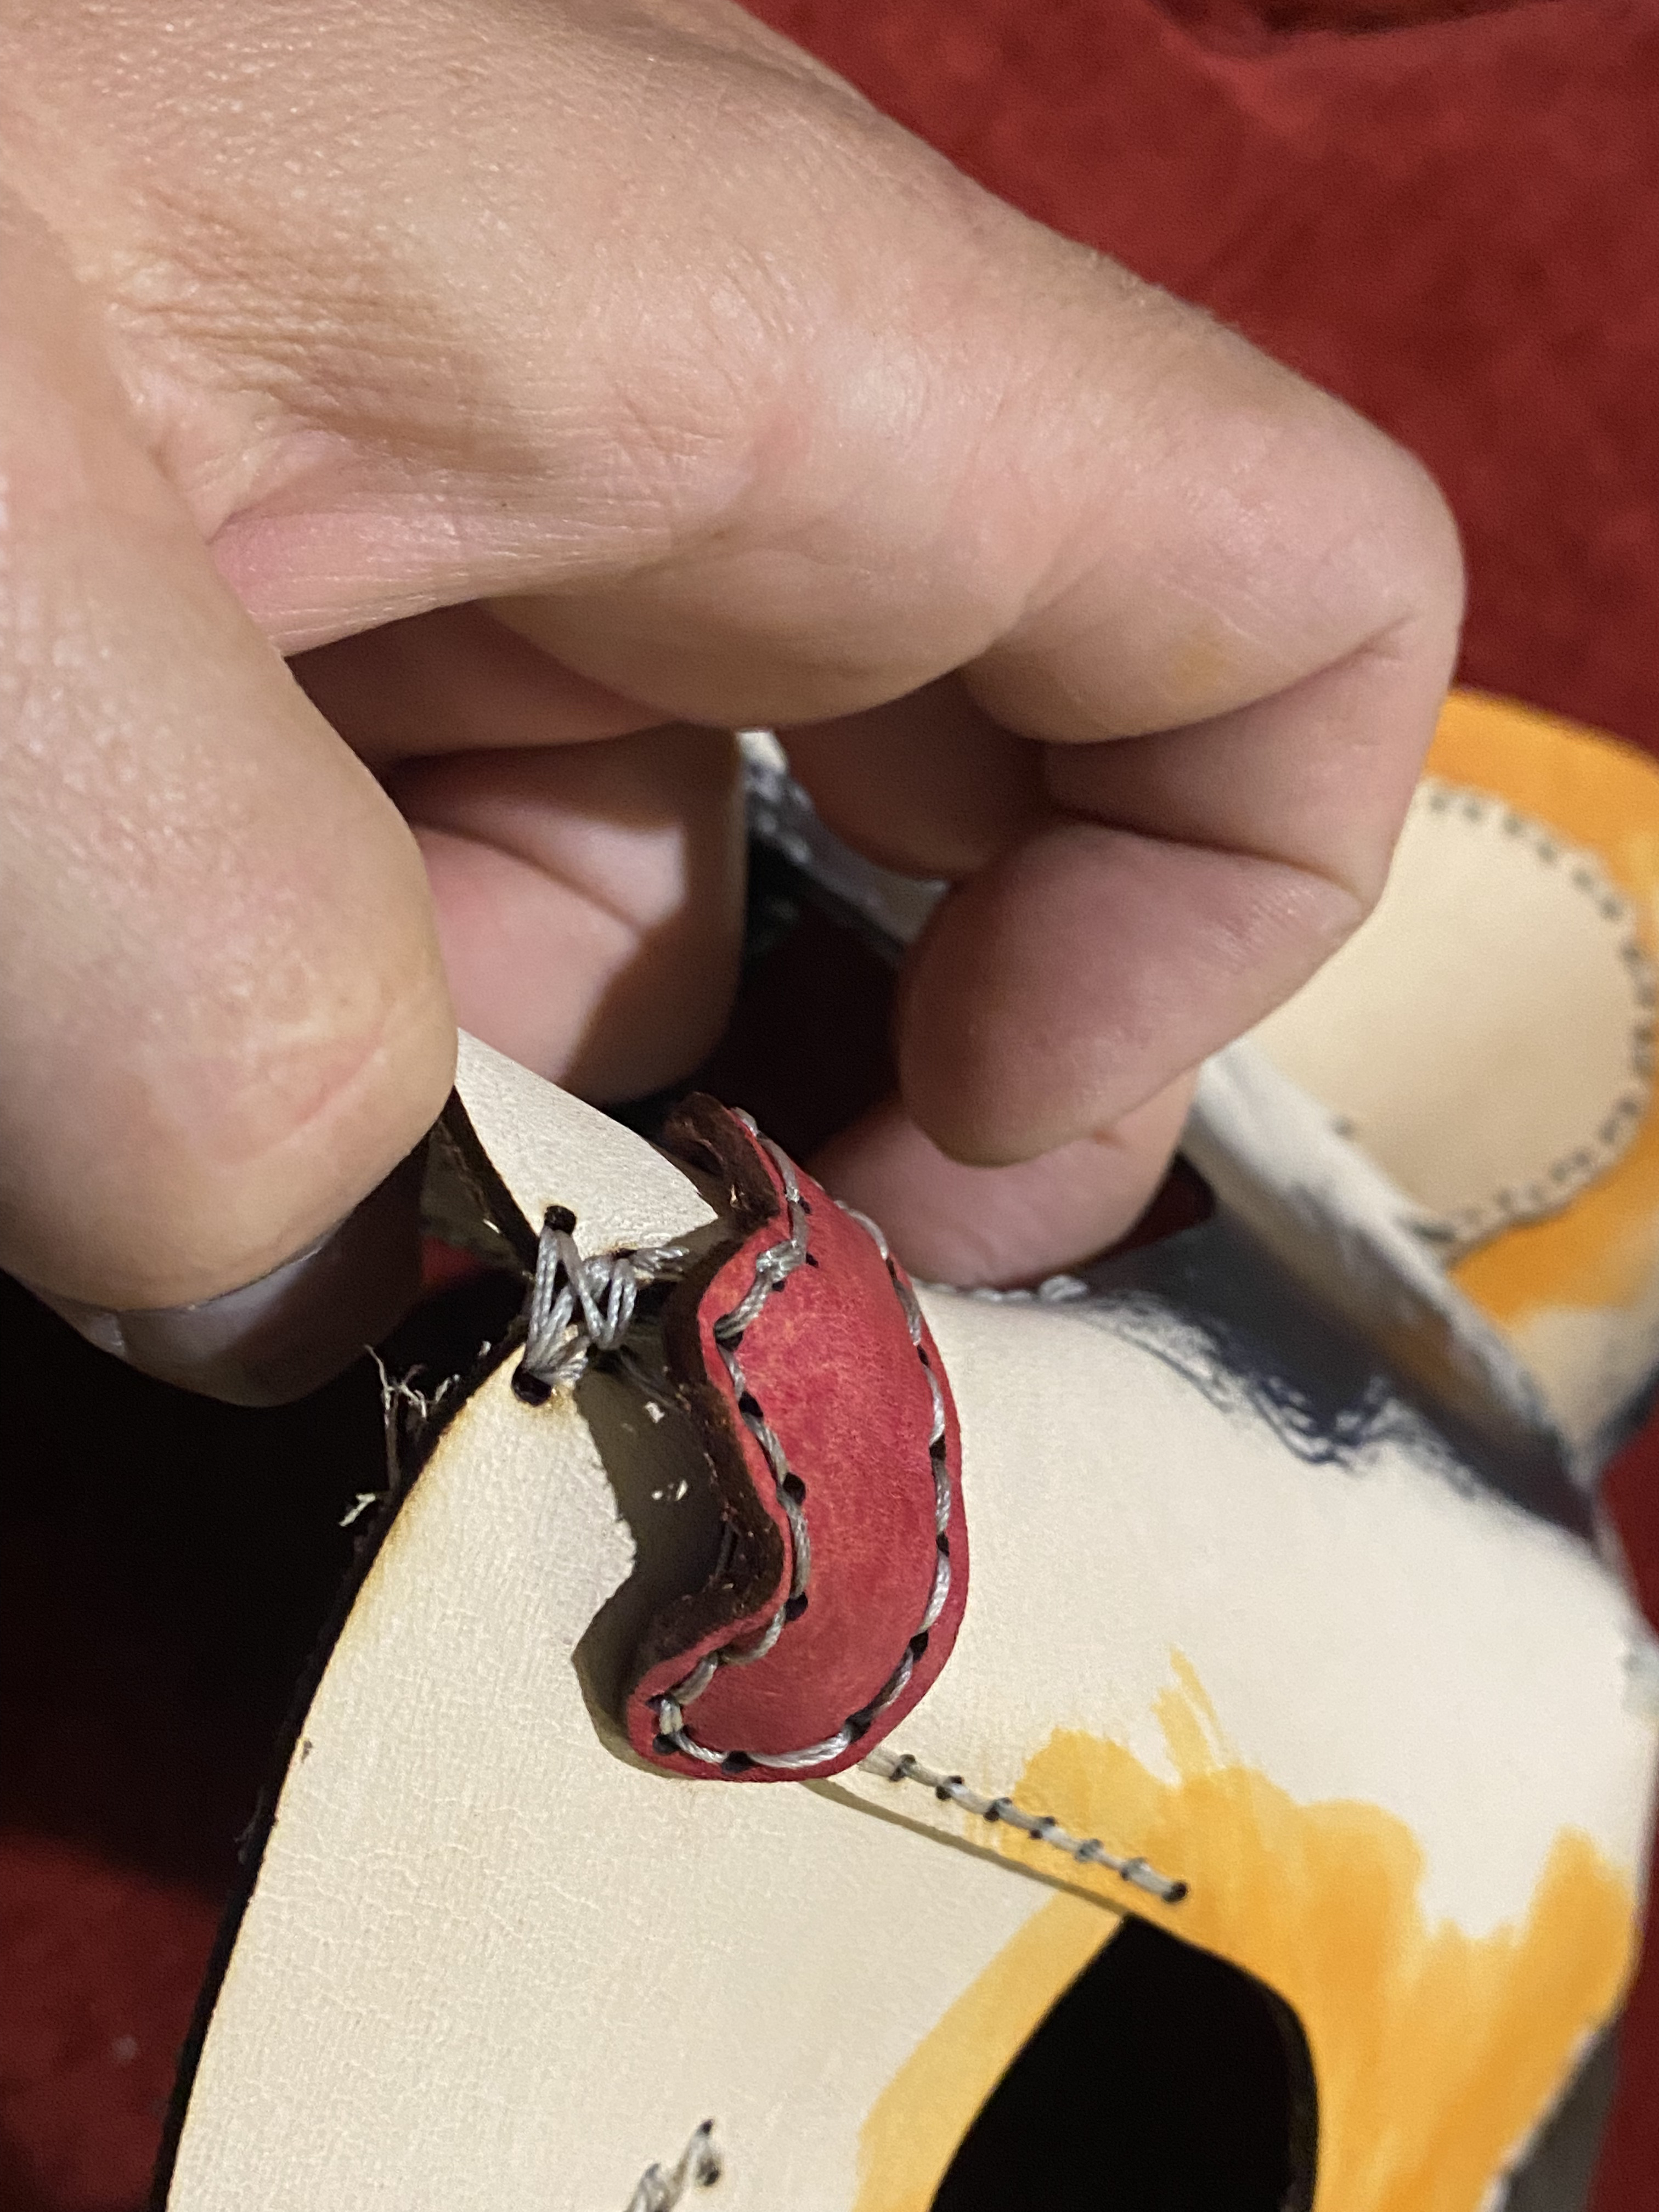
- The method I use for stitching is called a running stitch, but then I come back and reverse it so there are 2 passes of the thread in each direction.
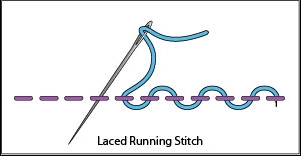
* This example shows both single and double running stitch
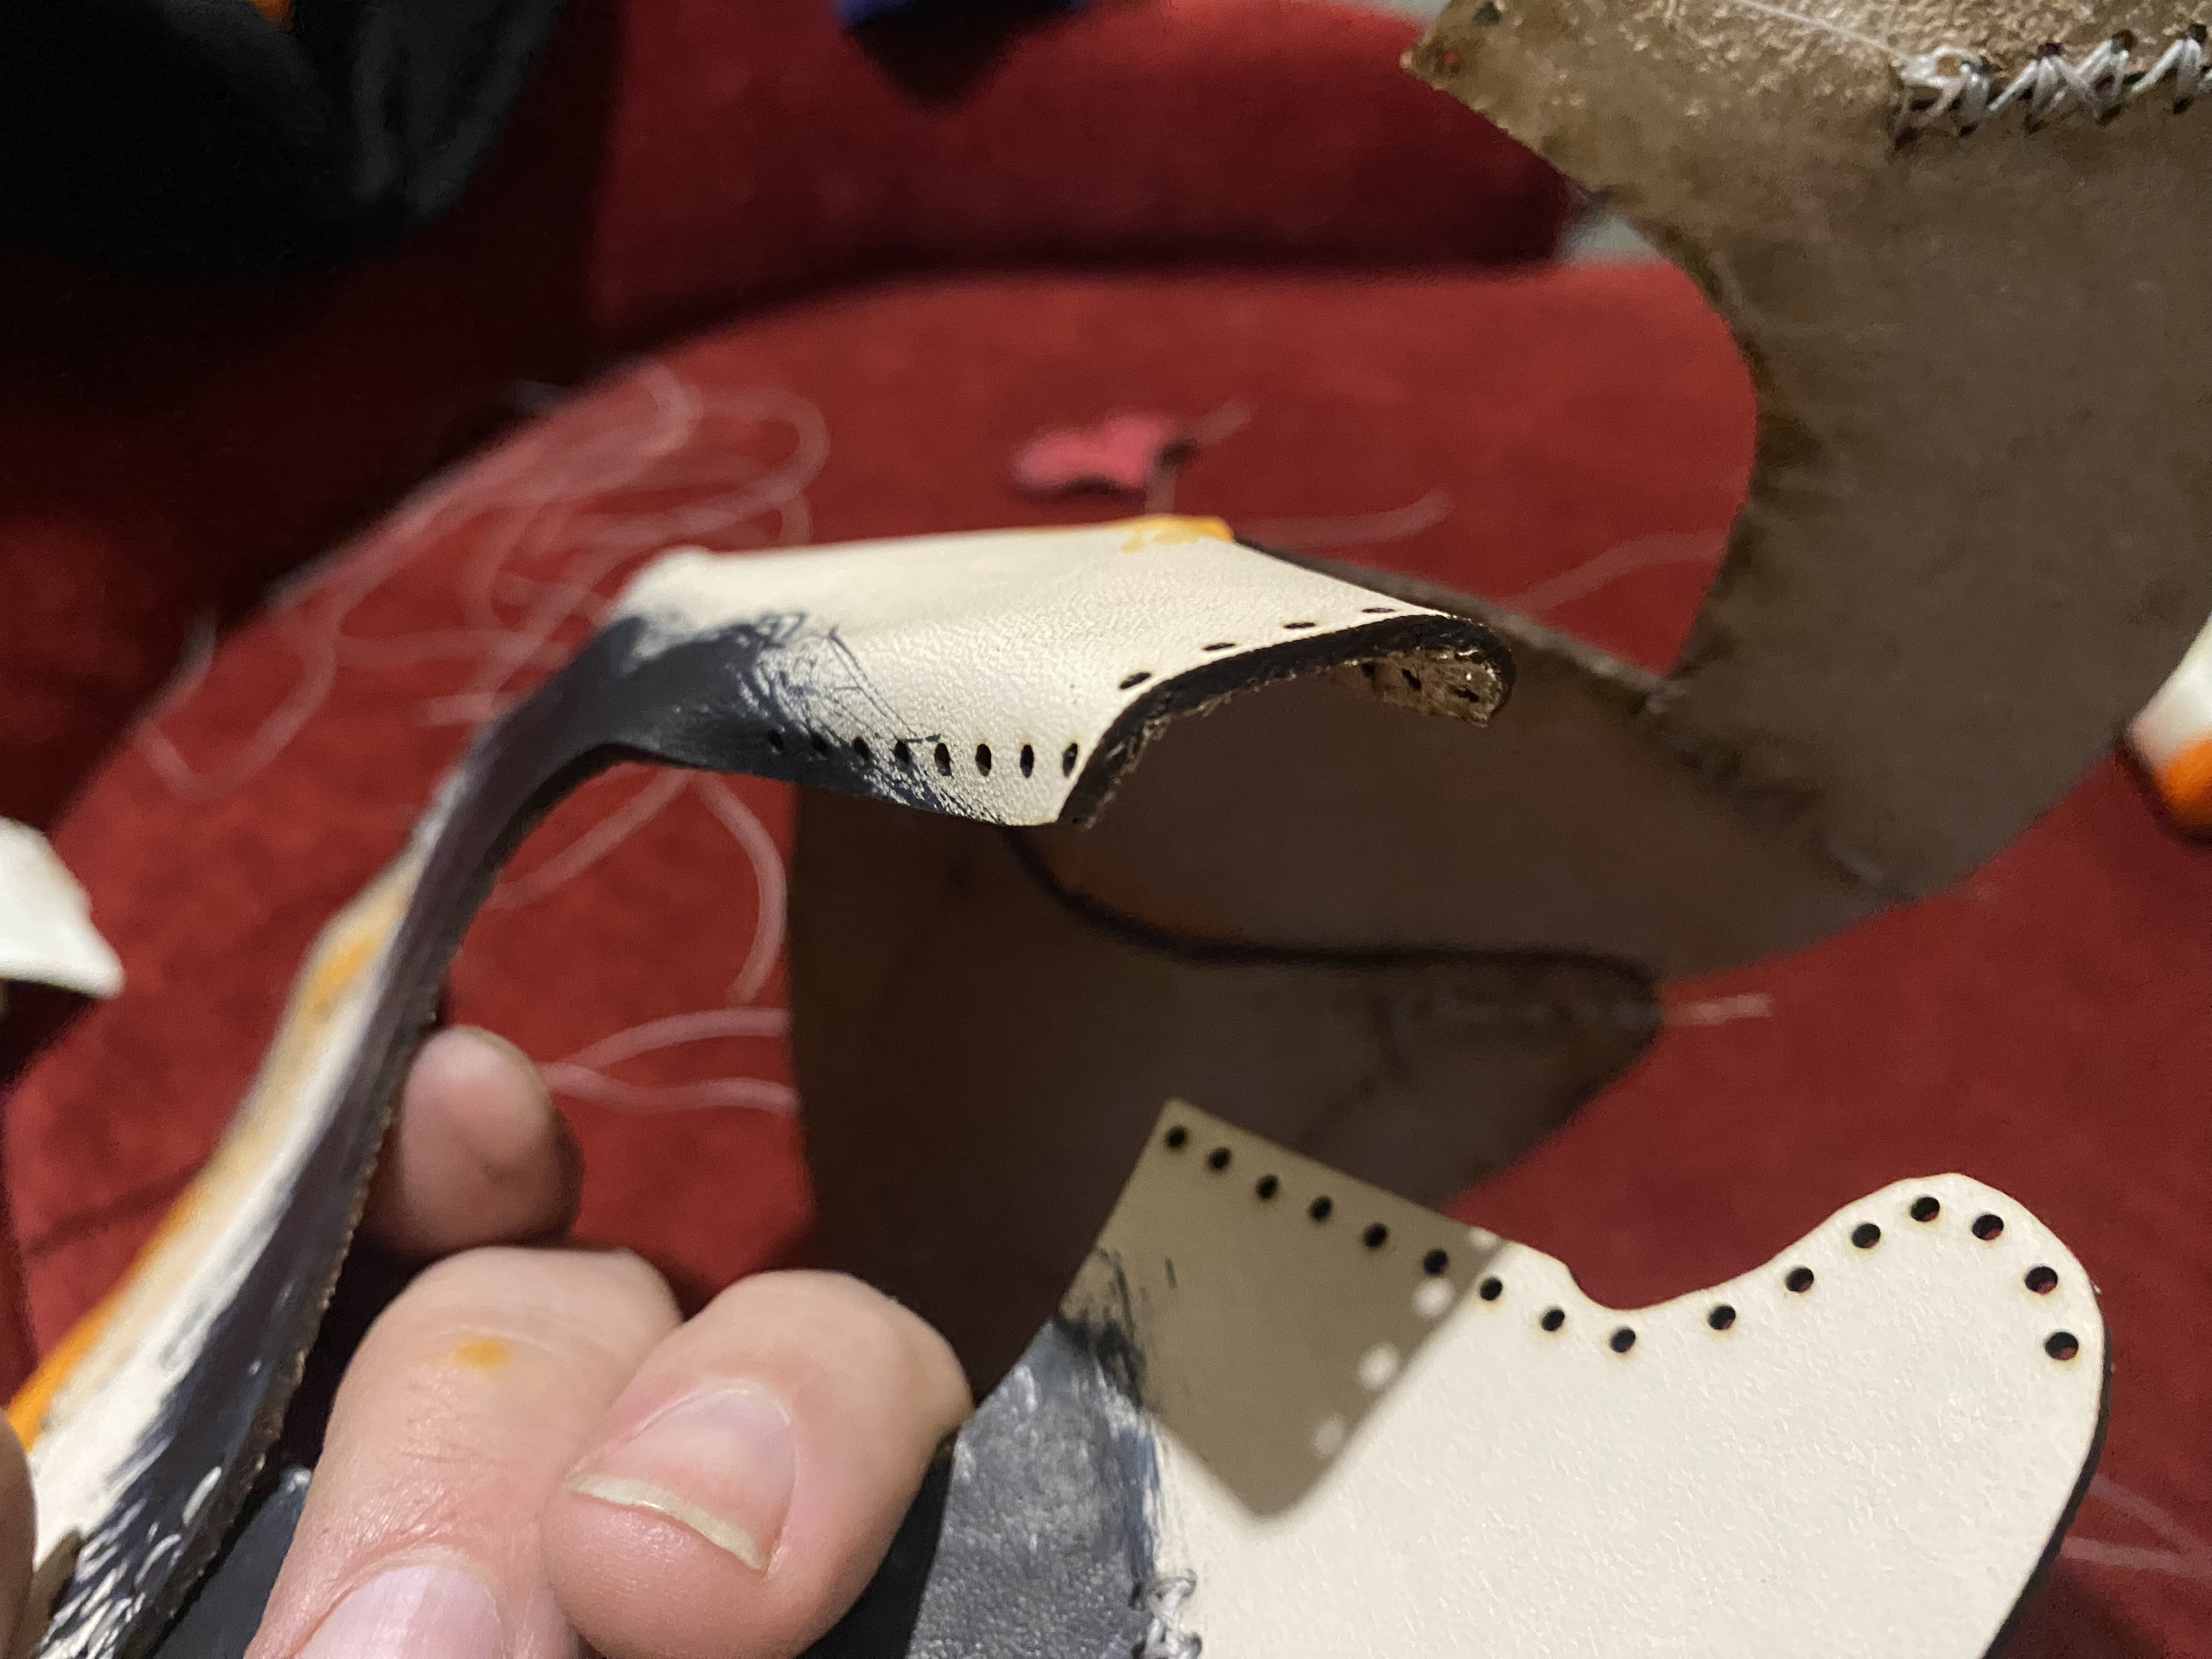
Attach Inner Ear to Outer Ear
- Find the matching left and right ear sets (inner and outer). Because this is not a high stress seam, I chose to only do a single pass running stitch.
Step2
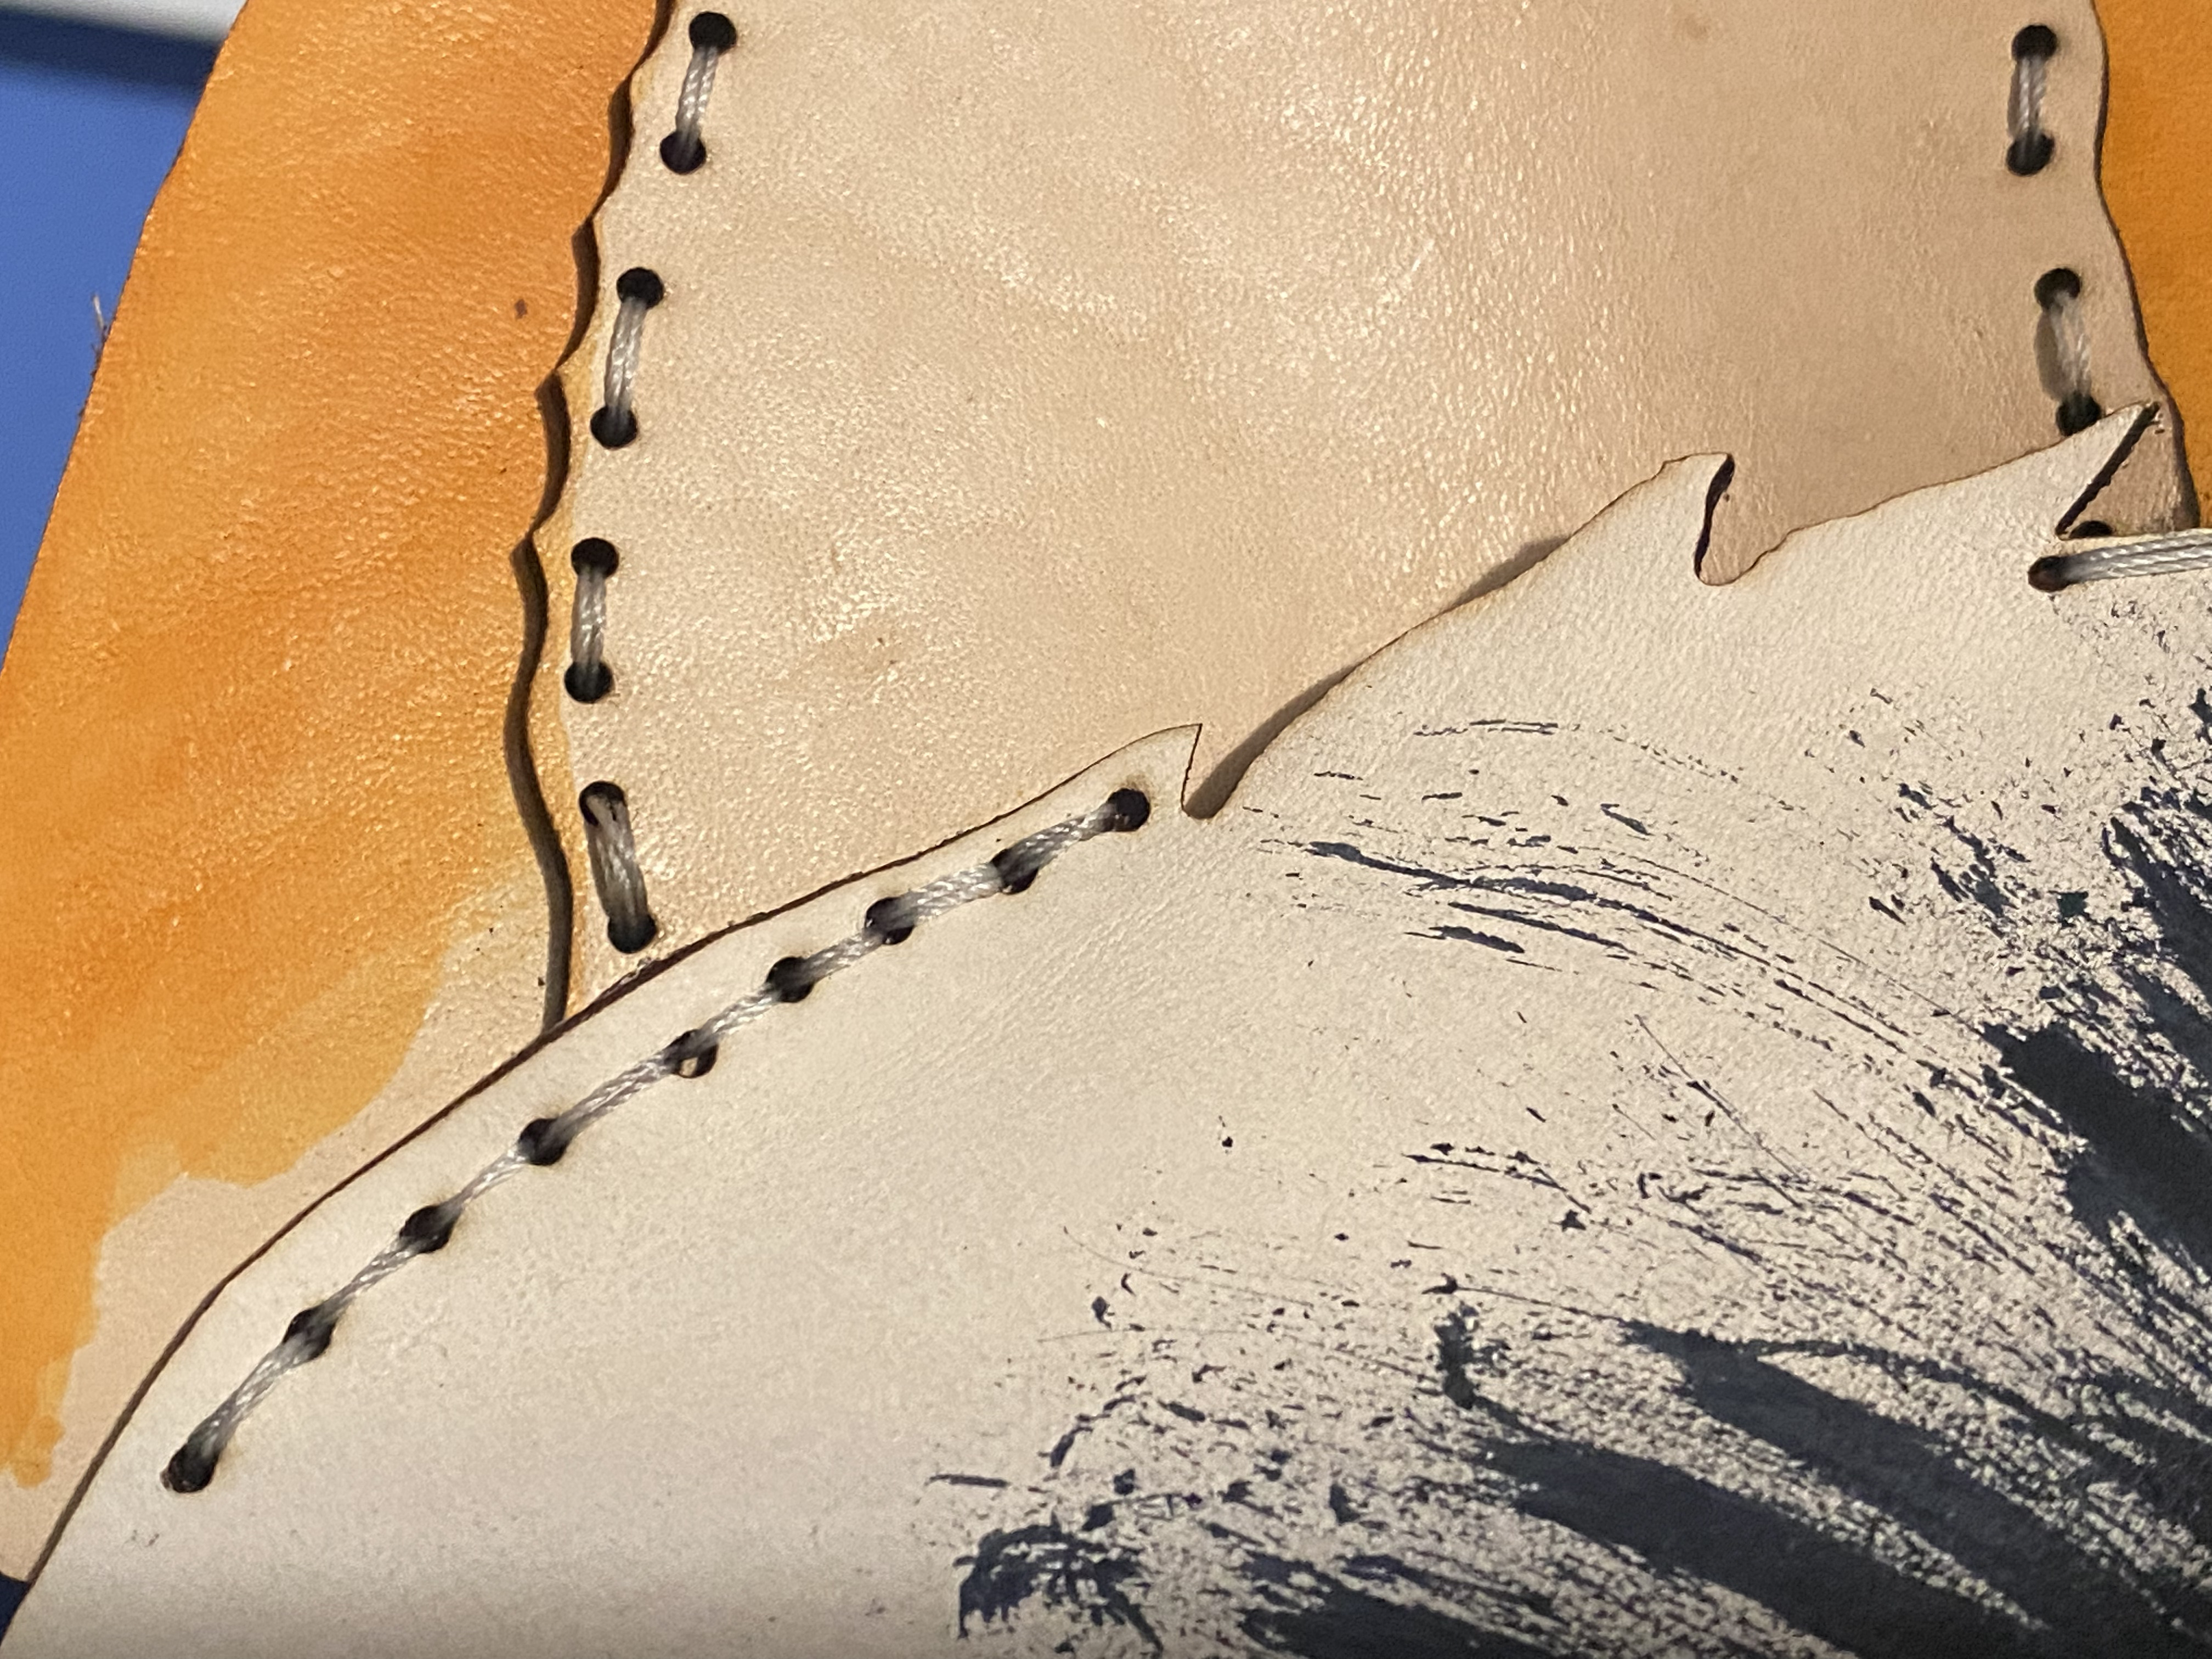
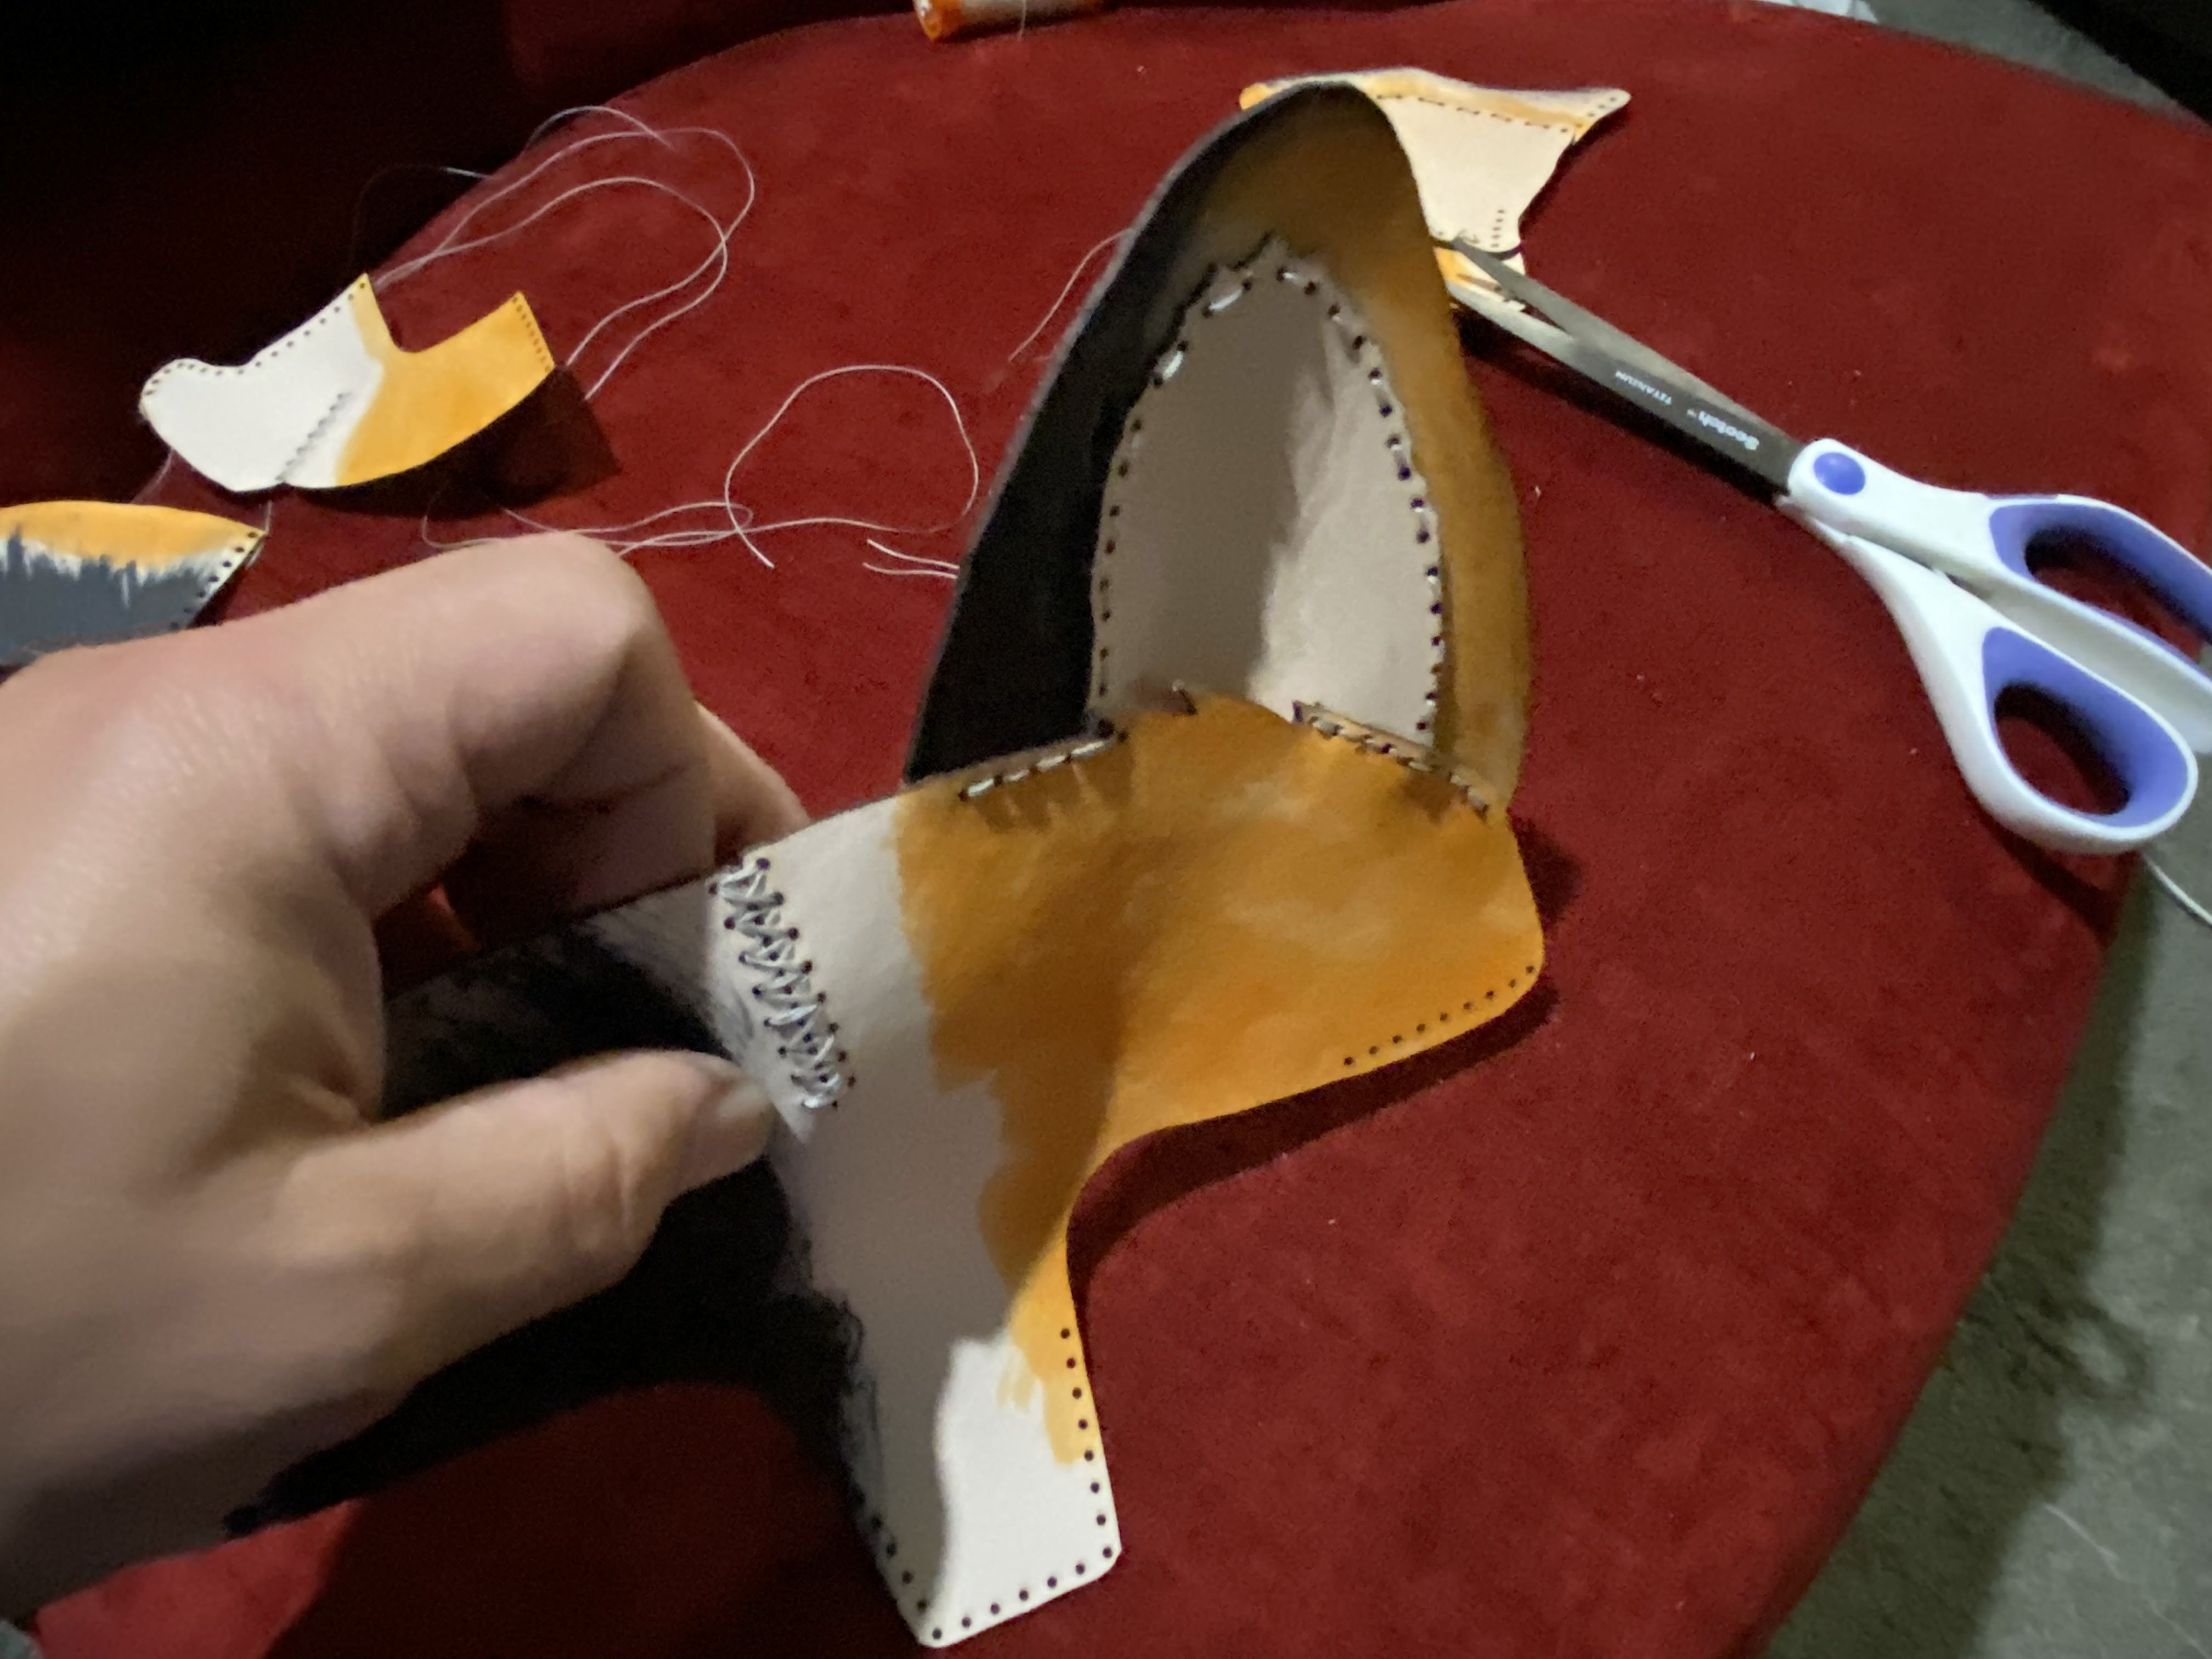
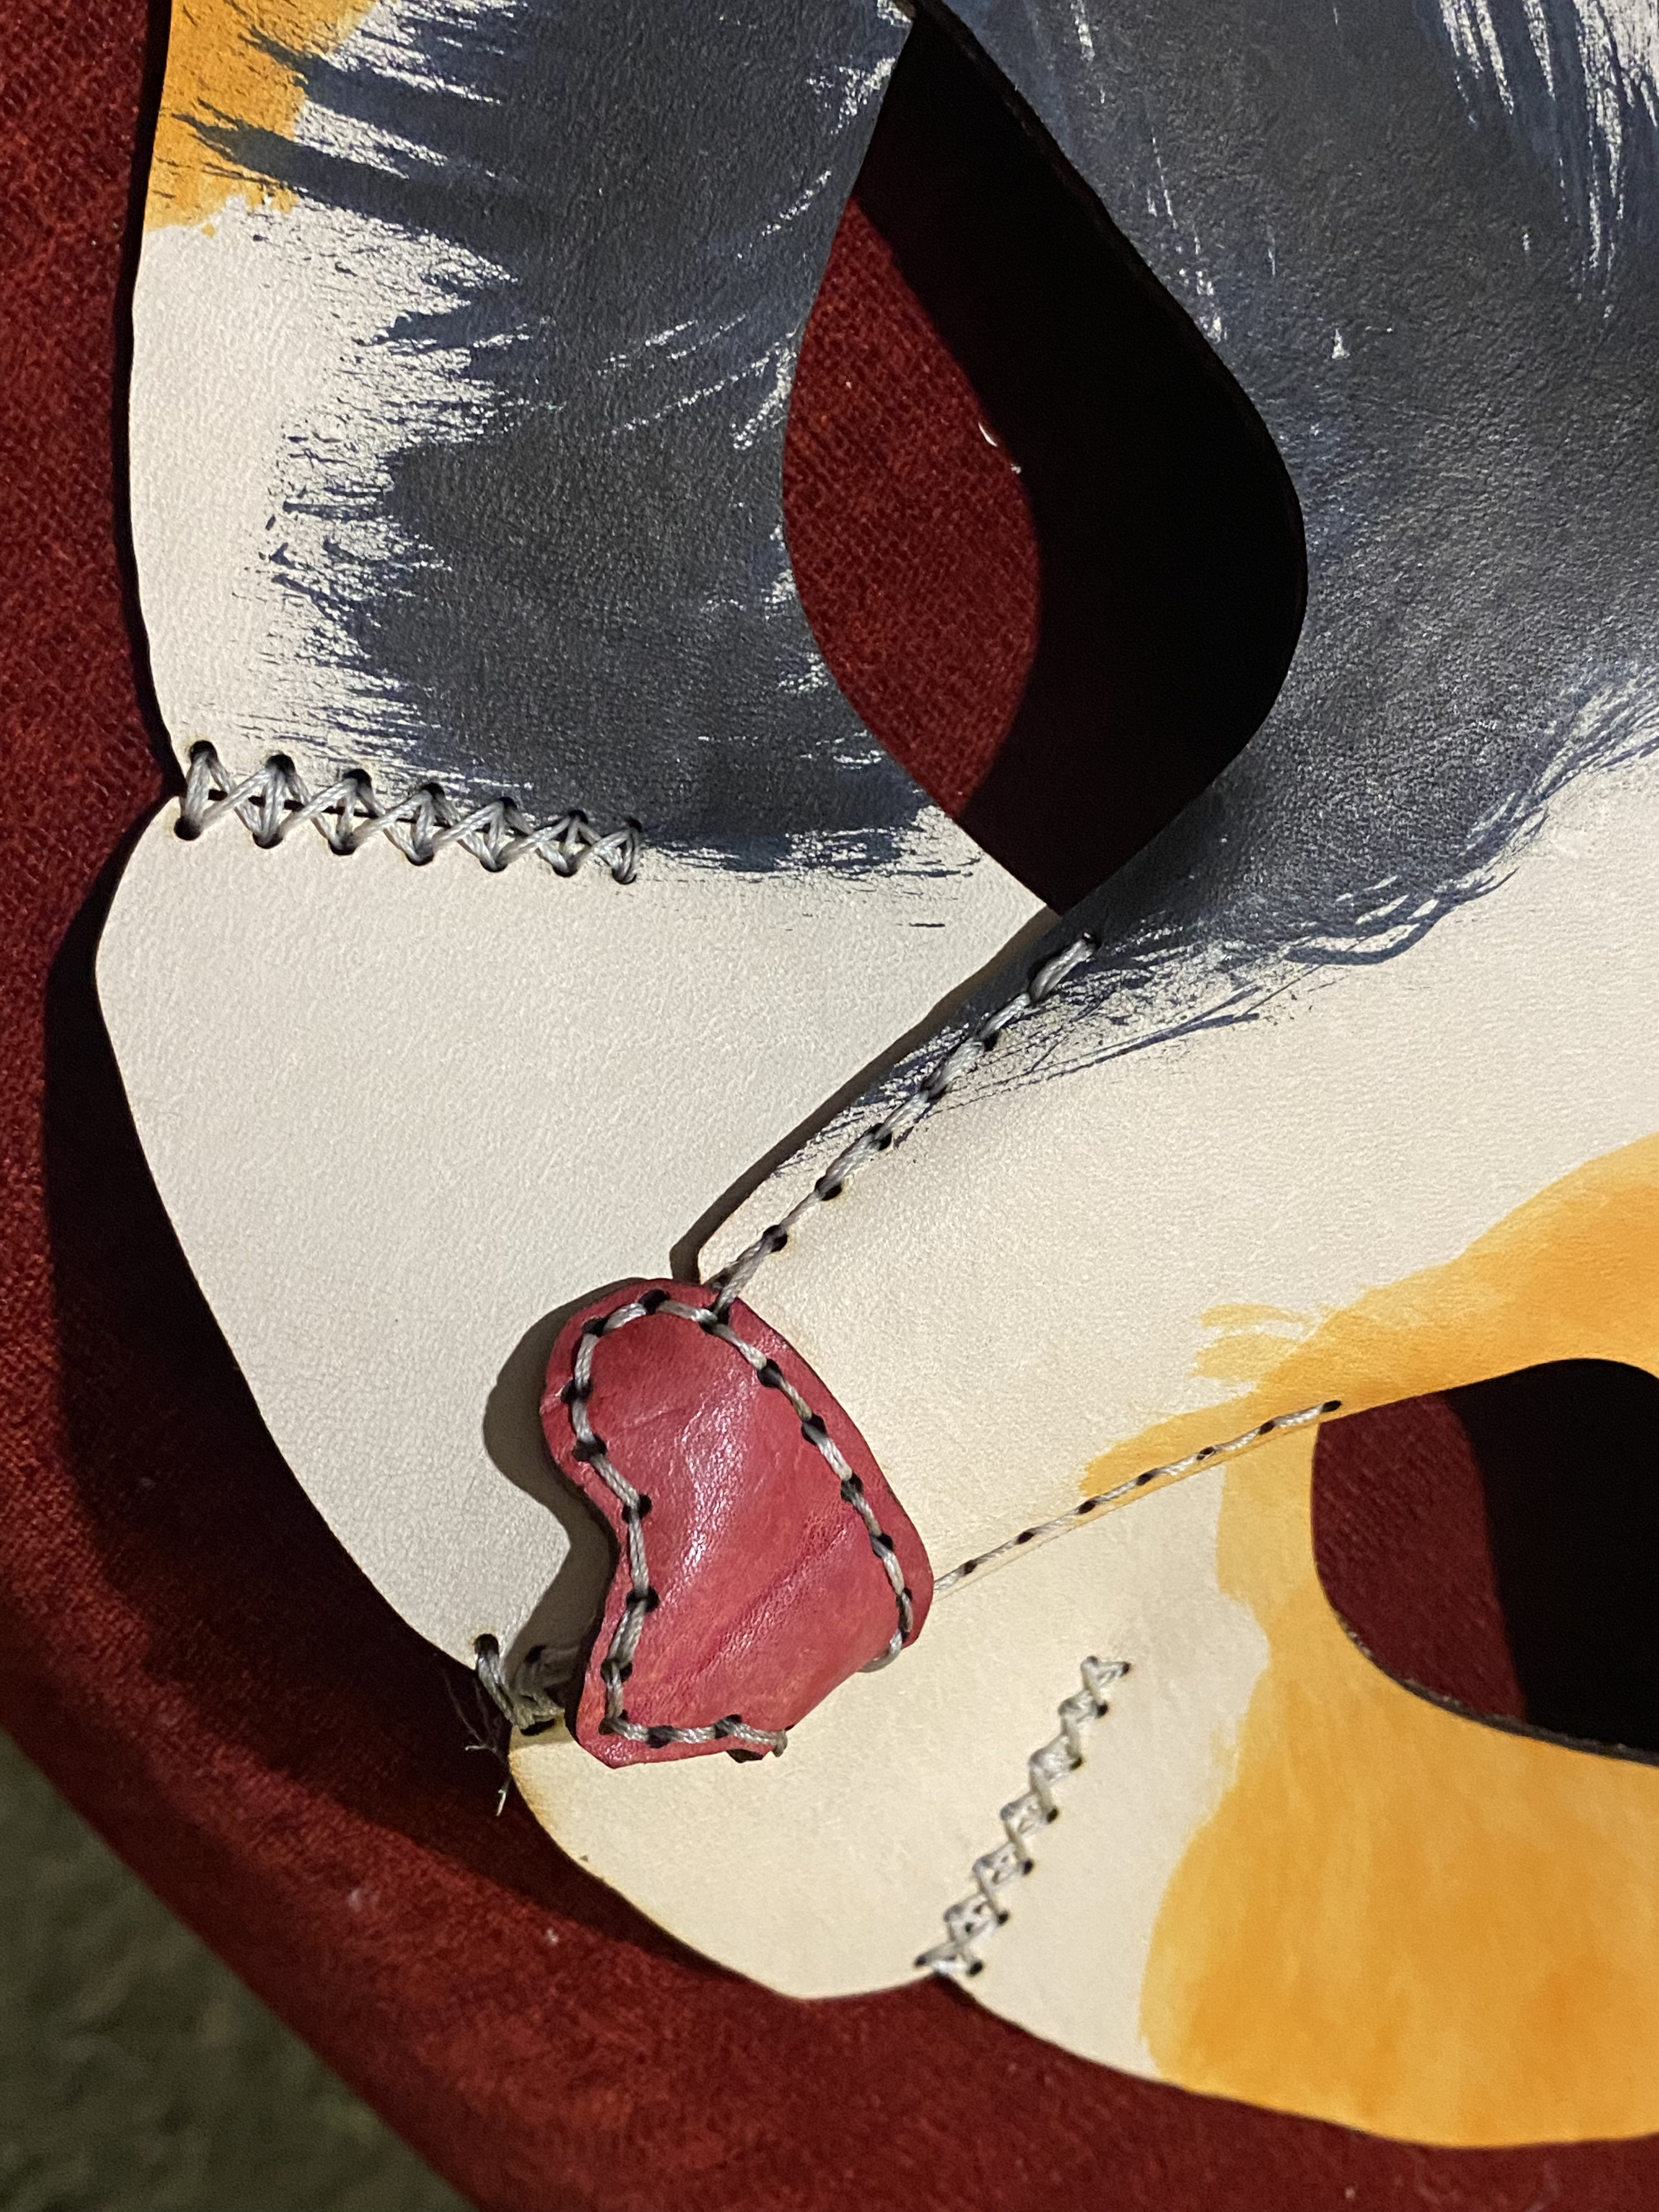
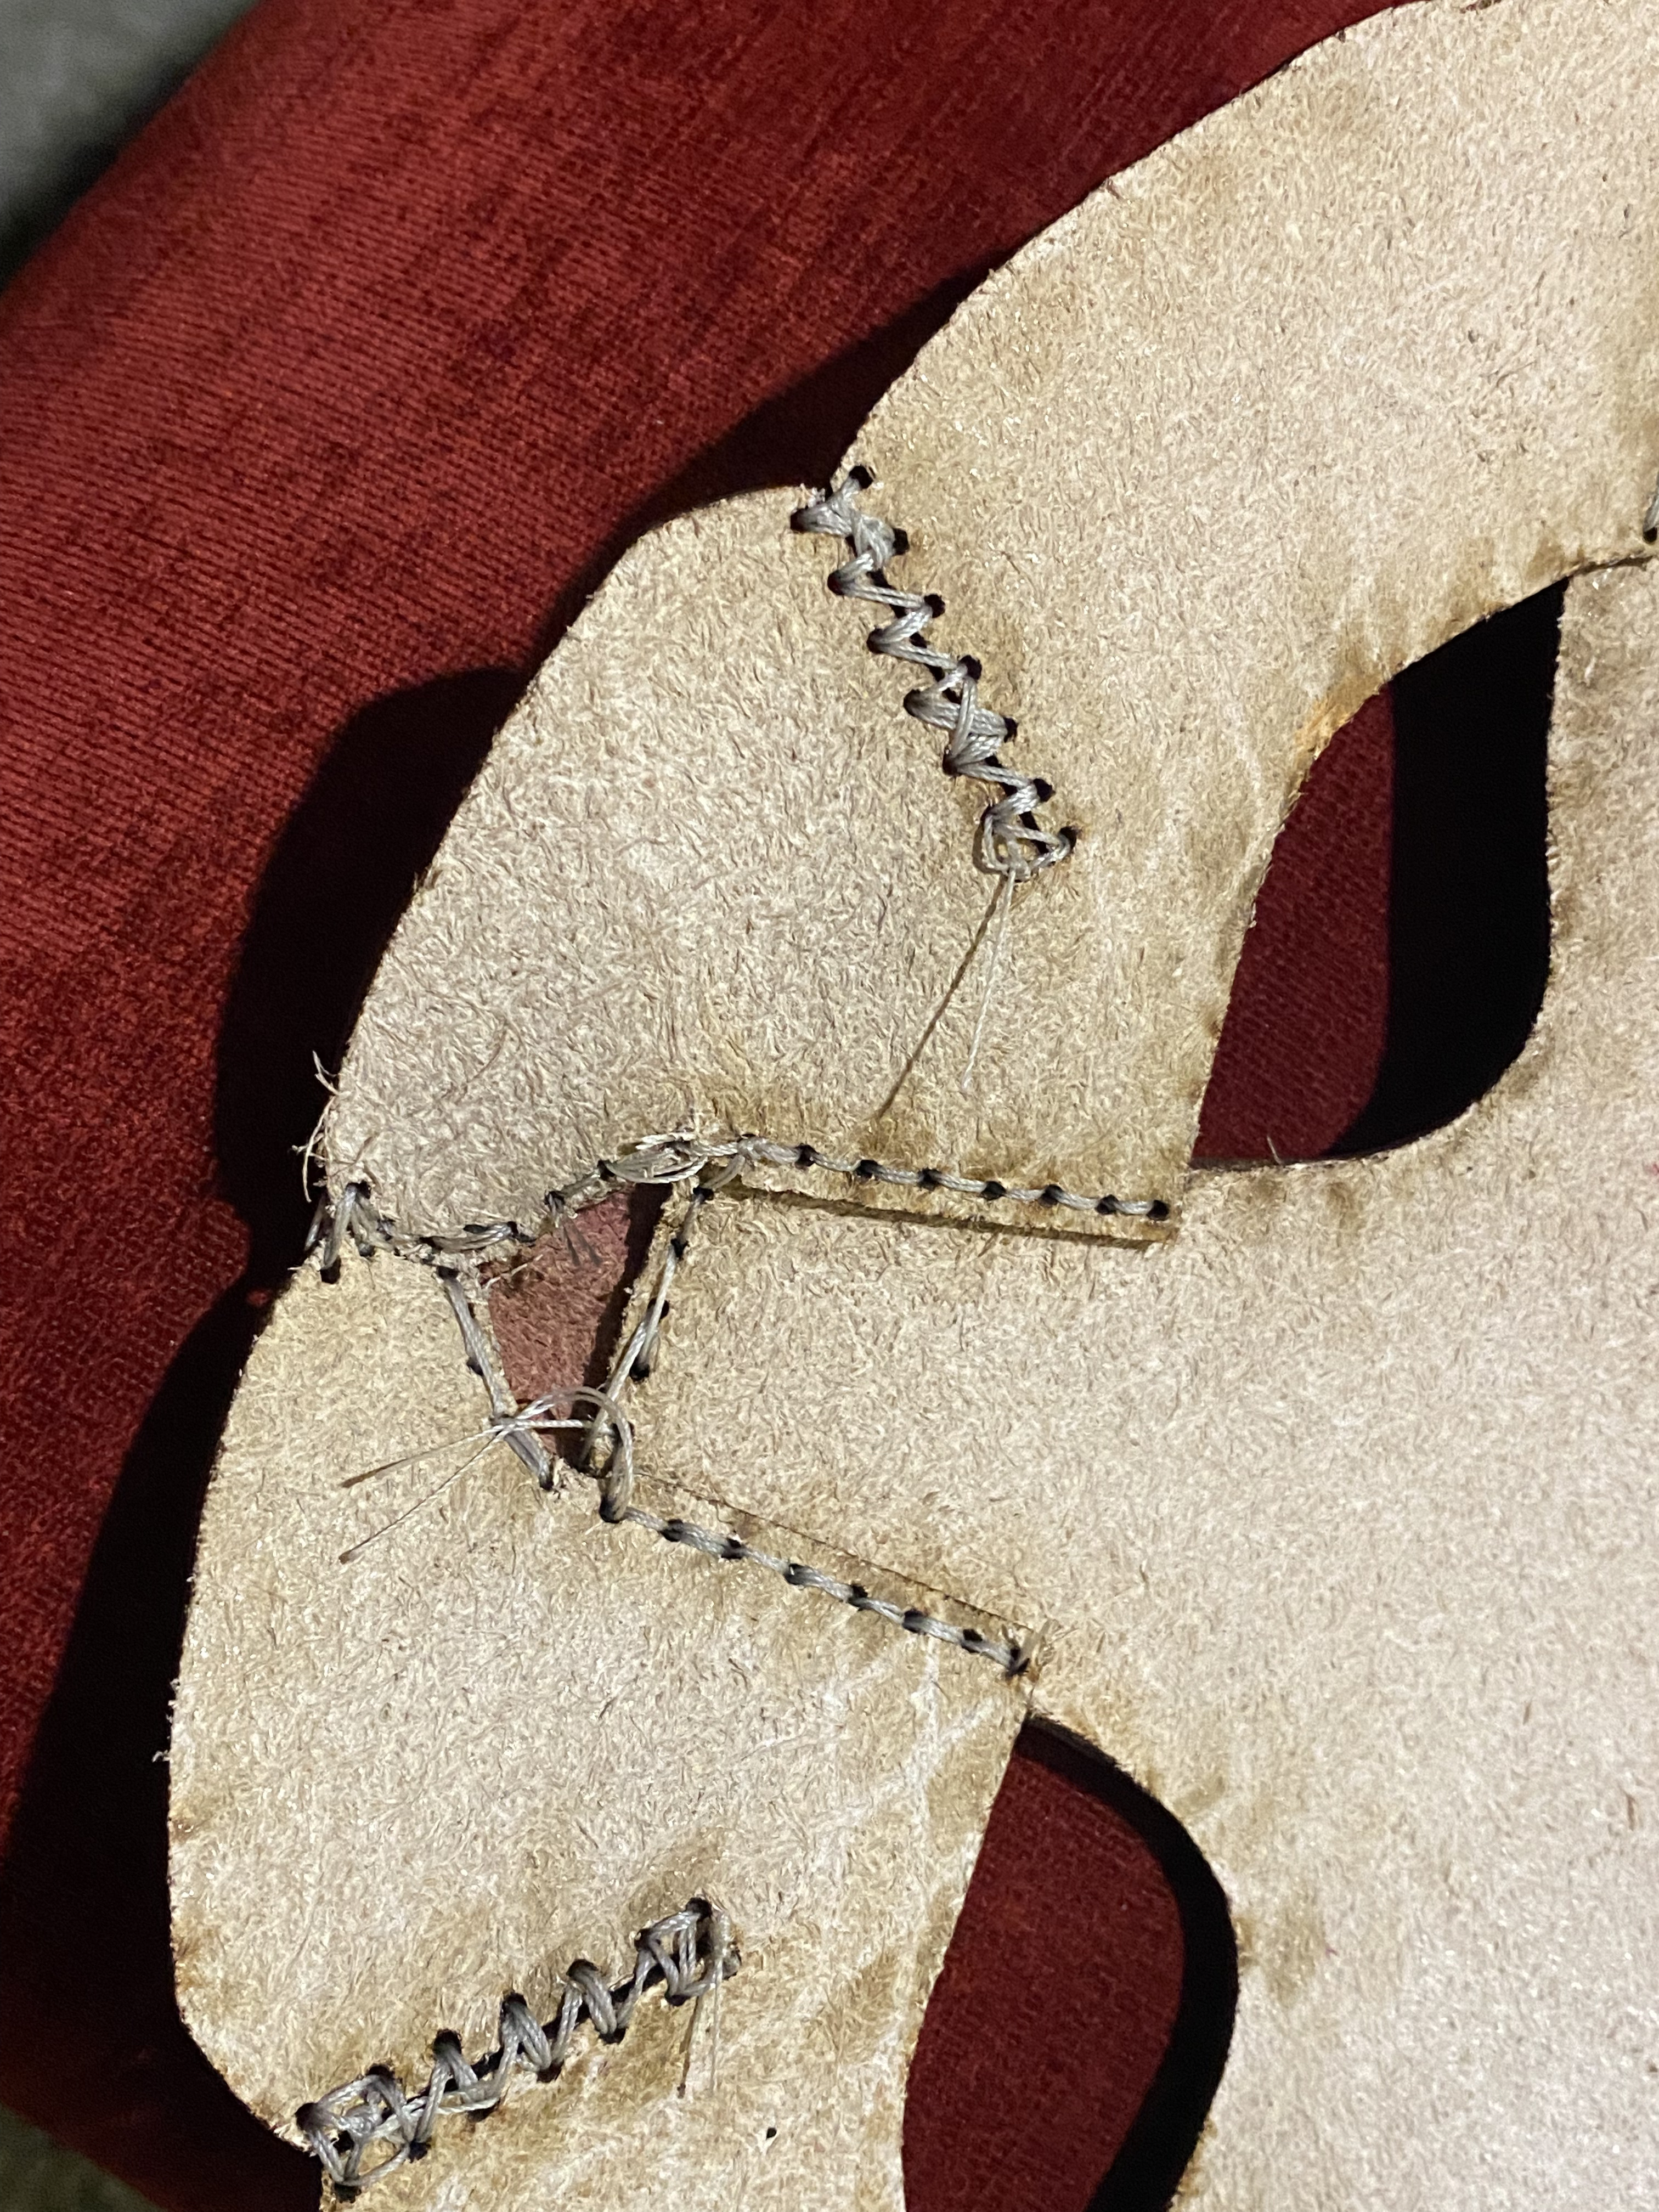
Stitch up the "V" shaped stitches in the forehead and cheeks. These seams allow the mask to contour better to your face. For this "V" seam, I suggest adding a couple "criss/cross" stitches to hold the tighter (see below). Hold the "V" seam closed while you stitch to create this effect.
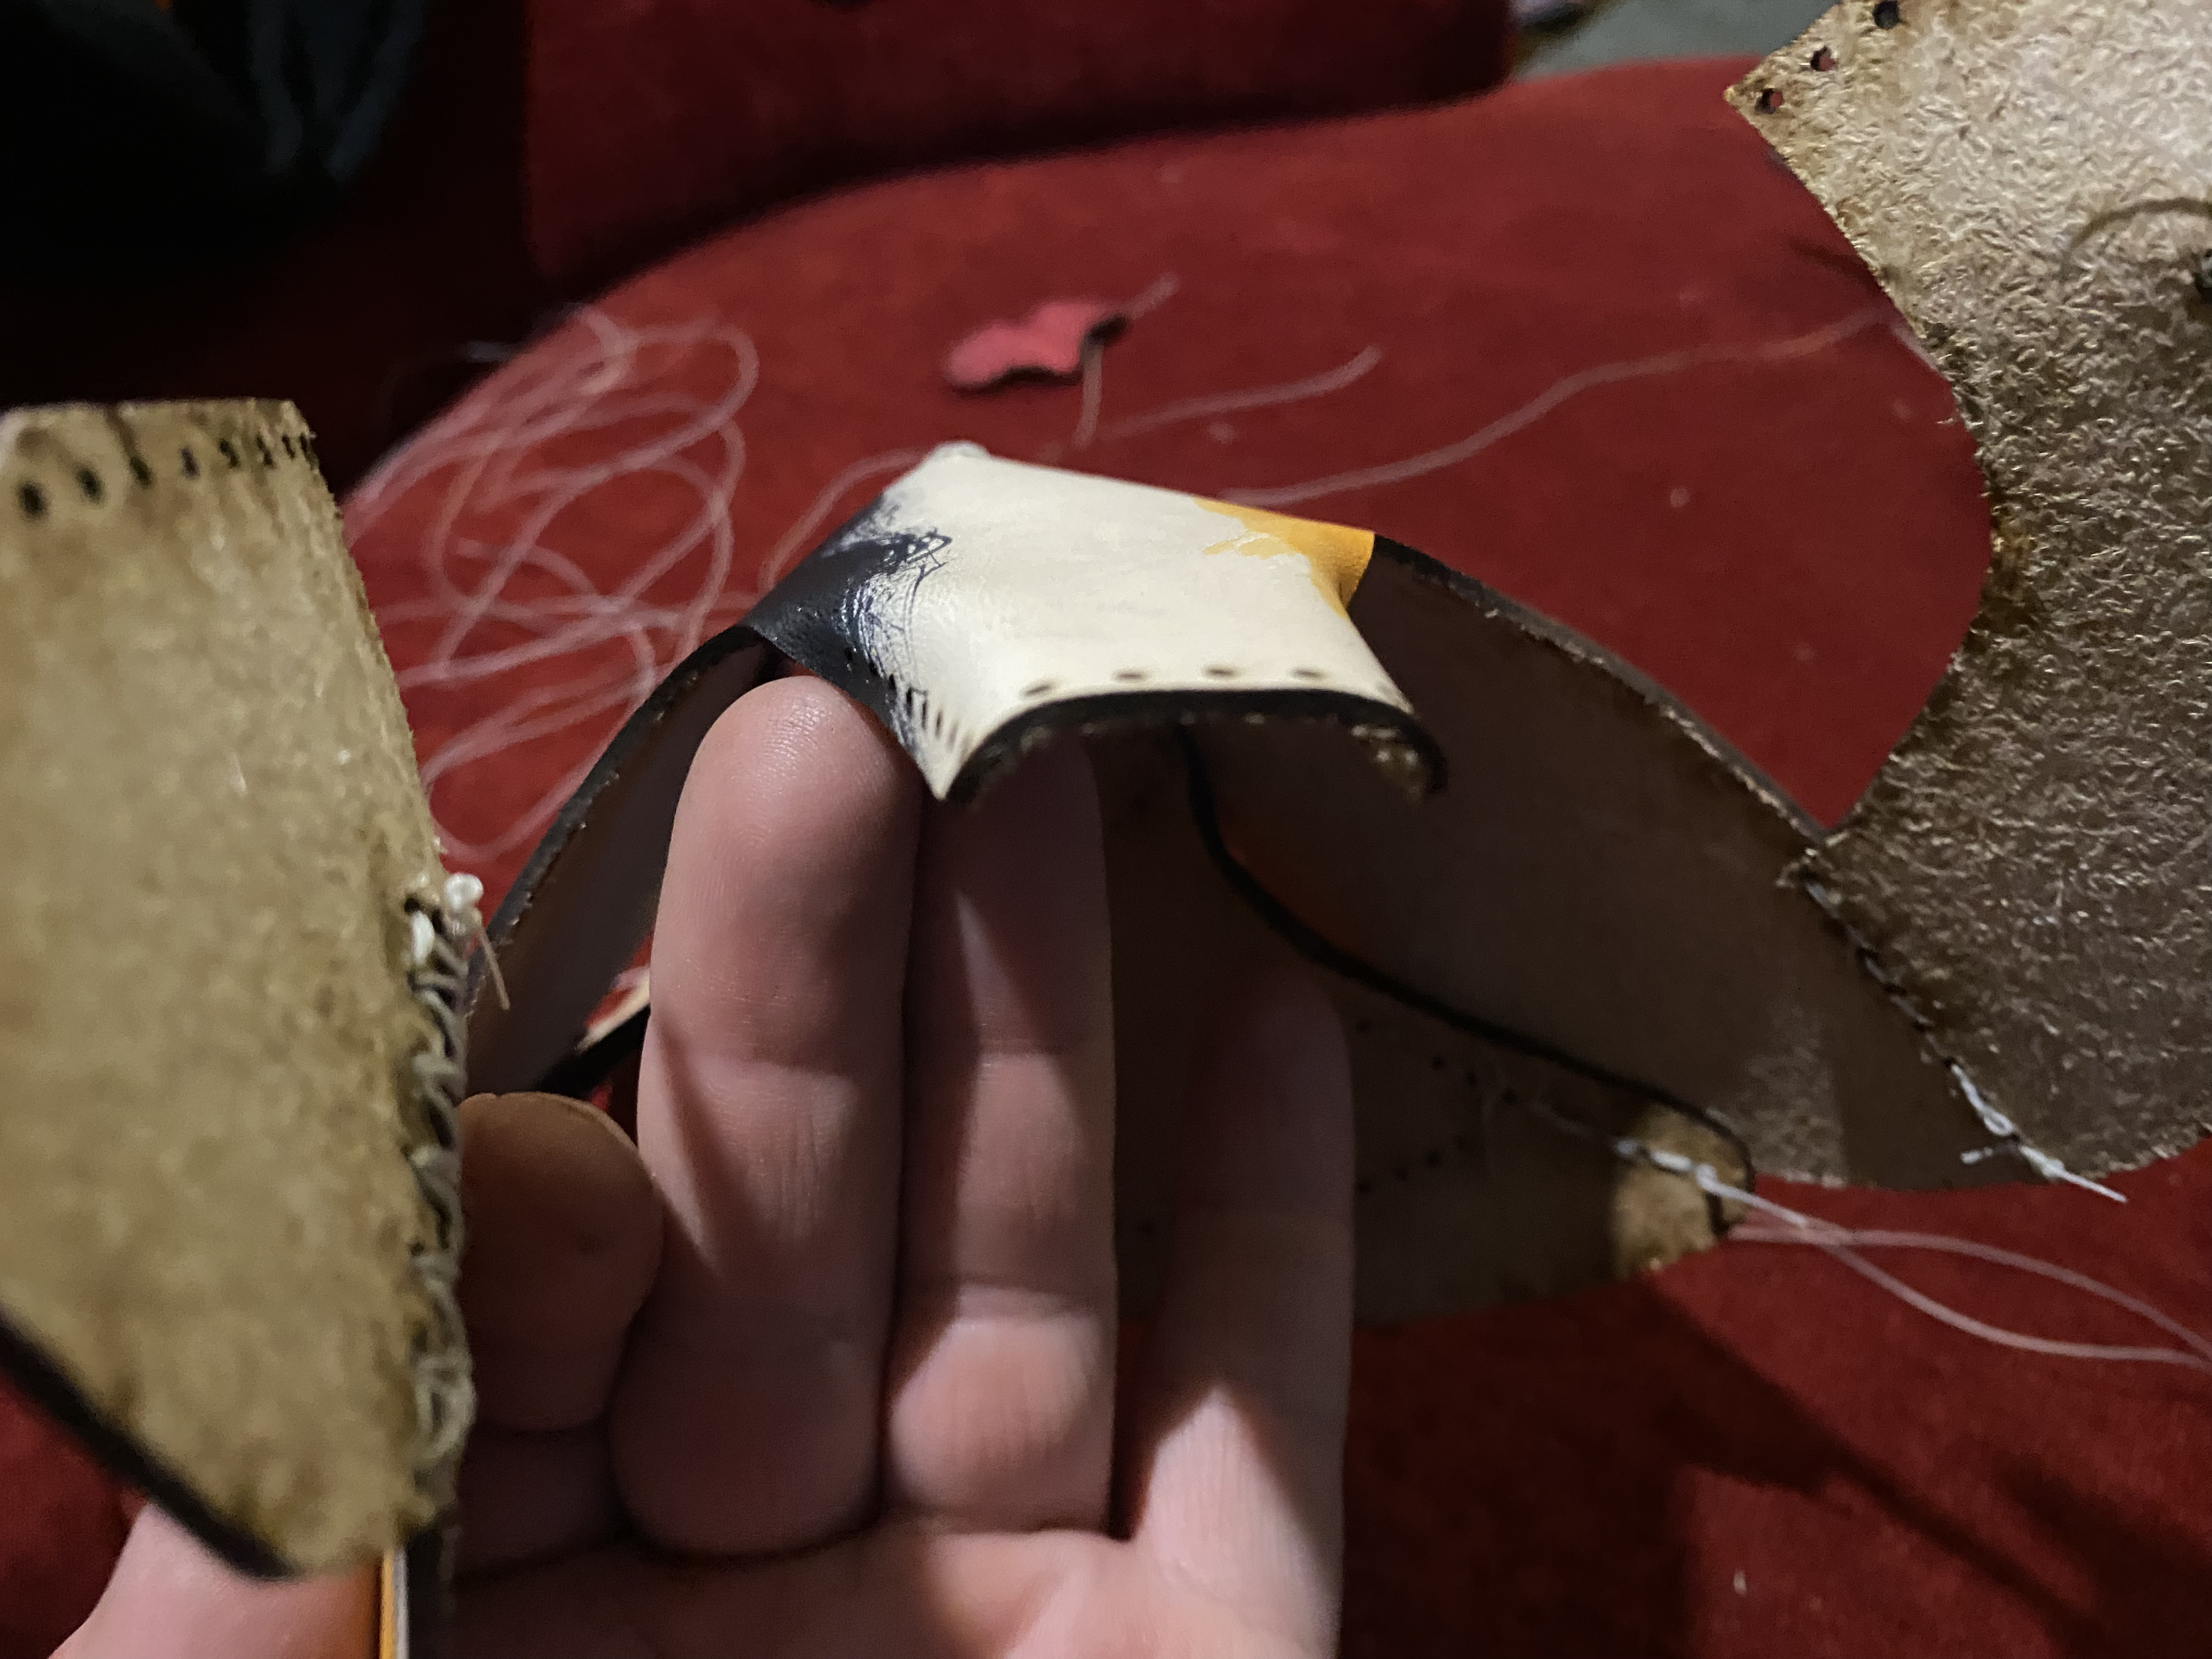
Attach the ears to the forehead. The ears attach from the back and have a slight curve to them to make them look more realistic.
The curve is achieved because the stitch holes on the forehead are slighter closer together than on the ear, so the ear will need to curve slightly for all the holes to line up. Repeat for 2nd ear.
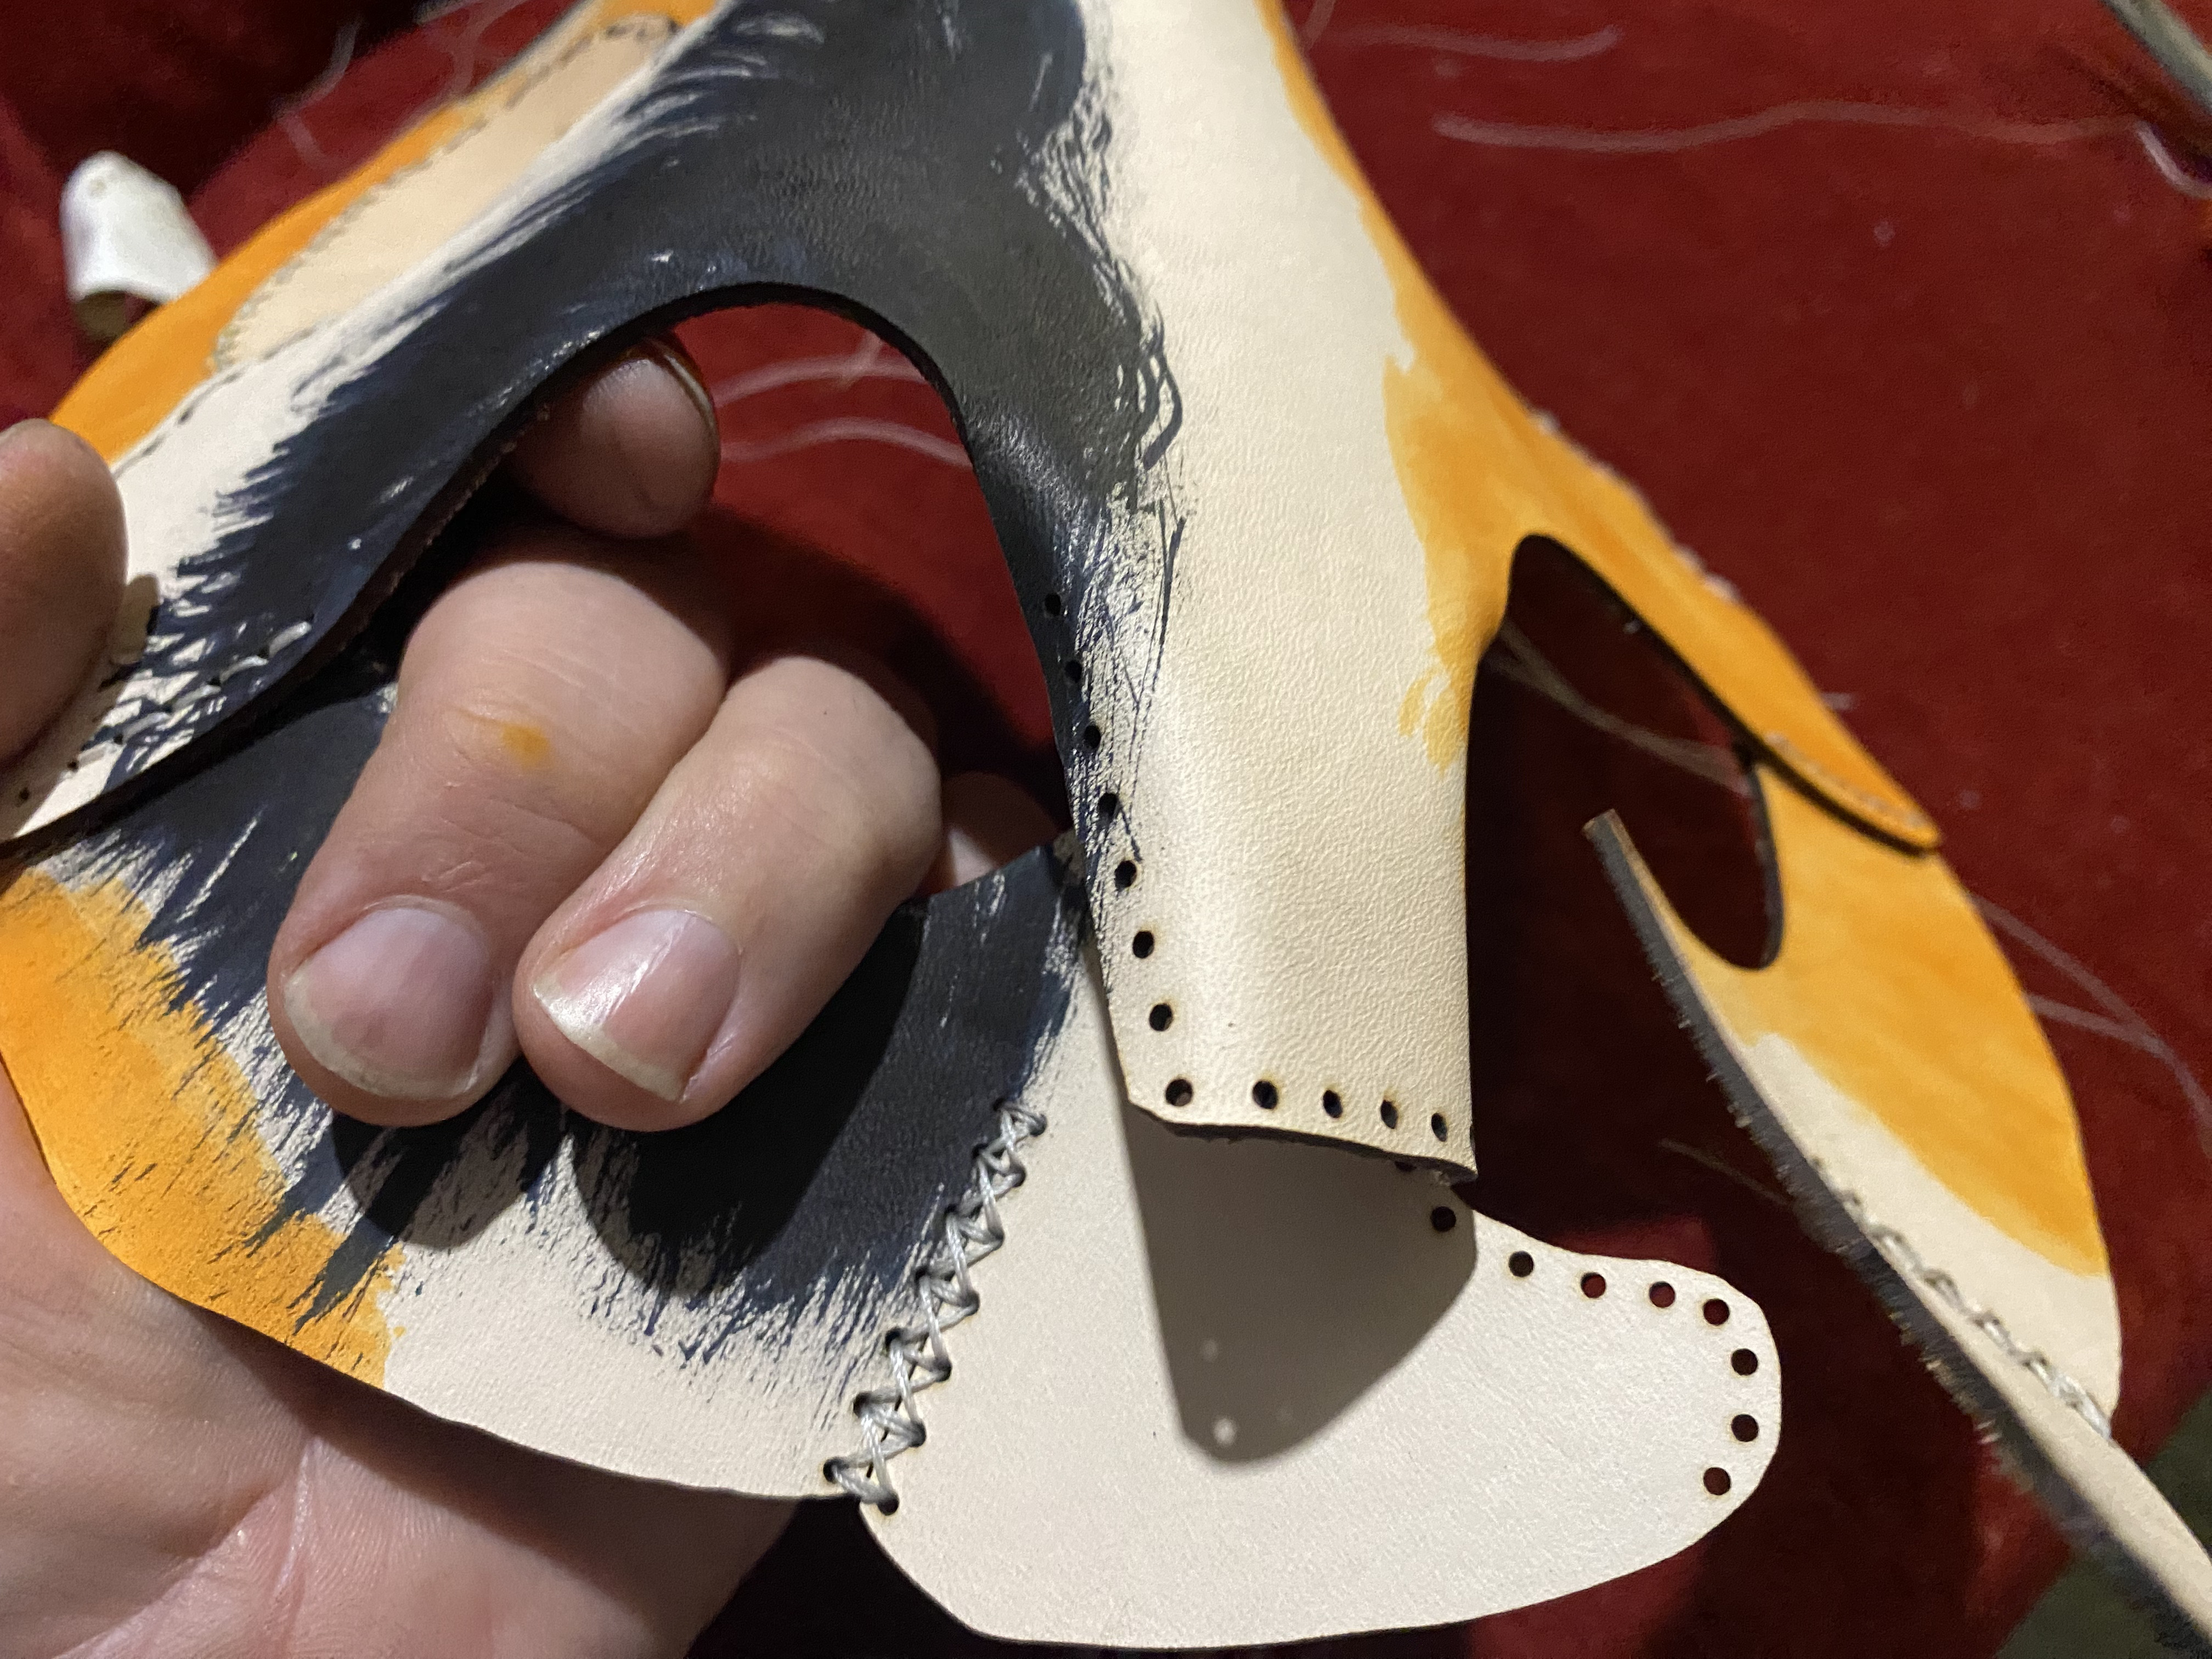
Attach the forehead to the cheek at the horizontal line under the eye. Back side of the mask seen here where they cheeks first attach. Repeat for 2nd side.
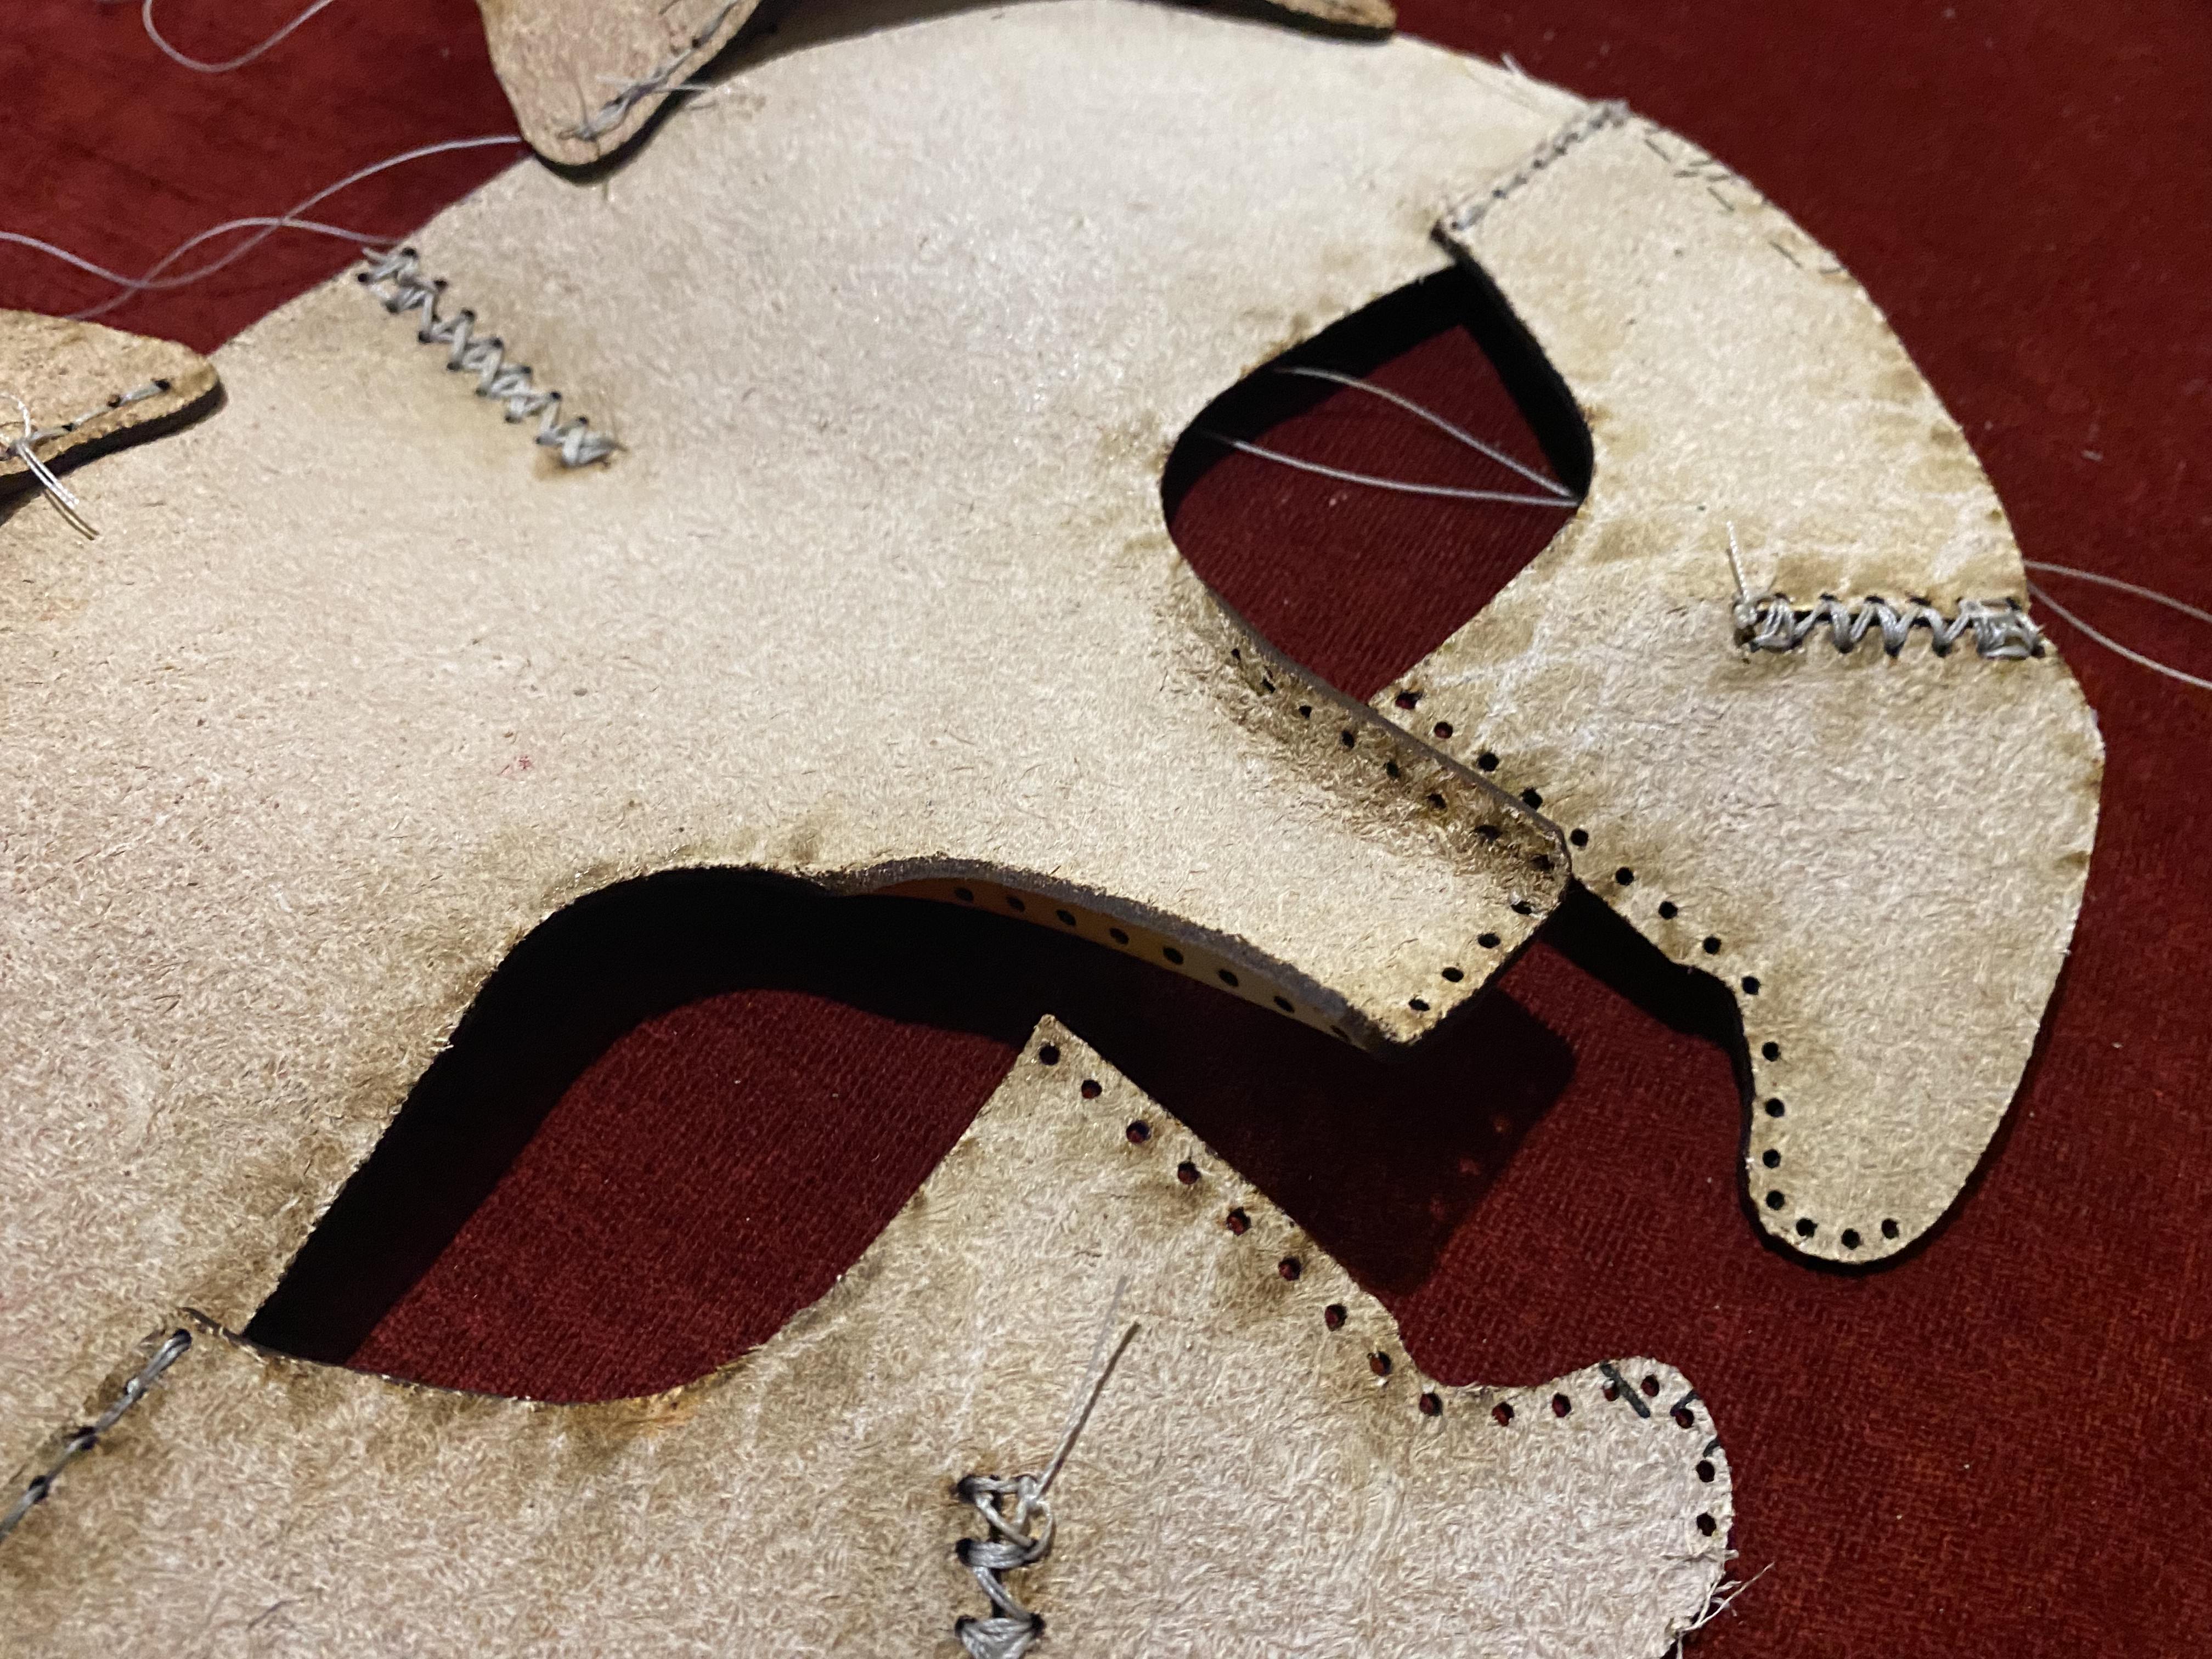
Bend the bridge of the nose slightly with your fingers to create a curved effect and attach the lower section of the cheek. You can slightly dampen the back side of the leather to make it softer and easier to bend.
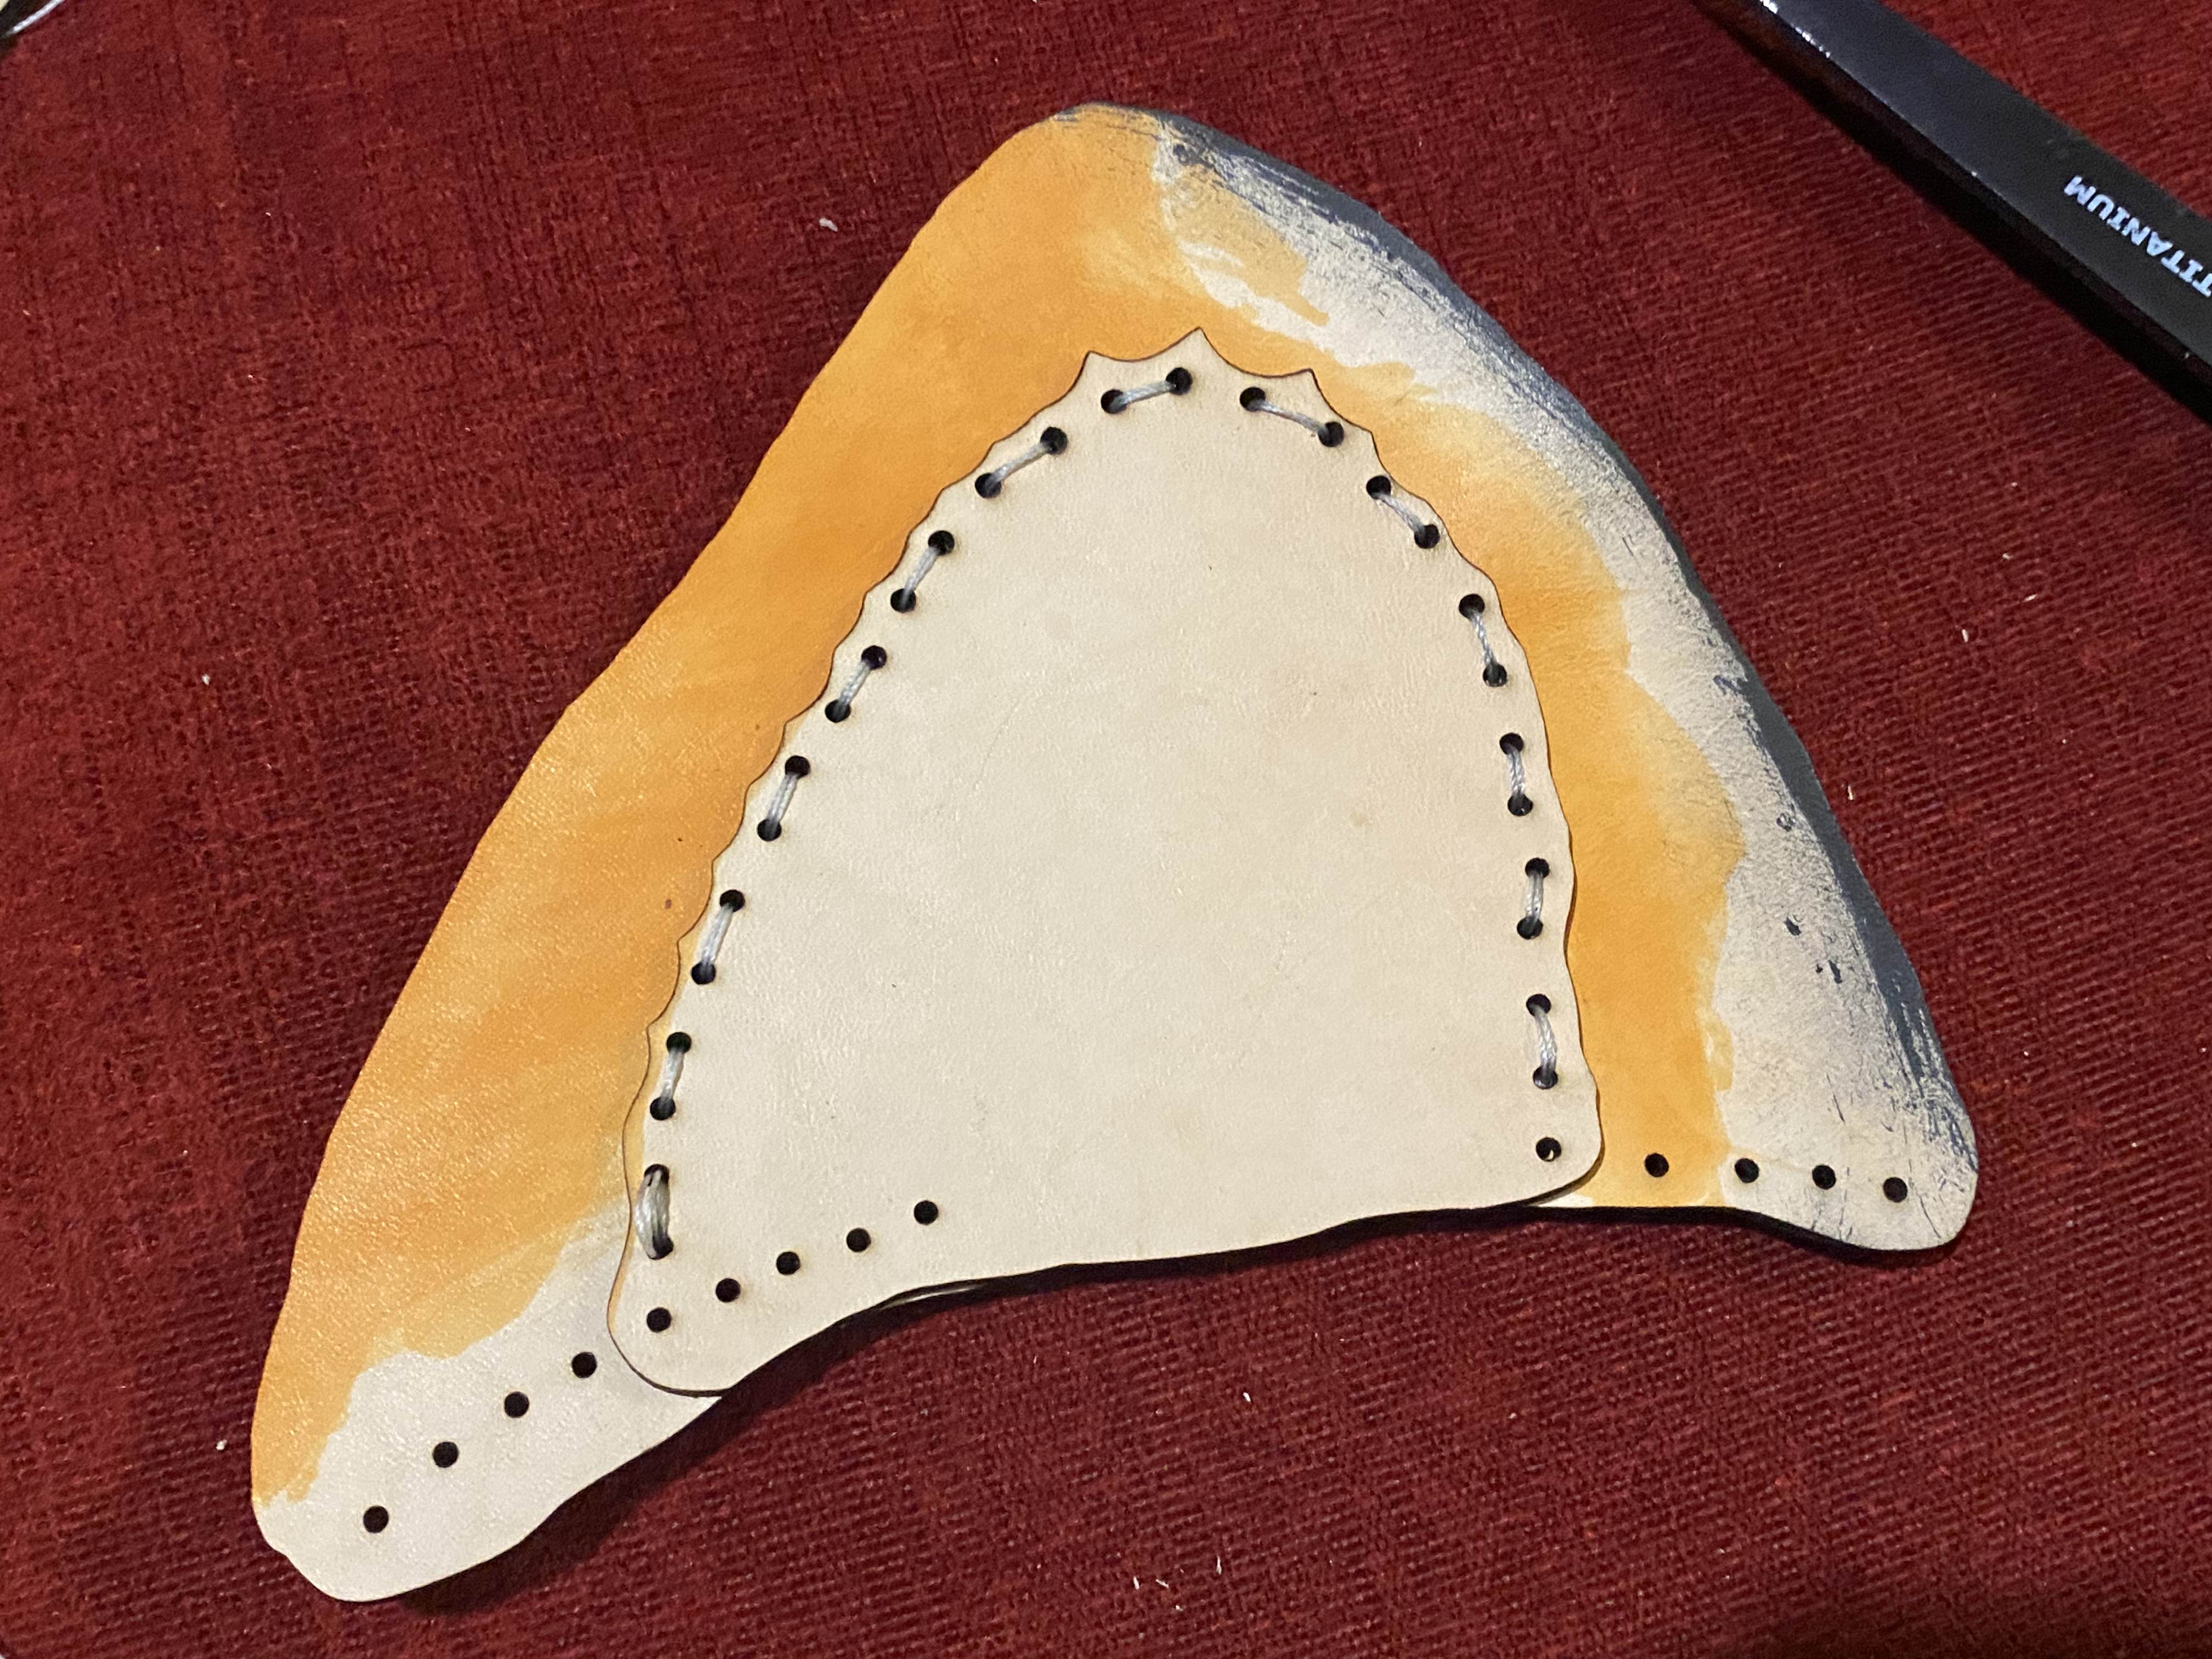
Stitch the lower end of the cheek to the bridge of the nose with the cheek attaching behind the bridge of the nose section.
Step3
The last step is attaching the nose, it's a little tricky/frustrating because it stretches the leather over the curve of the lower cheek. Take your time and it may take going over 2 times to get the thread to contour the nose right. Be patient, it's not you, it's just a tough seam to sew. The last 2 sets of holes on the cheek are used to attach the 2 sides together under the nose.
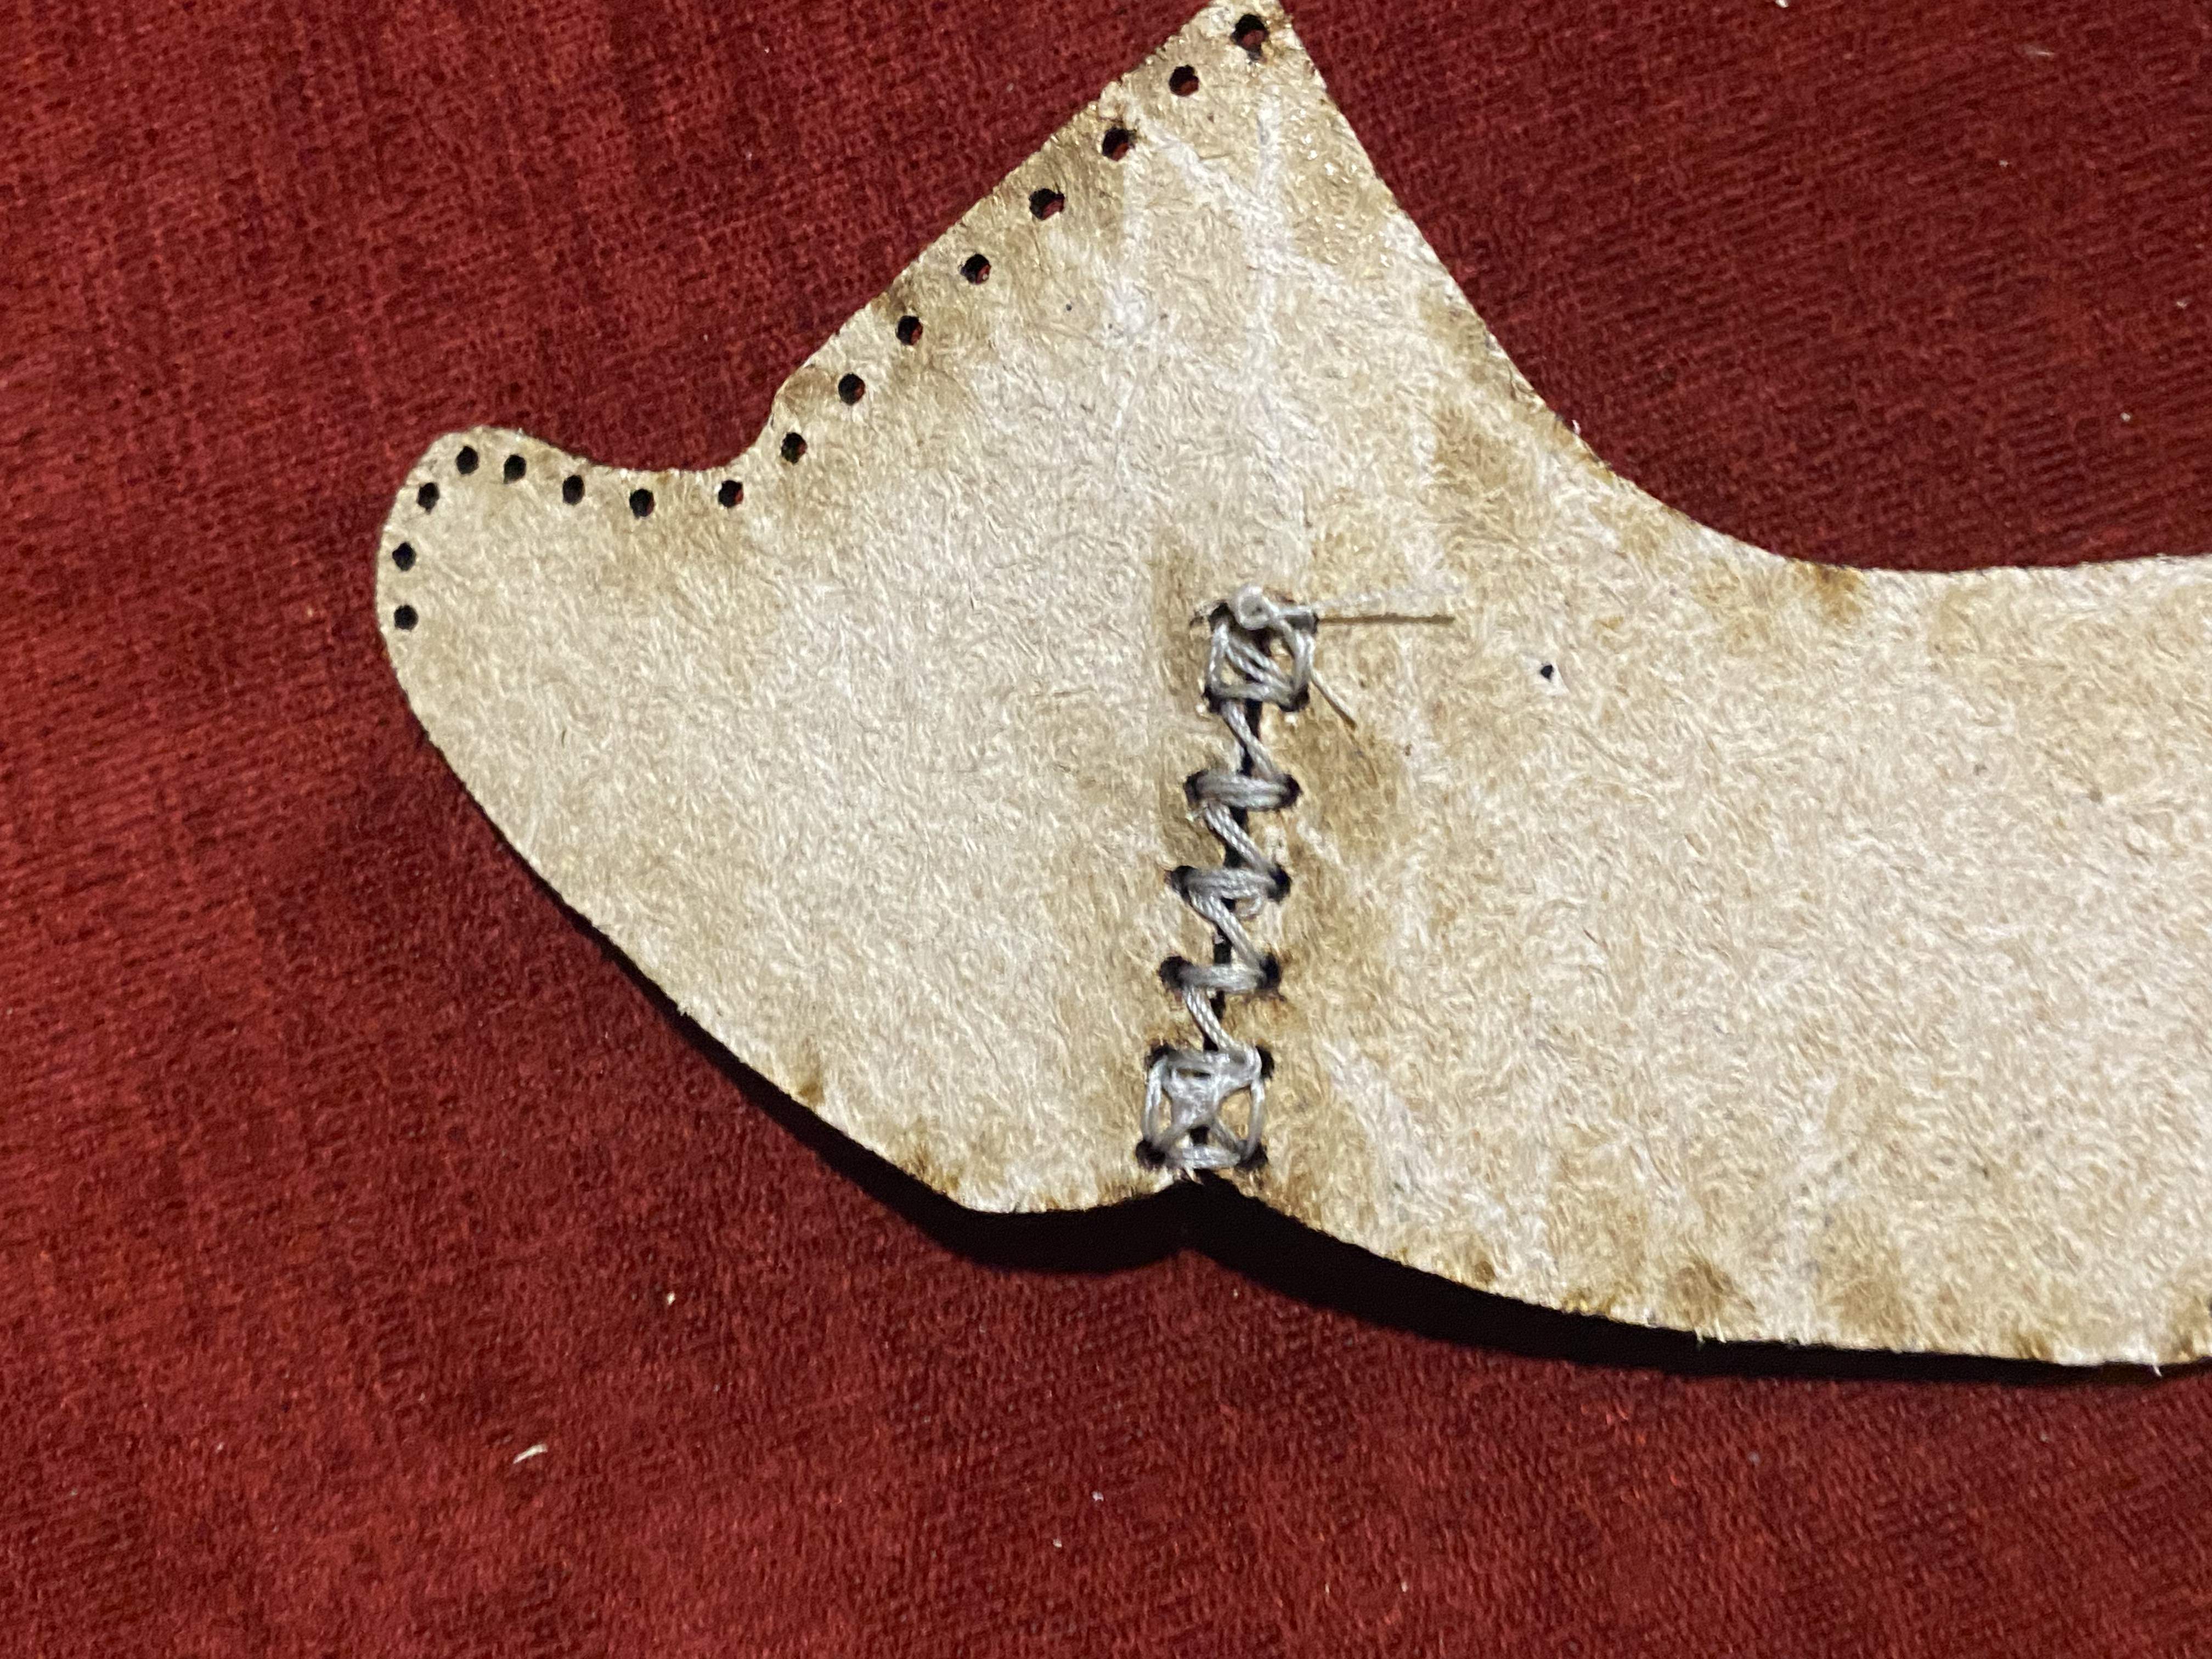
View from the back with the nose attached.
The strap can be attached from the back at the seem where the forehead meets the cheek.
Step4
*** Bonus - How to Design Your Own Mask from a Drawing ***
Sure, cats are nice, but you want to design your own mask...
Here are a few steps that I did to design the cat mask that may help you make your own design.
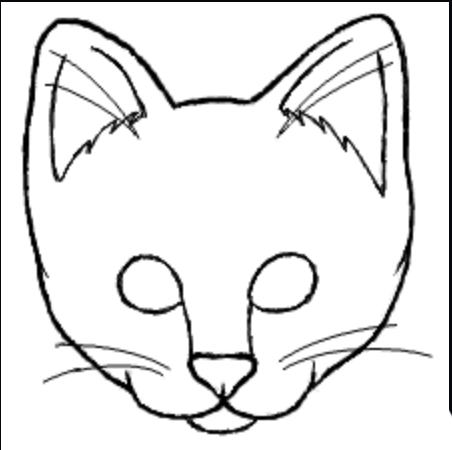
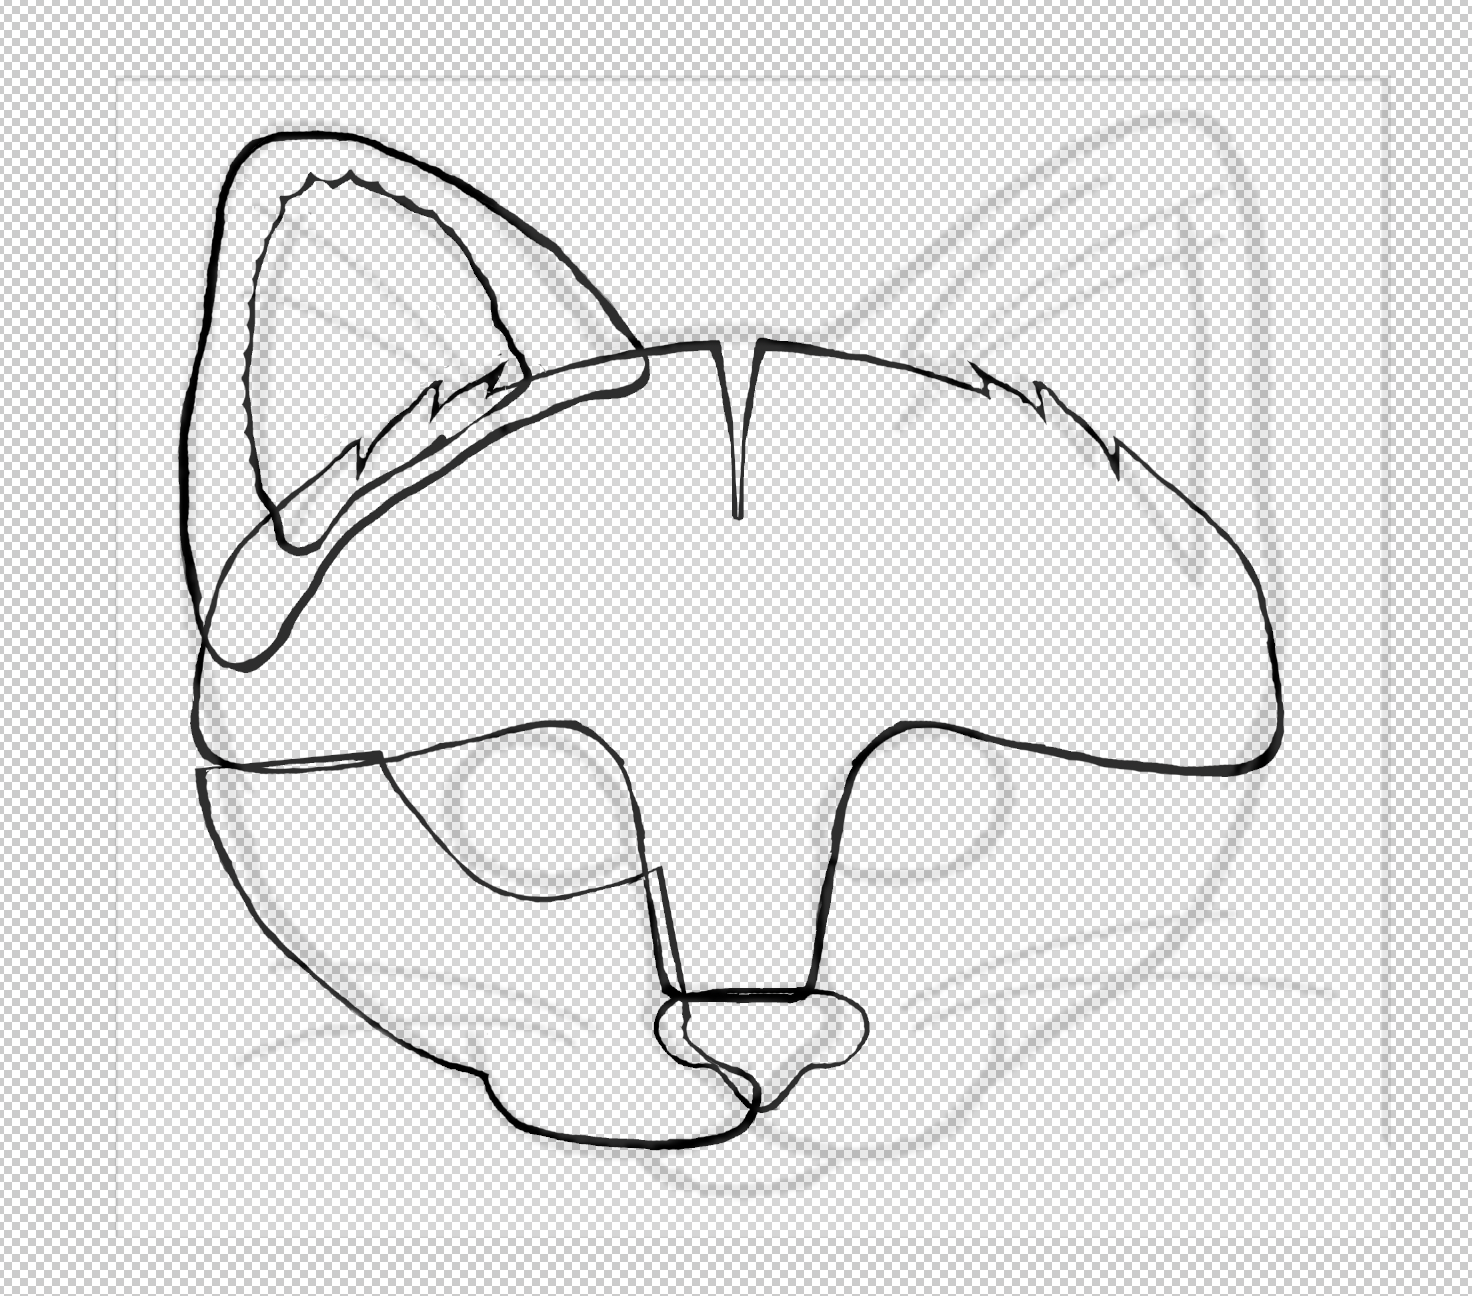
Draw or find a design you want to base your mask off of. I started with this picture of at cat that looked like it could make a good mask.
I used Photoshop but you could use GIMP or any other image editor to carve up your Image. I think about what parts are needed, i.e. Forehead/Ears/Cheeks/Nose.
The sections don't need to be perfectly drawn because we are going to trace the shapes to make cut lines.
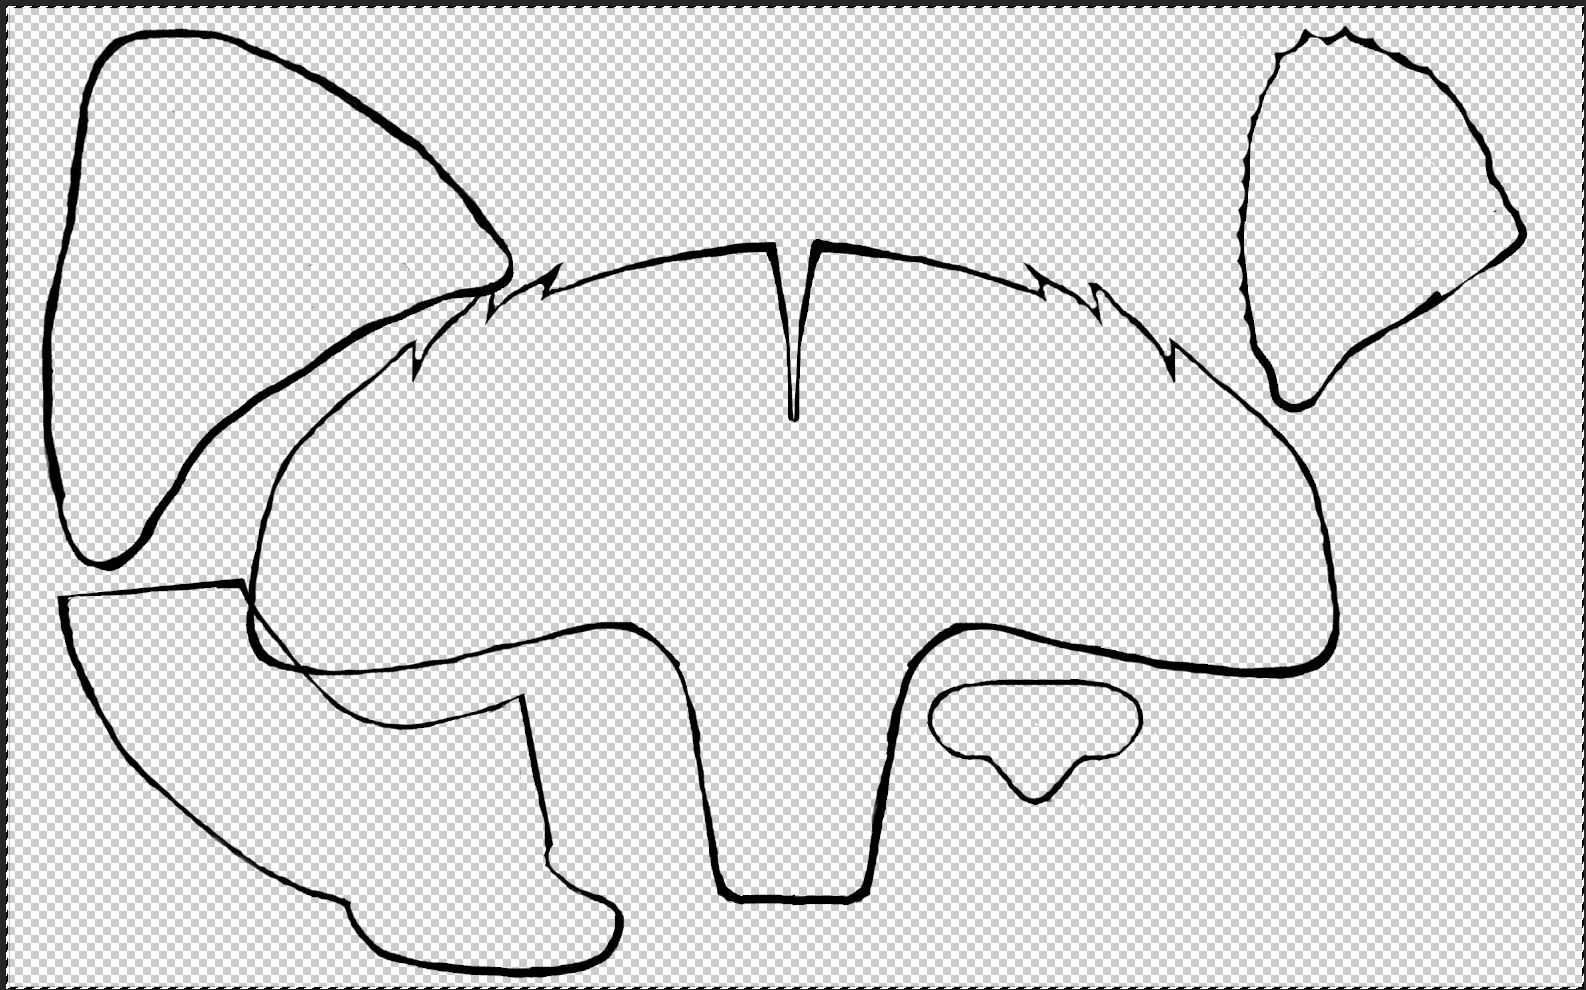
Split the components up, I prefer into layers to make it easier to move and modify.
* Tip: Draw a box around all the shapes with a know size for scale, that way when you import each piece as a png you can make sure they are all the same scale.
Step5
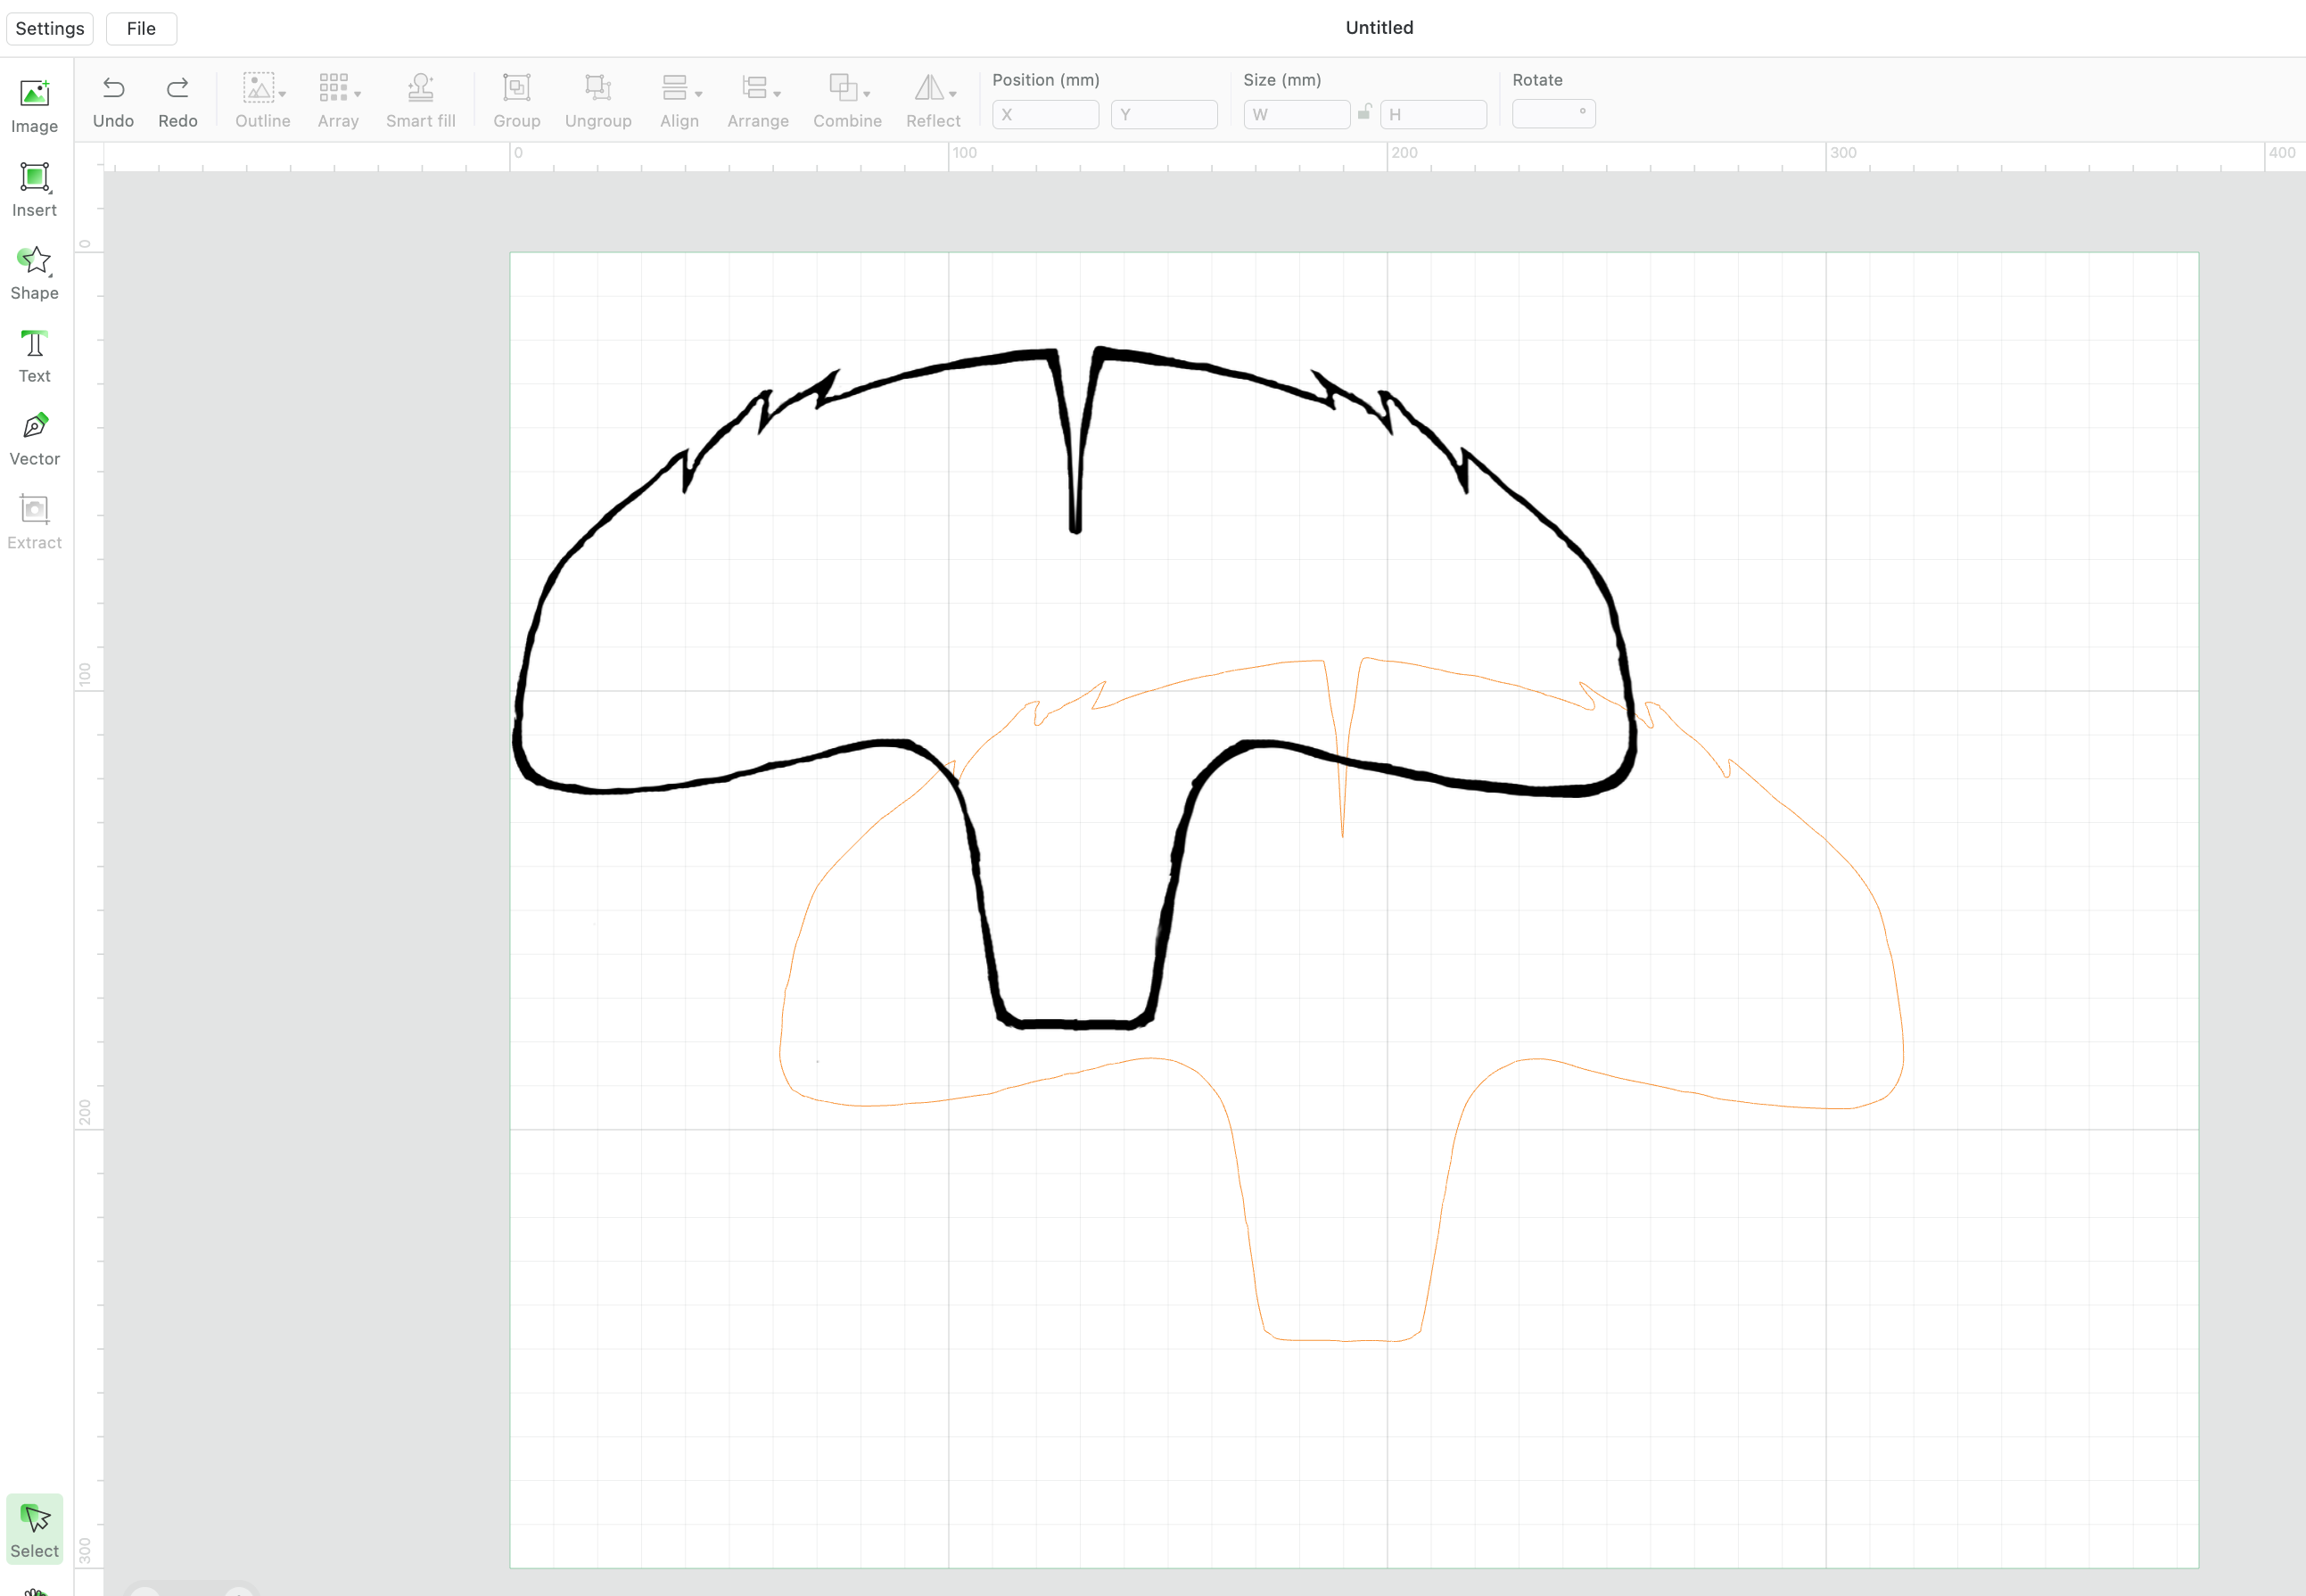
Import the piece into XCS and draw an "Outline" of 0mm to create the cut line of the shape. Repeat for each piece.

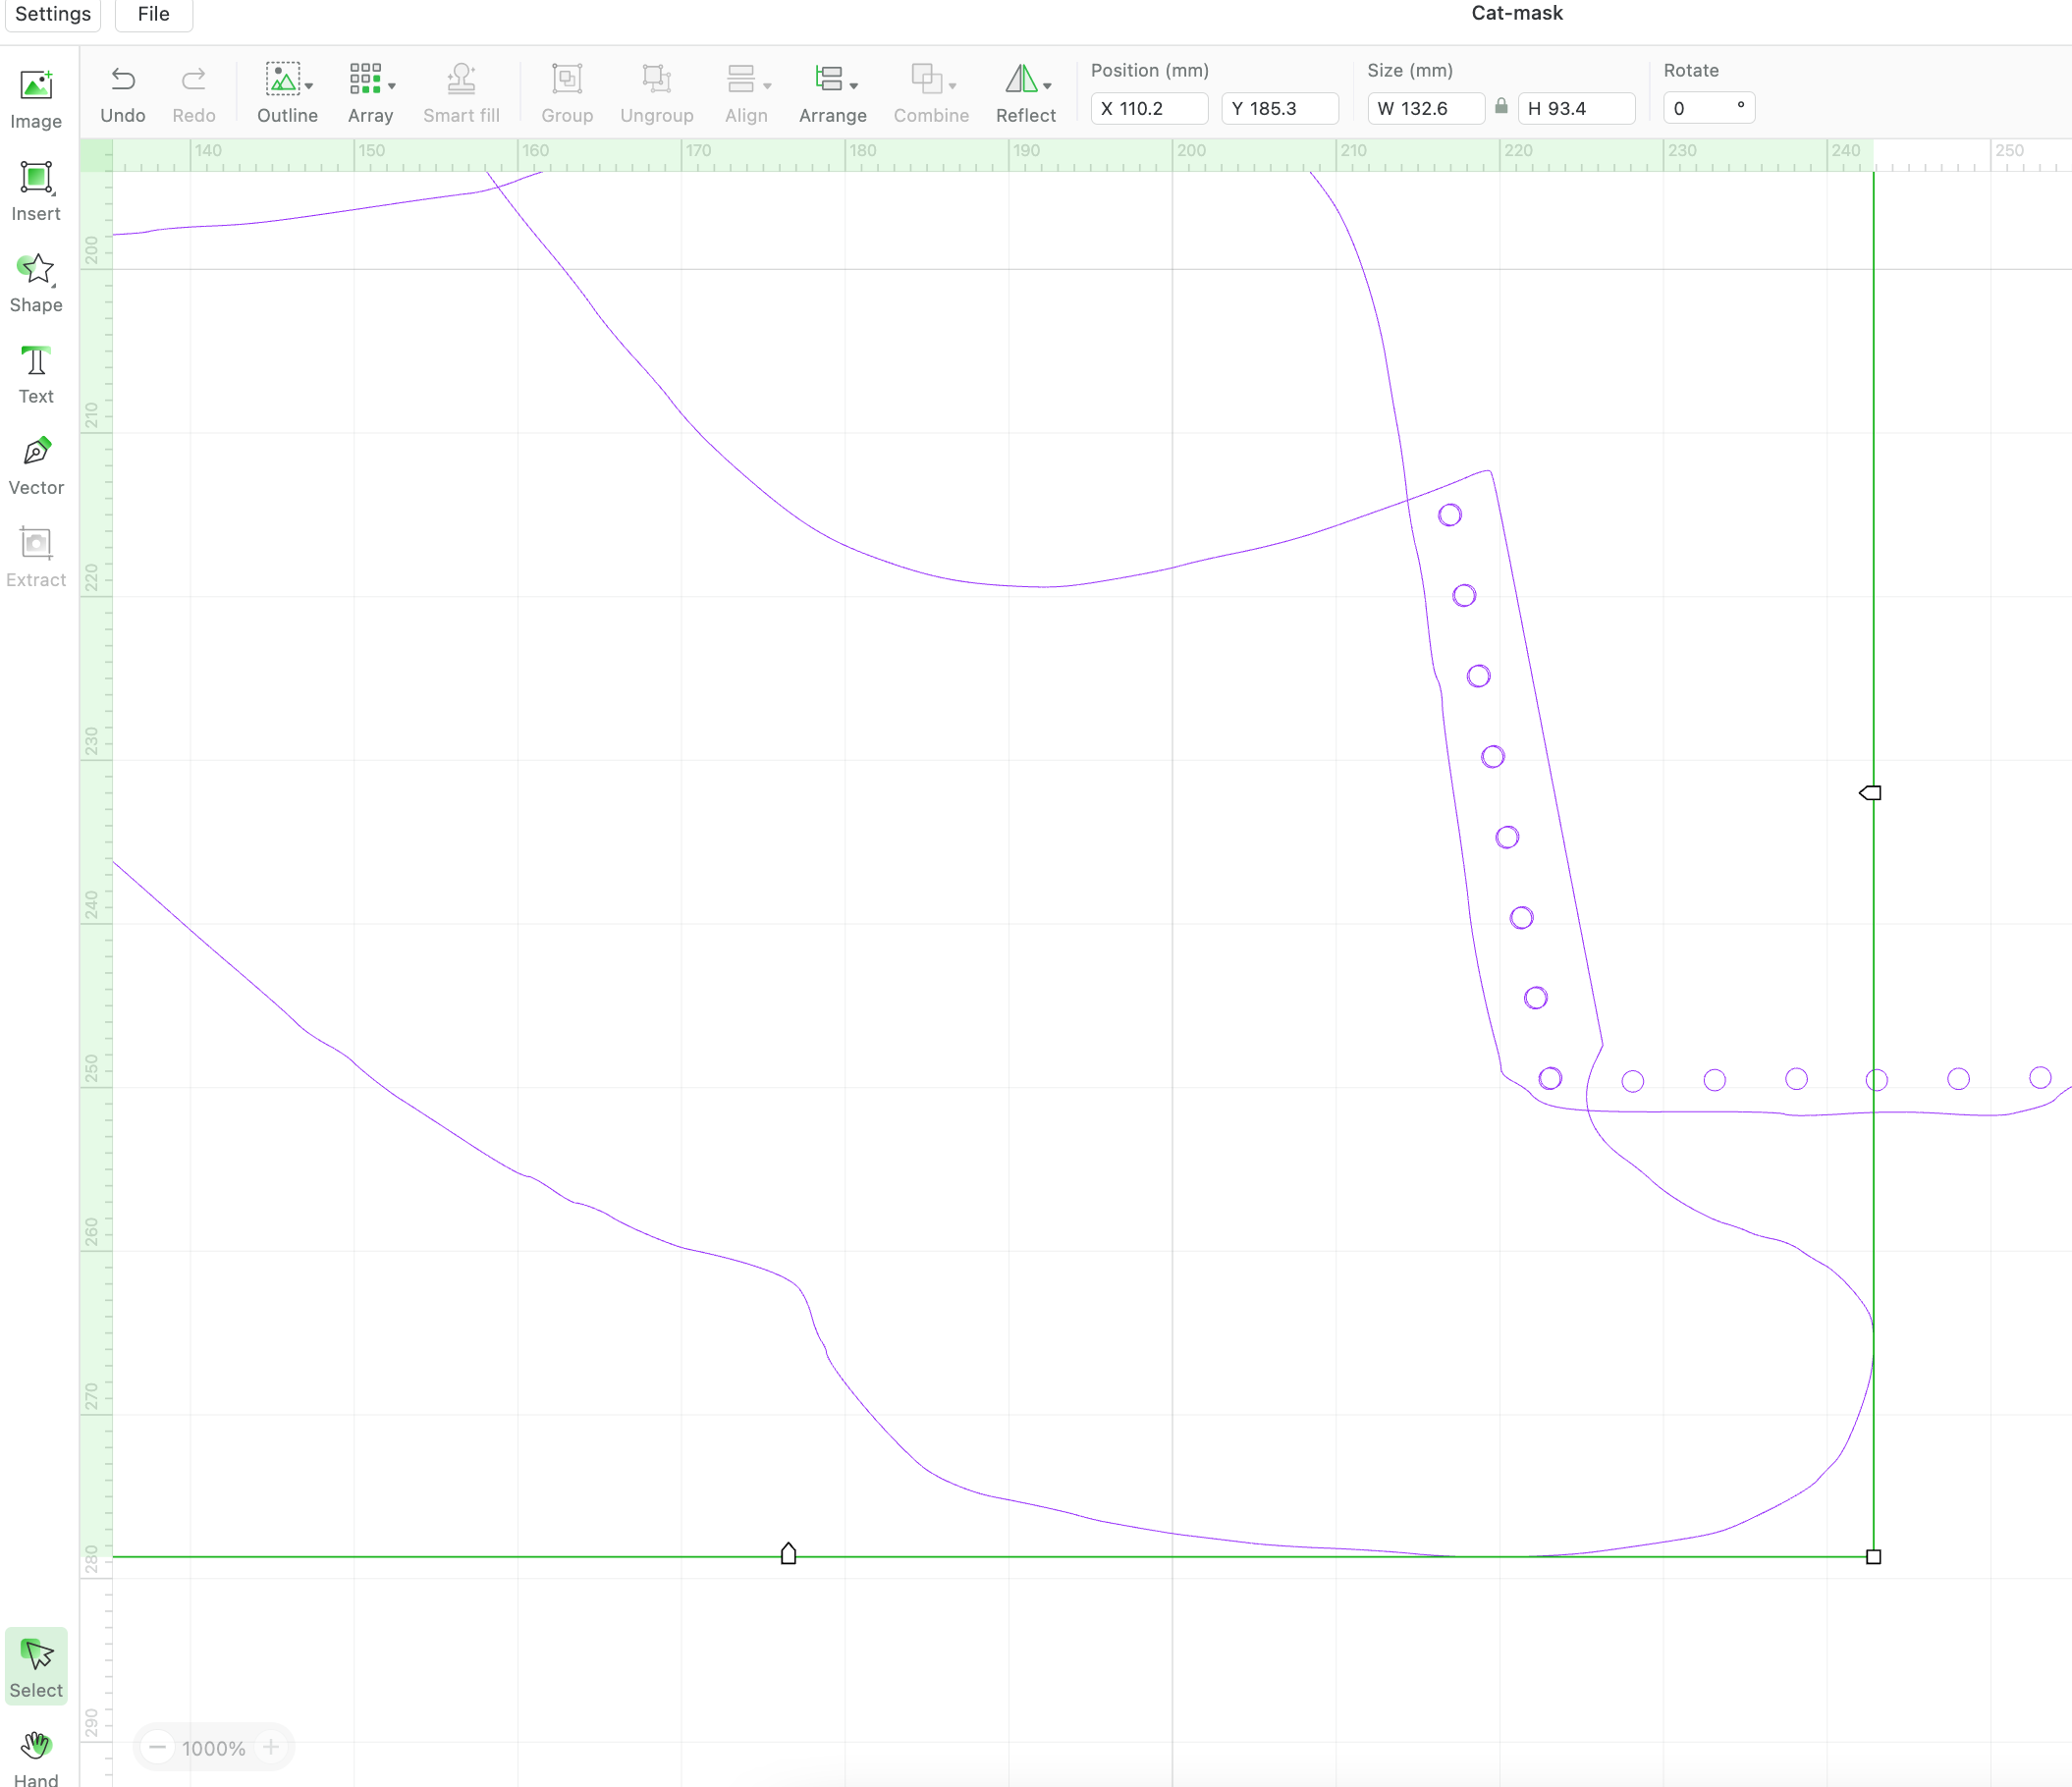
Add stitch holes where pieces attach. I make holes 1.3mm circles and I space them approximately 5mm apart.
Optional: Test the cut files on cardboard, I find this helpful in testing before I use the leather.
