
![[Laser cut and engrave] Spooky Tea Light Holder - Multiple Designs](https://image-res.xtool.com/ali-res/community/making/301f7982-bbd1-402a-858c-23e8ec9b746d/CoverImage.png?x-oss-process=image/resize,w_1200,h_900,limit_0/interlace,1/format,webp/auto-orient,1)
Spooky Tea Light Holder - Multiple Designs
 Instruction
Instruction
Step1
This is a quick and easy project to get started with and gives you the option to create your own spooky design to be projected on the wall.
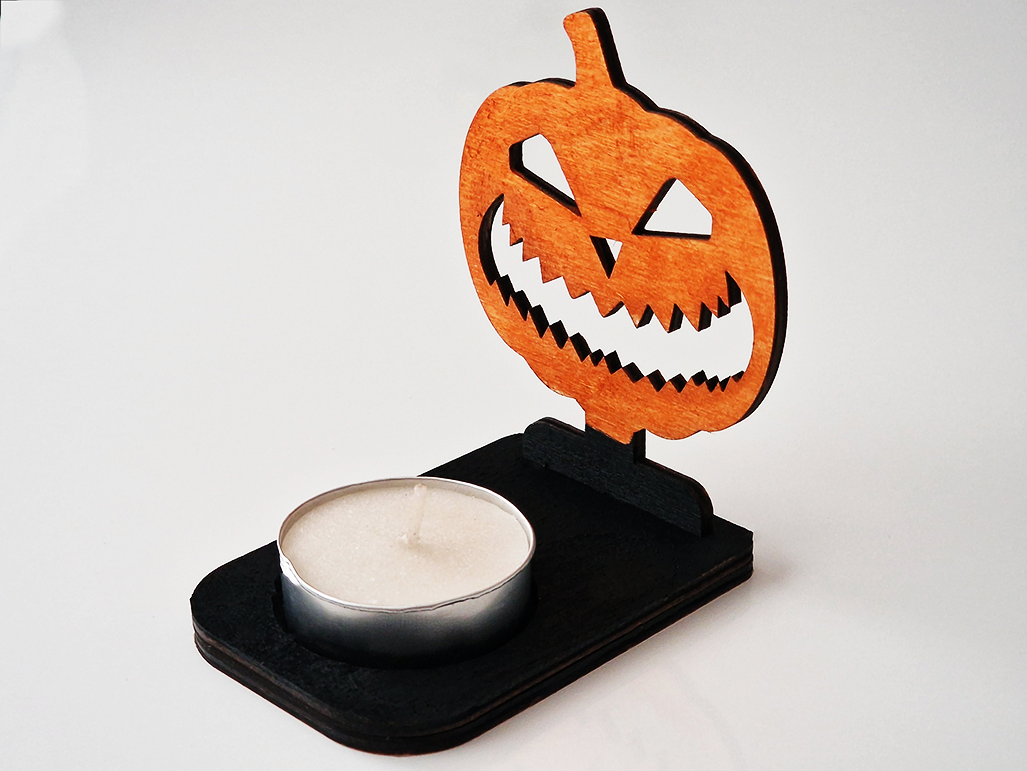
Here is what we are looking to end up with, the pieces in the back can be swapped in and out as required.
Materials
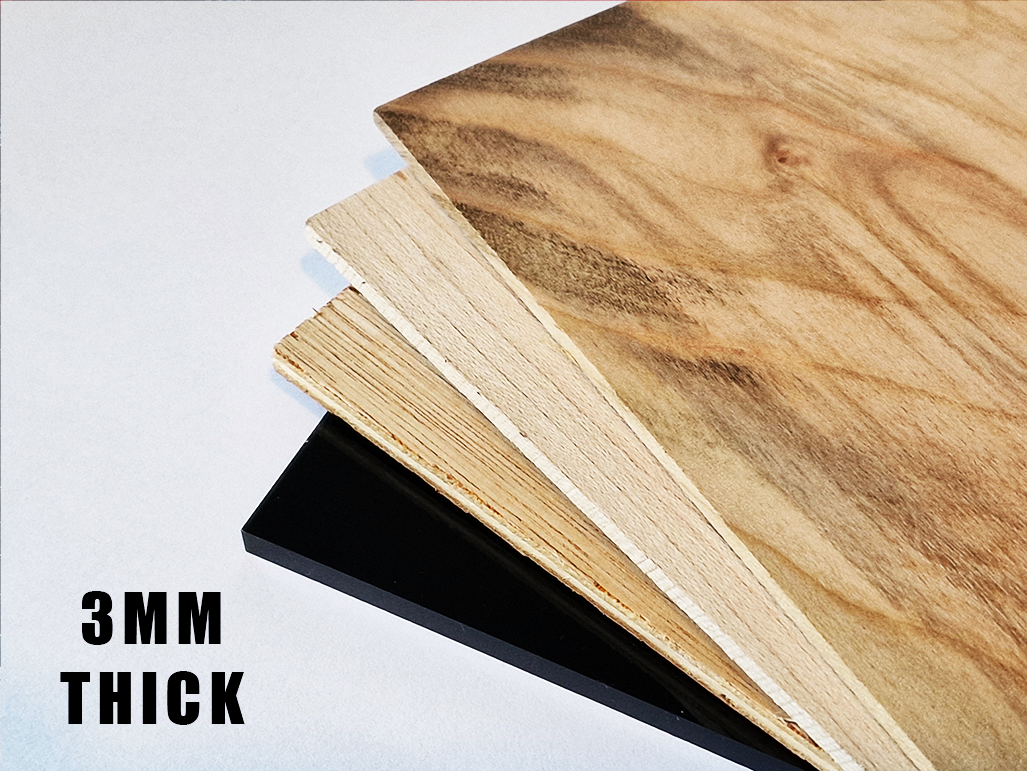
Any 3mm material will work with this file - plywood, mdf, wood sheets and opaque acrylic.
You will need roughly one A4 sheet worth, more if you want to design and cut your own spooky projections.
Import the design file
Download the file attached to this page that matches your chosen software, you can use any software that you prefer.
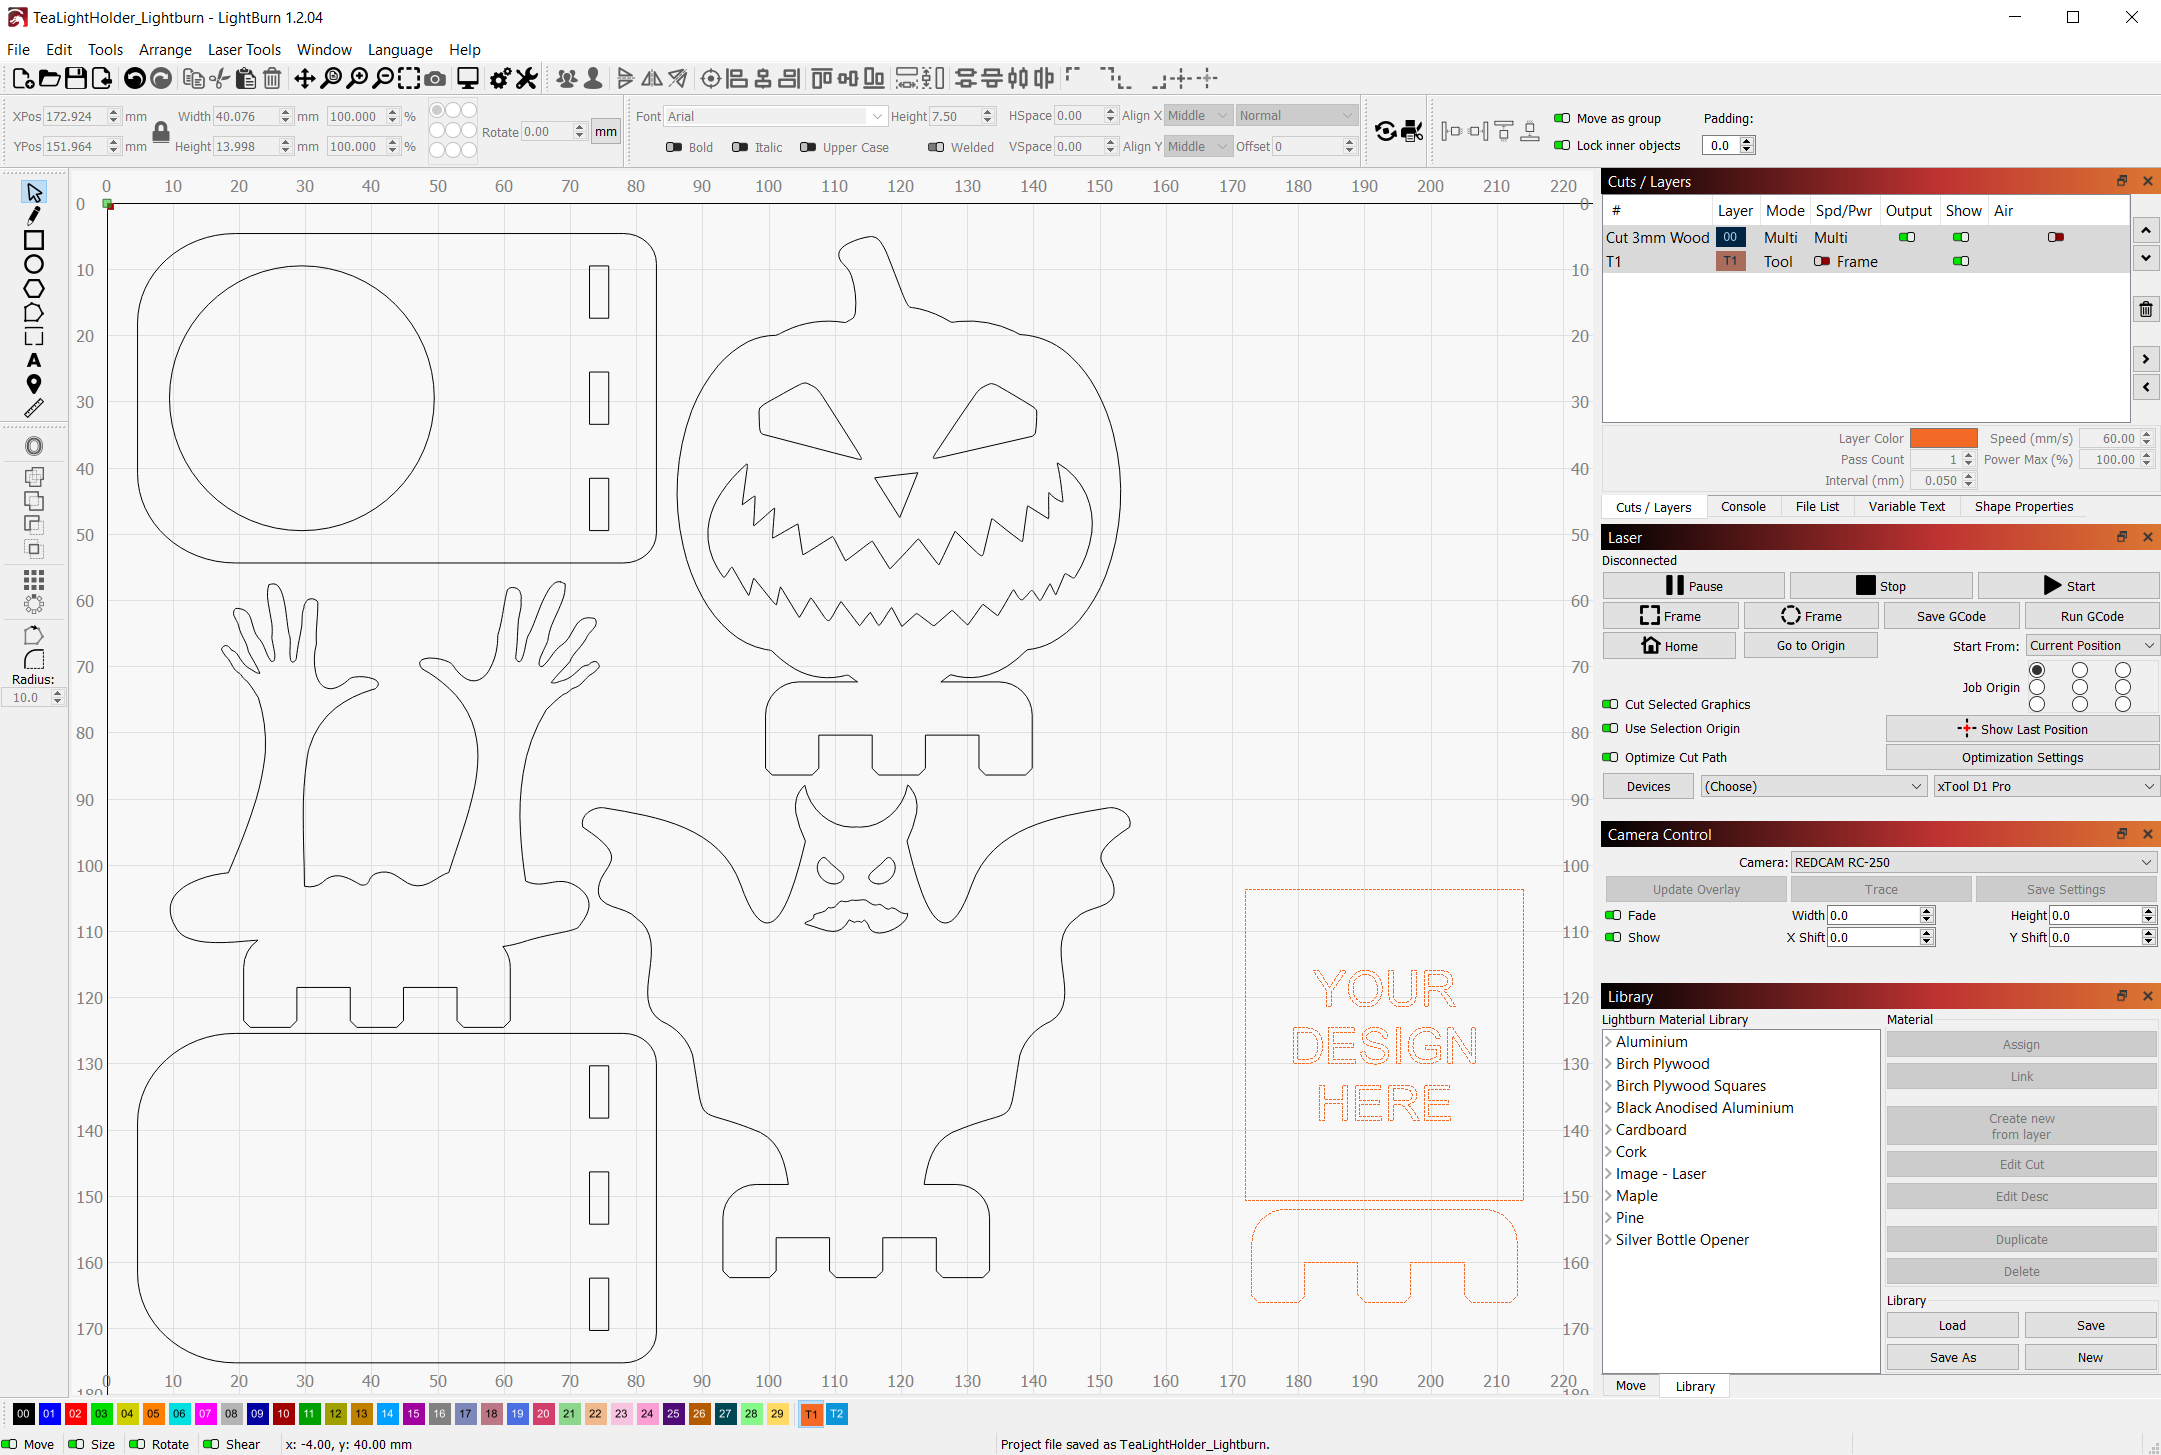
For this guide I will be using Lightburn.
- Lightburn - TeaLightHolder.lbrn2
- XCS - TeaLightHolder.xcs
- Other - TeaLightHolder.svg
Step2
Adjust your cut settings
Familiarise yourself with the file, the most important are the pieces on the top left and bottom left.
These parts combine together to form the tealight holder itself.
The other parts are swappable backplates that allow an image to be projected on to a nearby wall, I have included a few of my own designs that you can use - but feel free to experiment with your own! See step 6 for more details.
Adjust your cut parameters to ensure a clean cut through your material of choice.
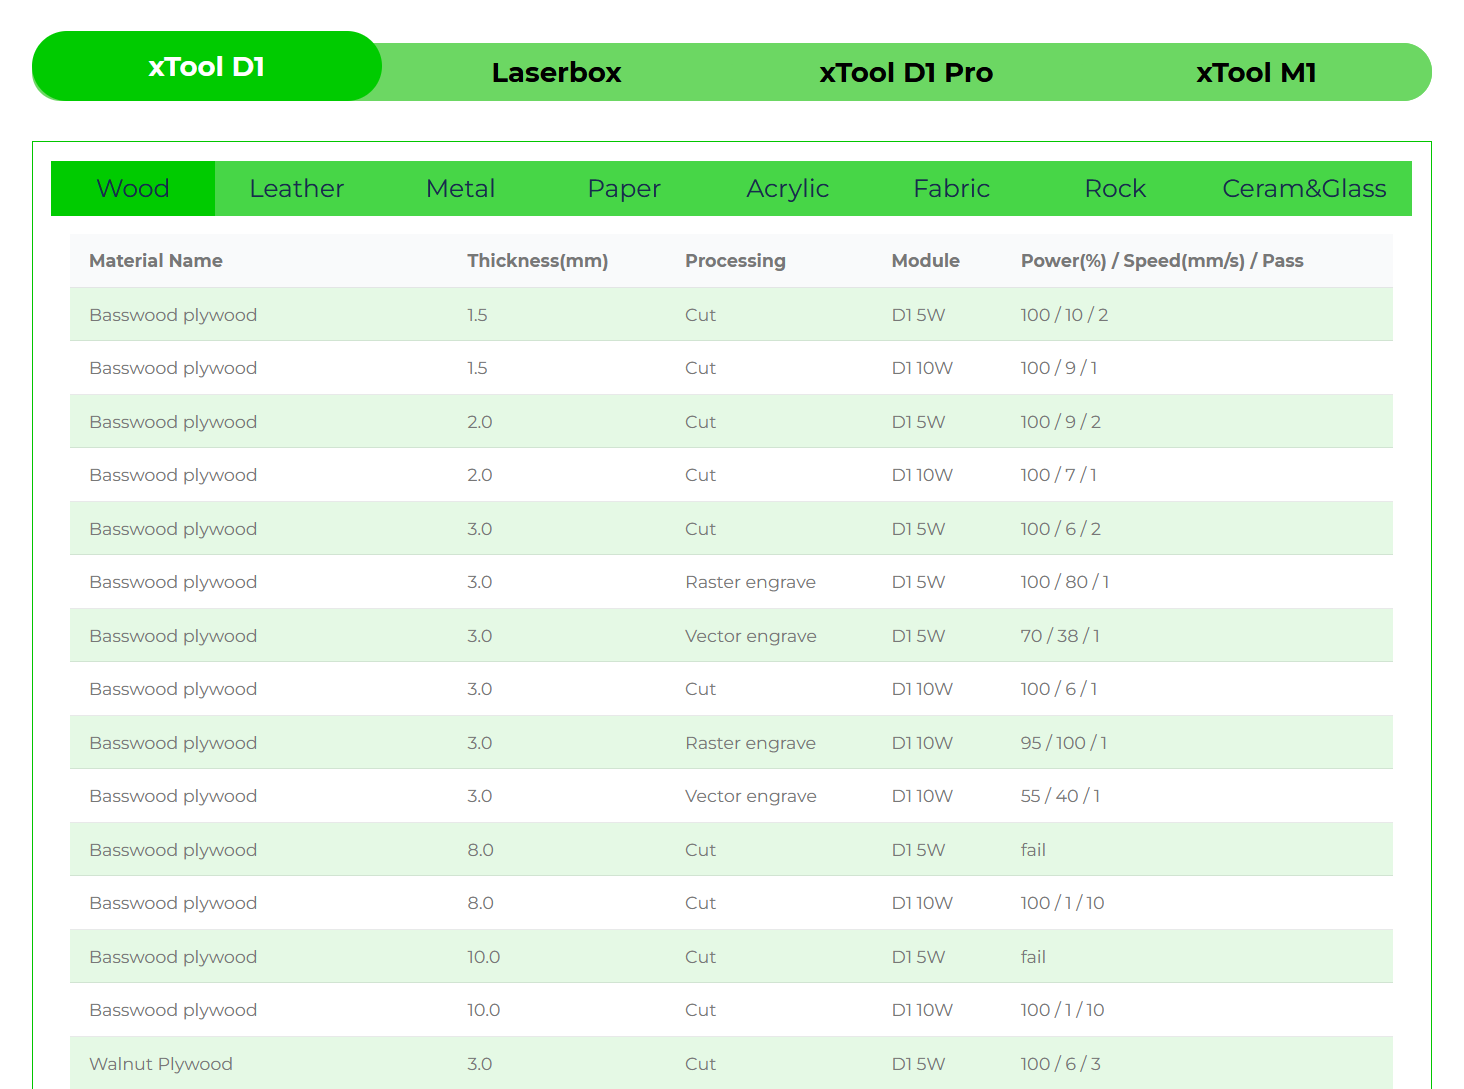
xTool has a great web-page that will give you recommended settings for your material: xTool Material Settings
Select your machine, then you are looking for the correct material, thickness, process, and laser module (5/10/20w).
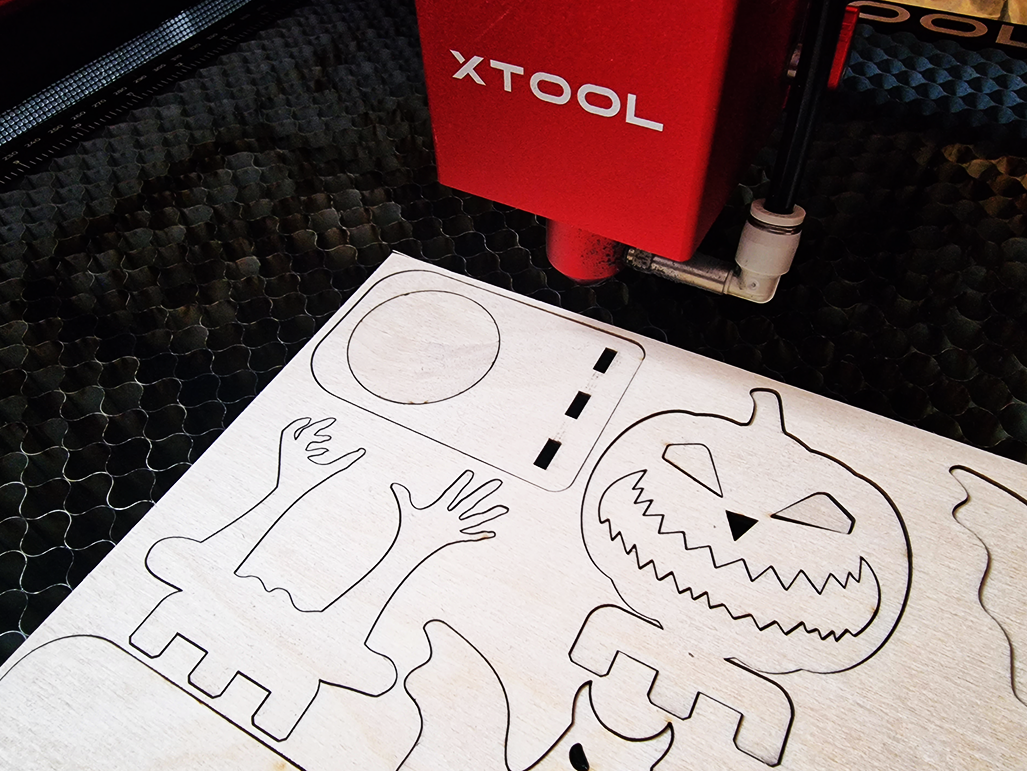
Step3
Cut your material
Prepare your material and run a frame operation to ensure everything is positioned correctly.
Start the job according to the software you are using.
After completion, avoid disturbing the laser head and material until you are certain that the design has cut through your material completely.
If you find that it hasn't cut through and you haven't disturbed the laser position/material you can start the job again for an extra pass.
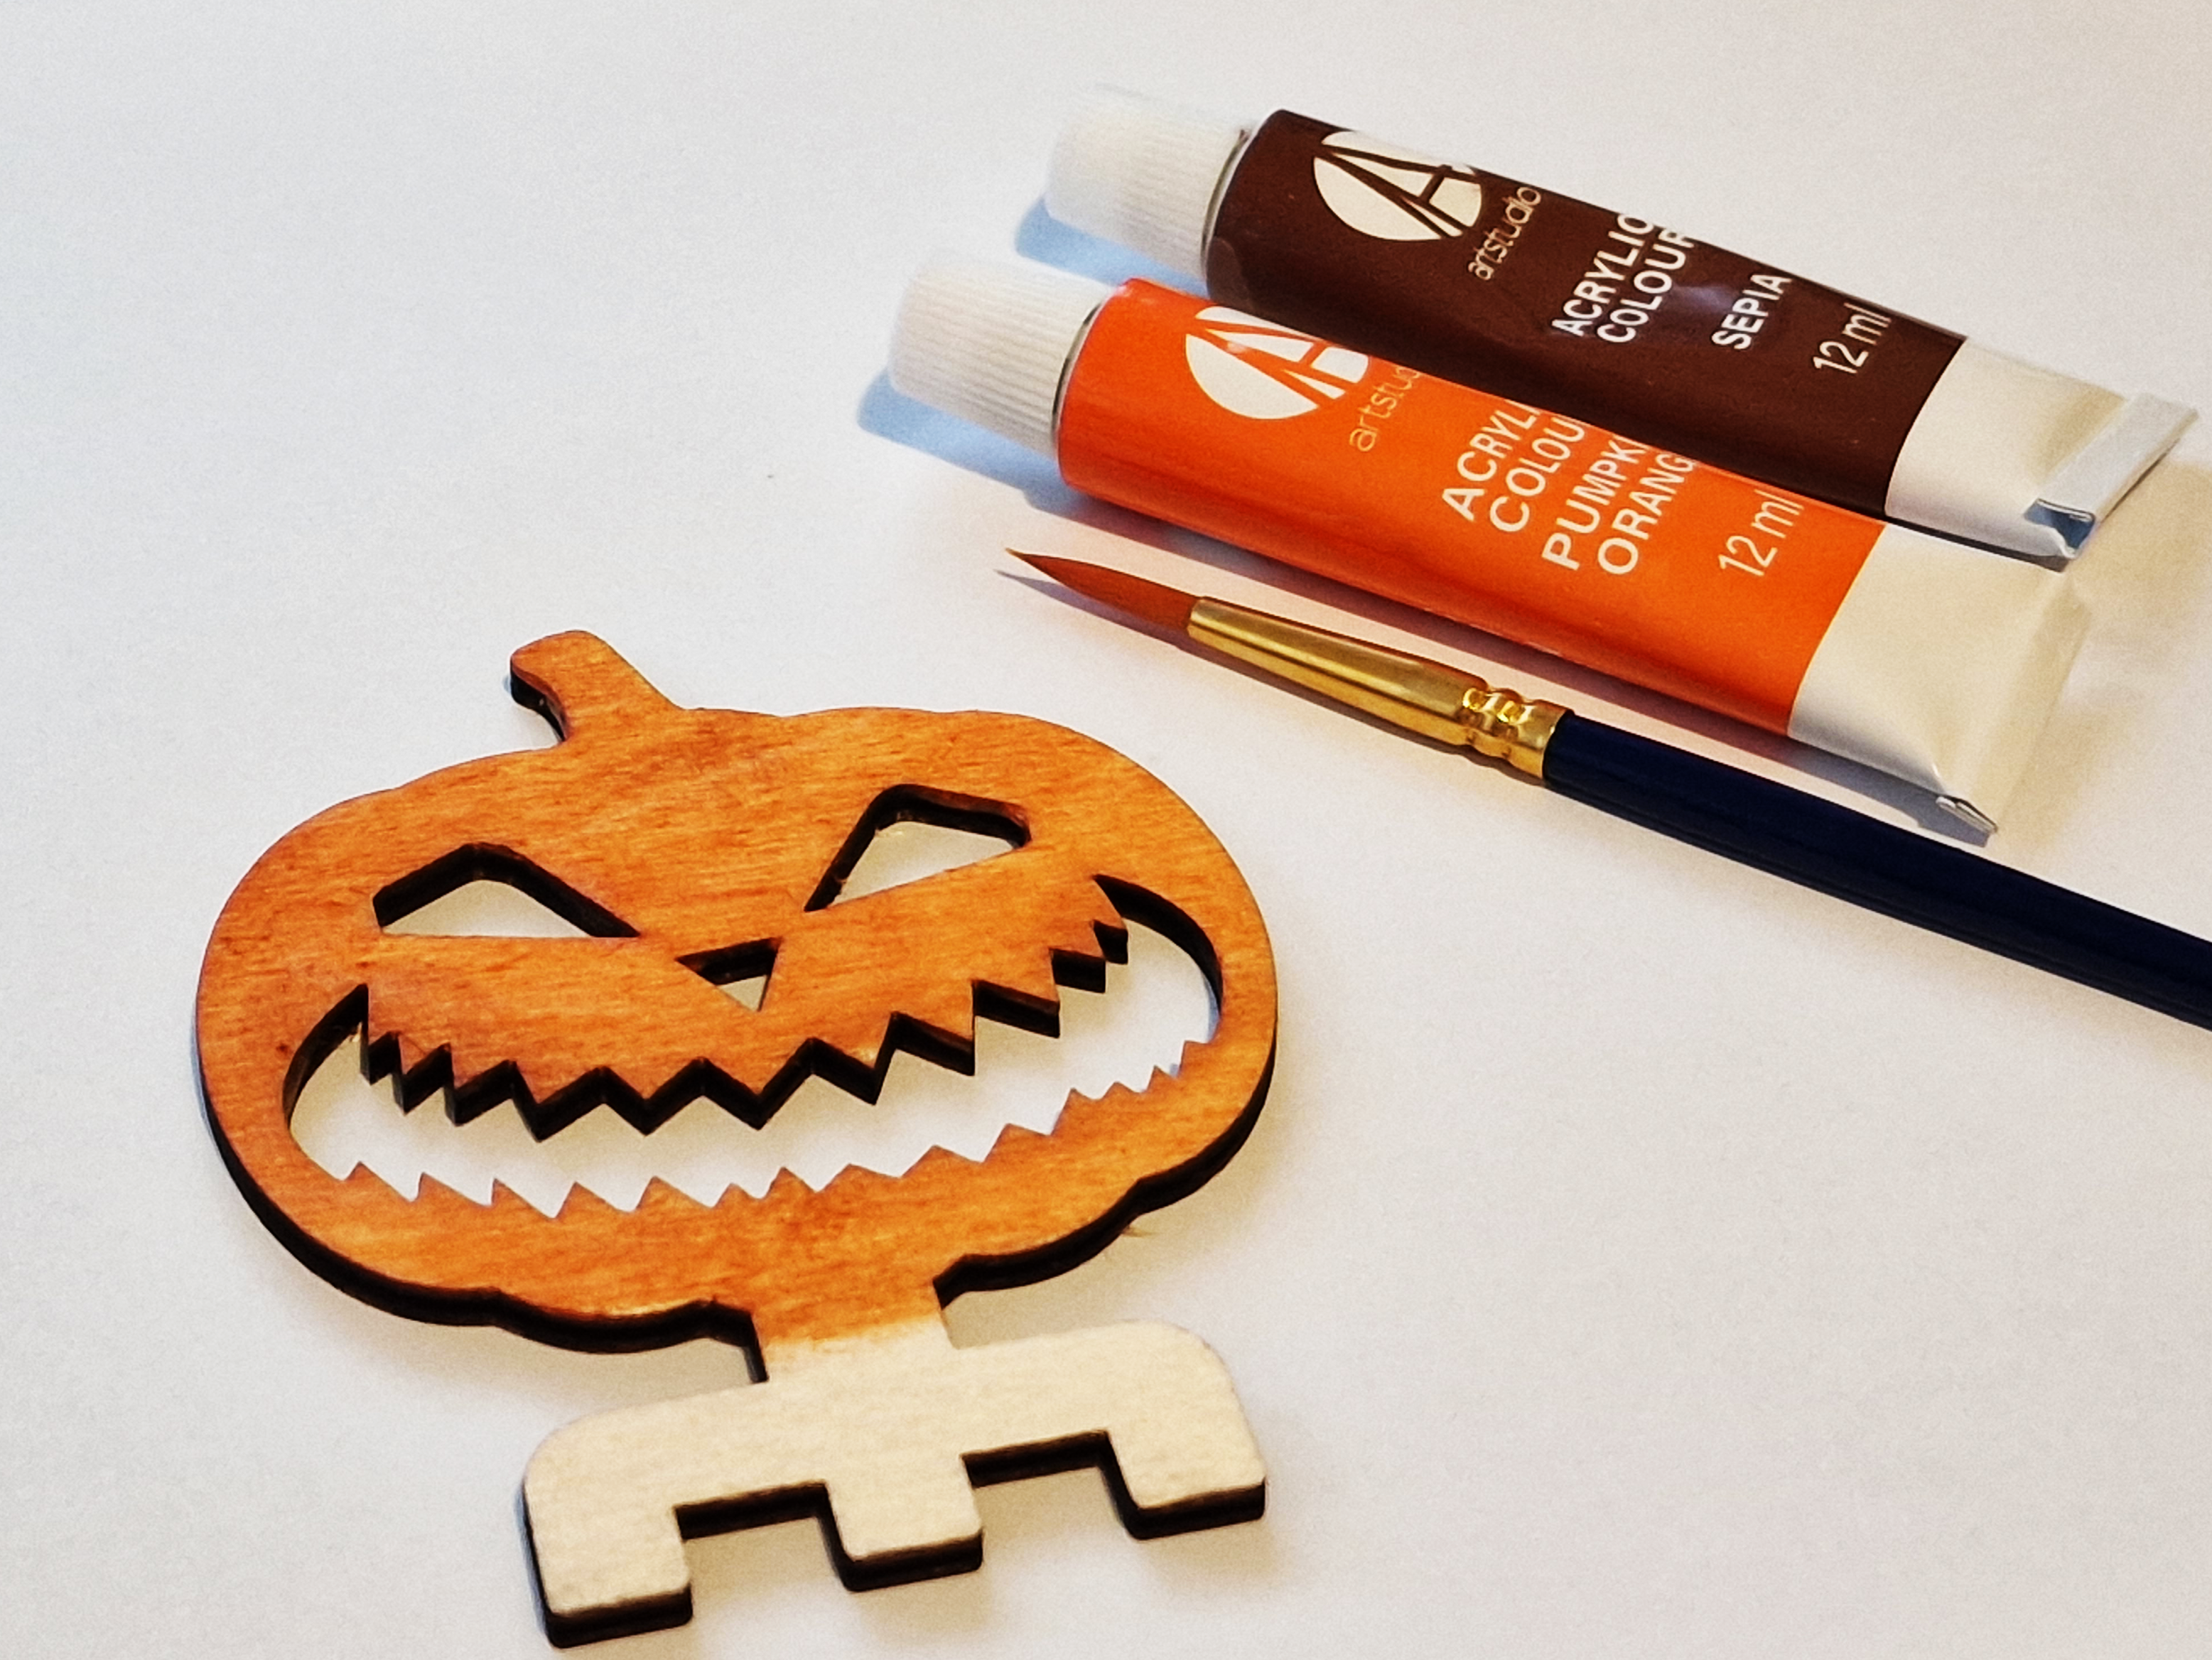
Step4
Finish your cuts
Depending on your material choice, you may choose to finish your cut out pieces. A light sanding and painted design can go a long way to producing an impressive halloween prop that looks great during the day, but truly comes to life at night. You could also engrave a spooky design before the cut if you are feeling creative.
Step5
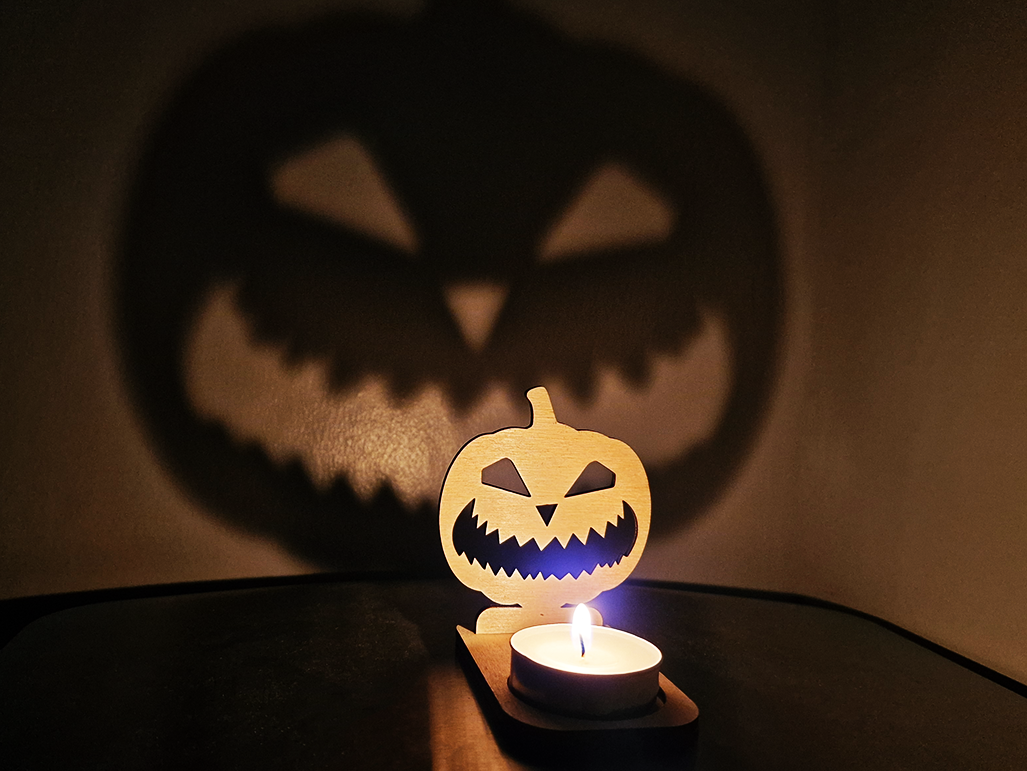
Assemble and Illuminate
Assembling the tea light holder is easy, apply a little glue to the top layer (the one with the large circular hole) - carefully align it with the bottom layer and press together.
Allow the glue to set, then you can insert your cut out backplates - they should slide into the holder quite firmly, but this does depend on the thickness of your material.
If you find that the backplates are too tight, you can lightly sand them to fit better.
Once assembled and you are happy with the look, add your tea light - you can use an LED candle or open flame candle.
Turn off the lights and admire your haunting creation.
Project against a window to horrify your neighbours too!
Step6
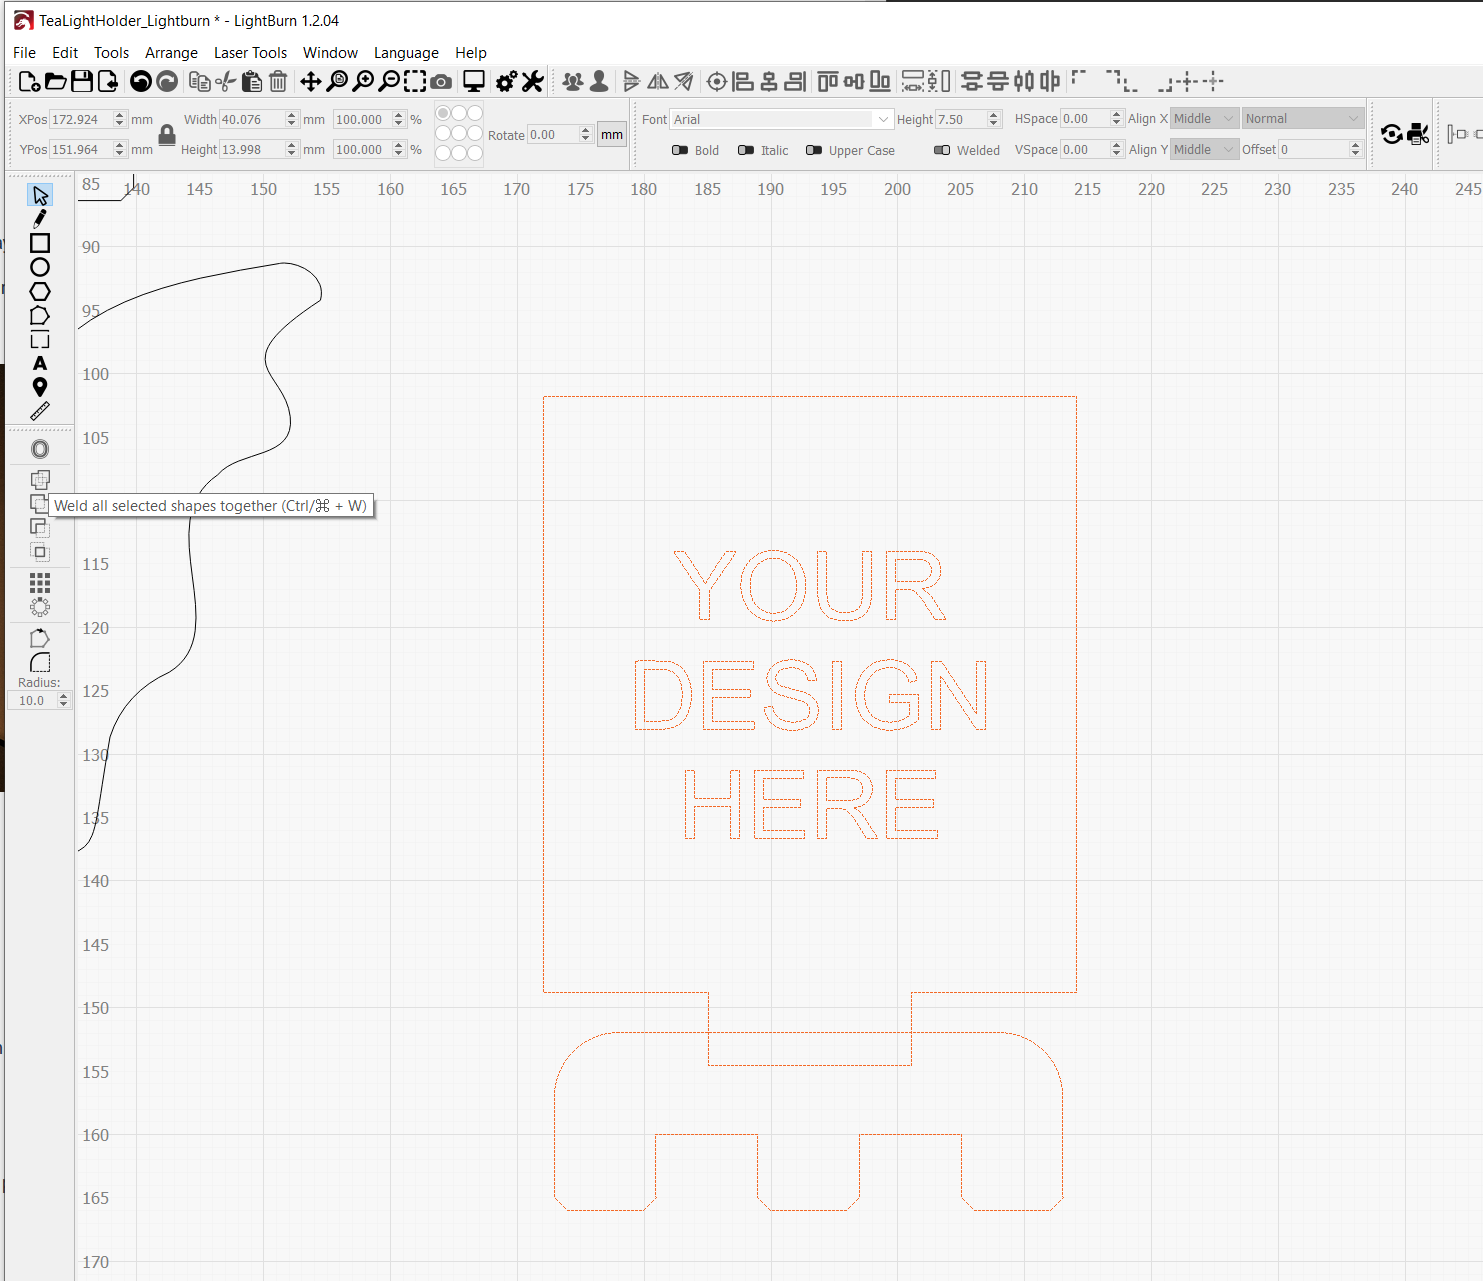
Create your own projection
Your now ready to take your holder to the next level with your own haunting creation.
Import your own svg/design and weld together with the provided bottom adapter.
Make sure you change it to a cut layer.
Cut your design, finish as per previous steps and delight your friends and family by switching in and out your shadow creations.
I'd love to see what you come up with, if you do design your own please post a picture of the final result in the comments!
Safety Note.
If you use an open flame candle, do not leave it unattended. Be aware of any flammable materials nearby and extinguish the flame carefully when you are done.
