
![[Laser cut and engrave] Coffee transformer suitcase](https://image-res.atomm.com/resource/xtool/community/attachment/xtool-community/8665c7c5-2e24-4ab4-a0cb-3a3df68548de.png?x-oss-process=image/resize,w_1200,h_900,limit_0/interlace,1/format,webp/auto-orient,1)
![[Laser cut and engrave] Coffee transformer suitcase](data:image/png;base64,iVBORw0KGgoAAAANSUhEUgAAAAoAAAAKCAYAAACNMs+9AAAAAXNSR0IArs4c6QAAABdJREFUKFNjZCASMBKpjmFUId6QIjp4AAppAAuXjCs4AAAAAElFTkSuQmCC)
![[Laser cut and engrave] Coffee transformer suitcase](https://image-res.atomm.com/resource/xtool/community/attachment/xtool-community/8665c7c5-2e24-4ab4-a0cb-3a3df68548de.png?x-oss-process=image/resize,w_200,h_150,limit_0/interlace,1/format,webp/auto-orient,1)
![[Laser cut and engrave] Coffee transformer suitcase](https://image-res.atomm.com/resource/xtool/community/attachment/xtool-community/429eaa86-5898-4327-9503-8c08cd6304af.png?x-oss-process=image/resize,w_200,h_150,limit_0/interlace,1/format,webp/auto-orient,1)
![[Laser cut and engrave] Coffee transformer suitcase](https://image-res.atomm.com/resource/xtool/community/attachment/xtool-community/c7cdc063-1c47-488b-a1dd-c1c57ae9554f.png?x-oss-process=image/resize,w_200,h_150,limit_0/interlace,1/format,webp/auto-orient,1)
Coffee transformer suitcase
 Second Prize in Coffee Organizer Contest
 Instruction
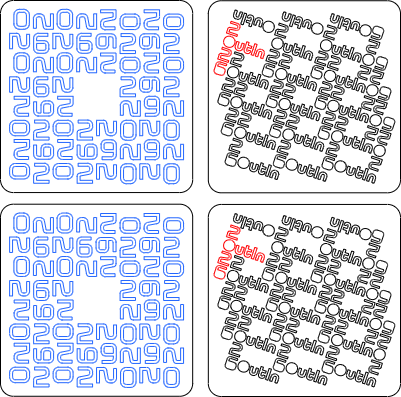


Information
      ☕ Imagine a backpack that doesn’t just carry your gear — it brews your next great moment. The Coffee Transformer Backpack began as a spark of inspiration: what if your daily coffee ritual could meet the spirit of adventure, all in one smart, laser-cut design? Built for makers, wanderers, and coffee lovers alike, this project transforms everyday materials into a multifunctional companion. With clever compartments for beans, mugs, and accessories, it even converts into a mini table — a perfect surface for brewing outdoors, at a festival, or during a creative break in the city.

But this is more than just clever engineering — it’s a celebration of community and craft. Inspired by Outin’s ethos of portable, high-quality coffee experiences on the go, this transformer backpack embraces that same passion for great coffee anywhere life takes you. Whether you’re paired with an Outin Nano or sipping a hand-poured espresso in the wild, it’s a story of design meeting lifestyle, where every journey begins with that perfect first cup.
Instruction
Step1: First Impression
Here is a first impression of the functional tranformer coffee suitcase:
Step2: Designing the case


The first step in my new projects is always the design. I use Sketchup Make for this and can highly recommend the program to anyone!
The most challenging part was designing the folding table using bendable wood. But after a few attempts and test cuts, I achieved a solid result.
Just give it a try with the design and, above all, keep testing the joints with patterns in the wood or things like the bend in the wood.
Step3: Designing the flexible part

Since I was asked about this in the comments and because I believe it can be used to create truly beautiful designs, here is some assistance on how to create the flexible part in the wood! The image shows the dimensions I use, which have proven effective in both 3mm and 5mm plywood.
The length of the lines can be adjusted or aligned with the target design. For example, if you want to create a 50 mm wide curve, shorten the lines so that you have the short line (1.1 mm in the image) on both sides again and place two lines in between, each 2 mm apart.
The number of lines in a row is determined by the desired radius. Minimum radii of 10-12 mm are possible here (otherwise the wood will be subjected to too much stress).
With a radius of 20 mm, you calculate the length of the quarter circle and make the corresponding number of consecutive lines.
And IMPORTANT: Always alternate, as shown in the picture!
Step4: Ideas for text and logos

With the back cover, which also serves as a tabletop, I wanted to combine function and design, which is why I thought about the Outin logo and finally came up with the idea of a 2-in-1 function:
using the O's in the logo as windows on one side and as cup holders on the other. And voilà, the final text for the cover was created in XTool Studio.
Step5: Designing coasters


I also wanted to create special coasters for this particular outdoor case. You can do this relatively easily in XTool Studio:
1. Create a rectangle and round off the corners. (The size of the rectangle can vary; in my case, it was determined by the interior of the case).
2. Write any text (in my case, “2026” and “Outin”) in a font that is bold enough (and not too ornate) to be cut and not just engraved.
3. Copy the text/word and arrange it as desired on the rectangle. In my case, I wanted to combine symmetry and also combine “2026” with “Outin.”
4. Center the whole thing on the rectangle.
Your coaster is now complete!
Step6: Cutting and assembly (outer parts)

Once you have cut the 5 mm files using the settings above, you can already start with the assembly of the outer box!
The cool thing is: although the box has 6 sides, only 5 parts are needed!
1. Lay the back on the table and place the side walls to the right and left of it and the smaller wall underneath.
2. Start with one side and press it carefully into the back wall before tapping it gently with a hammer.
3. Do the same with the other two individual sides. Now you can tap the whole thing together a little harder; the parts are designed to fit together tightly.
4. Finally, the front cover can be attached at the top, again using the hammer if necessary. The text must of course face outwards!
I will show you how to assemble the outer part in the following GIF:
Step7: Cutting and assembly (inner parts)

Once you have cut the 3 mm files using the settings above, it has to be assembled like shown in the picture. I will show you the steps to do this in the following GIF:
Step8: Boxes assembly


The next step is to assemble the boxes. Of course, you can fill the boxes with whatever you like, but coffee beans and snacks are ideal! To assemble them, you will of course need the two acrylic fronts.
If you don't have a laser that can cut trough acrylic, just replace the acrylic parts with wooden parts!
Depending on the thickness of the material, you may need to use a little glue (e.g., superglue) for the boxes. Here is a GIF showing how to assemble them:
Step9: Final assembly
Finally, there are a few small details left: installing the boxes (the interior can simply be slid into the outer box after assembly) and the rubber band that will hold the suitcase closed! Here is the link:
Finally, here is the GIF for installing the band and filling the suitcase:
Have fun with this project! If there are any questions don't hesitate to comment!
Remixes


You may also like

Tambour Expresso/Coffee Cabinet


'/%3e%3cdefs%3e%3clinearGradient%20id='paint0_linear_1433_15726'%20x1='12'%20y1='5.25'%20x2='12'%20y2='18.75'%20gradientUnits='userSpaceOnUse'%3e%3cstop%20stop-color='%23FFC654'/%3e%3cstop%20offset='1'%20stop-color='%23FF8D12'/%3e%3c/linearGradient%3e%3c/defs%3e%3c/svg%3e)
"Stackable Coffee Organizers w/Tray" Laser Cut and Engraved


Smart 3-Lid Coffee Storage System – Organize Tea, Sugar & Capsules in One Elegant Box


Laser Cut Wooden Adventurer Coffee Maker Box with Engraved Design


Laser Cut Wooden Dolce Gusto Coffee Capsule Storage Organizer


Hand Painted Coffee Storage Box


Coffee Storage Cabinet with pod and frother holder


Laser Cut Wooden Smart Coffee Station


Laser Engraved Wooden Coffee Storage Box Set with Coffee Bean and Spoon Icons


Laser-cut stackable wooden storage crate with hexagon pattern and handles


The Barista’s Secret Box – A Luxury Coffee Ritual Organizer (7 in 1)


Laser Cut Wooden Coffee Capsule Storage Box with Drawer Organizer


Portable Coffee Station


3D Bee boxes bundle. Wooden honey box laser cut files. Honey jar storage svg. Wooden gift box. Personalized svg. Geometrical pattern


Laser Cut Wooden Storage Box with Nautical Landscape Design


Wooden Hexagon Storage Box for Kitchen or Snacks Laser Cut. Desk Organizer. Wooden Craft Bin


Coffee Pod Drawer Organizer SVG | Laser Cut Coffee Capsule Holder | Plywood Coffee Storage Box File


Coffee Pod Storage and Organizer
