











![[Laser cut and engrave] Engraved Dragon Reading Books Decorative Coin Plaque](https://storage-us.atomm.com/resource/xtool/community/attachment/xtool-community/619c2dc8-be69-45c6-abcf-2d4f949f7d38.jpeg?x-oss-process=image/resize,w_1200,h_900,limit_0/interlace,1/format,webp/auto-orient,1)
![[Laser cut and engrave] Engraved Dragon Reading Books Decorative Coin Plaque](data:image/png;base64,iVBORw0KGgoAAAANSUhEUgAAAAoAAAAKCAYAAACNMs+9AAAAAXNSR0IArs4c6QAAABdJREFUKFNjZCASMBKpjmFUId6QIjp4AAppAAuXjCs4AAAAAElFTkSuQmCC)
![[Laser cut and engrave] Engraved Dragon Reading Books Decorative Coin Plaque](https://storage-us.atomm.com/resource/xtool/community/attachment/xtool-community/619c2dc8-be69-45c6-abcf-2d4f949f7d38.jpeg?x-oss-process=image/resize,w_200,h_150,limit_0/interlace,1/format,webp/auto-orient,1)
![[Laser cut and engrave] Engraved Dragon Reading Books Decorative Coin Plaque](https://storage-us.atomm.com/resource/xtool/community/attachment/xtool-community/3f4b2531-8d59-452e-a1f2-59324e0c3b5f.jpeg?x-oss-process=image/resize,w_200,h_150,limit_0/interlace,1/format,webp/auto-orient,1)
จอง Wyrm Coin
 คำแนะนำ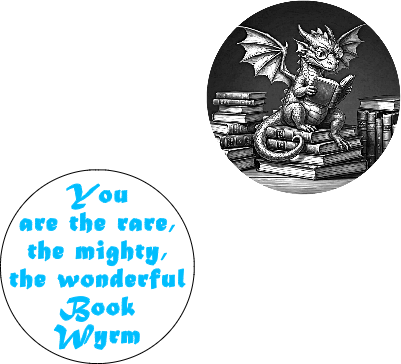


ข้อมูล
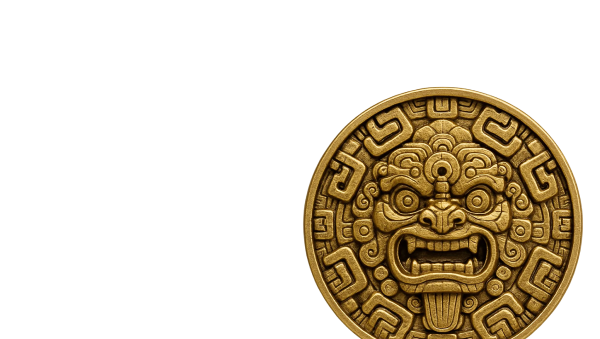
ฉันชอบแกะสลัก / แกะสลักเหรียญและล่าสุดของฉันก็สนุก เพลิดเพลินไปกับหนังสือ Wyrm Coin ของฉัน
คำแนะนำ
ขั้นตอน1: ก่อนที่คุณจะเริ่ม
ฉันเพิ่งแกะสลักเหรียญเพื่อเรียนรู้ F2 ของฉัน นี่เป็นโครงการที่สนุกและการใช้ AIMake ฉันได้พัฒนามังกรอ่านหนังสือ อีกชื่อหนึ่งของมังกรในอาณาจักรแห่งจินตนาการคือ Wyrm ดังนั้นฉันจึงตัดสินใจรวมหลังที่เล่นกับวลี "หนอนหนังสือ" โปรดทราบว่าสิ่งนี้ทําโดยใช้เหรียญทองเหลืองจาก xTool หากคุณใช้เหรียญทองเหลืองอื่นหรือเหรียญอื่นนอกเหนือจากนี้ การตั้งค่ามักจะแตกต่างกัน และคุณจะต้องปรับเปลี่ยนตามนั้น
เหรียญเหล่านี้จาก xTool มีน้ําหนักมาก ให้ความรู้สึกดีมาก และคุ้มค่ากับเงินที่จ่ายไปอย่างแน่นอน หากคุณสนใจ ลองดูที่นี่:
https://www.xtool.com/products/blank-commemorative-coins-5pcs?_pos=1&_psq=coin&_ss=e&_v=1.0&ref=g5od6XkG4zCooH&utm_medium=affiliate&utm_source=goaffpro&utm_term=16349
ขั้นตอน2: ตําแหน่งและการแกะสลัก


อย่าลืมวางเหรียญลงในเครื่องอย่างถูกต้อง วางราบและใช้จุดสองจุดเพื่อจัดแนวความสูงที่ถูกต้องของเหรียญของคุณกับเครื่อง
หากใช้ F2 เมื่อคุณโหลดแผนแล้ว ให้วางตัวกั้นรูปตัว L ที่มาพร้อมกับ F2 บนแผ่นฐานที่คุณต้องการเหรียญ วิธีนี้จะช่วยในการจัดวางและช่วยให้คุณทําทั้งสองด้านได้อย่างง่ายดาย
จัดเรียงมังกรโดยใช้ฟังก์ชันการจัดเฟรม ฉันชอบที่จะตั้งค่าเฟรมเป็นโครงร่างเพราะมันช่วยให้จัดเรียงได้อย่างสมบูรณ์แบบ ตรวจสอบให้แน่ใจว่าขอบของภาพอยู่ภายในขอบของเหรียญไปรอบๆ
ใช้การตั้งค่าด้านบนเพื่อแกะสลักด้านมังกร จากนั้นพลิกเหรียญกลับด้าน โดยใช้ตัวกั้นรูปตัว L เพื่อให้อยู่ในพื้นที่ทั่วไปเดียวกัน ณ จุดนี้ฉันเลือกคําที่จะแกะสลักที่ด้านหลังและเลื่อนไปด้านบนและด้านซ้ายของมังกร จากนั้นฉันเลือกทั้งคําและมังกรและใช้ฟังก์ชันจัดตําแหน่งที่ด้านบน ฉันเลือก Align bottom ก่อนแล้วจึงจัดชิดขวา สิ่งนี้จะทําให้คําอยู่ในจุดเดียวกับมังกร จากนั้นฉันยกเลิกการเลือกสองรายการแล้วเลือกมังกรทางด้านขวาของหน้าจอ สิ่งนี้จะคว้าเพียงมังกรและอนุญาตให้ฉันย้ายมันออกจากหน้าจอเพื่อเอามันออกไป จากนั้นฉันใช้การตั้งค่าด้านบนเพื่อแกะสลักคํา หากคุณต้องการให้คําเข้มขึ้น คุณสามารถลดความเร็วลงและเพิ่ม LPC ได้
ขั้นตอน3: ความคิดสุดท้าย
นี่เป็นโครงการที่สนุกและสนุกสนานอีกครั้ง ฉันชอบเรื่องแฟนตาซีและนี่คือซอยของฉัน ฉันหวังว่าจะทําเงินได้มากขึ้นในอนาคต
หากคุณชอบโครงการนี้และต้องการตรวจสอบรายการอื่น ๆ ของฉัน ให้ตรวจสอบลิงค์ด้านล่าง ฉันมีแผนฟรีมากมายและแผนพรีเมียมสองสามแผน<
a href="https://www.atomm.com/profile/15190?utm_source=Social_Share">https://www.atomm.com/profile/15190?utm_source=Social_Share
เช่นเคย มีความสุขในการประดิษฐ์!!