
![[Laser cut and engrave] Coffee Bar Wall Sign with Backlight](https://image-res.atomm.com/resource/xtool/community/attachment/xtool-community/9915ed83-59d6-4d18-b6e2-0cb2bfc8bd4c.png?x-oss-process=image/resize,w_1200,h_900,limit_0/interlace,1/format,webp/auto-orient,1)
![[Laser cut and engrave] Coffee Bar Wall Sign with Backlight](data:image/png;base64,iVBORw0KGgoAAAANSUhEUgAAAAoAAAAKCAYAAACNMs+9AAAAAXNSR0IArs4c6QAAABdJREFUKFNjZCASMBKpjmFUId6QIjp4AAppAAuXjCs4AAAAAElFTkSuQmCC)
![[Laser cut and engrave] Coffee Bar Wall Sign with Backlight](https://image-res.atomm.com/resource/xtool/community/attachment/xtool-community/9915ed83-59d6-4d18-b6e2-0cb2bfc8bd4c.png?x-oss-process=image/resize,w_200,h_150,limit_0/interlace,1/format,webp/auto-orient,1)
![[Laser cut and engrave] Coffee Bar Wall Sign with Backlight](https://image-res.atomm.com/resource/xtool/community/attachment/xtool-community/e789254c-8a90-412a-b333-0b6c0367bc50.png?x-oss-process=image/resize,w_200,h_150,limit_0/interlace,1/format,webp/auto-orient,1)
![[Laser cut and engrave] Coffee Bar Wall Sign with Backlight](https://image-res.atomm.com/resource/xtool/community/attachment/xtool-community/9b18bb8e-931b-4408-ab80-035f47ebdd58.png?x-oss-process=image/resize,w_200,h_150,limit_0/interlace,1/format,webp/auto-orient,1)
Cartel de pared de bar de café con retroiluminación
 Instrucción
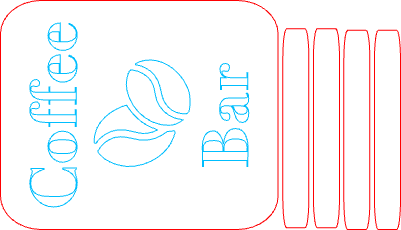

Información
Este cartel de bar de café es una pieza decorativa para una pared de un rincón de café y puede iluminarse opcionalmente con una pequeña cadena de luz LED. Está fabricado en MDF y producido mediante cortadora láser.
Instrucción
Paso1: Preparación del material
Puedes usar MDF blanco y negro o MDF simple. Si usas MDF simple, píntalo en blanco y negro antes de cortarlo y déjalo secar completamente.
Paso2: Montaje de cortadora láser

Ajusta el grosor del material a tres milímetros, activa la medición automática del material y ajusta el marco al tamaño de tu lámina de MDF.
Paso3: Corta la placa base negra

Empieza cortando el MDF negro, que será la placa inferior. El diseño está grabado y recortado para que se vean las líneas guía para las letras y los granos de café. Activa la medición automática de materiales y coloca el marco y láser todas las piezas. Si la pieza no está completamente cortada, especialmente con MDF negro, repite el proceso láser. Limpia los bordes después de cortarlo.
Paso4: Corta los elementos blancos


Abre el segundo espacio de trabajo, activa de nuevo la medición automática de materiales, configura el marco y láser todas las partes blancas. Repite el corte si no hay piezas completamente separadas.
Paso5: Ensamblar el diseño frontal


Pega las letras y los granos de café en la placa negra usando las líneas guía grabadas, luego pega el marco alrededor del diseño y deja que se seque.
Paso6: Construye los espaciadores traseros


Pega las piezas de separador rectangular en pares, un par alineado y otro ligeramente desplazado en la parte superior. Este desplazamiento permite que el cartel cuelgue de un tornillo y crea espacio para la cadena de luces LED. Si se usa una cadena de luz más gruesa (la parte más gruesa de mi cadena de luz LED mide seis milímetros, por eso pegué 3 mm dos veces en la parte trasera), añade más capas.
Paso7: Fijar la estructura trasera

Pega la estructura del separador en la parte trasera del cartel, con la parte desplazada en la parte superior y la alineada en la parte inferior.
Paso8: Añadir piezas de soporte


Pega las pequeñas piezas blancas de soporte en los lados izquierdo y derecho de la parte trasera para que la cadena ligera se mantenga en su sitio.
Hay cuatro piezas más pequeñas y cuatro piezas más grandes. Las piezas más grandes se pegan encima de las más pequeñas para que sobresalgan por arriba, creando un hueco para la cadena ligera.
Paso9: Instala la cadena ligera

Fija la caja de la batería en la parte superior con cinta adhesiva para que se pueda quitar después, y luego enrolla la cadena ligera de forma uniforme alrededor de la parte trasera del cartel.
El cartel de la pared de la barra de café ya está terminado y listo para colgar.
Paso10: ¡Disfrutad!

Remixes


También te puede gustar

3D Coffee Sigs cortados con láser. Percha de barra de café retro de madera. Cartel de pared vintage SVG. 1 Diseño


Arte decorativo de pared de cafetería cortado con láser y diseño de tazas


Carteles de barra de café: paquete de corte láser, arte de pared de barra, frases de café SVG, colgadores de pared de café, taza de café, señal de bienvenida SVG, decoración de cocina SVG


"Deadly Grounds" Cartel de pared de cafetería cortado con láser Toma café o muere


Cartel de madera de la barra de café con el nombre de la familia y el recordatorio de limpieza

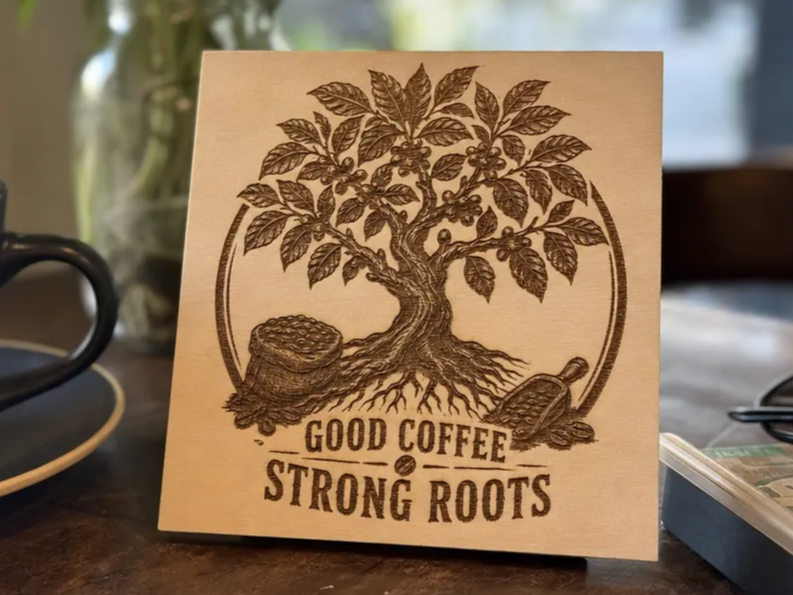
Buen cartel de madera de raíces fuertes con buena imagen de árbol de café


Cartel de café de madera grabado con láser y diseño de granos de café


Arte de pared de madera cortada con láser y diseños de tazas


'/%3e%3cdefs%3e%3clinearGradient%20id='paint0_linear_1433_15726'%20x1='12'%20y1='5.25'%20x2='12'%20y2='18.75'%20gradientUnits='userSpaceOnUse'%3e%3cstop%20stop-color='%23FFC654'/%3e%3cstop%20offset='1'%20stop-color='%23FF8D12'/%3e%3c/linearGradient%3e%3c/defs%3e%3c/svg%3e)
Cartel decorativo de pared en forma de corazón de café con un diseño de planta floral en grano de café


Arte de pared de tiempo de café SVG XCS | Decoración elegante de taza de café de madera | Diseño moderno de paredes de cocinas y cafeterías para descargar


Arte mural de café cortado con láser con granos de café y panel acrílico


Decoración de arte mural con letras de grano de café grabado con láser

Decoración en capas 3D Coffee cortada con láser. Arte de madera para la pared de café. Cartel de pared de bar de café. 10 diseños

Cartel de madera de cocina de café cortado con láser con letra y soporte de solapa


Cartel de pared grabado con frases de madera de café con correa de cuero

Cartel de café de madera grabado

Decoración de Coffee Corner con señalización grabada láser en la barra de café, tablero de recetas y accesorios (5 en 1)

