


![[Laser cut and engrave] Laser Cut Wooden Storage Basket with Handle and Decorative Pattern and Customisable Text](https://storage-us.atomm.com/resource/xtool/community/attachment/xtool-community/ead21f75-04da-4283-bdc5-cddc7a0794ca.png?x-oss-process=image/resize,w_1200,h_900,limit_0/interlace,1/format,webp/auto-orient,1)
![[Laser cut and engrave] Laser Cut Wooden Storage Basket with Handle and Decorative Pattern and Customisable Text](data:image/png;base64,iVBORw0KGgoAAAANSUhEUgAAAAoAAAAKCAYAAACNMs+9AAAAAXNSR0IArs4c6QAAABdJREFUKFNjZCASMBKpjmFUId6QIjp4AAppAAuXjCs4AAAAAElFTkSuQmCC)
![[Laser cut and engrave] Laser Cut Wooden Storage Basket with Handle and Decorative Pattern and Customisable Text](https://storage-us.atomm.com/resource/xtool/community/attachment/xtool-community/ead21f75-04da-4283-bdc5-cddc7a0794ca.png?x-oss-process=image/resize,w_200,h_150,limit_0/interlace,1/format,webp/auto-orient,1)
![[Laser cut and engrave] Laser Cut Wooden Storage Basket with Handle and Decorative Pattern and Customisable Text](https://storage-us.atomm.com/resource/xtool/community/attachment/xtool-community/686d5490-a5ce-43a3-b4f8-92e61bb99996.png)
![[Laser cut and engrave] Laser Cut Wooden Storage Basket with Handle and Decorative Pattern and Customisable Text](https://storage-us.atomm.com/resource/xtool/community/attachment/xtool-community/7a3158f1-22be-47a9-94da-310cc630c2c7.png?x-oss-process=image/resize,w_200,h_150,limit_0/interlace,1/format,webp/auto-orient,1)
![[Laser cut and engrave] Laser Cut Wooden Storage Basket with Handle and Decorative Pattern and Customisable Text](https://storage-us.atomm.com/resource/xtool/community/attachment/xtool-community/40aa19bc-fdb7-417c-99e6-c283cdceecae.png?x-oss-process=image/resize,w_200,h_150,limit_0/interlace,1/format,webp/auto-orient,1)
![[Laser cut and engrave] Laser Cut Wooden Storage Basket with Handle and Decorative Pattern and Customisable Text](https://storage-us.atomm.com/resource/xtool/community/attachment/xtool-community/ee7a3c14-06a8-40f6-8e13-8e689a0687e9.png?x-oss-process=image/resize,w_200,h_150,limit_0/interlace,1/format,webp/auto-orient,1)
![[Laser cut and engrave] Laser Cut Wooden Storage Basket with Handle and Decorative Pattern and Customisable Text](https://storage-us.atomm.com/resource/xtool/community/attachment/xtool-community/e2fb12d0-c21a-485a-a12a-5e1547955897.png?x-oss-process=image/resize,w_200,h_150,limit_0/interlace,1/format,webp/auto-orient,1)
Laser Cut Wooden Storage Basket with Handle and Decorative Pattern and Customisable Text
 Instruction
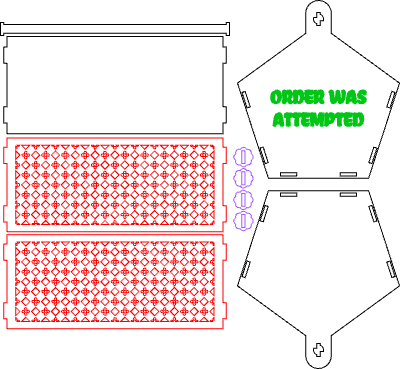


Information
      This laser-cut organiser is basically a tiny wooden tote with big opinions.

Cut from 3mm basswood (or 3mm MDF) with a clean lattice pattern and an easy grab handle, it’s ready to hold mail, craft supplies, tea packets, or whatever is currently living on your desk rent-free.
Best part: the front text is completely customisable, go sentimental, go sarcastic, go full meme.
Instruction
Step1


Step 1 — Attach the side panels to the back panel
Start by laying the pentagon-shaped back panel flat, with the handle-tab pointing outward.
• Take the two patterned side panels and align their tabs with the matching slots on the left and right edges of the back panel.
• Slide each side panel into place until the joints sit flush and the panels stand upright, forming a “U” shape.
• Make sure the patterned faces are oriented the way you want them facing outward before pressing everything fully together.
Step2


Step 2 — Attach the bottom panel
With the back + two patterned side panels already connected, place the assembly upright so the open bottom edge is facing you.
• Take the rectangular bottom panel and line up its tabs with the matching slots along the lower edges of the back and side panels.
• Press the bottom panel in evenly—start at one corner, then work across until every tab clicks fully into its slot.
• Run a finger along all joints to confirm everything is fully seated and flush (no gaps), then gently square the shape so the sides sit straight.
Step3

Step 3 — Attach the front panel
Take the front pentagon panel (the one with the custom text) and orient it so the text reads correctly from the outside and the small handle-tab is at the top.
• Line up the front panel tabs with the open slots on the two side panels and the bottom panel.
• Insert one side tab first, then gently “walk” the panel into place by aligning and pressing the remaining tabs until everything seats evenly.
• Push along each joint until the edges sit flush and the whole body feels square and rigid (no wobble).
Step4


Step 4 — Assemble and install the handle
Now it’s time to give the basket its “carry me like I’m important” handle.
• Take the long handle piece and slide two flower-shaped spacers onto it (one from each side), positioning them near the top area where the handle will sit.
• With the basket upright, align the handle ends with the slots at the top of the two pentagon end panels.
• Carefully pass the handle through the first slot, across the top, and out through the slot on the opposite side, keeping the flower spacers in place as you guide it through.
• Center the handle so it sits evenly and the spacers look balanced on both sides.
Step5


Step 5 — Rotate + glue-lock the handle
Apply wood glue to every joint in this step (handle slides and flower pieces) to permanently secure the handle and prevent unwanted rotation.
• Rotate the handle in the front and back slides until it sits in the correct position: straight and horizontal across the top of the basket.
• Add a small amount of glue, then attach the two inside flower pieces (from the previous step) so they sit snug against the inside of each end panel.
• Add a small amount of glue, then attach two more flower pieces on the outside of the end panels to “sandwich” the handle and lock its rotation in place.
• Hold everything for a moment so the parts don’t shift, then double-check the handle is centered and level while the glue starts to set.
Step6

It’s finished—thanks and enjoy your new basket.


