


Report
![[Laser cut and engrave] Elegant Orchid Flower Decoration](https://storage-us.atomm.com/resource/xtool/community/attachment/xtool-community/df724407-50d5-416e-8aad-7f4d4f5e363b.jpg?x-oss-process=image/resize,w_1200,h_900,limit_0/interlace,1/format,webp/auto-orient,1)
![[Laser cut and engrave] Elegant Orchid Flower Decoration](data:image/png;base64,iVBORw0KGgoAAAANSUhEUgAAAAoAAAAKCAYAAACNMs+9AAAAAXNSR0IArs4c6QAAABdJREFUKFNjZCASMBKpjmFUId6QIjp4AAppAAuXjCs4AAAAAElFTkSuQmCC)
![[Laser cut and engrave] Elegant Orchid Flower Decoration](https://storage-us.atomm.com/resource/xtool/community/attachment/xtool-community/df724407-50d5-416e-8aad-7f4d4f5e363b.jpg?x-oss-process=image/resize,w_200,h_150,limit_0/interlace,1/format,webp/auto-orient,1)
![[Laser cut and engrave] Elegant Orchid Flower Decoration](https://storage-us.atomm.com/resource/xtool/community/attachment/xtool-community/fcfff07d-3d91-4eb0-9a43-d0d41a38cc8b.jpg?x-oss-process=image/resize,w_200,h_150,limit_0/interlace,1/format,webp/auto-orient,1)
Elegant Orchid Flower Decoration
 Instruction
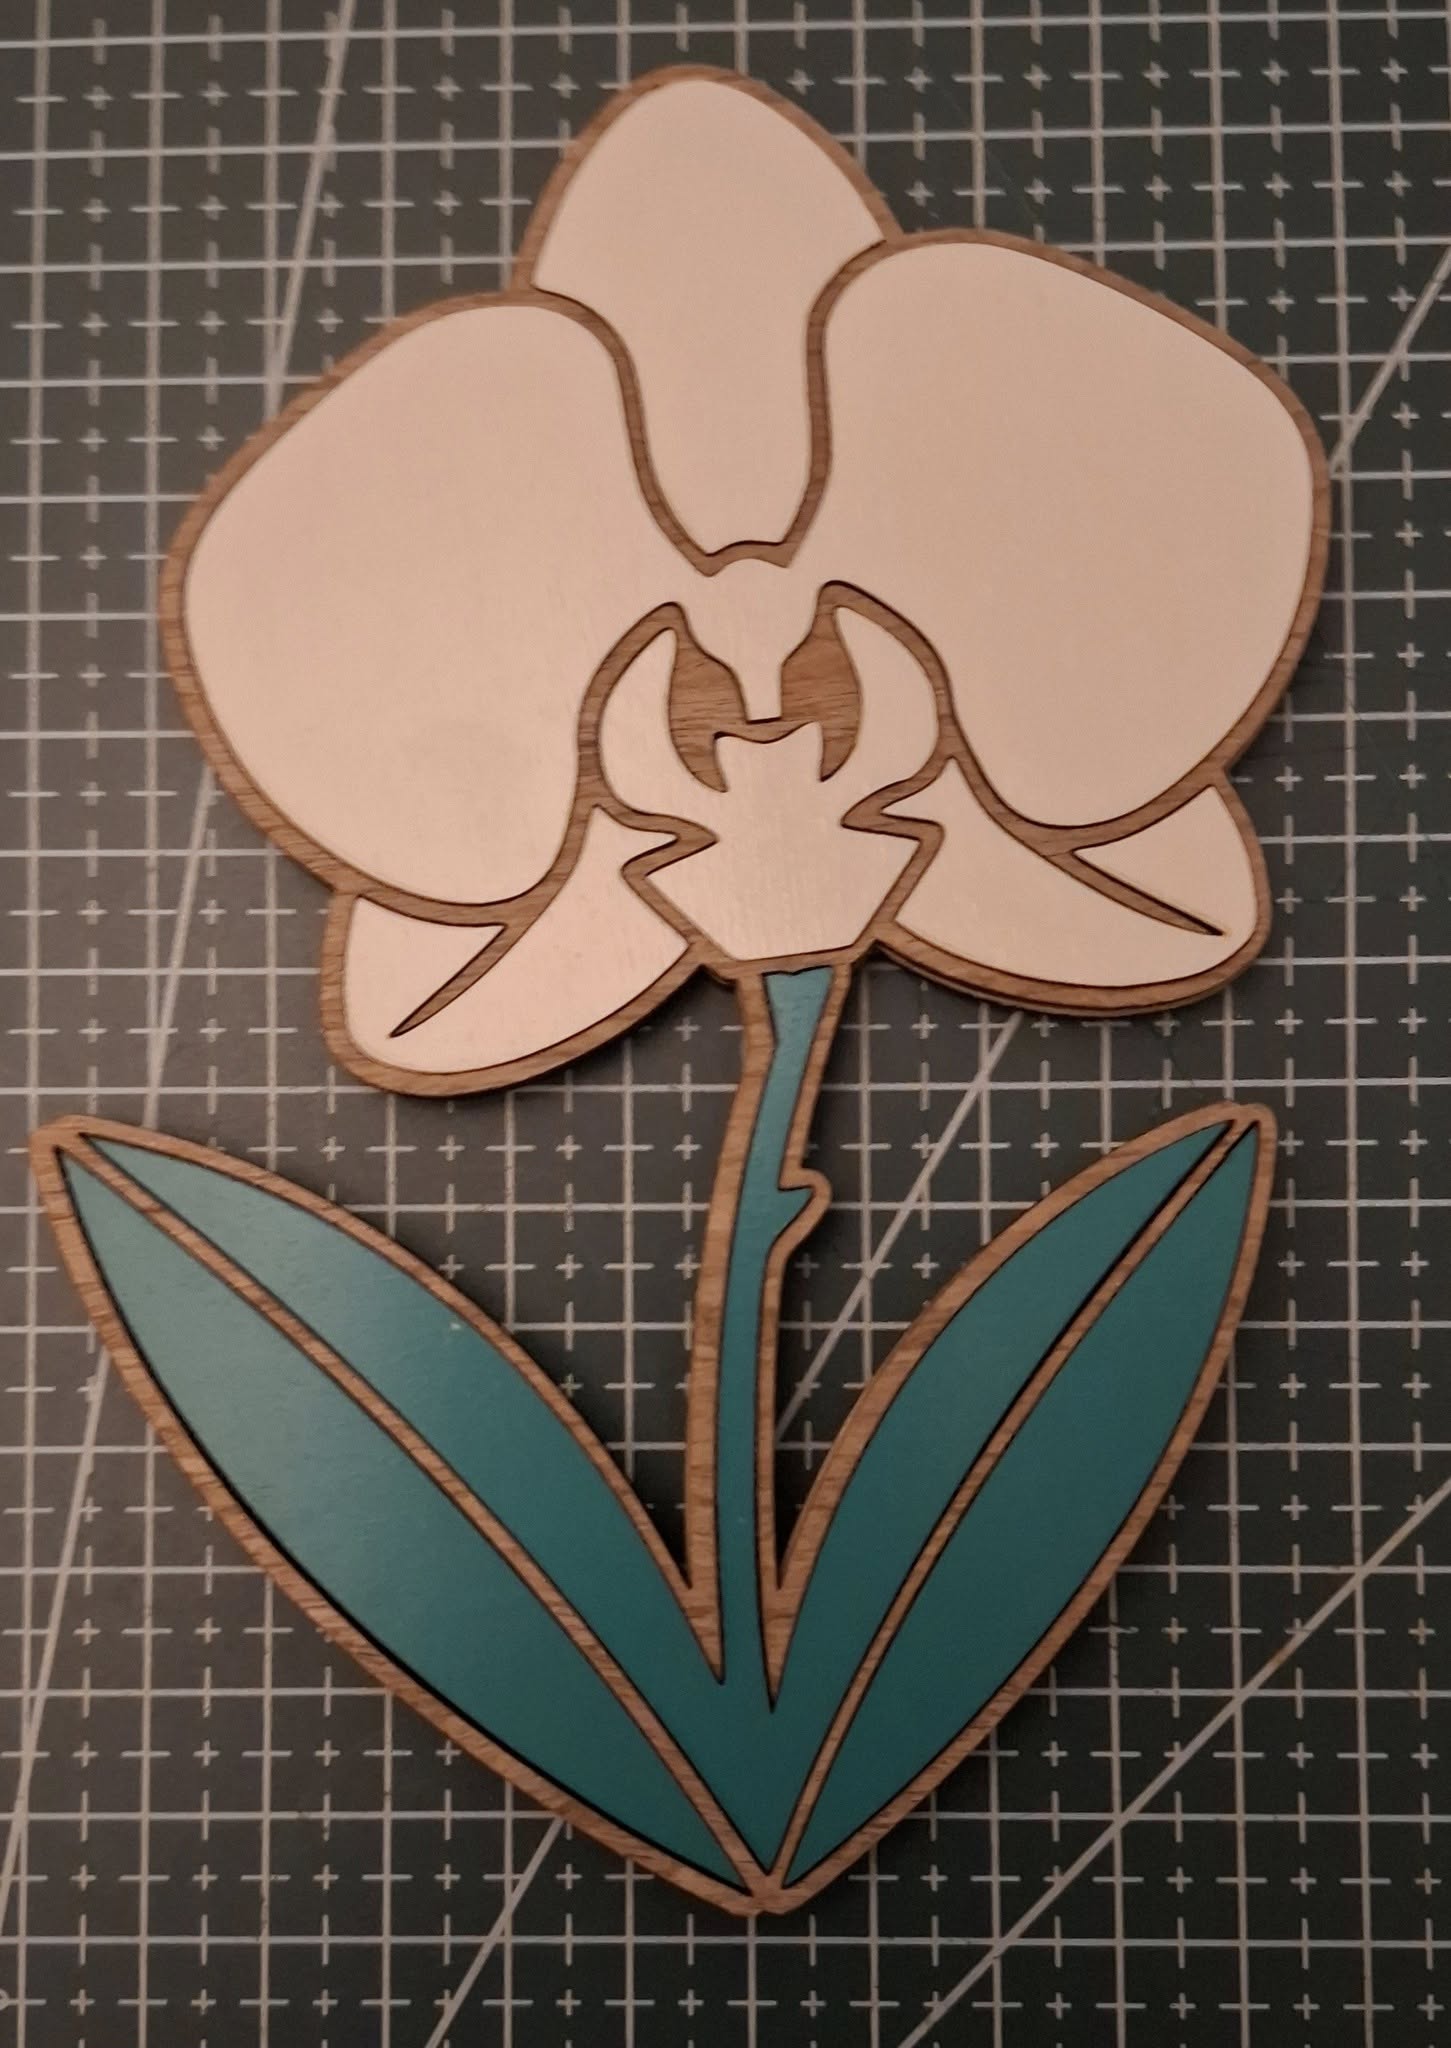
orkide
.jpg
Application scenario
Laser processing
Machine & module
xTool P2S
55WMaterial used

1/8"(3mm) Ash Plywood
1
22
Information
      bout the Design: This orchid was originally crafted using 3mm plywood, which provides a clean, natural, and sturdy look. However, the design is highly versatile—if you don't work with wood, it can easily be made using heavy paper or cardstock.

Specifications:
Material: 3mm plywood (or paper/cardstock of your choice).
Style: Modern layered design with sharp, elegant contours.
Usage: Perfect as wall art, table decor, or a thoughtful handmade gift.
Instruction
1
Step1
Assembly Instructions: Orchid Flower Decoration
Follow these simple steps to assemble your decorative orchid.
What You Will Need:
The Parts: 4 laser-cut or hand-cut pieces (3mm plywood or heavy cardstock).
Adhesive: High-quality wood glue (or paper glue if using card).
Optional: Clamps or a heavy book for pressing.
Step-by-Step Guide:
- Preparation: Ensure all pieces are clean and free of dust. If you plan to paint or stain the parts, it is often easier to do so before assembly.
- The Base Frame: Apply a thin, even layer of wood glue to Part 1 (the solid base). Carefully align Part 2 (the outer border/edge) on top. Press firmly to ensure the edges are flush.
- The Flower: Apply glue to the back of Part 3 (the orchid flower). Place it into the upper section of the frame, nesting it into its designated position.
- The Leaves: Apply glue to Part 4 (the leaves and stem base). Secure them at the bottom of the frame to complete the design.
Pro Tip: For the best result, place the assembled orchid under a heavy object for about 15 minutes while the glue sets. This ensures the layers bond perfectly flat.
Comments


